
Imagine you’re miles from civilization, deep in the heart of the wilderness. As daylight fades and the temperature drops, you realize you need shelter, fast. But out here, there are no tents, no cabins, no pre-built structures to rely on. As someone who’s lived off-grid in tiny homes for over a decade, I’ve mastered the art of constructing shelters in the wild using the materials at hand. From sturdy woodland huts to secure outdoor tents, my travels have taught me the essentials of survival construction.
Surviving outdoors means tuning into nature and responding effectively to her challenges. In this guide, we’ll cover how to build shelters that can brave harsh weather, from the dense forests to the biting cold. Drawing on my journey, I’ll share expertise on the robust practices behind garden-rich tiny houses, shelter construction, and the essentials of self-sufficient living.
Whether you’re a die-hard survivalist or just starting out, mastering the construction of a primitive survival shelter is key. Come along as we explore the time-tested techniques of shelter building and the joys of a life intertwined with nature. We’ll explore how to make waterproof shelters in the woods and the best designs to keep you warm. Join me, and let’s explore the mastery of constructing survival shelters that stand firm against the elements.
Importance of Shelter in Primitive Survival
When you’re in a survival situation, having shelter can mean the difference between life and death. A good shelter protects you from harsh weather, keeps you warm and dry, and helps you stay alive. Without shelter, you’re at the mercy of the elements. Wind, rain, cold, and sun can all take a toll on your body, leading to hypothermia or heat exhaustion. A solid shelter acts as your first line of defense.
But shelter isn’t just about physical protection. It also gives you a sense of safety and comfort in a stressful situation. When you have a warm, secure space to rest in, it’s easier to stay positive and focused on survival.
Plus, a shelter helps you conserve energy and body heat. When you’re not exposed to the elements, your body doesn’t have to work as hard to stay warm or cool. That means you’ll have more energy for other important tasks, like finding food and water. So don’t underestimate the power of a good shelter. Whether it’s a sturdy woodland hut or a simple lean-to, having a place to take refuge can be the key to surviving in the wild.
With the immediate threat of the elements mitigated, shelter serves as a critical base for recovery and planning in survival scenarios. The security and stability provided by a well-built shelter create a conducive environment for rest and recuperation after enduring challenging ordeals in the wild.
Factors Influencing Shelter Needs
Recognizing the importance of shelter in extreme situations is crucial for survival. Understanding the factors that influence shelter needs can make a significant difference in emergency living conditions.
There are several key factors that influence the type of survival shelter needed in a given situation:
- Climate and weather: Shelters must be designed to withstand the specific environmental conditions, whether it’s extreme cold, heavy rain, strong winds, or intense heat.
- Natural resources: The availability of materials like wood, leaves, rocks, etc. determines what can be used for construction.
- Hazards And Your Skills: Potential dangers like flooding, falling trees, or animal threats may require specific shelter design elements. Prior experience and knowledge of primitive construction techniques guide the complexity of shelters built.
- Group size And Duration: Shelters need to accommodate individuals or larger groups accordingly. Short-term vs. long-term shelter needs differ in terms of durability and insulation requirements.
- Wildlife And Location: The presence of certain animals may necessitate more secure or elevated shelter designs.Terrain, vegetation, water sources all impact ideal shelter placement and construction methods.
- Health factors: Physical condition, injuries, or medical issues can dictate specific shelter accessibility or amenity needs.
Read also: Shepherd’s Hut: Ultimate Guide to Idyllic Retreats for Dreamers
Types of Primitive Shelters
In the wilderness, primitive shelters are essential for providing protection from the elements and ensuring survival. These shelters can be constructed using natural materials found in the surrounding environment, showcasing the resourcefulness and simplicity of bushcraft techniques. Here are various types of primitive shelters:
Natural Shelters
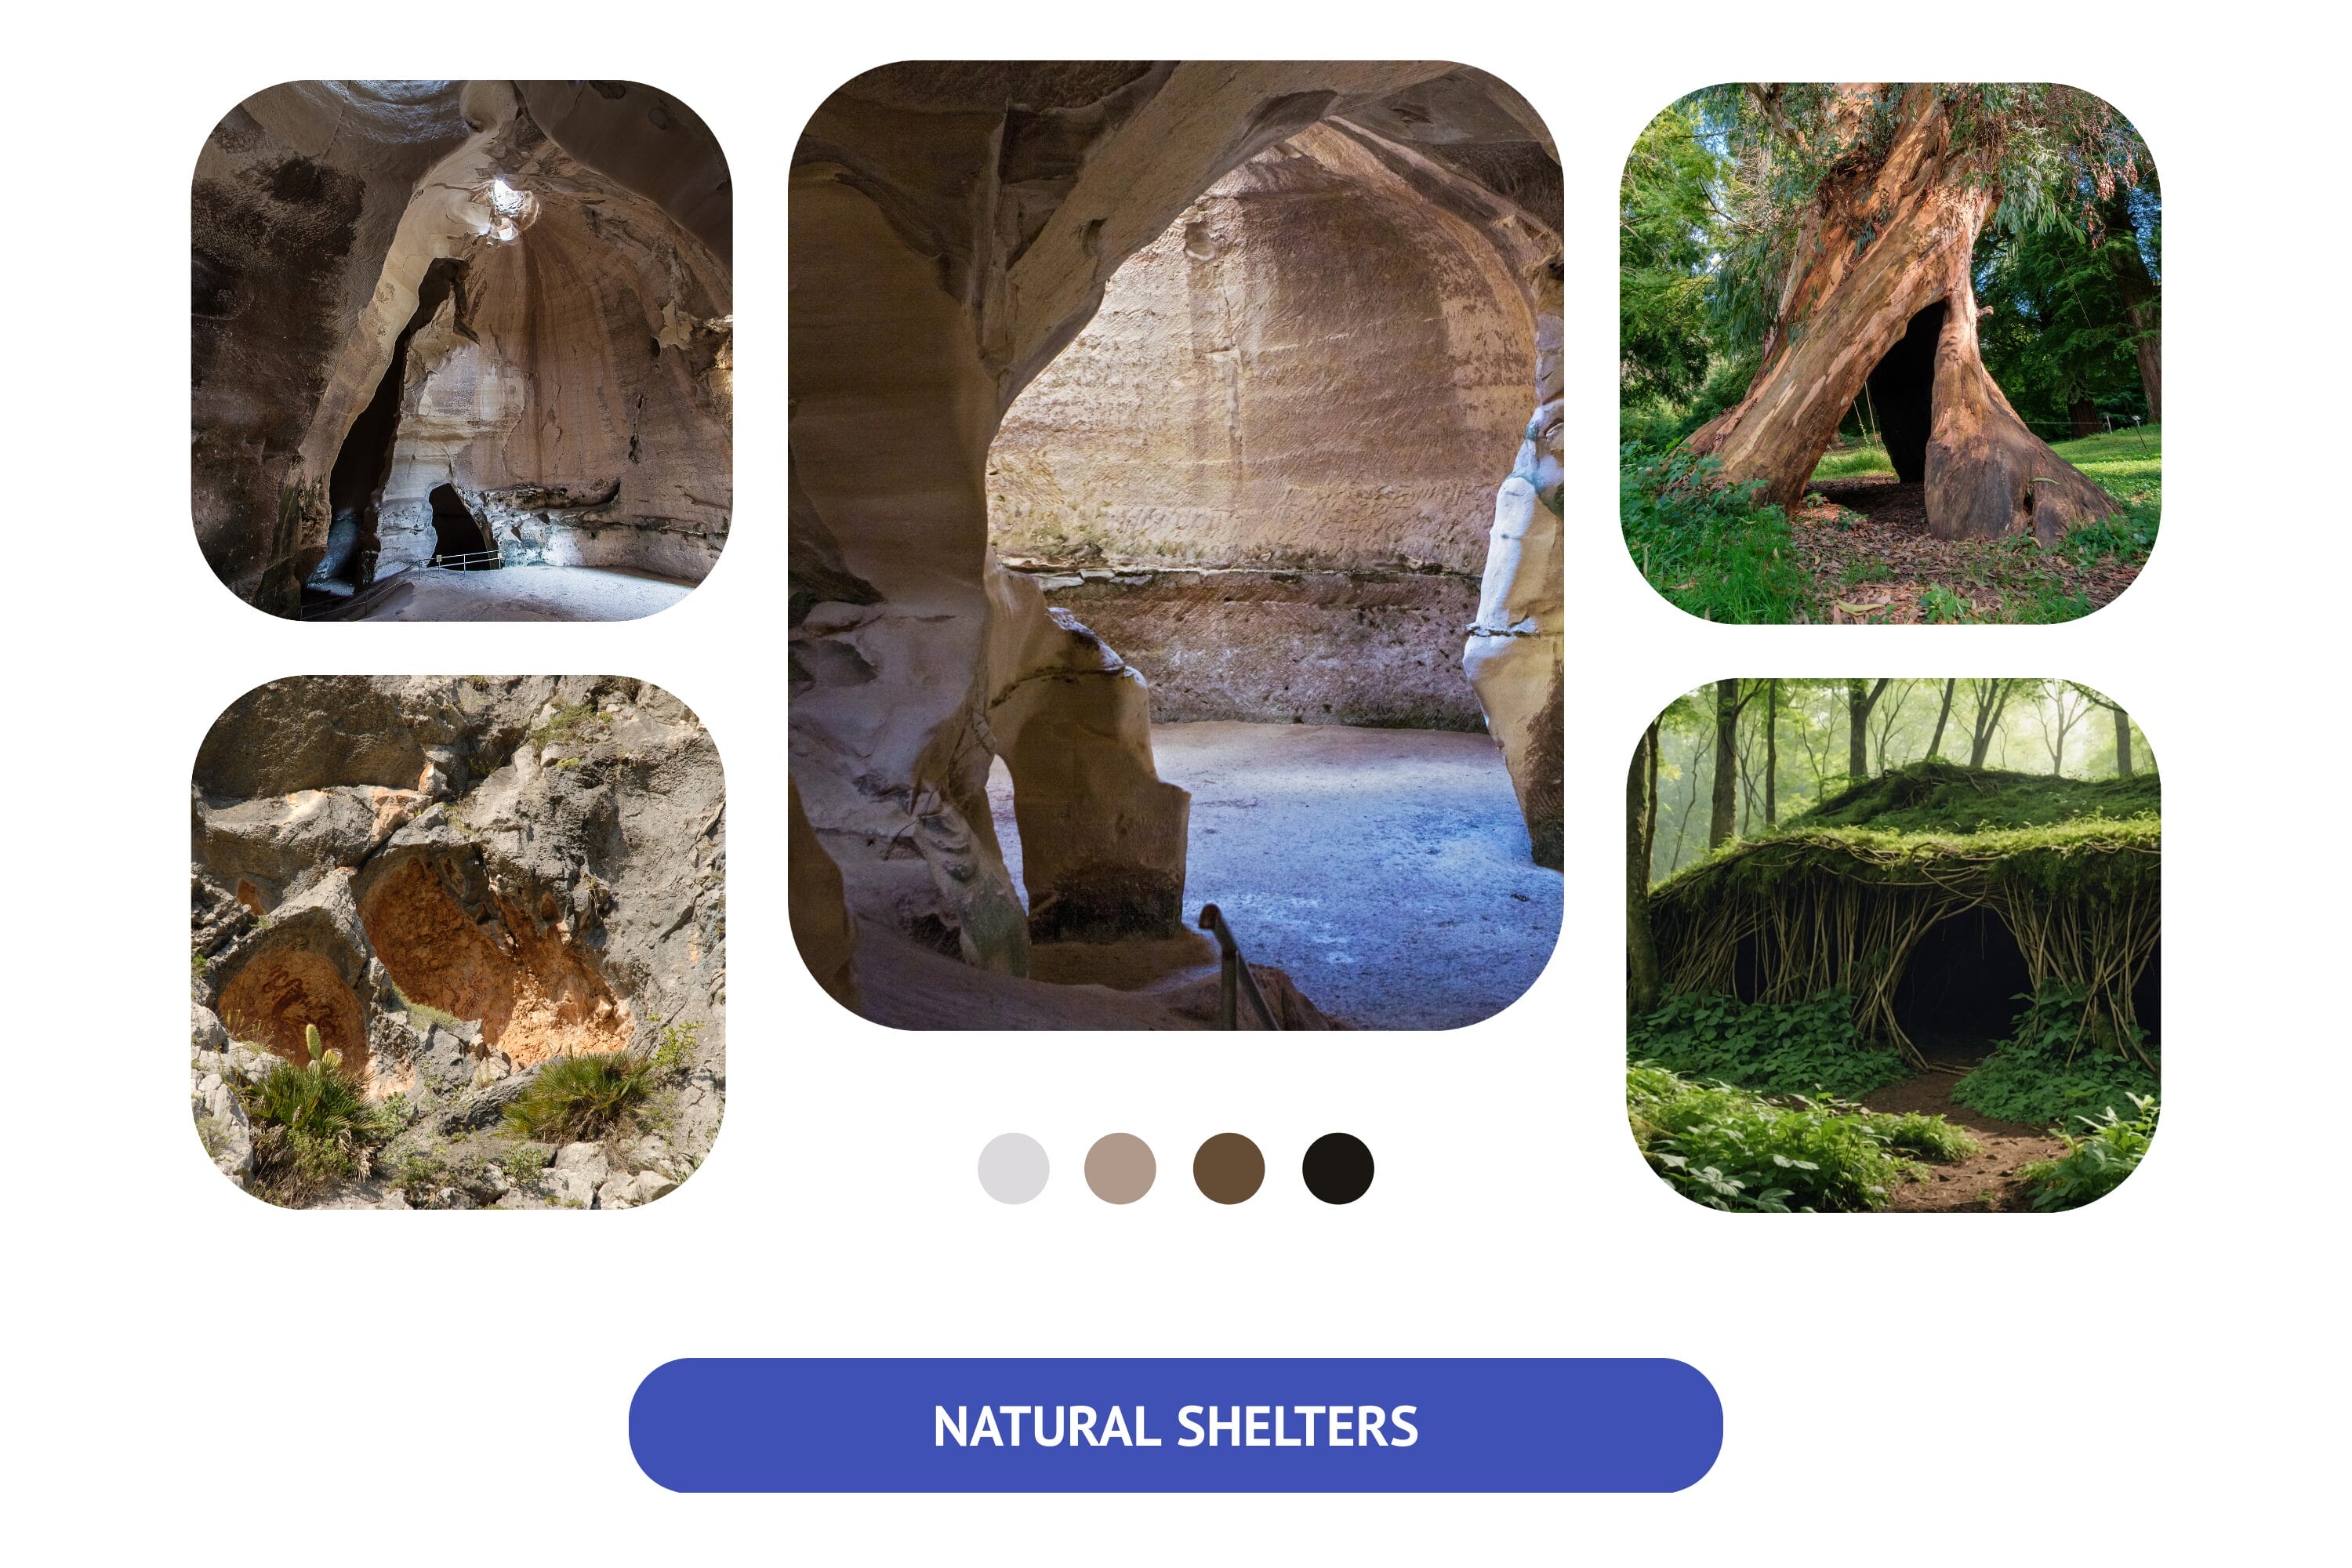
- Caves
- Rock outcroppings
- Thickets
- Hollow logs
The rock shelter not only provides safety but can also serve as a base for other survival activities. It can serve as a place to rest, cook food, and store supplies.
Survival Huts

- Debris hut: A small, dome-shaped shelter made from branches, leaves, and other natural debris.
- Wickiup: A cone-shaped shelter made from poles and covered with brush, leaves, or bark.
- Quinzhee: A snow shelter made by hollowing out a large pile of snow.
Lean-tos
- Basic lean-to: A simple shelter with a slanted roof supported by a ridgepole and leaning against a tree or other support.
- A-frame lean-to: A variation of the lean-to with an A-shaped frame for added stability and space.
Tarp Shelters
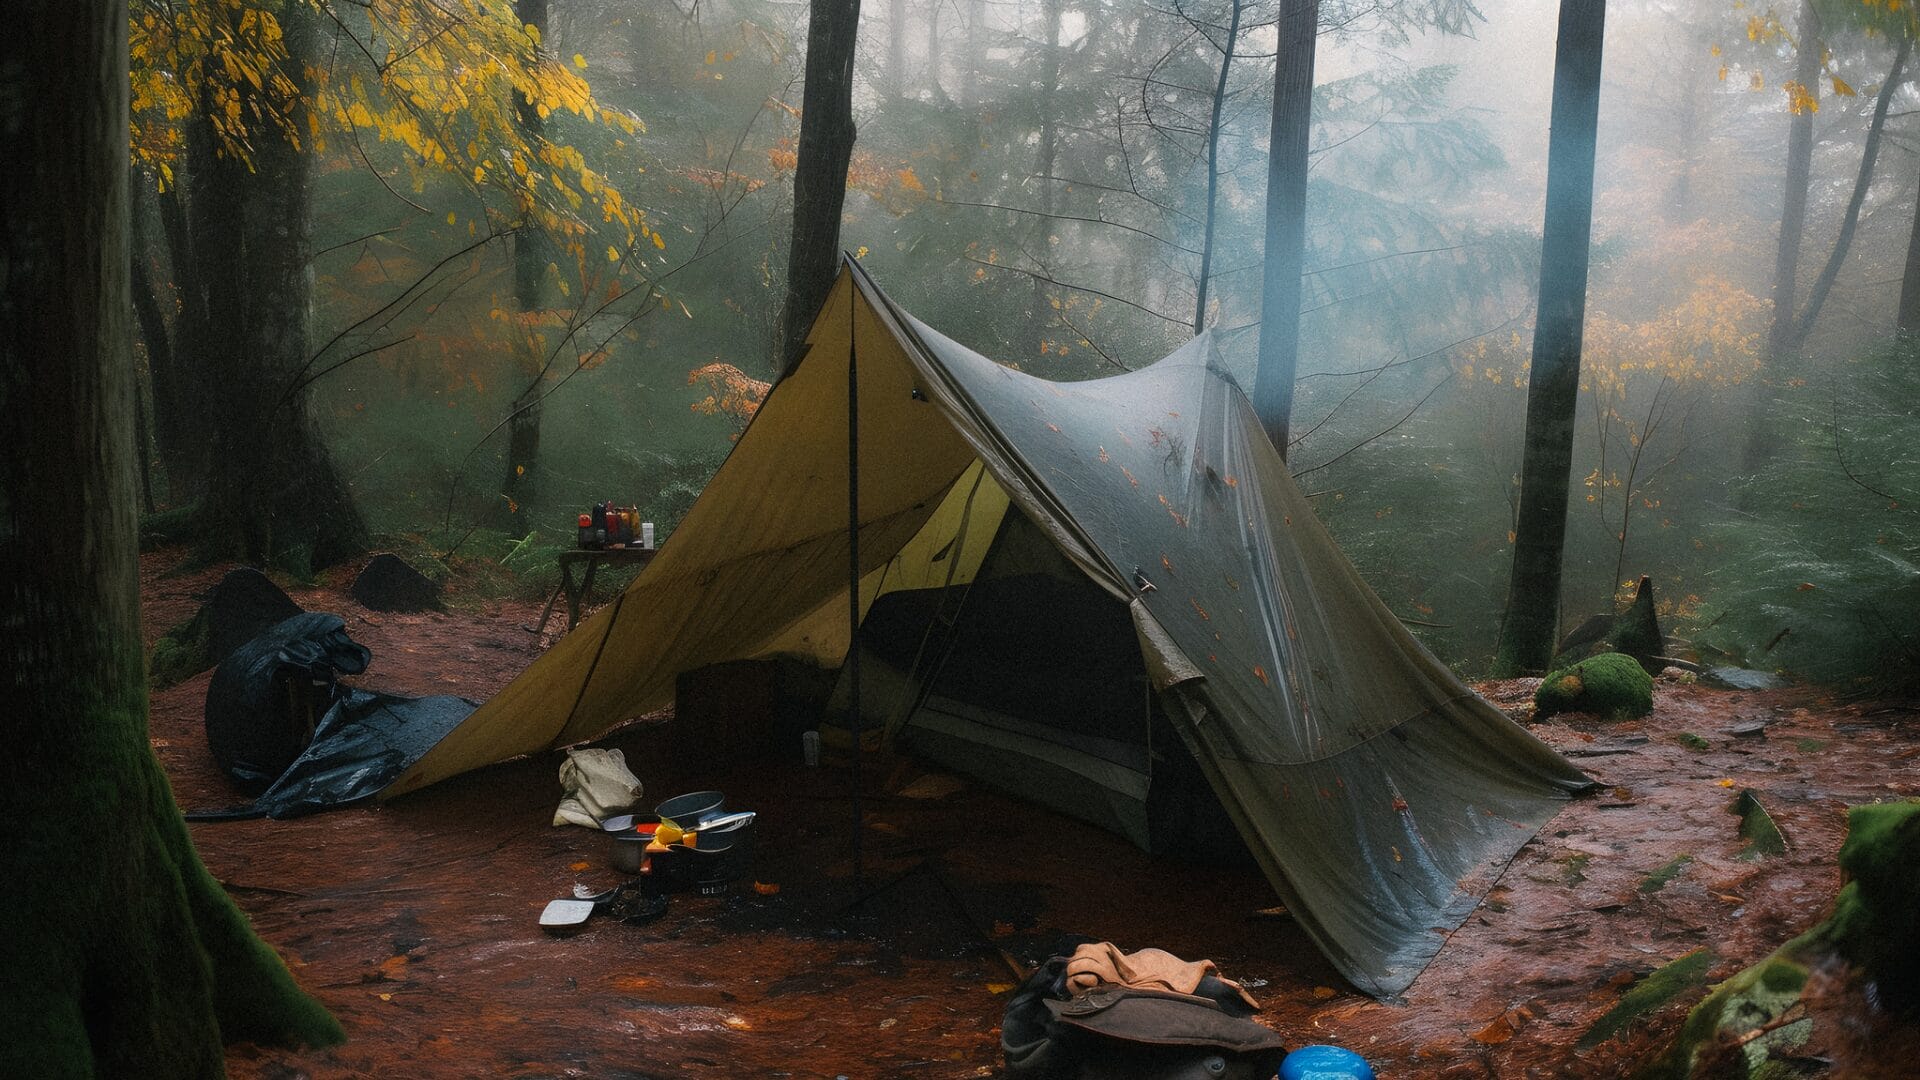
- A-frame tarp shelter: A shelter created by draping a tarp over a ridgepole supported by two poles in an A-shape.
- Wedge tarp shelter: A shelter made by tying a tarp between two trees or poles, creating a wedge-shaped space.
- Burrito tarp shelter: A shelter made by wrapping a tarp around the body like a burrito, providing quick protection.
Snow Shelters
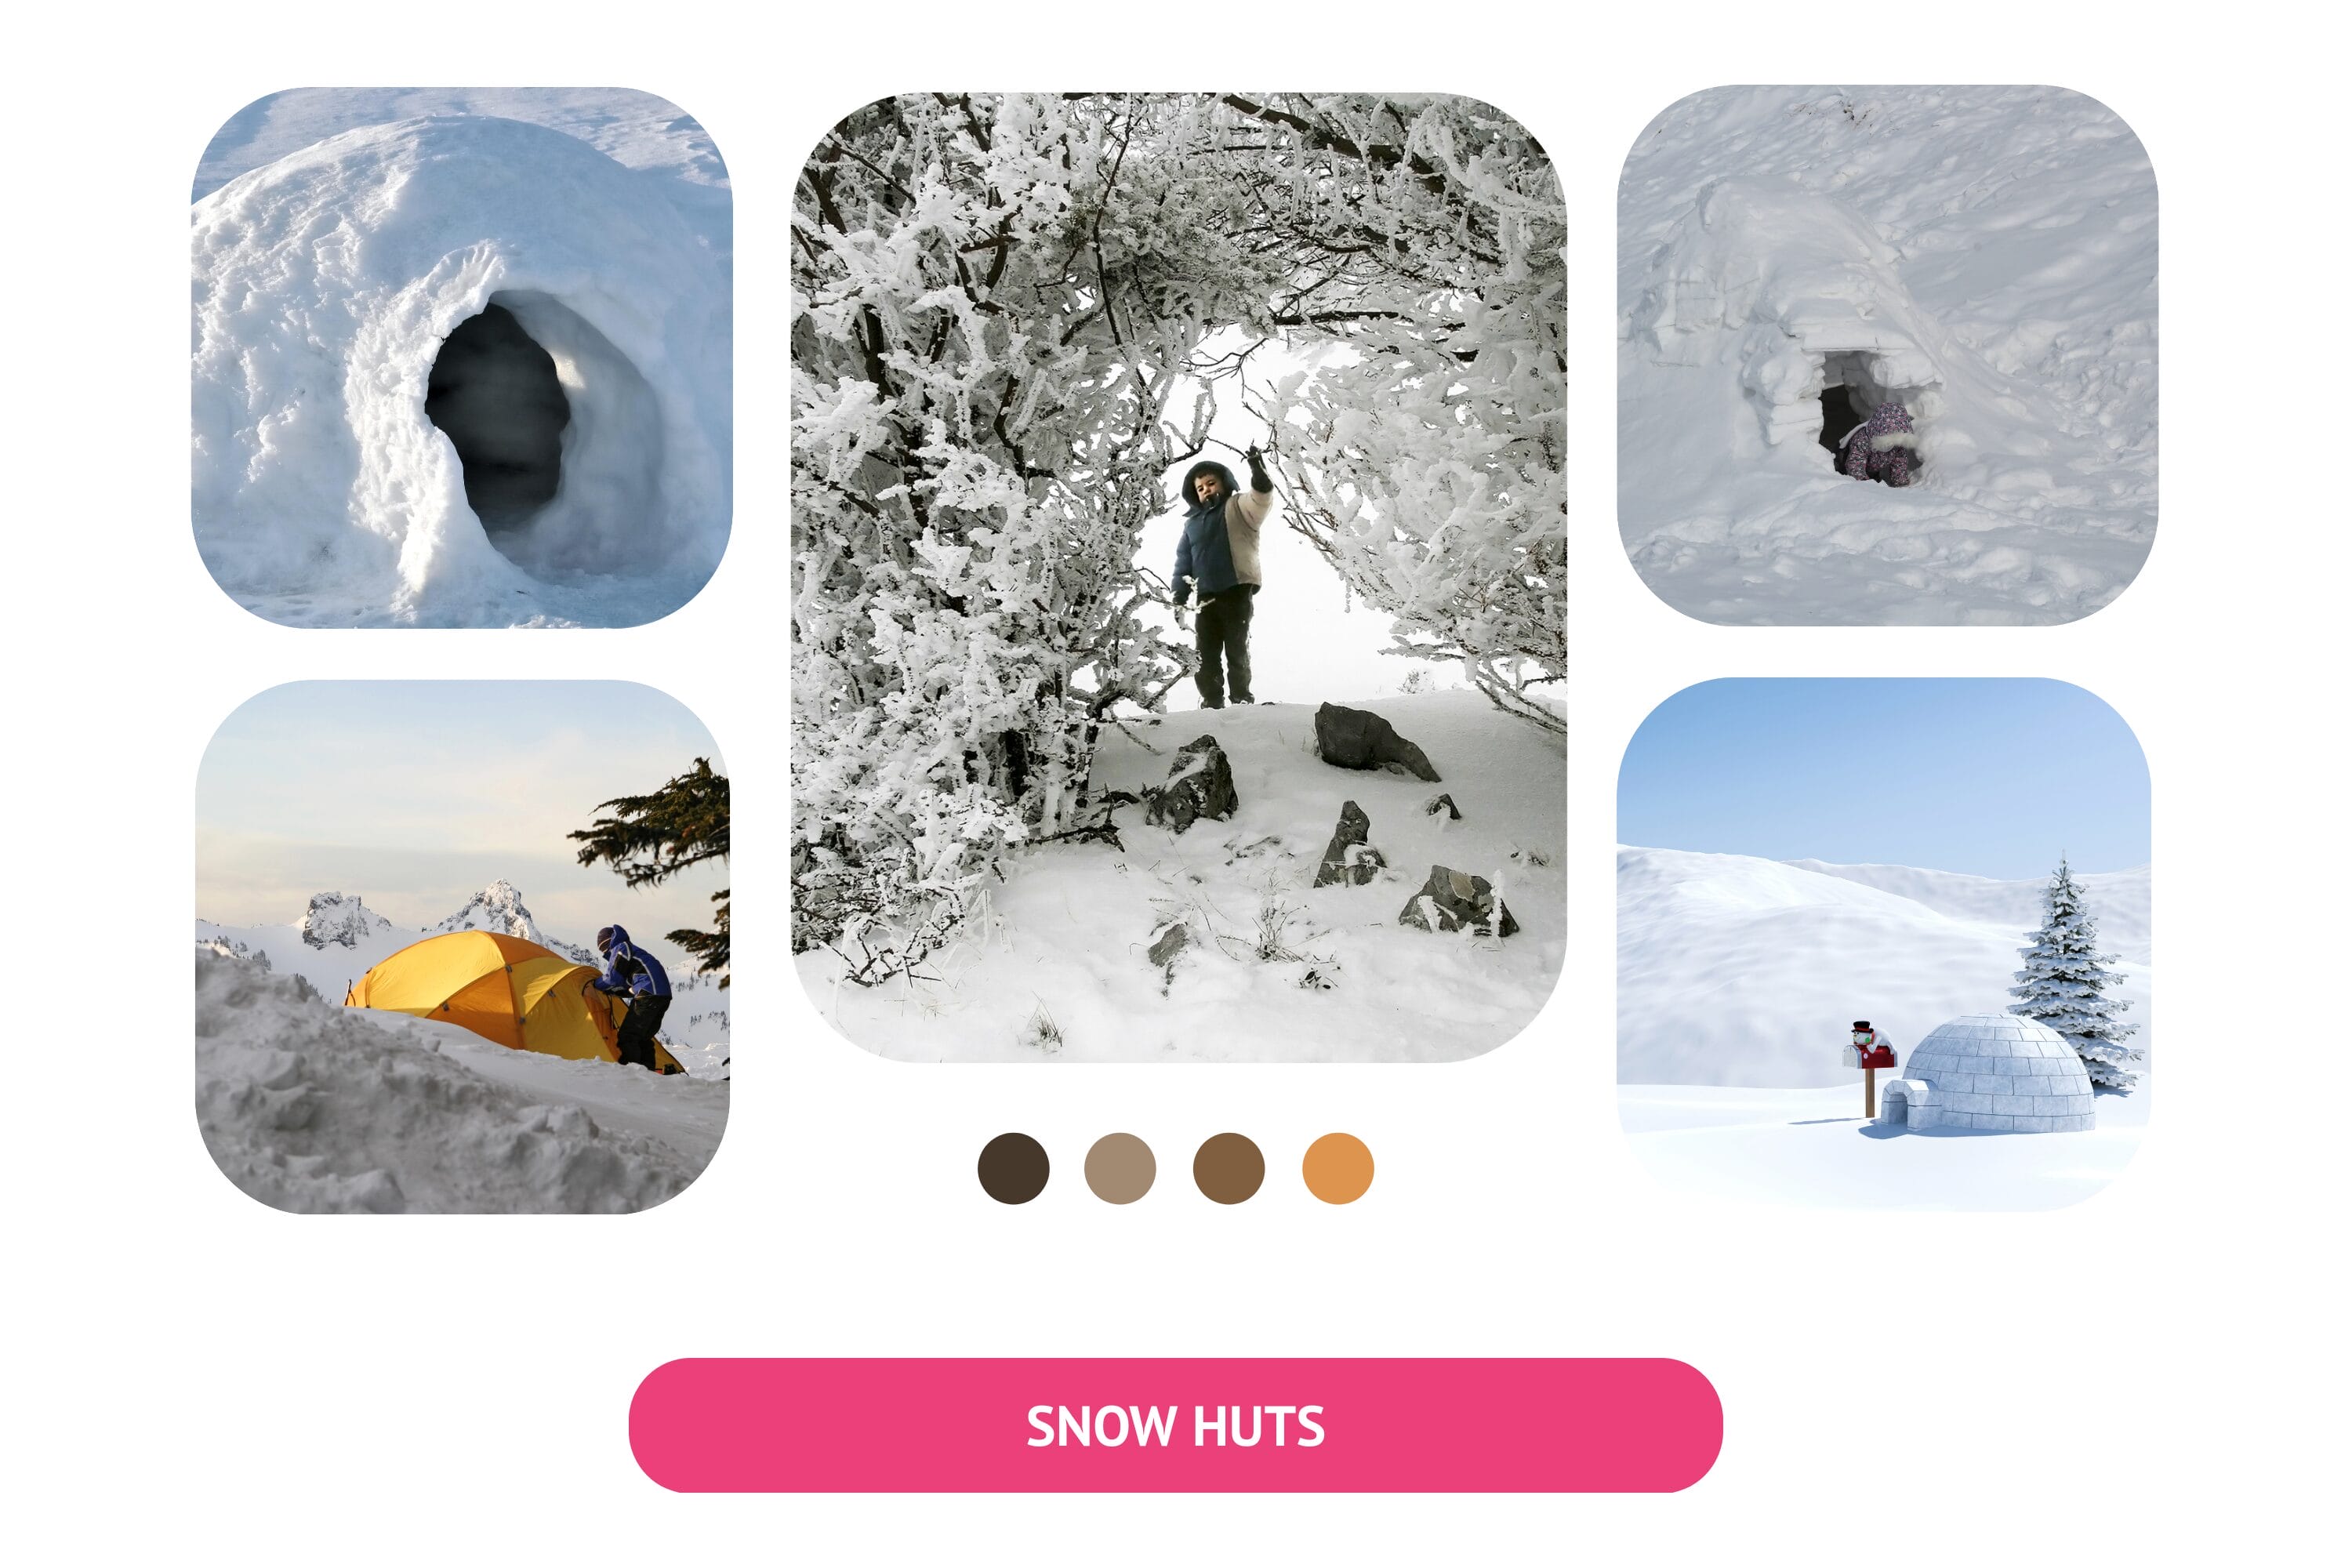
- Snow cave: A shelter dug into a deep snowdrift or snow bank, providing insulation and protection from wind.
- Igloo: A dome-shaped shelter made from blocks of compacted snow.
Raised Platforms:
- Tree platform: A platform constructed in a tree using branches and lashed together for added protection from ground-dwelling animals.
- Raised bed: A platform made from poles and covered with leaves or pine needles for insulation from the cold ground.
Teepee:
- A cone-shaped shelter made from poles tied together at the top and covered with canvas, hides, or other materials.
Wikiup:
- A semi-permanent, dome-shaped shelter made from bent poles and covered with brush, leaves, or grass.
These primitive shelters offer temporary housing and protection from the elements, utilizing basic wilderness survival skills and the resources available in the surrounding environment. While they may not provide the same comfort as permanent homes or modern houses, these survival constructs showcase the ingenuity and adaptability of outdoor living.
Read: How to live off the grid with no money? It’s easy.
Pros and Cons of Popular Shelter Types
Not all primitive shelter designs are created equal. Each type has its own set of pros and cons that must be carefully considered when choosing the right shelter for your survival situation. Below is a breakdown of the popular shelter types:
| Shelter Type | Pros and Cons |
|---|---|
| Lean-to |
|
| Debris Hut |
|
| Quinzhee |
|
Building a Primitive Shelter: A Step-by-Step Guide

In the vast expanse of the wilderness, having the ability to construct a reliable shelter can be the difference between survival and peril. Whether you find yourself in an emergency situation or simply seeking to embrace the simplicity of outdoor living, building a primitive shelter is a crucial skill to master. This guide will walk you through the step-by-step process of constructing a sturdy and functional shelter using only the resources available in nature.
Step 1: Choose the Right Location

Before you begin building your shelter, it’s essential to carefully select the ideal location. Look for a flat, well-drained area that is free from potential hazards such as falling branches, areas prone to flooding, or insect nests. Additionally, consider the proximity to water sources, firewood, and natural windbreaks.
Step 2: Gather the Necessary Materials
Once you have identified the perfect spot, it’s time to collect the materials needed for your primitive shelter. Depending on the type of shelter you plan to build, you may need to gather items such as:
- Sturdy branches or saplings for the frame
- Smaller, flexible branches or vines for lashing
- Leaves, grass, bark, or other natural insulation materials
- Tarp or waterproof material (if available)
Step 3: Construct the Frame

The frame is the backbone of your primitive shelter, providing the structural support and shape. One of the most common and effective designs is the lean-to shelter, which consists of a ridgepole supported by two upright posts or a sturdy tree trunk.
To build the frame, start by selecting two sturdy trees or erecting two vertical posts approximately 6-8 feet apart. Next, secure a ridgepole (a long, straight branch or sapling) between the supports, ensuring it is firmly lashed or wedged in place. For added stability, you can create a tripod-style frame by incorporating a third support post or leaning the ridgepole against a large, sturdy tree.
Step 4: Add the Roof and Walls
With the frame in place, it’s time to create the roof and walls of your shelter. This is where your gathered materials come into play.
For the roof, start by layering larger branches or saplings across the ridgepole, creating a slanted structure. Then, cover this framework with a thick layer of insulating materials such as leaves, grass, bark, or pine needles. The key is to create a dense, waterproof barrier that will protect you from the elements.
For the walls, you can use a similar technique, layering branches and insulating materials against the frame. Alternatively, you can create a woven wall by weaving smaller branches or vines together, creating a more sturdy and wind-resistant structure.
Read: Living in a Shed: Designing Your Perfect Tiny Home
Step 5: Add Finishing Touches
Once the basic structure of your shelter is complete, you can add finishing touches to enhance its functionality and comfort.
- Create a door or entrance by leaving an opening on one side and covering it with a woven mat or tarp.
- Line the interior with additional insulating materials such as leaves, moss, or pine needles to create a comfortable sleeping area.
- Build a small fire pit or hearth just outside the shelter entrance for warmth and cooking.
- Construct a basic windbreak or wall around the shelter for added protection from the elements.
Step 6: Maintain and Improve
A well-built primitive shelter can provide reliable protection for an extended period, but it requires regular maintenance and improvements. Monitor the condition of your shelter and make repairs or reinforcements as needed, especially after heavy rain or strong winds.
Moreover, you can continue to enhance your shelter’s functionality by adding additional features such as a smoke hole for ventilation, a raised platform for sleeping, or a storage area for your gear and supplies.
Building a primitive shelter is not only a valuable survival skill but also an opportunity to connect with nature and appreciate the resourcefulness of our ancestors. By following these steps and embracing the principles of bushcraft and wilderness living, you can create a safe and functional shelter that will protect you from the elements and provide a sense of security in even the harshest environments.
Maximizing Shelter Protection

Now, your primary concern in a primitive survival shelter is to ensure waterproofing to protect yourself from the elements. With severe weather conditions being a significant threat, waterproofing becomes crucial for your safety. Utilizing materials like thatch, tarps, or even natural resources like leaves and branches can help create a barrier against water infiltration.
Properly layering and compacting these materials in a way that channels water away from the shelter can enhance its ability to keep you dry. Paying attention to the quality of the roof and walls, sealing any gaps or overlaps, and reinforcing weak spots will significantly improve the shelter’s waterproofing capabilities.
Creating Proper Ventilation
Ensuring proper ventilation in your primitive shelter is key to maintaining a healthy living environment. Adequate airflow can prevent the buildup of condensation, reduce the risk of mold and mildew, and help regulate internal temperature. Utilizing techniques like creating vents or installing openings in strategic locations can facilitate air circulation.
The presence of proper ventilation not only contributes to your comfort but also impacts your overall well-being during your stay in the wilderness. By allowing fresh air to flow through the shelter, you minimize the chances of respiratory issues and maintain a more pleasant living space amidst challenging conditions.
Strategies for Wind Protection in Shelters
For your shelter to provide optimal protection, fortifying it against high winds is crucial. Wind can carry moisture and cold air, compromising the shelter’s integrity and your comfort. Implementing strategies such as building windbreaks, using natural terrain features, or adjusting the shelter’s orientation can help mitigate the impact of strong winds.
This targeted approach to wind protection enhances the overall resilience of your shelter, making it more effective in extreme weather conditions. By strategically positioning your shelter and incorporating wind-blocking elements, you create a more stable and secure living space, allowing you to weather the storm with greater ease.
Long-Term Shelter Solutions
Once again, when it comes to surviving in extreme conditions, the ability to construct long-term shelter solutions is paramount. Building sturdier and more durable shelters can significantly increase your chances of survival in the wild. Little improvements in construction, such as reinforced walls and sturdy roofing, can make a world of difference in the long run.
When aiming for long-term shelter solutions, consider using materials that are resilient to harsh weather conditions and can withstand the test of time. Little details like proper insulation, reinforced joints, and regular maintenance can go a long way in ensuring the durability of your shelter.
Prioritizing structural integrity and robustness in your shelter construction will provide a secure and comfortable living space in the wilderness.
For those looking to establish sustainable living arrangements off the grid, mastering the art of building sturdier and more durable shelters is imperative. Recall, investing time and effort in creating a reliable shelter now can offer long-term security and stability in challenging environments.
Read also: Living In A Tent Full Time: Handle these Challenges
Tips for Maintaining and Repairing Shelters in the Wild
An integral part of maintaining long-term shelter solutions in the wild is understanding how to repair and upkeep your living space effectively.
By following a few key tips for maintenance and repair, you can ensure that your shelter remains a safe haven even in the harshest conditions. Regular inspections, minor repairs, and proactive upkeep are vital to sustaining your shelter’s longevity.
- Regularly check for signs of wear and tear on the structure to address issues promptly.
- Keep a supply of repair materials handy to fix any damages swiftly and prevent further deterioration.
- The proactive approach to shelter maintenance can extend the lifespan of your living space and enhance its resilience against the elements.
Survival Shelter Considerations for Different Environments
Constructing survival shelters requires adapting to varying environments, utilizing available resources, and ensuring protection from unique climate challenges, whether in forests, deserts, tundra, or rainforests.
Shelter Options in Forested Areas
In forested regions, options like debris huts and lean-tos offer insulation and camouflage. Debris huts, built from branches, leaves, and mud, blend seamlessly into the surroundings. Lean-tos, using tarps or large leaves for a sloping roof, provide quick shelter.
For long-term living, semi-permanent wigwams or lean-tos from wood and bark offer sturdier protection. These can be enhanced with fire pits, raised beds, and natural insulation for a comfortable wilderness living space.
Dry and Arid Climates
Shelter options in dry, arid climates are limited by resource scarcity, making shade and insulation crucial. Shade shelters, constructed from lightweight materials like cloth or tarp, create cool, shaded areas. Burrow shelters, dug into the ground, utilize the cool earth for natural insulation against extreme temperatures.
Strategic placement and ventilation are key to maximizing comfort in these challenging environments.
Snowy and Cold Weather
In snowy and cold weather, shelters prioritize insulation and protection from the elements. Snow caves, dug into drifts or snowbanks, leverage the insulating properties of snow for warmth and security. Igloos, dome-shaped structures built from packed snow blocks, provide sturdy, well-insulated living spaces that withstand freezing temperatures and harsh winds.
Proper insulation and ventilation are essential for maintaining warmth and air quality in these harsh winter conditions.
Essential Bushcraft Skills for Shelter Building
Mastering essential bushcraft skills is pivotal for constructing robust survival shelters in the wild. These skills encompass selecting suitable locations, resourcefully using natural materials, and understanding diverse building techniques to create shelter against the elements.
Selecting and Preparing Natural Materials
Materials are the foundation of any primitive shelter, making their selection and preparation crucial. Seek durable, flexible, and insulating natural resources like sturdy branches, thick leaves, and vines. Gather sustainably, respecting the environment.
Proper preparation, like removing debris, sharpening edges, and sizing components, ensures easy assembly and structural integrity. Honing your skills in working with natural materials enhances your bushcraft abilities and improves your chances of creating a secure, weatherproof shelter.
Using Basic Tools and Knives Effectively
Basic tools like knives and axes are indispensable in shelter building, enabling precise cutting, shaping, and refining of materials. Master proper grip, cutting techniques, and safety measures to streamline construction and achieve professional results.
Develop proficiency in tool usage to tackle challenges confidently, ensuring your shelter’s structural integrity. These instruments serve as extensions of your hands, transforming raw materials into functional, secure structures – invaluable assets in bushcraft survival.
Rope and Cordage Techniques for Securing and Supporting Shelters
Rope and cordage techniques are fundamental for constructing shelters that withstand the elements. Prioritize strong, durable, and flexible ropes for effective anchoring and reinforcement. Master knots, hitches, and lashings to enhance your shelter’s resilience and longevity.
Explore diverse applications like framework construction and panel weaving to adapt to different terrains and conditions. Advanced cordage skills elevate your bushcraft proficiency, fortifying your emergency living spaces. Embrace the art of knot-tying and rope manipulation to create reliable, resilient shelters that stand the test of time.
Assessing and Adapting to Changing Weather Conditions
Closely monitor weather patterns by observing cloud formations, wind directions, and changes in temperature and humidity. Learn to recognize signs of impending storms, such as darkening skies or shifts in wind patterns. Familiarize yourself with local weather patterns and seasonal trends to better anticipate potential changes.
Be prepared to reinforce or modify your shelter in response to changing weather conditions. For example, if heavy rains are expected, reinforce the roof and walls with additional waterproof materials or insulation. In the event of high winds, secure your shelter with extra guy lines or additional anchors to prevent structural damage.
Unique Skills for Shelter Building
Building a substantial shelter in the wilderness requires a set of unique bushcraft skills that go beyond the basics. Knowing how to identify and avoid a dangerous shelter location is as crucial as the construction itself. In areas with deep snow, constructing a dome-shaped snow shelter, such as an igloo or quinzhee, offers a surprisingly warm shelter due to the insulating properties of compressed snow.
The skill lies in molding the snow into stable, airtight blocks and arranging them in a precise, self-supporting dome. For larger shelters that can accommodate groups, the use of dozen poles or more to create a frame becomes necessary. This structure can be enhanced with plant material such as pine boughs to add insulation and wind resistance.
A bed frame, elevated from the ground, can be constructed using smaller poles, providing not only comfort but also protection from ground moisture and pests.
One key skill is weaving and layering plant material like leaves, moss, and pine boughs effectively for both insulation and waterproofing. When constructing a shelter suitable for longer stays, the ability to craft a more substantial shelter that can withstand changing weather conditions is a testament to advanced bushcraft expertise.
Among the types of bushcraft shelters, a lean-to made using a pole with tree branches is one of the simpler structures. However, for it to be effective, it must be angled correctly to shield from prevailing winds and angled precipitation.
In the end,
Primitive survival shelters are a vital necessity when facing nature’s harshest conditions. These basic structures, built using readily available natural materials, offer a safe haven from extreme weather, hazardous terrain, and potential wildlife threats. Whether a sturdy woodland hut or a simple leaf-covered lean-to, these shelters provide crucial protection and a much-needed sense of security in the wild.
They showcase humanity’s ability to adapt and thrive, even in the most challenging situations. With the right knowledge and skills, anyone can construct a reliable survival shelter tailored to their specific environment and needs. Mastering these primitive techniques empowers individuals to confidently venture into the great outdoors, knowing they possess the means to create a temporary home, no matter where their adventures lead.