

A kitchen of around sixty square feet does not fail because it is small. It fails because everything in it is fighting for the same two feet of counter: the kettle lives where the chopping board should land, pans hide behind other pans, and every meal starts with a small, annoying excavation. The fix is rarely more cupboards. It is better behaviour from the cupboards, walls and drawers you already have — storage that shows its contents, moves toward you, and puts daily things within an easy reach band while banishing the rest to the high, deep and hidden places. These tiny kitchen storage hacks are organised in the order a cook actually moves through a small kitchen, from the walls inward to the habits that keep it all working.
One principle runs through every idea below: reach beats capacity. A smaller store you can see and grab in two seconds serves you better than a cavernous cupboard that swallows things for months. So measure your kitchen honestly before changing anything — the true internal depth of drawers, the clearance above doors, the gaps beside the fridge — and work through the sections that match your worst friction points first. Most of these ideas are cheap, reversible and testable within a week, and none of them needs the kitchen to be bigger than it already is.
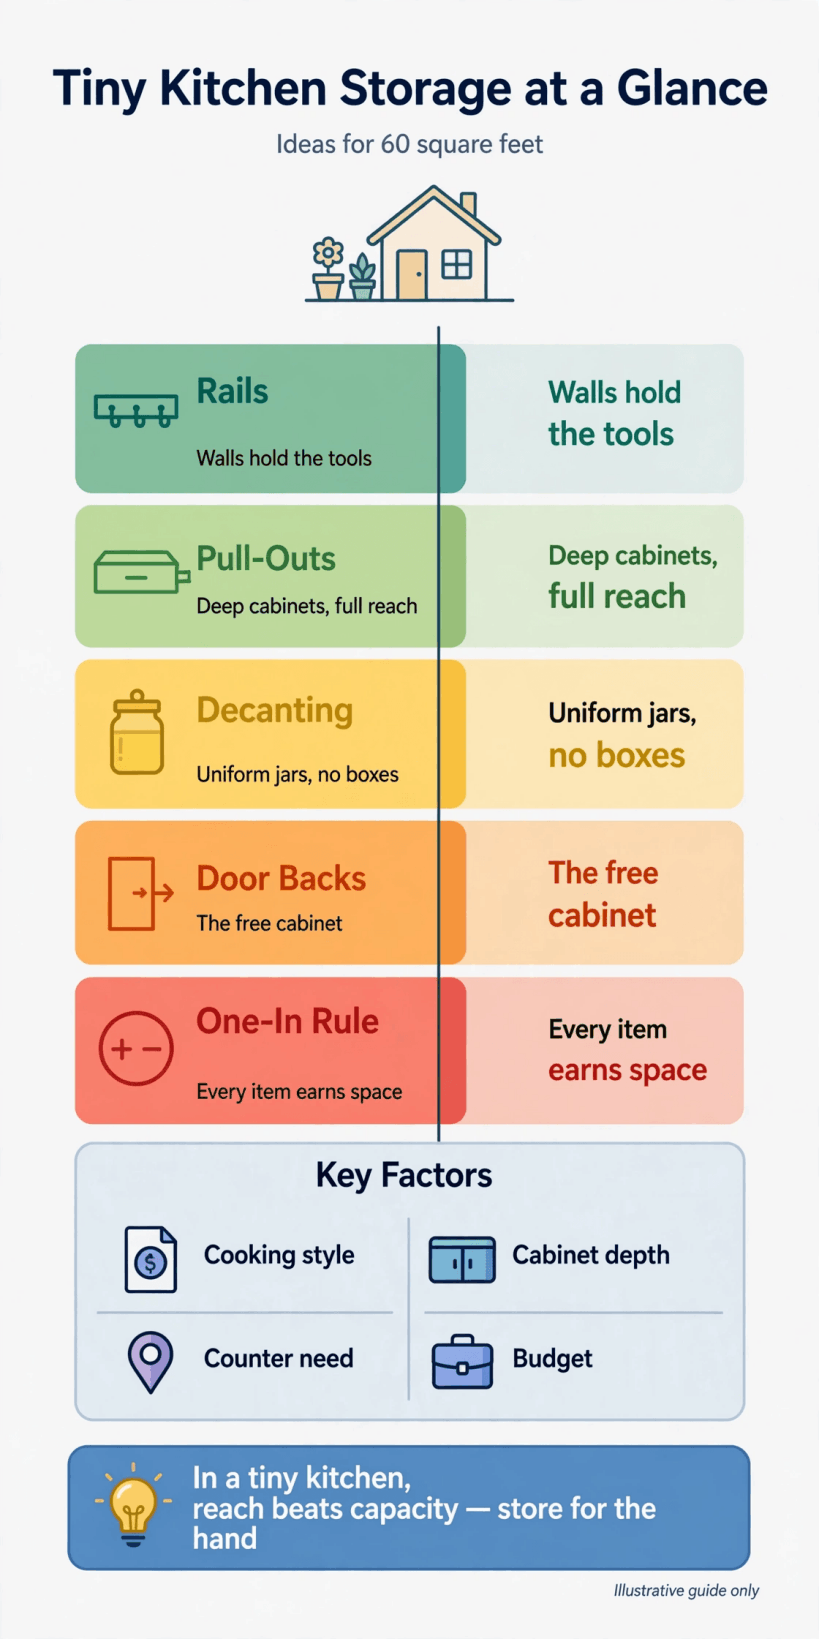
Tiny Kitchen Storage Hacks: The Summary Table
| Section | Kitchen Zone | What It Solves |
|---|---|---|
| 1 | Wall Rails | Utensils and pans hanging where the cook stands |
| 2 | High and Vertical Space | Rarely used items lifted off counters and shelves |
| 3 | Pull-Outs and Drawers | Deep cupboards that bring their contents to you |
| 4 | Door Backs | Thin storage on doors and inside cupboard doors |
| 5 | Decanting and Food Zones | Dry goods made visible, dated and easy to rotate |
| 6 | Counters and Appliances | Worktop kept clear for actual cooking |
| 7 | Sink and Cleaning | The wet zone dried, drained and organised |
| 8 | Reach Over Capacity | Prime-height storage for daily things only |
| 9 | Fridge and Freezer | Cold storage you can read at a glance |
| 10 | Habits | One-in-one-out and the weekly reset |
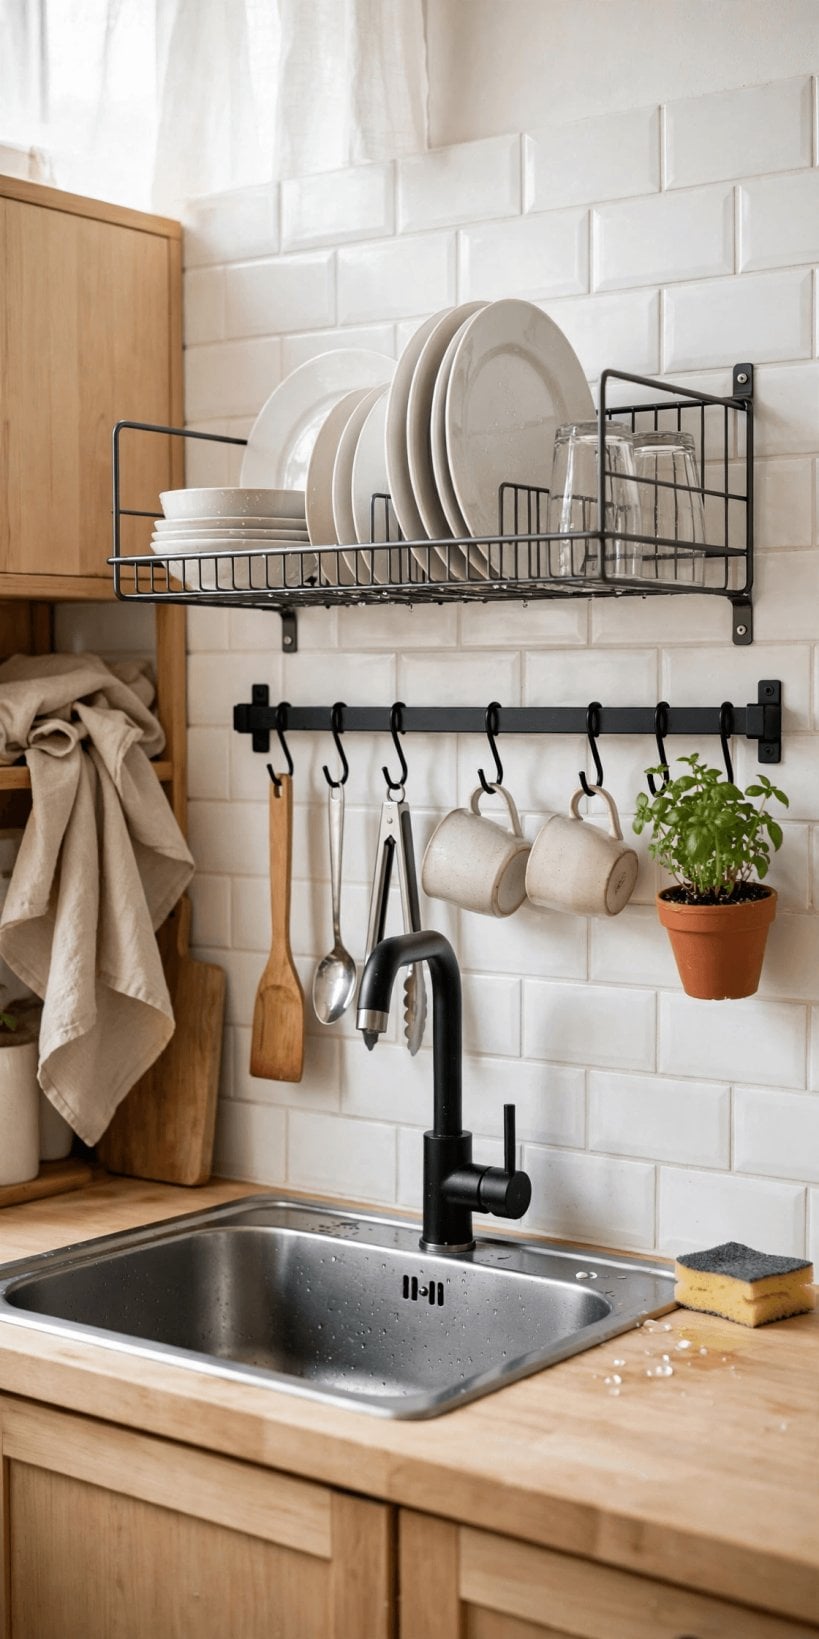
1. Wall Rails for Utensils, Pans and Knives: Storage Where the Cook Stands
The wall in front of you while you cook is the most valuable storage surface in a small kitchen, and the cooking zones in tiny house kitchen ideas to make your space feel bigger use it relentlessly. Rails keep tools visible, grabbable and out of drawers entirely.
1. A utensil rail above the work zone. Fix one sturdy rail on the wall between counter and cabinets, within arm’s reach of the hob and the main chopping area, and hang the ladles, tongs and spatulas you use every day on simple hooks. The test is honesty: if a tool has not been touched in a month it does not earn rail space, because a crowded rail is just a drawer turned sideways.
2. A pan rail or pot rack at the end of the run. Heavy pans are the worst tenants of deep cupboards; hung from a rail on a side wall or a short ceiling rack they free a whole base cabinet and stop the clattering stack entirely. Hang the largest, least-used pan highest or furthest, keep the everyday frying pan at the near end, and check fixings go into something solid, because a loaded rail is genuinely heavy.
3. A magnetic strip for knives and spice tins. One magnetic strip takes the knife block off the counter and a second, or the same one, can hold metal-lidded spice tins where you season food. Mount strips where hands naturally travel, never above the hob where steam and grease coat everything, and keep knife blades well clear of the route small helpers use to reach the tap.
2. High and Vertical Space: Above-Door Shelves, Cabinet Tops and the Fridge Gap
Every small kitchen has a forgotten band of space between the top of the cabinets and the ceiling, and another sliver above its door. The tall rooms in tiny house plans with high ceilings show how much this layer can hold when it is used deliberately rather than as a dust shelf.
4. An above-door shelf for the rarely used. A single shelf over the kitchen door holds the big, light, seldom-needed things: the preserving pan, spare jars, the cake stand. Fit a shallow lip across the front so nothing vibrates off when the door closes, and keep the contents in one visible row — the moment things stack two deep up there, they are effectively lost.
5. Uniform baskets on top of the cabinets. If there is a gap above your wall cabinets, fill it with matching lidded baskets rather than a jumble of objects. One basket for baking kit, one for party and picnic gear, one for bulk spares. Uniform containers turn an awkward gap into a calm visual line, lids keep kitchen grease off the contents, and a note on each front ends the guessing.
6. A slim pull-out in the fridge gap. The few inches between fridge and wall or counter, so often home to a leaning broom, fit a tall, narrow pull-out tower on castors or runners: bottles, jars and tins in single file, sliding out for full inspection. Single file is the whole point — nothing can hide behind anything else, and the tower earns its keep in kitchens with almost no larder space.
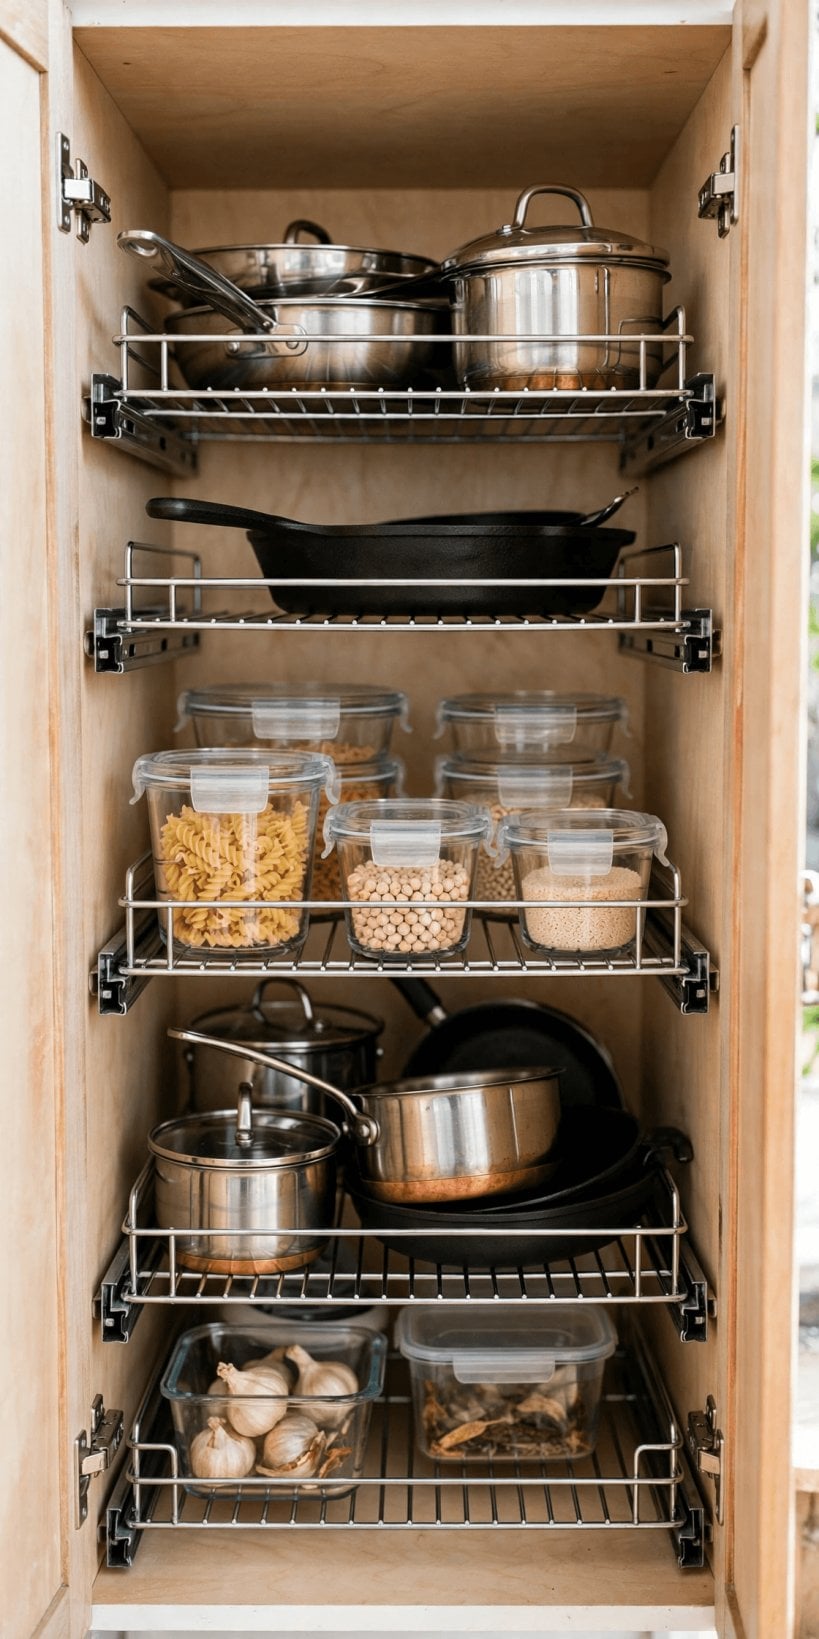
3. Pull-Outs and Deep Drawers: Cupboards That Bring Their Contents to You
The deep base cupboard is where small kitchens go to lose things. Converting even one or two of them into moving storage changes the whole room, and the cabinet-first thinking in tiny house plans with hidden storage applies inside kitchen units just as well as under stairs.
7. A pull-out frame under the sink. A sliding frame or tiered caddy that works around the trap brings cleaning bottles out into daylight, ending the kneel-and-grope routine. Choose a frame shaped for pipework rather than a rectangle that pretends pipes do not exist, keep chemicals in one lidded box on it, and leave a cloth on the frame for the drips that under-sink life guarantees.
8. Vertical filing for pans, lids and trays in a deep drawer. A deep drawer with simple dividers stores frying pans, lids, chopping boards and baking trays on edge like files, instead of in a heavy, scratched stack. You see every piece from above, lift one out without moving three others, and the drawer stops being the loudest thing in the kitchen at six in the morning.
9. A corner pull-out or corner drawer. Corners eat volume and return frustration; a pull-out mechanism or a set of corner drawers turns that dead diagonal into reachable storage for dry goods or the heavier pots. This is the one conversion here that costs real money and fitting time, so do it last, after a month of noting what you actually reach into that corner for.
4. Door Backs and Inside-Door Racks: The Thinnest Storage in the Kitchen
Doors are storage surfaces that most kitchens ignore completely. Their load limit is real — hinges are not shelves — but for thin, light, constantly used things, a door back is prime land precisely because it moves with you as you open the cupboard.
10. Racks inside cupboard doors for wraps and lids. Foil, film, freezer bags and pan lids are thin, light and miserable in drawers. A rack or a set of rails on the inside of one cupboard door corrals them vertically, visible the second the door opens. Check the door still closes cleanly with loaded racks, and keep this door’s hinges in mind: wrap and lids, yes; jars and bottles, no.
11. An over-door rack on the larder or kitchen door. The back of a full-height kitchen or pantry door fits a multi-tier rack for spices, packets and small jars, using the clearance gap that already exists. Test the door’s full swing before fixing anything, pad contact points so the rack does not mark the door, and put the everyday spices at hand height with refills and spares exiled to the top tier.
12. Hooks inside the sink door for cloths and gloves. Two small hooks or a slim rail inside the under-sink door hold the washing-up gloves and the cloth currently in use, where they can drip and dry in peace instead of draping the tap. It is a two-minute fix that clears the sink’s edge completely, which in a sixty-square-foot kitchen feels like gaining a window sill.
5. Decanting and Food Zones: Visible Jars, Honest Labels and One Category per Shelf
Dry food in a small kitchen fails in two ways: it hides, so you buy duplicates, or it sprawls, so one shelf holds flour, batteries and a birthday candle. Decanting and zoning fix both by making food storage readable at a glance.
13. Decant dry staples into uniform jars. Flour, rice, pasta, oats and lentils poured into matching jars with wide mouths stack neatly, show their levels instantly and end the avalanche of half-open bags. Uniformity matters more than beauty: same footprint, same lids, scoopable tops. Keep the original packet’s date with the jar until you trust your labelling, and only decant what you genuinely use monthly.
14. Label with contents and date, every time. A label on the front at reading height — what it is, when it went in — turns decanting from a display habit into a rotation system. New stock goes behind or below old stock, so the oldest is always used first, and a quick glance before shopping lists exactly what is running low instead of what you vaguely fear might be.
15. One shelf, one category. Give each food shelf or basket a single job: baking, breakfasts, tins, snacks. Mixed shelves breed duplicates and bury the small things; zoned shelves make putting shopping away a no-decision task and make a stock-check a ten-second look. In a very small kitchen one category may be a basket rather than a shelf — the discipline matters, not the furniture.
6. Counter Discipline and Appliances: A Worktop That Stays a Worktop
Counter space is for cooking, not for storage with plugs. The sizing logic in best compact kitchen appliances for tiny houses and the folding pieces in convertible furniture tiny house plans both serve the same goal: surfaces that return to empty when the meal is done.
16. Only daily appliances earn counter space. Apply a blunt rule: an appliance lives on the counter only if it is used most days. For most small kitchens that means the kettle and perhaps one other; everything else — blender, toaster, processor — gets a cupboard home with its cable, and comes out for its shift. Counters cleared this way make the whole kitchen feel a size larger before you have stored a single extra thing.
17. Mount the small stuff under the cabinets. The underside of wall cabinets is free mounting space: a paper-roll holder, a rail for measuring cups, the microwave on a proper bracket, a small shelf for the radio or tablet you cook from. Each mounted item returns a hand’s-width of counter, and in sixty square feet those hand’s-widths add up to the only stretch of clear worktop some kitchens ever see.
7. The Sink and Cleaning Zone: Drying, Draining and Bottles Under Control
The wet end of a small kitchen works like the bathrooms in tiny house bathroom layouts: small, steamy and used constantly, so everything there needs a drained, visible, single home or it turns into a damp pile around the tap.
18. An over-sink rack or board. A rack or sturdy board that spans the sink gives washed dishes somewhere to drain that is not the worktop, and doubles as extra prep surface or a stand for hot pans. Choose one that rolls, folds or lifts away in seconds for washing up big items, and in a one-sink kitchen treat it as a tool you deploy, not a permanent bridge that traps the tap.
19. A single cleaning caddy, not a bottle forest. Every cleaner you own, apart from the one in daily use, lives in one caddy under the sink or on its pull-out: washing liquid, spray, cloths, brush, bin bags. One container, one location, one glance to audit. Small kitchens drown in duplicate half-bottles bought because the first was invisible; the caddy makes duplication obvious and faintly embarrassing, which is exactly the point.
8. Reach Over Capacity: The Prime Zone Between Knee and Shoulder
The most useful idea in this whole list costs nothing: rearrange what you already store by how often you touch it. Daily things belong between knee and shoulder height, in the front half of every cupboard. Everything else — however well it fits — is stealing prime land.
20. Map the prime zone and stock it deliberately. Stand at your cupboards and mark, honestly, the band you can reach without a stool, a stretch or a kneel. Everyday plates, glasses, mugs, pans and staples live there and only there; the fondue set, the big platter and the spare everything move up high, down low or out. When two people share the kitchen, stock the overlap of both reach bands first.
21. Keep a slim, stored-flat step for the high layer. Reach-based storage only works if the high layer is safely gettable: a folding step that lives in the gap beside the fridge or hangs on a door makes top shelves honest storage instead of a no-go zone. Choose one you can open one-handed and that does not wobble on your floor; a step you distrust quietly converts good shelves back into dead space.
9. Fridge and Freezer Order: Cold Storage You Can Read at a Glance
In a small kitchen the fridge is a cupboard that hums, and it deserves the same zoning discipline as the dry shelves. Ten seconds of order here saves the daily door-open rummage that wastes food, energy and temper in equal measure.
22. Bins and a first-in-first-out fridge layout. Group fridge contents in a few open boxes — dairy, cooked leftovers, raw ingredients — so a whole category lifts out instead of items migrating to the back and expiring in the dark. New items go behind old ones within each box, leftovers get a front-row seat with a use-first position, and a small note on the door lists anything that must be eaten this week.
23. Freeze flat, label honestly. Soups, sauces and portions frozen flat in bags stack and file like books, using a fraction of the space of tubs and thawing faster under a tap. Squeeze the air out, freeze on a tray until solid, label with contents and month in marker, and keep a running list on the freezer door so the frozen layer stays a larder rather than becoming an archive of mysteries.
10. Habits That Hold It Together: One In, One Out, and the Weekly Reset
Systems fail quietly when habits do not back them, especially in a shared kitchen — the couples in tiny house layouts for couples run on the same two agreements below. They take minutes a week and protect every other idea on this page.
24. One in, one out — no exceptions for bargains. A new pan, gadget or storage box enters only when a similar item leaves. The rule works because it bites at the till and at the door, not in a guilty sort-out months later, and it forces the real question: is this better than the one it replaces, in this kitchen, at this size? If the honest answer is no, the bargain stays in the shop.
25. A ten-minute weekly reset. Once a week, set a timer and put the kitchen back to its map: jars fronted and dated, rails thinned to the true daily set, fridge boxes audited, one shelf checked for duplicates. Ten honest minutes is enough at this scale, and it is the difference between a system that compounds calmly and one that dissolves back into counter drift by the end of the month.
Final Considerations
Work in the order your kitchen frustrates you. For most sixty-square-foot cooks that means counters and the sink first, pull-outs and rails second, decanting and cold storage third, and the habits running underneath from the first day. Be honest about trade-offs: rails display your tools to guests as well as to you, decanting asks for labelled discipline or it becomes prettier chaos, and high storage is only as good as the step that reaches it. Prefer reach over capacity, visibility over cleverness, and reversible changes while you learn your own cooking patterns. A small kitchen organised this way never becomes a big one — but it stops fighting you, three meals a day, and that is the whole prize.


0 Comments