
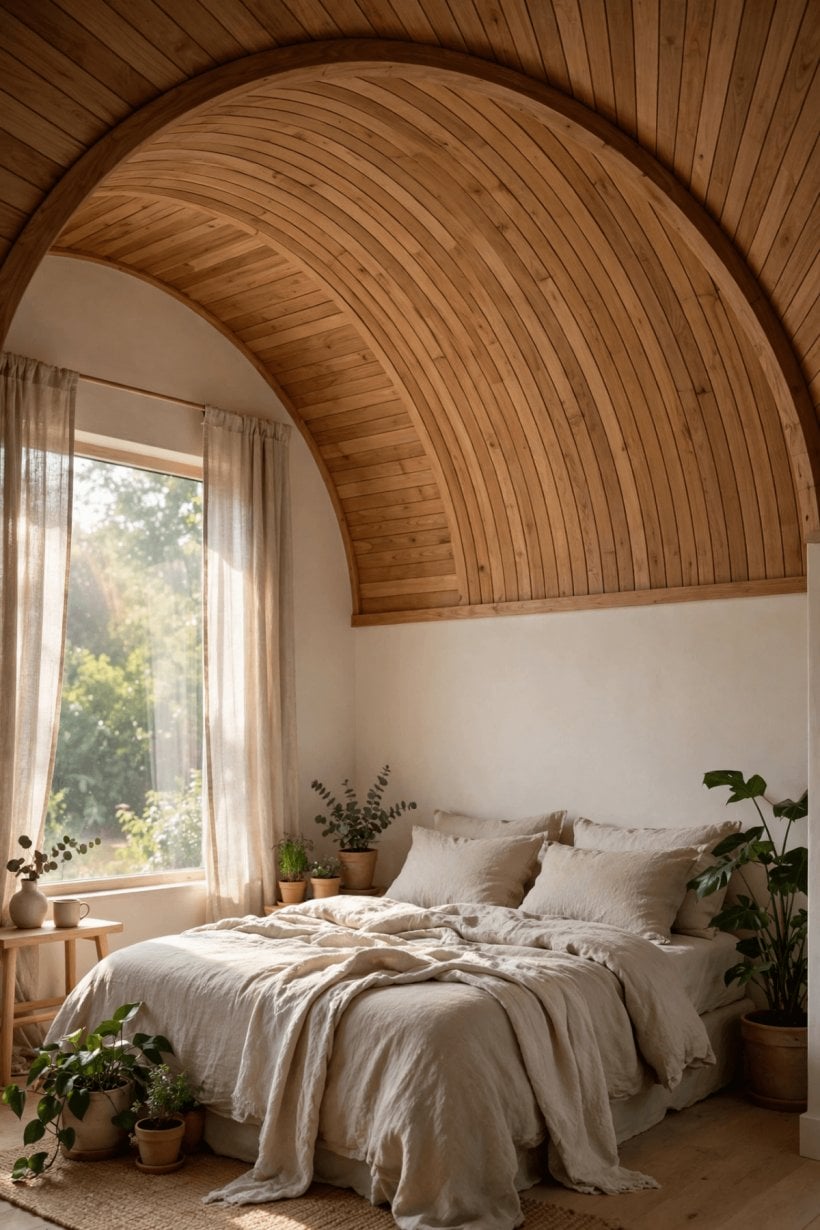
A flat ceiling does its job quietly and asks for no attention. A curved one changes the feel of a room the moment you look up: softer light, a gentle sense of height, and an echo of old halls, chapels and station roofs.
A barrel vault is simply that curve — one continuous arch stretched along the length of a room, like the inside of a barrel laid on its side. This guide walks through its shapes, materials and honest limitations, so you can judge where the curve will earn its keep and where it will only cause trouble.
1. At a Glance: What the Curve Changes
Strip away the romance and a barrel vault is a geometry decision with practical consequences. The arch springs from two opposite walls — the spring line — and rises to a crown at the centre. That single move lifts the highest point of the ceiling, borrows volume from the roof space or the floor above, and gives light a surface it can slide along instead of a flat plane it simply bounces off. Rooms feel taller than their wall height suggests, and long rooms gain a rhythm that pulls the eye from one end to the other.
The same geometry asks questions in return. The curve pushes outward as well as up, so the walls or structure at the spring line have to deal with that spread. The edges of the room lose headroom even as the centre gains it, which matters for tall furniture, doors and anyone over six feet walking near the walls. Sound behaves differently too: a concave surface can focus voices and clatter toward the middle of the room. None of this rules the idea out — generations of builders used the form happily, and the serene calm of tiny church interior ideas shows how naturally the curve suits quiet, gathered spaces. It simply means the shape should be chosen with open eyes, not from a photograph alone.
| Aspect | What to know |
|---|---|
| Profile | A segment of a circle, from a full semicircle down to a shallow, barely-there arc |
| Rise | The height from spring line to crown; more rise means more drama and more lost headroom at the edges |
| Span | Modest spans are straightforward; wide spans need serious structure and professional design |
| Best rooms | Long living spaces, dining rooms, hallways and calm bedrooms with enough wall height |
| Watch-outs | Outward thrust, echo, services in the way, and doors or wardrobes that clash with the falling edges |

Keep those three measurements — profile, spring line, rise — written down from the start. Every later choice in this guide, from material weight to pendant length, refers back to them, and changing the rise halfway through a build is the kind of decision that quietly doubles the work.
2. Shapes and Profiles
The full semicircle is the oldest profile and the most demanding: for a given span it produces the greatest rise, which is wonderful in a hall and wasteful in a cottage. Most domestic curves are segmental — a slice of a much larger circle — giving a gentle lift that reads as elegance rather than architecture showing off. The shallower the segment, the easier it is to build and light, but also the easier it is to lose the effect entirely under a coat of flat white paint.

A slightly pointed profile, borrowed from Gothic building, sheds the eye upward more assertively and can suit narrow rooms where a round arch would feel squat. Elliptical curves — flatter at the crown, quicker at the edges — are trickier to set out but kind to headroom where people actually walk. Some ceilings add ribs across the curve at intervals, which breaks a long sweep into bays, hides minor ripples in the surface, and gives lighting a natural place to hide. Others step the profile, running two or three shallow arcs side by side across a wide room instead of one ambitious span.
Whichever profile you choose, draw it full-size before committing. A curve that looks graceful on a screen can feel mean at the edges in real life, and a template of card or thin board held against the wall tells the truth faster than any rendering. It is striking how often the shape language of modern tiny house interior ideas — clean lines, one strong gesture per room — suits a shallow segmental profile best: the curve becomes the room’s single ornament, and everything else can stay quiet.
3. Where the Curve Works Best
Long rooms are the natural home of this ceiling. A living room that stretches away from the entrance gains direction and ceremony; a dining room gains a canopy effect that gathers people around the table; a hallway, so often a leftover space, becomes a small gallery that makes the whole home feel considered. In each case the curve runs with the length of the room, never across it — an arch spanning the short dimension fights the room’s proportions and usually loses.

Bedrooms reward a gentle hand: a shallow profile over a bed adds softness without drama, and the quieter acoustics of a sleeping room forgive the curve’s tendency to focus sound. Browsing tiny house bedroom decor ideas is a good reminder that restful rooms are built from soft layers — the ceiling can be one of those layers rather than a statement. Kitchens can work beautifully too, especially where the curve runs above a central island, but grease, steam and the need for extractors demand honest thought about surfaces and services, covered in section 8.
Some rooms should be left flat. Low rooms where the spring line would start below comfortable head height at the walls, bathrooms too small for the curve to read as anything but a squeeze, and attic conversions where the roof already throws three slopes into the space — all of these fight the form. The curve also struggles in square rooms, where a single-direction arch feels arbitrary. Better a flat ceiling done well than a vault that spends its life apologising.
4. Materials Compared
Plasterboard on a curved frame is the workhorse: light, affordable in material terms, and finished with the same plaster and paint as any ceiling. Its skill lies in the framing beneath — a series of ribs cut to the profile — and in boarding that bends without snapping, using thinner boards or careful scoring. Timber boarding, tongue-and-groove or simple planks following the curve, brings warmth and forgives small movements with shadow gaps rather than cracks; it is the finish that makes the form feel at home in the relaxed world of tiny barn house interior ideas, where wood and whitewash do most of the decorative work.

Brick and stone are the historic materials and the heaviest by far: a true masonry vault is a structural project in its own right, not a finish, and belongs in new builds designed around it from the foundations up. Metal sheet and panels can take a curve crisply and suit utility spaces, though they ring with sound and show condensation in steamy rooms. Lime plaster over lath or board gives the softest, most light-friendly surface and suits older houses that need breathable finishes. Acoustic fabric systems exist for rooms where echo is the enemy, stretched over the curve on tracks — effective, but a specialist job to install and repair.
Weigh each option against three honest questions: how heavy is it, who locally knows how to build it, and how will you repair it in ten years when a stain appears at the crown? The cheapest material on the shelf is rarely the cheapest curve once labour and scaffolding join the bill, and the most beautiful sample is no use if a repair means rebuilding a quarter of the ceiling.
5. Structure and Framing Checks
An arch does not simply rest on walls; it pushes against them. Every curved ceiling tries, gently and constantly, to spread its supports apart, and the wider and heavier the curve, the harder it pushes. In a framed, non-structural version — plasterboard ribs hung beneath existing joists — the push is modest and the frame mostly carries itself, but even then the fixings at the spring line deserve respect. In anything heavier, or where the curve replaces part of the existing ceiling structure, a structural engineer’s calculations stop being optional.

Before any design work, find out what is already up there. Ceiling joists may be carrying a floor, a water tank or a forest of stored boxes; rafters may rely on ties that a new curve would cut through. Establish where the loads travel, what the walls are made of, and whether the spring line lands on solid masonry or on a partition that was only ever meant to divide space. Older homes hide surprises — shallow lintels, chimney breasts, wiring from three different decades — and every one of them is cheaper to meet on paper than mid-build.
Permits and inspections vary widely, so treat this as a prompt rather than a rulebook: check with your local building department before work starts, especially if the project touches structure, electrics or the space between floors. A short conversation early on can confirm whether your curved ceiling counts as a simple finish or as structural alteration, and that single answer shapes the budget, the trades you hire and the paperwork you keep for the day you sell the house.
6. New Build, Retrofit and Faux Options
In a new build, the curve is nearly free at the drawing stage: the roof or floor structure above can be shaped to receive it, services can be routed around it, and the spring line can sit exactly where the proportions want it. Extensions are the next best case, particularly single-storey ones where a shaped roof and a curved ceiling can be planned as one gesture, inside and out. If you are designing from scratch, decide the profile before the window heads are fixed — tall glazing at the end wall, rising toward the crown, is one of the great pleasures of this ceiling form.

Retrofitting under an existing flat ceiling is the commonest scenario and usually means building a false curve below the real one. The cost is headroom: the crown of the new curve sits below the old ceiling, and the edges drop lower still, so measure the room’s existing height with brutal honesty. A shallow profile, a high spring line and discipline about what hangs from the crown can make a modest room feel generous; an ambitious semicircle in the same space will feel like a tunnel.
Lighter still are the faux options: shaped coving and a painted arc can suggest a curve where none exists, and applied mouldings following a gentle arc give some of the shadow play at a fraction of the disruption. Treat lightweight decorative profiles with care in escape routes and above heat sources, and check that any product you consider is certified for ceiling use in your area — your local building department or supplier can confirm what is acceptable. An honest painted suggestion beats a flimsy imitation that sags, cracks or yellows within a year.
7. Lighting the Curve
Flat ceilings forgive lazy lighting; curved ones reward thought. The classic move is a concealed source at the spring line — a continuous strip hidden in a ledge or cornice that washes light up and across the curve, so the ceiling itself becomes the lampshade. Done well, the room glows without a visible fitting; done badly, with a lumpy strip or the wrong spacing, every ripple in the surface is underlined in light. Keep the source far enough from the surface, dim it, and test with a temporary rig before the plaster dries.

Pendants belong at the crown, hanging on straight drops from the highest point, where their weight can be carried by structure rather than by board. One long pendant over a table works; a row along the crown can be beautiful in a long room; a heavy chandelier needs its support designed in from the start, not improvised through a finished surface. Recessed spots are the awkward guests: each one must sit flat against a surface that is not flat, so either use small fittings in the flatter zones near the crown, gimbal fittings that can aim properly, or keep spots in the flat borders of the room and let the curve stay clean.
Colour does quiet work here too. A curve painted a breath lighter than the walls lifts the room; a deep colour makes it cocoon-like and can be glorious in a dining room or bedroom, though it will show every flaw in the surface under raking light. The collected wisdom in tiny house interior paint colors applies doubly overhead: sample on the curve itself, look at it morning and evening, and remember that light washing upward flatters matte finishes and exposes glossy ones.
8. Sound, Insulation and Services
A concave ceiling is a gentle acoustic mirror. Whispering-gallery effects are real: sound launched along the curve can arrive surprisingly clearly at the other end, and hard surfaces all round will make a dining room ring. The cures are softness and interruption — rugs, upholstered furniture, curtains, books, a run of ribs or coffers that break the sweep — rather than afterthought panels. If the room’s main job is conversation or music, raise the acoustic question with your builder before the profile is fixed, not after the first dinner party.
Above the curve there is usually a void, and voids need decisions. Insulation should follow the curve or sit in a continuous blanket above it, with no gaps at the edges where heat loves to escape; ventilation of any roof void above must be preserved, not smothered. Condensation is the quiet enemy in kitchens and bathrooms, so vapour control and extract routes belong in the drawing, not in a site improvisation. Where the curve is false and the old ceiling remains above it, the void between them deserves the same tidy thinking.
Services are the third guest at this table. Wiring for lights, speaker cable, alarm sensors, ducting for extraction or air conditioning — all of it wants to cross exactly where the curve wants to be. Route first fix before boarding, photograph every run for future reference, and consider a discreet access point where future-you will thank present-you. Pipes are best kept out of the void entirely: water above a finished plaster curve is a risk with no upside.
9. Finishes and Day-to-Day Care
Finish is where the curve meets daily life. Matte and soft-sheen paints are the forgiving friends of large curved surfaces, hiding the faint undulations that even good plastering leaves; high gloss turns the ceiling into a funfair mirror and should be reserved for the very confident and the very well-plastered. Limewash and other mineral finishes add a cloudy depth that suits the form’s old soul and shrug off minor marks gracefully. Timber can be left to silver, oiled for warmth, or painted for calm — each choice pushing the same room toward rustic, cosy or serene.

Colour confidence helps: the playful spirit in colorful tiny house interior ideas translates overhead as a tinted curve above white walls, a soft plaster pink, a pale sky blue that leans into the vault-of-heaven joke without labouring it. Whatever the finish, expect the spring line to be where cracks announce themselves first — hairline movement cracks where curve meets wall are common, cosmetic, and best handled with flexible filler and patience rather than alarm.
Care is mostly about reach. Dust settles on the crown as happily as anywhere, so a long-reach duster becomes part of the household kit, and repainting means a scaffold tower or a very steady platform rather than a step ladder — worth knowing before you fall in love with a colour that needs refreshing often. Keep leftover paint, note the finish and batch on the tin, and the ceiling will ask little of you between its birthdays.
10. Costs in Kind, Trades and Final Checks
Money talk, kept honest and number-free: the curve itself is rarely the expensive line — the shape around it is. Costs gather in the framing labour, the scaffolding or tower time, the plasterer’s skill premium for a surface with nowhere to hide, and the electrician’s extra visits when lighting hides in ledges. Spans, heights and heavy materials multiply all of these; shallow profiles in plasterboard, in rooms a tower can reach, sit at the gentle end. As with the space planning in tiny house kitchen design ideas, the budget behaves when the decisions happen in the right order: shape first, structure second, services third, finishes last.
The cast is usually a carpenter for ribs and framing, a plasterer who has curved before — ask, and ask to see one — an electrician for first and second fix, and a decorator who understands that raking light forgives nothing. An engineer joins for anything structural. Get each trade to walk the room together once, tape measure in hand, before anyone orders anything; most curved-ceiling disasters are born in the gaps between trades, not within them.
Final checks before you sign anything off: the profile drawn full-size and approved in the room; the spring line level and landing on solid support; thrust and loads signed off where needed; services routed, photographed and accessible; lighting tested against the actual surface; insulation and vapour control continuous; and the local building department’s requirements confirmed in writing. Tick those, and the ceiling above your head will be the least of your worries for decades.
Final Considerations
A curved ceiling is a commitment of shape rather than of stuff: once the profile is set, everything else in the room arranges itself around it. Choose the gentlest curve that still changes the room, spend your effort on the unglamorous checks — structure, services, light — and let the surface stay simple. Do that, and the arch overhead will repay you every day in the oldest currency architecture has: a room that simply feels good to be in.


0 Comments