

A sloping garden does not have to stay a problem you mow sideways and apologise for. One well-built wall can turn that slope into level beds, a terrace, a seat and a backdrop, all at the same time.
The trick is choosing the right wall for the height, the soil and the look of the house. These seventy-five ideas cover layouts, materials, colours, drainage and the small practical details that decide whether a wall lasts for decades.
1. Retaining Walls at a Glance: The Job Every Wall Has to Do
| Detail | What to know |
|---|---|
| Main job | Hold back soil, level sloping ground and help manage where rainwater goes |
| Height matters | Low garden walls are one thing; taller or load-bearing walls usually need professional design and local approval |
| Drainage | The single biggest factor in how long any wall lasts; water trapped behind a wall is its worst enemy |
| Common materials | Natural stone, concrete block, brick, timber sleepers, gabion baskets and poured concrete |
| Colour direction | Match the house and the local stone, or render smooth for a calm, modern backdrop |
| Cost drivers | Height, length, site access, drainage work and material choice, in roughly that order |
| Skill level | Short, low walls can suit confident DIY; anything tall, structural or near a boundary deserves a professional |
| Upkeep | Keep drains and weep holes clear, watch for leaning or bulging, and repoint or replant as needed |
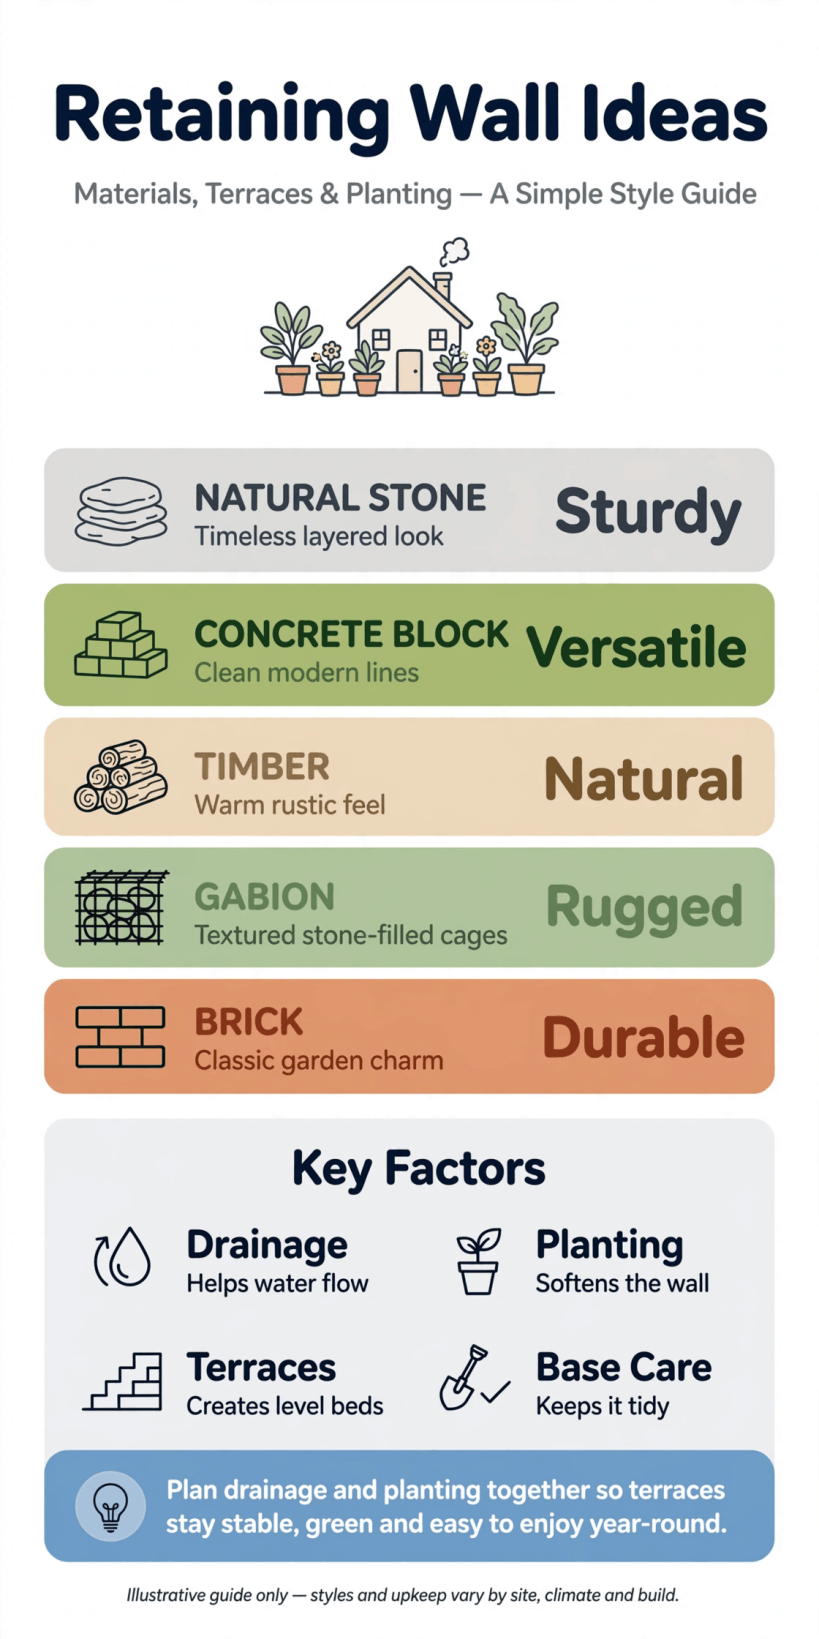
A visual guide to the layouts, materials and drainage details that the seventy-five ideas below build on.
The best retaining wall ideas start with honesty about the job. A wall is not a fence and it is not a decoration that happens to be heavy: it is a structure holding back tonnes of soil that gets far heavier every time it rains. Get the height, the footing and the drainage right and almost any material can look wonderful for decades. Get them wrong and even beautiful stonework will lean, bulge and quietly fail. That is why this list spends as many ideas on foundations and water as on good looks, in the same spirit as good tiny house landscaping ideas, where the pretty result always rests on unglamorous preparation.
One more piece of honesty before the ideas: rules differ. How tall a garden wall may be before it needs approval, how close it can sit to a boundary, a road or a neighbour’s land, and who is responsible for the soil it holds all vary between cities and counties. Nothing here can tell you your local rule, so treat heights and permissions as a question to check with your city or county planning and building office before you dig, the same habit anyone researching where can I build a tiny house learns on day one. A short conversation first is far cheaper than rebuilding a wall later.
2. Layouts First: Terracing, Levels and Lines
Draw the wall before you price it. On paper, your slope becomes a set of decisions: one wall or several, straight or curved, where the steps go, and what each new level is actually for. Gardens planned in levels, much like the rooms in thoughtful tiny house interior design ideas, end up feeling generous because every level has a job. Start with these layout moves.
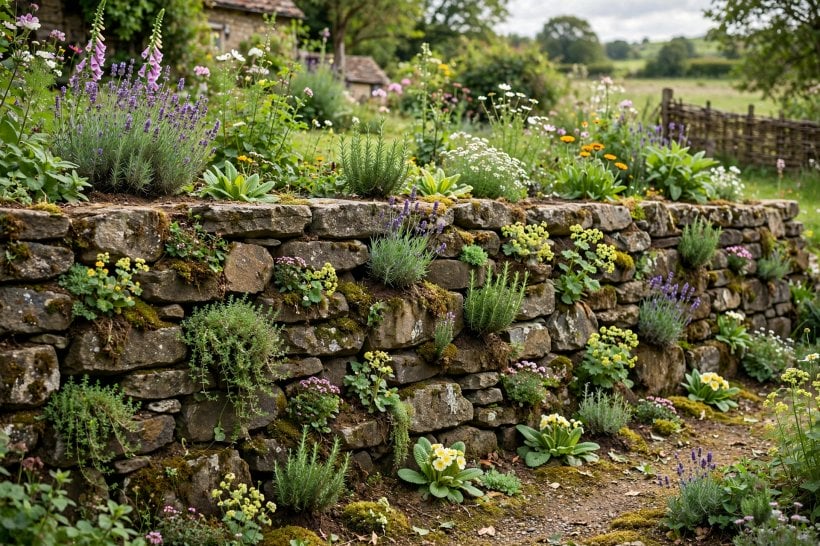
- Terrace a steep slope into two or three low walls. Several short walls, each holding a modest height of soil, are safer, cheaper to build well and far prettier than one tall wall straining at the bottom of a bank, and the flat beds between them become the garden’s best planting.
- Follow the contour of the land. A wall that runs along the natural contour line needs less digging, less backfill and less material than one forced across it, and it settles into the garden as if it had always been there.
- Curve the wall to soften a formal garden. A gentle curve turns a hard engineering line into a design feature, hugs a path or a lawn edge beautifully, and often feels stronger and more natural against planting than a ruler-straight run.
- Run it straight for a crisp, modern look. Where the house is contemporary, a dead-straight wall with clean joints and a level cap reads as architecture; just make sure the groundwork is precise, because straight lines show every small wobble without mercy.
- Step the wall down in even drops. On a side slope, lower the wall in level steps rather than sloping the cap, so each section keeps proper depth in the ground and the top line looks deliberate instead of tired and sagging.
- Return both ends into the bank. Turning the last stretch of wall back into the slope, in an L or a curve, locks the ends in, stops soil escaping around the sides and finishes the wall the way a full stop finishes a sentence.
- Make the top level a real terrace. If you are levelling ground anyway, size the top terrace for its job: deep enough for a table and chairs, a lawn a child can actually play on, or beds you can reach without climbing.
- Leave a service gap behind paths and fences. A narrow bed or gravel strip between wall and path catches soil splash, gives you access for weeding and drain checks, and stops the wall face being scuffed by mowers, boots and wheelie bins.
3. Choosing Materials With Eyes Open
Material is where budget, looks and lifespan collide. Stone is the romantic choice, block is the pragmatic one, timber is the warm one, and each has a personality about water, weight and ageing. Choose with the wall’s height in mind first and your favourite photograph second, because a material that behaves beautifully at knee height may be the wrong answer at chest height.
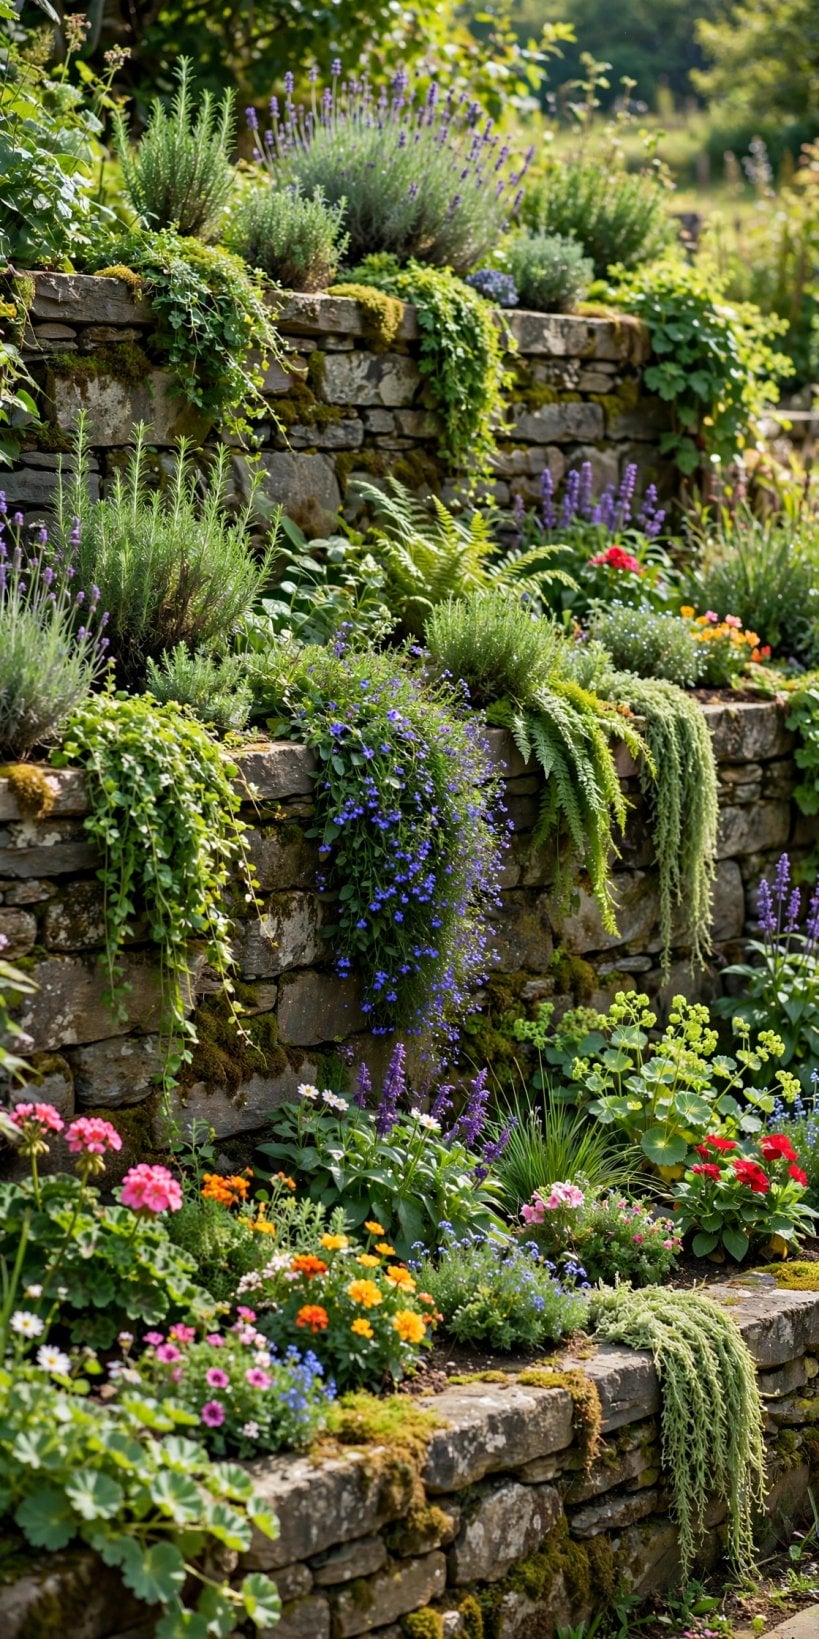
- Natural stone for permanence. Real stone, laid well on a proper footing with drainage behind it, is the longest-lived and most forgiving option: it weathers instead of dating, hides small imperfections in its own texture and suits old and new houses alike.
- Dry-stacked stone for a living wall. Stone laid without mortar lets water escape through the joints instead of building up pressure, and the gaps become homes for small plants and insects; it asks for patience and skill, and repays both for generations.
- Interlocking concrete blocks for reliability. Segmental block systems are engineered to lock together, lean back into the slope and go up in even courses, which makes them the most predictable choice for straighter, taller garden walls and for careful DIY builders.
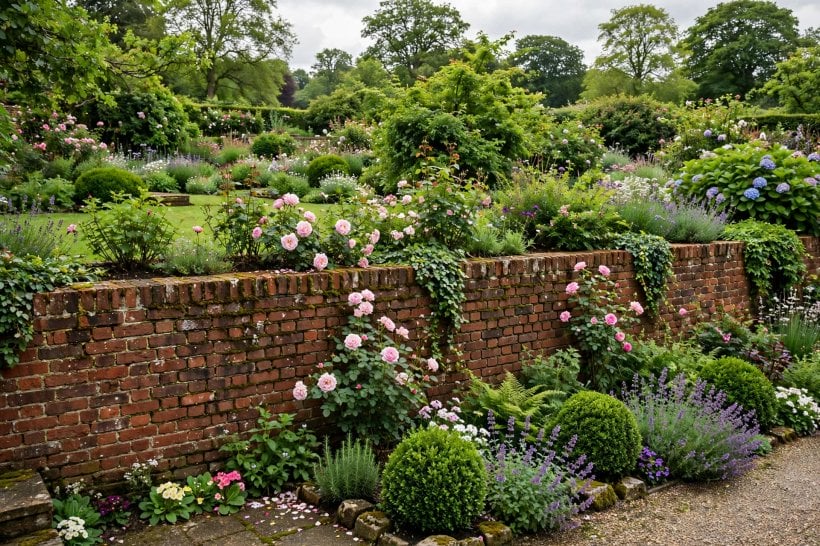
- Brick to match the house. Where the home is brick, a brick wall ties garden to architecture instantly; use bricks rated for ground contact and frost where your climate demands it, and cap the wall so water cannot sit in the joints.
- Timber sleepers for warmth and speed. Chunky treated sleepers build fast, feel friendly and suit informal gardens; accept that timber is the shortest-lived material here, detail it off the wet ground where you can, and choose timber rated for ground contact.
- Gabion baskets for rugged texture. Wire cages filled with stone drain freely, need no mortar and shrug off awkward, uneven ground; they read industrial or rustic depending on the fill, and they are wonderfully forgiving of a slightly imperfect base.
- Poured concrete for a single clean plane. A cast wall, especially board-formed so the timber grain prints into the surface, gives a strong, minimal backdrop for modern planting; it needs proper reinforcement and formwork, which usually means professional hands.
- Rendered block for a smooth, painted finish. Ordinary blockwork disappears under render and paint, giving you the crispest, most contemporary wall of all at a sensible build cost; the render and its detailing then carry the maintenance story, not the structure.
- Mix materials on purpose. A stone base with a timber top, or block below render with a stone cap, can solve budget and looks together; keep the mix to two materials and repeat it across the garden so it reads as a decision.
4. Stone Walls: Rustic, Formal and Everything Between
Stone deserves its own section because its range is enormous: the same material can build a farm track edge or a formal terrace that looks like it belongs to a manor. The difference is in how the stone is chosen, coursed and capped. If stone is your direction, these are the variations worth knowing before you order a single load.
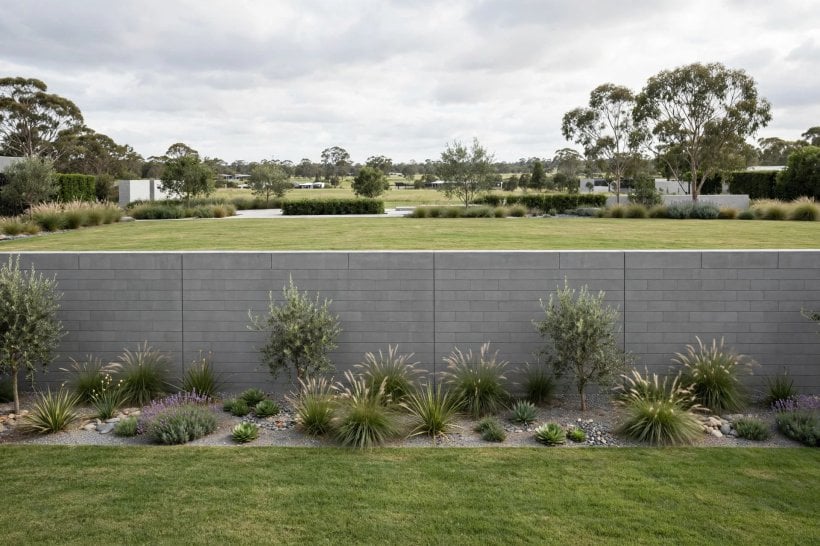
- Course the stone in level rows. Sorted, coursed stone with regular bed lines looks calm and architectural, suits formal gardens and house walls, and is easier to cap neatly than random work because the top course arrives almost level by itself.
- Go random rubble for countryside character. Mixed sizes fitted tightly together give the relaxed, found-in-the-field look that suits cottages and informal planting; the skill hides in the fitting, where every stone should touch its neighbours and never rock.
- Build a boulder wall on gentle ground. Large rounded boulders, nested into the slope and into each other, make a superb low wall where a natural look matters more than a flat top; keep the height modest and the base stones the biggest.
- Use stone veneer over a block core. A structural block wall faced with a skin of real stone gives you engineered strength with a genuine stone face at a friendlier cost; the veneer must be tied and detailed properly so it never delaminates.
- Choose mortared or dry-laid deliberately. Mortar gives a tidier, more formal face and holds thin stone securely, while dry-laid drains freely and can be re-stacked; decide by look, height and your comfort with maintenance, not by whichever the first quote assumes.
- Cap with wide, heavy stones. Generous capstones protect the wall’s top from water, give the eye a clean finished line and, at the right height, become the most fought-over seat in the garden on a sunny afternoon.
- Match the stone to the region. Walls built from the stone that local buildings and field walls use always sit quietly in the landscape; imported stone in the wrong colour or shape can look like a stage set, however well it is laid.
- Consider reclaimed stone and setts. Old kerbs, setts and salvaged walling stone bring instant age and keep good material in use; sort ruthlessly, because a load of reclaimed stone always contains some pieces fit only for the hardcore layer.
- Plant the pockets as you build. In a dry stone wall, tuck soil and small hardy plants, creeping thymes and tiny ferns, into chosen gaps during construction rather than forcing them in later, and the wall will soften beautifully within two seasons.
5. Timber, Sleepers and Warm, Informal Walls
Timber is the material of friendly gardens: raised vegetable beds, play areas, woodland slopes and anywhere a wall should feel like furniture rather than fortification. Its rules are different from masonry: keep water moving, expect a shorter life, and design so that a tired section can be replaced without dismantling the whole garden.
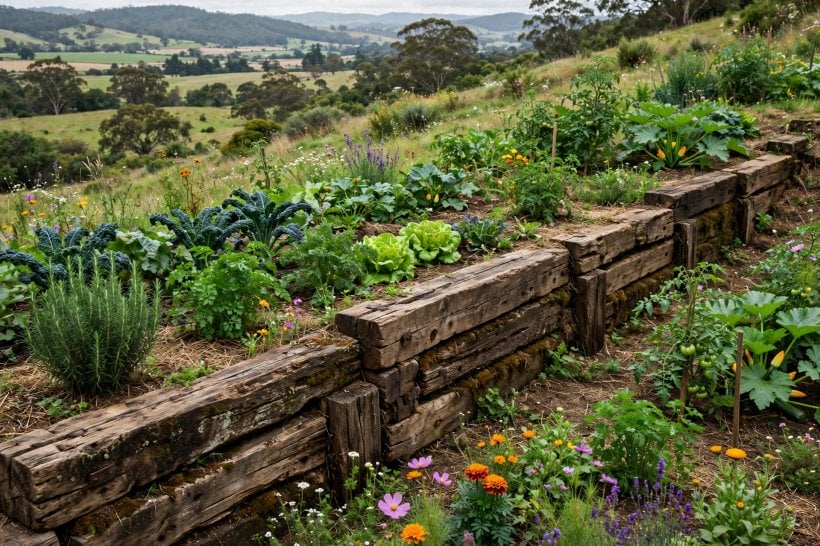
- Lay sleepers horizontally in staggered courses. The classic sleeper wall: long timbers stacked with joints offset like brickwork, fixed together and anchored back into the bank, giving a clean-lined wall that pairs happily with lawns, gravel and contemporary planting alike.
- Stand timber vertically for tight spaces. Upright posts or half-round timbers set in a trench follow curves sweetly, use the full depth of timber as the wall’s thickness and suit woodland gardens; the buried ends are the weak point, so drainage and treatment matter doubly.
- Let raised beds double as the retaining. On a gentle slope, a run of deep raised beds is a wall that grows dinner: each bed holds its level of soil, the fronts make the terrace, and the gardener gains waist-high planting in the bargain.
- Build sleeper steps into the wall line. Where the level changes, a flight of wide sleeper steps set into the wall itself keeps one material, one line and one weekend of work, instead of bolting a separate staircase onto the garden afterwards.
- Detail the top sleeper as a cap and seat. Finish a timber wall with its best, straightest sleeper laid flat on top; it protects the end grain below, tidies the line and turns a low wall into a bench along the whole bed.
- Let it silver naturally. Untreated-looking, weathered grey timber disappears gracefully into planting and asks for almost no upkeep beyond inspection; if you love the silvered look, choose durable timber and simply keep leaves swept off it.
- Stain it dark for contrast. A near-black stain makes green foliage look twice as lush, ties a timber wall to modern fences and outbuildings, and hides the small stains and marks that pale timber shows within a single season.
- Cap posts and cover end grain. Where posts or uprights form the wall, simple caps and sealed end grain shed the water that otherwise soaks straight down into the timber; end grain drinks like a straw, and it is where rot almost always starts.
- Design timber walls in replaceable sections. Build in bays between stout posts so that in fifteen or twenty years one tired bay can be swapped without touching its neighbours; a little humility at build time is the cheapest maintenance plan there is.
6. Colour, Render and Modern Finishes
A retaining wall is often the largest single surface in a garden, so its colour quietly sets the temperature of everything planted against it. Dark walls recede and make green glow; pale walls bounce light into shady corners and can glare at noon. Test your finish the way you would test tiny house interior paint colors: big sample, real light, a few days of looking before you commit.
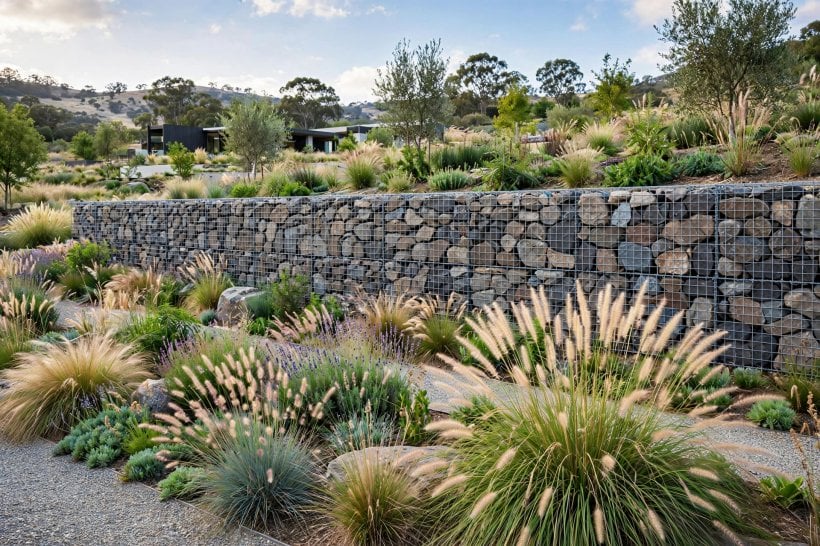
- Go dark to make the wall disappear. Charcoal, deep slate and near-black finishes pull a wall backwards visually, so the planting in front becomes the whole picture; dark is also the most forgiving colour for the splash marks every garden wall collects.
- Choose warm sand and stone tones for render. A render in the colour of local stone or dry earth sits comfortably with brick, gravel paths and terracotta, and warms a garden in climates where a bright white wall would feel like a beach in the wrong country.
- Use white or cream for a sun-washed feel. Pale rendered walls with dark planting and gravel give an unmistakable warm-climate mood, bounce light onto a terrace and make small gardens feel larger; budget a wash-down into your year, because pale shows algae first.
- Match the render to the house walls. Carrying the house colour down onto the garden walls makes house and garden read as one designed place, and the wall stops looking like a later addition that nobody quite planned.
- Leave concrete honestly grey. Board-formed or smooth grey concrete needs no paint, no render and no apology; its neutrality suits grasses, rusted steel and black-stained timber, and small weather streaks read as texture rather than damage.
- Try two tones: quiet wall, deliberate cap. A darker wall with a pale capstone, or the reverse, gives a long wall a designed horizon line; the cap is also the easiest part to repaint or replace when you fancy a change of mood.
- Test render colours outdoors on a board. Garden light is greener and stronger than any shop’s, and a tone that looked warm beige indoors can turn pink against a lawn; a painted sample board, moved around the garden for two days, tells the truth.
- Think about how the colour will weather. Every finish ages: pale render streaks below caps, dark paint chalks in full sun, stone deepens, timber silvers. Choose the ageing you will still like in ten years, not just the photograph you like today.
7. Drainage: The Build Details Nobody Photographs
Here is the least glamorous and most important section of this entire list. Walls almost never fail because the face was ugly; they fail because water sat behind them, soil turned to soup and pressure did the rest. None of these details will ever be pinned, photographed or complimented, and every one of them decides whether the wall is standing straight in twenty years.
- Backfill with clean gravel, not dug soil. A generous layer of free-draining gravel directly behind the wall gives water a path down instead of a sponge to sit in; it is invisible the day you finish and priceless every winter after.
- Lay a perforated drain at the base. A drainage pipe along the wall’s foot, wrapped and bedded in gravel and led out to a safe outlet, carries collected water away before it can build pressure; plan where it daylights before you start digging.
- Line the bank with filter fabric. A permeable fabric between the soil bank and the gravel stops fines washing into the drainage layer and slowly silting it shut, while still letting water pass; it is the cheapest insurance in the whole build.
- Form weep holes in mortared walls. Small gaps or pipes through the face at low level let trapped water escape visibly instead of forcing the wall; space them evenly, keep them clear, and never let planting or mulch bury them.
- Found the wall below the soft topsoil. Every wall needs its base on firm ground, dug past roots and topsoil; the exact depth and footing design depend on height, soil and local conditions, which is precisely the point where taller walls deserve professional design.
- Lean the wall back into the slope. A slight backward batter, built in course by course, uses gravity as an ally instead of an enemy; straight-up faces on any real height are asking the soil to win an argument it eventually always wins.
- Compact the backfill in layers. Filling behind the wall in shallow, tamped layers avoids the voids and sudden settlements that pull walls forward and crack caps in the first year; it is tedious, invisible and absolutely worth the afternoon it takes.
- Keep roof and surface water away. Downpipes, dripping taps and sloping paths should never discharge behind or onto a wall; give the top of the bank a shallow swale or a firm edge so storm water goes around the structure, not through it.
8. Planting a Wall Into the Garden
A wall earns its beauty from what grows around it. Planting on top, at the base and, where the construction allows, in the face itself turns a structure into a garden feature within two seasons. This is also the second view everyone saves: capstones, cascading green and a wall that looks as if the garden grew it rather than a contractor.
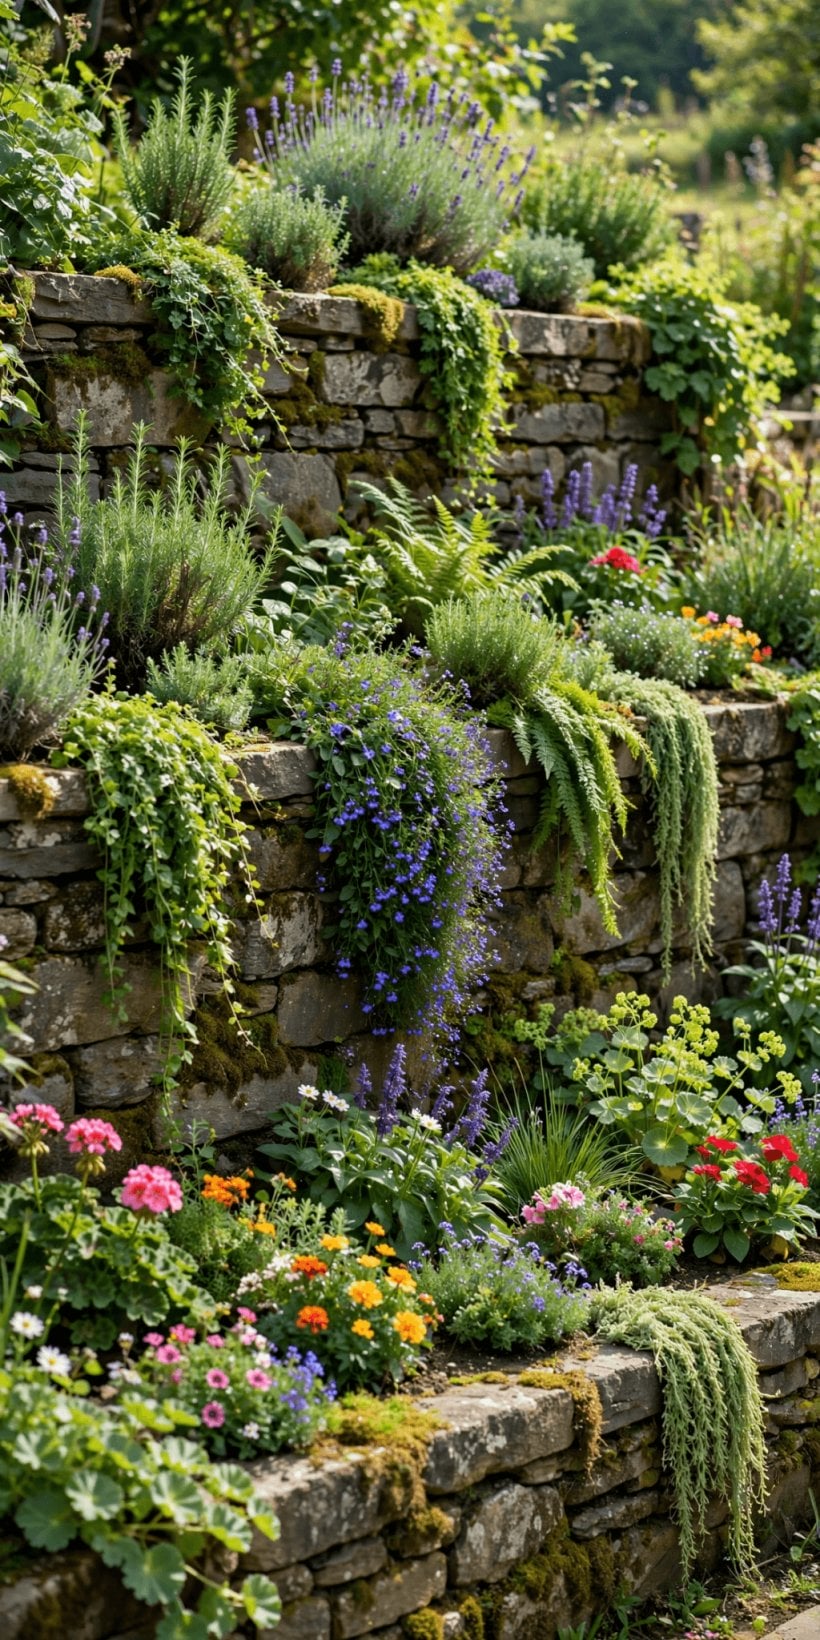
- Let plants cascade over the cap. Trailing rosemary, campanula, aubrieta and their tough cousins spill over the top edge and erase the hard line between wall and garden; plant them a hand’s width back from the face so crowns stay in soil.
- Plant the top bed for privacy and wind. The raised bed a wall creates is the perfect place for the hedge or screen planting your terrace needed anyway, with its roots happily above the neighbour’s sight line years sooner than ground-level planting.
- Grow herbs in the sunny top bed. A wall-top bed is warm, drained and within reach of the terrace: exactly what Mediterranean herbs ask for, and a cook’s short walk from the kitchen door on summer evenings.
- Soften the base with groundcover. A skirt of low planting or a gravel mulch strip at the wall’s foot hides the junction with the path, stops soil splash marking the face and gives the whole structure a settled, gardened base.
- Train a climber on taller walls. Where height makes a wall loom, wires or a trellis and one well-chosen climber will green the face in a few seasons; keep growth off caps and copings, and never let it root into mortar joints.
- Edge the cap with bulbs for spring. A drift of small bulbs along the top edge costs almost nothing, lights up the wall in the year’s first weeks and disappears under the summer planting before it can look untidy.
- Choose drought-wise plants for wall-top beds. Soil above a drained wall dries faster than any other bed in the garden, so pick plants that thrive lean and sunny, and mulch well, rather than fighting the conditions with a hose all summer.
- Never plant over the drainage. Keep weep holes, drain outlets and the gravel strip behind the cap clear of soil, roots and mulch; the most beautiful planting in the world is not worth a wall pushed over by its own trapped water.
9. Walls That Work Harder: Seats, Steps, Lights and Niches
The best garden walls moonlight. At seat height they become the terrace’s longest bench; pierced by steps they become the staircase; lit from within, they become the reason the garden is used after dark. Think of the wall as outdoor furniture with a structural day job, the same multi-tasking instinct behind good tiny house living room ideas and the layering in relaxed tiny house decorating ideas.
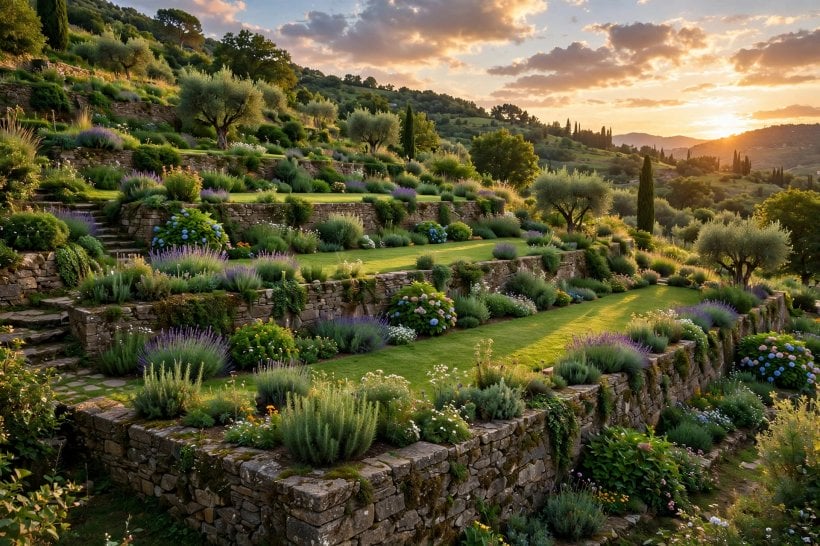
- Build one wall at perfect seat height. A stretch of wall finished at comfortable sitting height, with a wide, smooth cap, seats a whole party without a single chair being carried out; place it where the evening sun lands and it will never be empty.
- Bring the steps through the wall. A flight set into the wall’s line, as wide as the path it serves and lit if you can, feels grander and safer than steps bolted onto the side; align tread depths with comfort, not with leftovers.
- Recess lights into the wall face. Low, shielded fittings washing the steps and path make level changes safe and quietly theatrical after dark; outdoor electrics belong to a qualified electrician, and fittings should be rated for the exposure they will get.
- Make the wall the back of a bench and planter. A seat built against the wall, with a planter rising behind it, stacks three functions into one strip of garden and gives a small terrace the layered feel of a much larger one.
- Hide storage in the terrace’s dead space. Where levels change near the house, a lidded niche or cupboard built into the wall’s face swallows cushions, hoses and toys; keep it ventilated, drained and honestly weatherproof, or it will store only disappointment.
- Back a water feature against the wall. A simple spout and trough using the wall as its backdrop gains presence for free, and the wall’s mass carries the sound pleasantly; keep the plumbing accessible and the splash zone off the wall’s own drainage.
- Extend the wall into a gate pier or number post. Carrying the same stone or render out to the entrance, as a pier carrying the house number or a gate, stitches the front garden together and gives visitors their directions in the architecture itself.
- Edge a driveway with a low, tough wall. A modest wall where garden meets parking keeps gravel, mulch and planting out of the drive and tyres out of the beds; check your local rules about walls near boundaries and sight lines before you build.
10. Costs, Permissions and Mistakes to Avoid
Money talk, kept honest and number-free: a wall’s cost is mostly decided by things you cannot see in photographs. Height multiplies everything, difficult access multiplies labour, drainage is a real cost that protects a bigger one, and the face material is often the smallest part of the bill. Permissions vary just as much, which is why checking comes before digging in every item below.
- Expect height to drive the budget. Every extra course adds material, digging, drainage and design care, and taller walls cross thresholds where professional engineering and approval enter the picture; two low terraces almost always beat one tall wall on cost and calm.
- Price the access honestly. A garden reached only through the house or down a narrow side path costs more in labour than the same wall beside a wide gate, because every stone and barrow of gravel travels by hand; ask how materials arrive before you compare quotes.
- Insist drainage is inside the quote. If a price lists stone and labour but treats gravel, pipe and fabric as optional extras, it is not a cheaper wall, it is a shorter-lived one; the drainage line in a quote is the sign of a builder who expects the wall to last.
- Check permissions before you dig. Wall heights, boundary positions, conservation or heritage areas, protected trees and work near roads or shared drains can all need approval, and the rules are local; a quick check with your city or county office protects the whole project.
- Never build on topsoil or soft fill. The fastest route to a leaning wall is a base resting on dark, rooty topsoil or unconsolidated fill; dig to firm ground however unglamorous the extra depth feels, because the wall will find the soft layer eventually if you do not.
- Do not skip the cap to save money. An uncapped wall drinks rain straight into its core and joints all winter; caps are protection first and looks second, and omitting them is the classic false economy of garden building.
- Do not backfill with excavated clay alone. Heavy clay dug from the footing trench holds water against the wall like a bath; use it elsewhere in the garden if you must, and give the wall the free-draining backfill its design assumes.
- Photograph the drainage before you bury it. Take dated pictures of the pipe, fabric and gravel in place, and keep them with the house documents; if the wall ever needs diagnosis, or the house is sold, those photographs are worth more than any memory.
Final Considerations
The most successful retaining wall ideas are never only about looks. They pair a face you love with a footing you trust, drainage you cannot see and a height your plot, your neighbours and your local rules are all comfortable with. Choose the material that suits your house and your maintenance appetite, spend the invisible money first, and the visible result will look after itself for a very long time.
If your wall will be tall, structural, near a boundary, a road or a building, or holding up anything heavier than a flower bed, treat this list as inspiration and bring in a qualified professional for the design. For everything smaller, plan the levels on paper, check the local rules, build the drainage like you mean it, and plant the top bed the same week you finish. A slope that once felt like the garden’s apology can become its best feature, one honest course at a time.


0 Comments