

A small lot is not a failed big garden; it is a different design problem with its own advantages. Every plant is close enough to enjoy, every path is short, and a single well-chosen tree can shade the whole space. The most satisfying tiny backyard ideas start by accepting the real measurements, then borrow the tricks that make small interiors work: clear zones, furniture and planting sized to the room, vertical storage, and one calm color story repeated until the space feels intentional instead of squeezed.
This roundup collects twenty-five landscaping tricks that scale down gracefully, from curved paths that make a short yard feel longer to green screens that give privacy without a taller fence. None of them requires a contractor by default, and each one names its trade-off honestly, because small yards punish two things quickly: overplanting and overbuilding. Work through the zones and paths first if you are starting from bare ground. If your yard is already planted, jump to the vertical, screening, and lighting sections, where the cheapest visible improvements usually hide.
| # | Landscaping trick | Best for | Watch out for |
|---|---|---|---|
| 1 | Zone the yard into small rooms | Yards that must do everything | Zones too small to use |
| 2 | Lay the main axis on a diagonal | Short, square lots | Awkward leftover corners |
| 3 | One clear focal point | Views from the house | Competing ornaments |
| 4 | Curved paths | Making short yards feel longer | Wobbly, unplanned curves |
| 5 | Stepping stones through planting | Soft, informal routes | Uneven or rocking stones |
| 6 | Gravel path with firm edges | Budget routes, drainage | Gravel migrating into beds |
| 7 | Trellis and climbers on fences | Vertical color, privacy | Plants overwhelming the fence |
| 8 | Wall and fence planters | Herbs and flowers at eye level | Frequent watering |
| 9 | Tiered stands and hanging baskets | Pots without floor space | Top-heavy stands in wind |
| 10 | Layered planting heights | Depth in narrow beds | Tall plants swamping small ones |
| 11 | Repeat a few plants for rhythm | Calm, designed feel | One-of-everything clutter |
| 12 | Evergreen backbone | Winter structure | Slow growth, patience needed |
| 13 | Green privacy screens | Overlooked yards | Space taken by hedging |
| 14 | Staggered planting by the fence | Soft boundaries | Roots near fences and pipes |
| 15 | One small tree for canopy | Shade, height, birds | Choosing the wrong mature size |
| 16 | Shrink or reshape the lawn | Less mowing, more planting | Kids and dogs may need grass |
| 17 | Rockscaping for dry corners | Hot, dry, or shady-dry spots | Stone that looks dumped |
| 18 | Dry creek for drainage runs | Wet patches, downspout outlets | Must actually lead water away |
| 19 | Planted soaking dip | Gentle rain capture | Keep away from foundations |
| 20 | Raised bed in the sunniest corner | Vegetables and herbs | Soil cost and watering |
| 21 | Herb pots by the door | Daily cooking use | Pots drying out |
| 22 | Log planters as accents | Natural character, low cost | Timber slowly rots |
| 23 | Layered evening lighting | Yards used after work | Glare and light spill |
| 24 | Fire corner with real seating | Cool evenings, gatherings | Local fire rules, clearances |
| 25 | Seasonal edit and local checks | Every yard, every year | Fences, easements, tree rules vary |
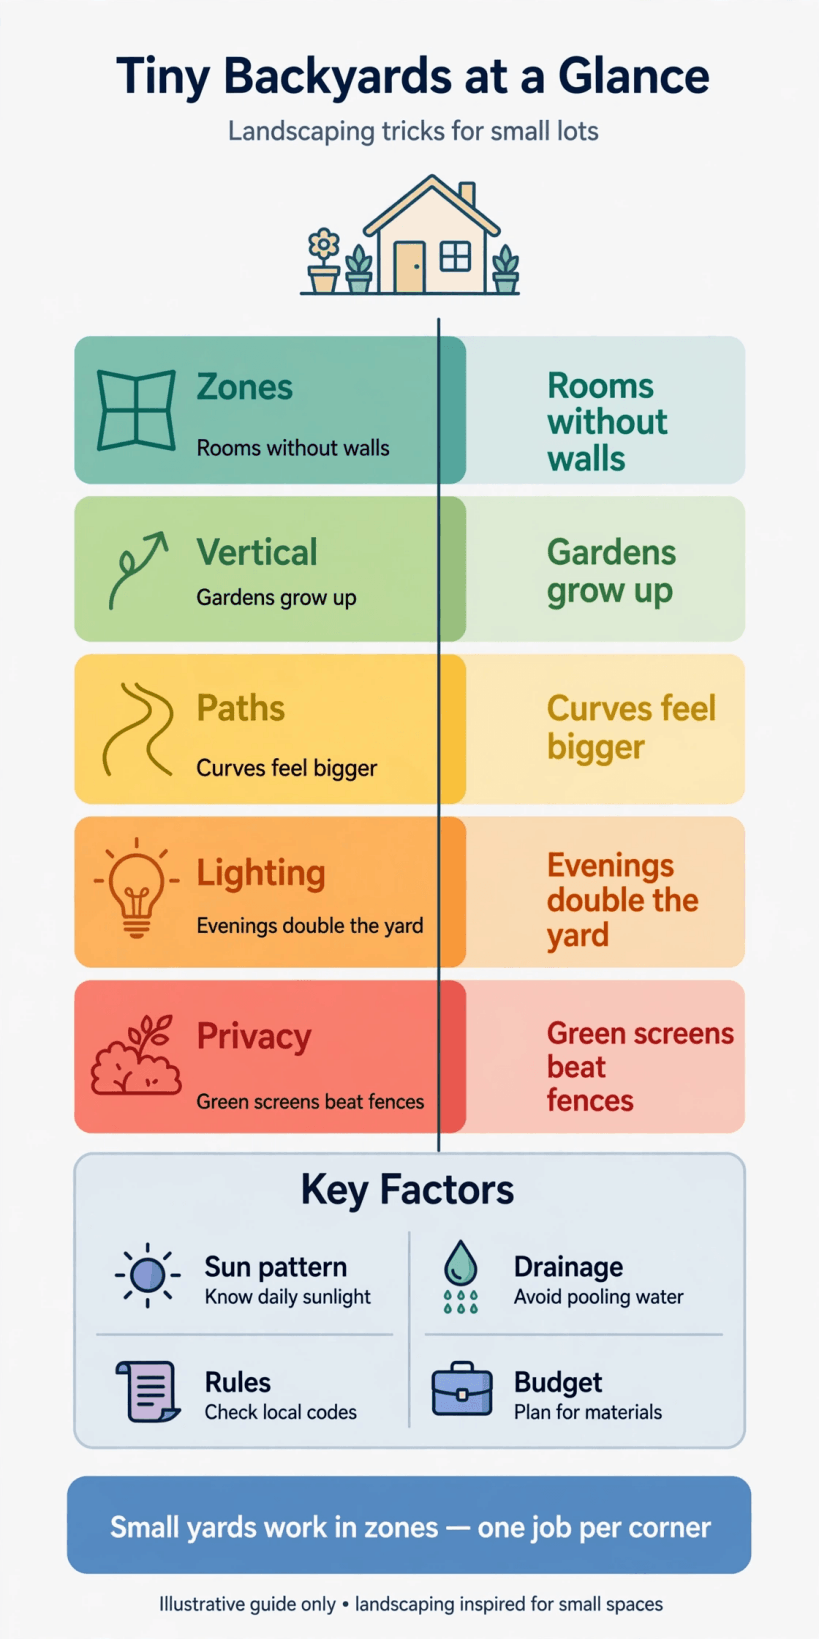
1. Backyard Zones and Layout: Small Rooms and a Longer View
1. Zone the yard into small rooms. A tiny yard that tries to be one open rectangle usually ends up as a patio with a border. Divide it instead into two or three loose zones: a sitting patch, a planted patch, and a useful patch for growing or storage, separated by a path bend, a low hedge, or a change of surface rather than walls. Each zone gets one job, which stops every activity fighting for the same square of ground. Keep zones honest-sized. A dining zone that cannot fit the table with chairs pulled out is a diagram, not a room.
2. Run the main axis on a diagonal. The longest line across a square lot is its diagonal, and laying the path or the view along it quietly stretches the space. Angle a path from the back door toward the far corner, set the main bed along that line, and the yard reads bigger from every seat. Diagonals do leave triangular corners; treat them as gifts for a tree, a bench, or a compost bin rather than problems. Test the line with a hose or a rope for a day before building anything, and adjust until the route feels natural to walk, not just clever on paper.
3. Give the yard one clear focal point. Small spaces need a single place for the eye to land: a small tree, a birdbath, a bench under an arch, or one large handsome pot. Seen from the main indoor window, that anchor makes the whole yard feel composed. The discipline is in the word one. Three focal points in a tiny yard cancel each other out and read as clutter. Choose the anchor for your most common view, usually from the kitchen or sofa, and let paths and planting lead toward it without shouting about it.
2. Backyard Paths: Curves, Stepping Stones, and Gravel
4. Curve the path, gently and on purpose. A curved path hides the yard’s full length, so a short garden unfolds in stages instead of showing everything at once. The curve needs a reason to feel right, bending around a bed, a tree, or the sitting zone, and it needs to be generous: tight wiggles look nervous and make wheelbarrow trips miserable. Lay the line with a hose, walk it with your arms full, then set the edging. A curve also slows visitors down in the best way, turning a five-step yard into a small journey.
5. Use stepping stones where traffic is light. For the route to the shed, the side gate, or the compost corner, large flat stones set into gravel or low groundcover are cheaper and softer-looking than a full path. Set each stone level, at a comfortable stride, on a compacted base so it cannot rock; a rocking stone is a twisted ankle waiting for a wet evening. Stones suit the informal zones of the yard and let planting flow right up to the walking line, which blurs the boundary between path and garden in a way small spaces benefit from.
6. Build the main route in gravel with firm edges. The everyday path from door to gate deserves a proper surface, and gravel on a compacted base with solid edging is the budget-friendly classic. It drains freely, forgives small level changes, and can be topped up in an afternoon. Edging is what keeps it tidy, holding the gravel out of beds and lawn. For a worked example with honest material notes, follow a gravel path with rock borders as a DIY walkway; where you want a firmer, more formal line, a dry-stack stone path laid without mortar shows the stone alternative step by step.
3. Vertical Gardens: Trellis, Wall Planters, and Tiered Pots
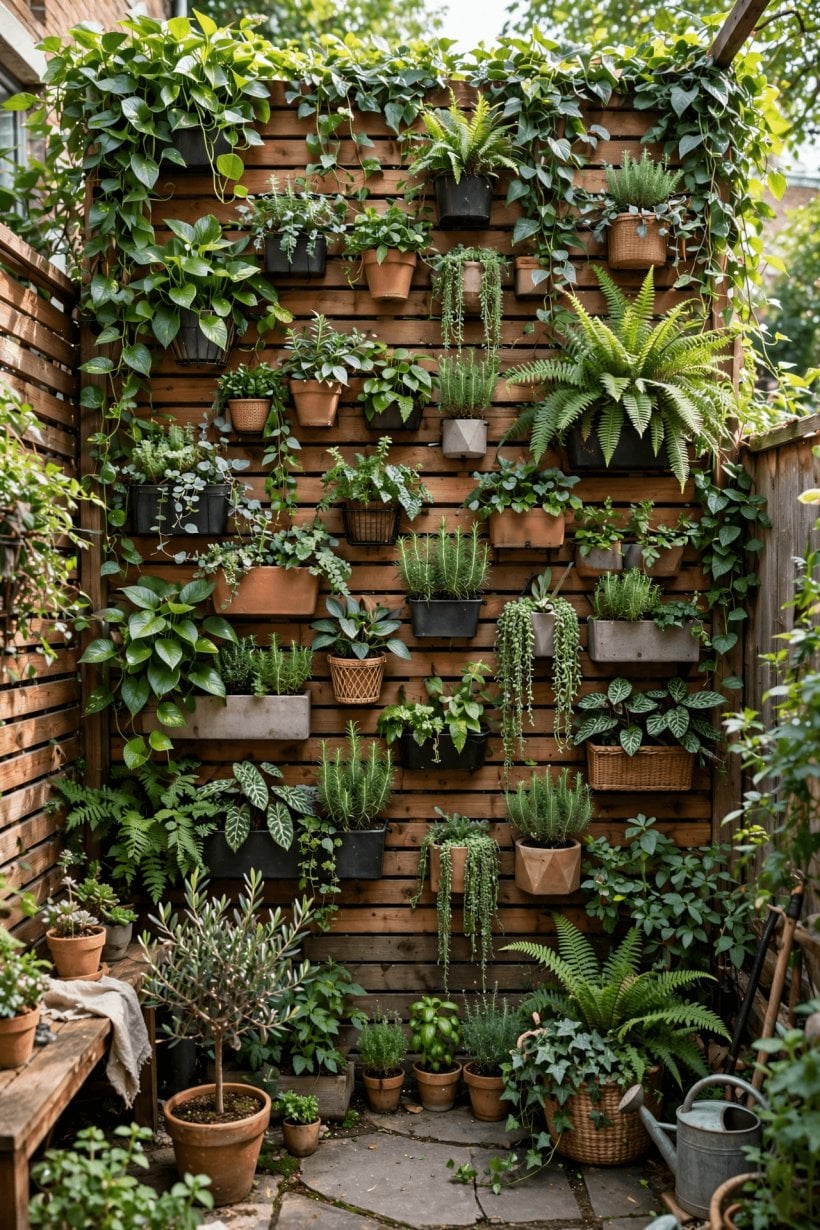
7. Grow up the fences with trellis and climbers. Fences are the largest unused surface in most small yards. A simple trellis panel with a climber turns a boundary into a flowering wall, adds privacy at seated eye level, and costs almost no floor space. Choose climbers whose mature vigor matches the panel; a rampant grower on a small fence becomes an annual wrestling match. Leave a small gap between trellis and fence boards so air moves and you can maintain the fence, and expect one or two seasons before the coverage looks like the photos. Patience is the real price of this trick, and it is worth paying.
8. Hang planters on walls and fences. Rail planters, wall pots, and pocket planters put herbs and trailing flowers at eye level, where a small yard shows them off best. They are ideal near the door for salad leaves and herbs you actually pick. The trade-off is water: small elevated containers dry out fast in wind and sun, so group them where the hose reaches easily and mulch the surface. Secure every fixing into structure, not just into a fence panel, because a watered planter is heavier than it looks and a fallen one takes the flowers, the pot, and your mood with it.
9. Stack pots on tiered stands. A stepped plant stand or a set of sturdy crates builds a small jungle in the footprint of one chair. Tiers suit collections of pots, a strawberry tower, or the nursery corner where seedlings wait for their beds. Place the stand against a wall or fence so it cannot tip in wind, keep the heaviest pots on the lowest tier, and run a small tray or saucer system so watering one level does not flood the next. Tiered displays look best slightly overfull; a sparse stand reads as storage, while a lush one reads as a garden.
4. Planting Structure: Layers, Repetition, and an Evergreen Backbone
10. Plant in layers, tall behind and low in front. Depth in a narrow bed comes from layering: small trees or tall shrubs at the back, mid-height perennials in the middle, and low groundcover spilling over the edge. From any seat, the eye reads three depths instead of one flat row, and the bed looks twice its width. In very small yards the layers can be modest; even a knee-high front edge against waist-high planting creates the effect. Keep one clear rule as you shop, because if everything is the same height, nothing is. Nurseries are happy to advise on mature sizes for your climate, so ask before buying.
11. Repeat a few plants instead of collecting singles. The fastest way to make a small yard look designed is repetition: the same grass in three drifts, the same shrub at both ends of a bed, the same pot shape in a row. Repetition calms the eye and makes limited space feel planned, while one-of-everything planting, however lovely each plant is, reads as a queue. Buy in threes and fives when the budget allows, split and move divisions as they grow, and let two or three foliage textures carry the whole yard. Save the single specimen for the focal point, where standing out is its job.
12. Build an evergreen backbone. A yard that vanishes every winter was only ever half designed. A backbone of evergreen shrubs, a small conifer, or structural grasses with winter presence keeps beds readable in the cold months and gives spring planting something to lean against. Evergreens also carry the privacy screens in section five when deciduous climbers are bare. Choose slow, compact varieties for small lots and plant them first, even though they are the least exciting purchase of the year. The honest cost is patience: backbone plants take seasons to fill their roles, and the yard looks better every year for having them.
5. Privacy and Screening: Green Walls and One Small Tree
13. Screen with plants, not a taller fence. Where neighbors overlook the yard, a green screen of hedging, tall grasses, or pleached and espaliered planting softens the boundary while staying within the fence height rules most localities set. Living screens filter light and wind instead of blocking them, so the yard feels sheltered rather than boxed. They do take width, which is the honest cost in a small lot, so choose slim, upright varieties and plant them where the sightline actually is, opposite the overlooking window or the raised deck next door, not evenly along every fence out of habit.
14. Stagger planting along the fence line. A straight soldier row against the fence advertises the yard’s true size. Staggering shrubs in a gentle zigzag, with deeper pockets of planting in places, breaks the line, creates planting depth, and gives wildlife corners to use. Deeper beds in the corners also hide the fence’s least attractive truth, which is where two boundaries meet at a bare right angle. Keep a maintenance path or stepping stones behind your thumb: you still need to reach the fence for repairs, and the local rules about boundary plants and overhang vary, so check before anything grows through into the neighbor’s airspace.
15. Plant one small tree for canopy. A single well-chosen small tree is the highest-value plant in a tiny yard: shade for summer seats, height that lifts the eye, blossom or autumn color, and a home for birds. The whole decision is mature size, so pick a species or variety whose adult canopy fits your lot with room to spare, and site it where its shade lands on the sitting zone in the afternoon, not on the vegetable bed in the morning. Local nurseries and municipal tree lists are the reliable guides here, since the right small tree differs completely by climate and soil.
6. Ground and Surfaces: Smaller Lawns and Dry-Corner Rockwork
16. Shrink the lawn to a deliberate panel. In many small yards the lawn is what is left over, an awkward shape that is hard to mow and hosts nothing. Reshaping it into one deliberate panel, a clean rectangle or curve of green, makes it a design element: a play patch, a picnic ground, a visual rest between beds. The edges you free become planting, which is where the interest lives. If children or dogs genuinely need the grass, keep it and shape it; if nobody uses it, groundcover or gravel with planting pockets will ask less of your weekends and give more back.
17. Rockscape the difficult corners. Every small yard has a corner where nothing thrives: too dry under the eaves, too shady under the tree, too hot against the sunny wall. Stone solves these honestly, turning a failing bed into a composed rock garden with a few drought-proof plants in pockets. Done well, it also slows runoff and needs almost no water once settled. The techniques in small backyard rockscaping for tiny spaces show how to set stone so it looks placed by geology rather than by wheelbarrow, half-buried, grouped, and graded from large to small.
7. Water and Drainage: Dry Creeks and Soaking Spots
18. Give runoff a dry creek to follow. If water already crosses your yard in a storm, a shallow stone-lined channel turns a drainage problem into the garden’s prettiest feature. A dry creek gives downspout water and surface runoff a planned route to a safe outlet, protects beds from washouts, and reads as pure decoration on dry days, which is most of them. It must genuinely fall toward its outlet and end somewhere sensible, away from foundations and the neighbor’s fence line. Line it so soil cannot wash into the stone, and plant the edges loosely. Local rules on altering drainage vary, so keep the route on your own lot and check before changing where water leaves it.
19. Let one low spot soak up rain on purpose. A shallow planted dip, sometimes called a rain garden, catches roof and path runoff and lets it sink slowly where deep-rooted plants can use it. On a small lot it can be as simple as directing one downspout to a mulched, planted hollow at a sensible distance from the house. The planting does the visible work, while the soil does the quiet work of keeping storm water out of drains. Homes and water belong apart, though: keep soaking features away from foundations and utilities, a layout point our guide to the tiny house plumbing layout and DWV design reinforces from the indoor side.
8. Useful Planting: Raised Beds, Door Herbs, and Log Planters
20. Put a raised bed in the sunniest corner. Vegetables want the best sun, so give them the yard’s prime corner in one tidy raised bed rather than scattering pots through shade. A raised bed warms early, drains kindly, keeps soil where you put it, and can be tended from the path without treading the bed. Fill and feeding decide its success more than timber choice. The log-based approach in a hugelkultur raised bed built with logs suits gardeners who want the bed to build its own fertility over seasons. Start with crops you genuinely eat, or the bed becomes a guilt feature by midsummer.
21. Keep herbs in pots by the door. Herbs earn their place through use, and use depends on steps: the pots you pass daily get snipped, the bed at the far fence gets admired. A cluster of generous pots by the kitchen door, on the tiered stand or along the sunniest wall, keeps basil, mint, and friends in the cooking loop. Mint always gets its own pot, because it treats shared soil as an invitation. Door herbs also perfume the sitting zone in the evening, which no landscaping catalog counts as a benefit and every cook recognizes as one.
22. Use log planters as natural accents. A hollowed log planter brings instant age and texture to a new yard, suits woodland and cottage styles, and makes a forgiving home for ferns, strawberries, or trailing flowers. Set one at a bed’s end, a pair flanking the bench, or a tiered stack as the focal point itself. Our favorite builds are collected in creative log planters, hollowed and tiered. Timber in soil contact slowly returns to the earth, so treat these as five-to-ten-season accents rather than permanent masonry, and enjoy them while they last.
9. Evening Backyard: Lighting Layers and a Fire Corner
23. Layer lighting for evenings outside. Small yards are often used most after work, and lighting decides whether they feel welcoming or forgotten. Combine path-level lights so steps and edges read clearly, one warm light over the sitting zone, and a little sparkle in the planting, a lantern in a tree or string lights along the fence. Keep bulbs shielded and aimed down or inward, both for your eyes and the neighbors’ windows. Solar fittings handle the decorative layer without wiring; anything mains-powered belongs with a qualified electrician where local rules require it. A lit yard also looks generous from indoors, doubling the effect.
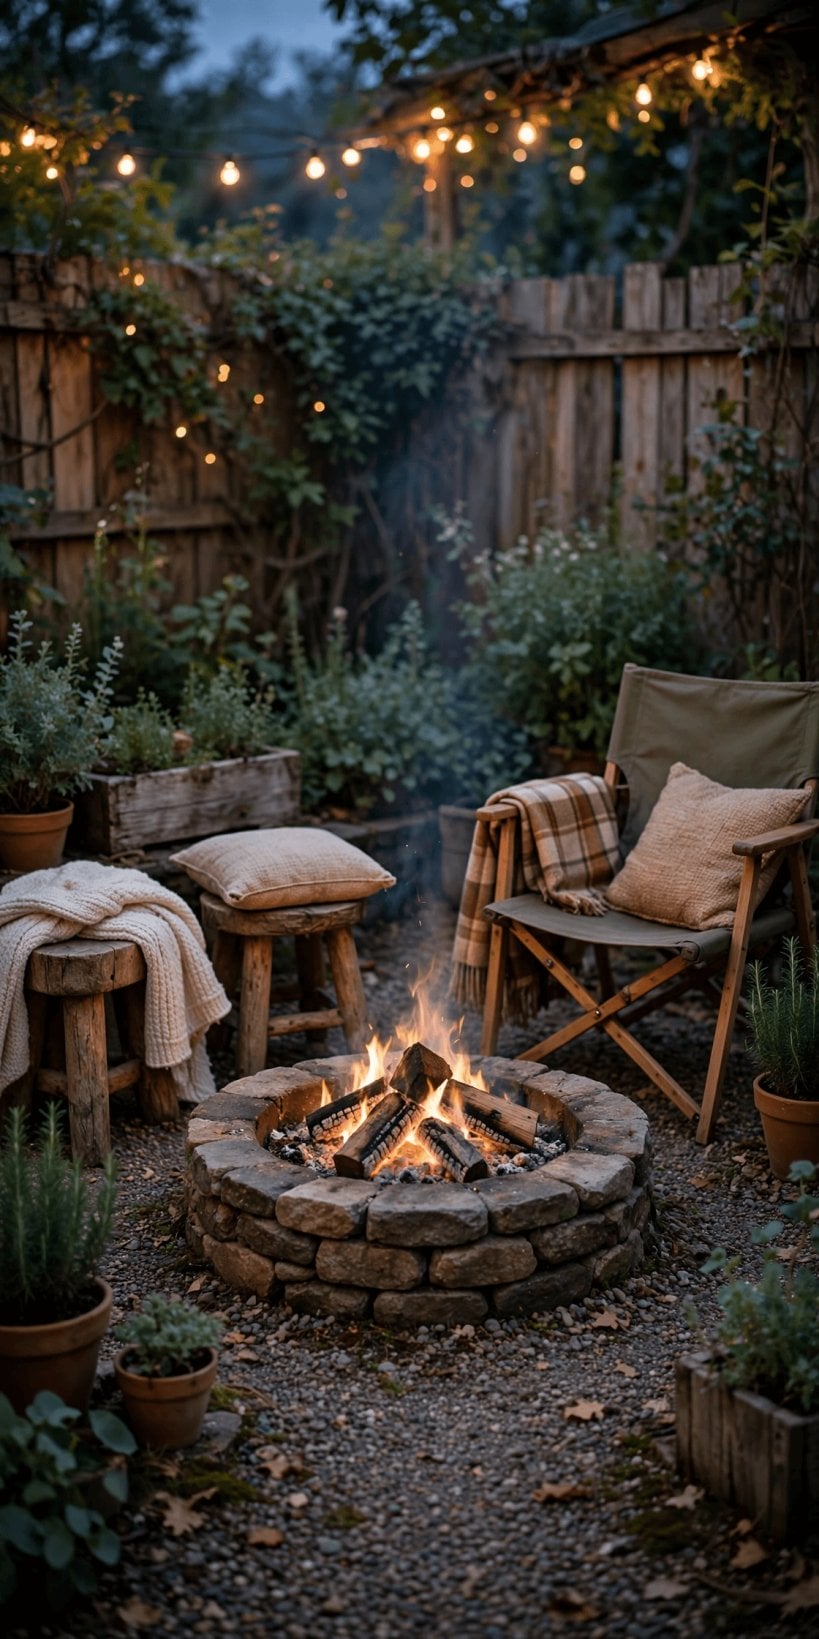
24. Build one fire corner with real seating. A small fire feature gives a tiny yard a destination after dark and extends its season at both ends of the year. Give it a defined gravel or stone patch, seating that is actually comfortable, and clear space around it, rather than a bowl stranded on the lawn. Built seating from stone or timber keeps the corner ready without hauling chairs. The arrangements in fire pit seating built from boulders, stumps, and logs scale down well to small lots. Always follow local fire rules and seasonal restrictions, and site any fire well away from fences, overhanging branches, and the house.
10. Keeping It Small and Beautiful: Seasonal Editing and Local Checks
25. Edit every season, and check local rules before building. The secret maintenance trick of every admired small yard is subtraction. Each season, walk the yard and remove one thing: the pot that never thrived, the ornament that stopped meaning anything, the self-seeded plant swamping its neighbor. Small spaces show clutter instantly, and editing is cheaper than any purchase in this article. The same honesty applies before projects: fence heights, easements, protected trees, drainage changes, and fire features can all be regulated, and the rules vary by locality, so a quick check with your local office or a look at your lot documents comes before the first spadeful. Then keep the routine light: mulch beds yearly, divide the repeats when they crowd, refresh gravel where it thins, and prune for the sightlines you actually use. A tiny yard asks for small, regular kindness rather than heroic weekends, and it repays that rhythm by looking composed in every month, not just in May.
Final Considerations
A small lot rewards intention over expenditure. Zones, a curved path, vertical planting, and one tree will change a tiny yard more than any single expensive feature, and they can arrive one season at a time. Measure honestly, plant for the mature size, and keep the surfaces you walk on simple and sound. The yard will start to feel less like the space left around the house and more like the best room you own.
Resist filling every corner in the first year. Leave one bed unplanned, watch where the sun and the puddles actually go, and let the second season’s decisions be smarter than the first. Small yards forgive slow gardeners and punish hasty builders, because everything is close enough to see. Build the bones well, edit kindly, and the tricks above will compound quietly until visitors start saying the thing every small-lot owner loves to hear: it feels bigger than it is.


0 Comments