

A deck gives a tiny home the one thing it cannot grow inside: floor space with sky over it. It becomes the dining room in summer, the workshop on mild weekends, and the buffer that keeps mud, firewood, and wet dogs out of a small interior. The most useful tiny house deck ideas share a common discipline. They keep the structure independent of the home, size the platform for real furniture and real routines, and choose materials whose care demands match the owner’s actual free time, not their best intentions.
The eighteen designs below move from structure to surface to the small comforts that make a deck feel finished. Some suit permanent sites, others suit leased land where everything must come out again one day. A few cost real money and most cost mostly weekends. Trade-offs are stated plainly throughout, because a deck that is honest about its maintenance, its shade, and its footing is a deck that still looks good in five years. Start with the sections on structure and levels if you are building new, or jump ahead to benches, materials, and planting if your platform already exists.
| # | Deck design | Best for | Watch out for |
|---|---|---|---|
| 1 | Freestanding frame, off the trailer | Homes on wheels, future moves | Gap and step between house and deck |
| 2 | Removable footings | Leased land, temporary sites | Leveling and frost movement |
| 3 | Split levels | Sloping lots, clear zones | Trip edges between levels |
| 4 | Low, ground-hugging platform | Easy access, calm look | Airflow and damp underneath |
| 5 | Built-in storage benches | Seating plus hidden storage | Ventilation for damp gear |
| 6 | Perimeter bench seating | Groups, parties, small footprints | Height and fall safety at edges |
| 7 | Composite boards | Low routine care | Heat underfoot, higher first cost |
| 8 | Timber boards with a care routine | Warm feel, easy repairs | Regular oiling or staining |
| 9 | Wide, low steps | Daily carrying, older guests | Even risers, grippy treads |
| 10 | Railings with a gate | Kids, dogs, raised decks | Local railing rules vary |
| 11 | Pergola over part of the deck | Filtered shade, structure for climbers | Partial shade only |
| 12 | Shade sail or retractable awning | Hot west-facing decks | Wind and anchor strength |
| 13 | Layered low-glare lighting | Safe steps, long evenings | Harsh floodlight glare |
| 14 | Fire feature beyond the deck edge | Gatherings, shoulder seasons | Clearances from boards and fabric |
| 15 | Planters on the edges | Herbs, color, soft boundaries | Weight and watering |
| 16 | Closed under-deck gap | Tidy look, fewer critters | Keep vents and access clear |
| 17 | Zoned dining and lounging | Decks used all day | Furniture that blocks the door path |
| 18 | Local checks plus seasonal care | Every deck, every climate | Rules differ by locality |
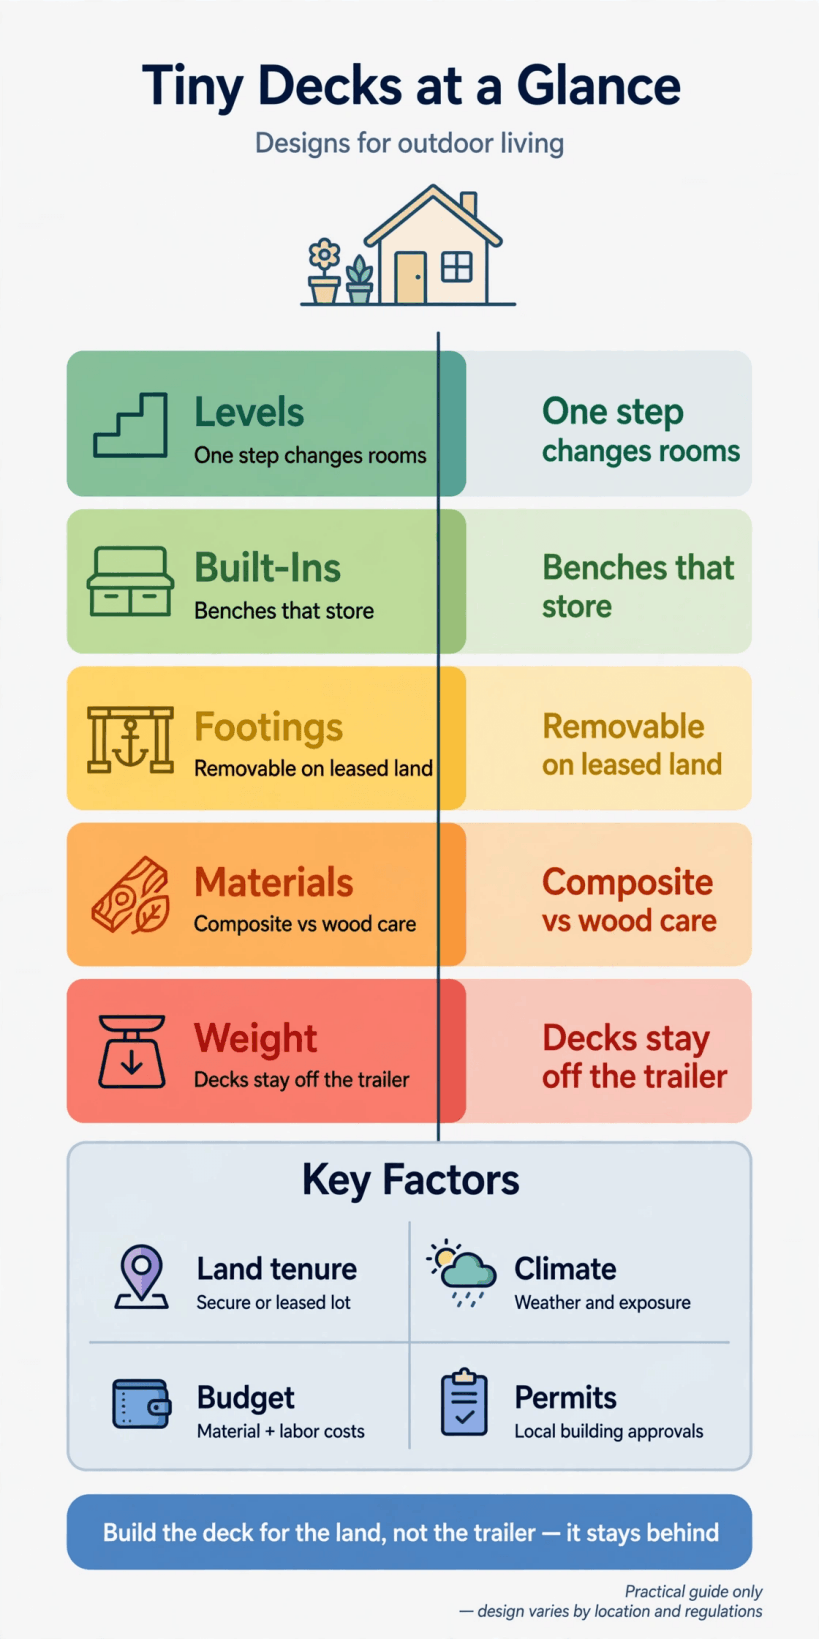
1. Deck Structure and Siting: Freestanding Frames and Honest Footings
1. Keep the deck freestanding and off the trailer. A tiny house on wheels is a vehicle as much as a building, and it should be able to leave. Build the deck as its own structure on its own supports, close enough to the door for a comfortable step across, but never hung from the trailer frame or bolted through the chassis. The small gap is a feature, not a flaw: it lets the home be serviced, leveled, or moved without demolishing your outdoor room. Cover the gap with a loose threshold board you can lift, and expect the step height to need a shim after the house is re-leveled. Decks that lean on the home also transfer every footstep vibration indoors, which nobody enjoys at breakfast.
2. Use removable footings on leased land. Where the land is rented, borrowed, or shared, the deck should be able to leave without a trace. Precast deck blocks, ground screws, and other surface or screw-in footings avoid poured concrete and heavy digging, and they come out again with hand tools. The honest trade-off is movement: surface footings can shift with frost, heavy rain, or soft soil, so check level each spring and keep a pry bar and shims in the bench. Whatever system you choose, keep supports clear of buried services and keep access to the home’s underside open, a point our guide to tiny house skirting options for pipes and insulation covers in practical detail.
2. Deck Layout: Split Levels and Low Platforms
3. Split the deck into levels instead of one big platform. Two modest levels do the zoning work that furniture alone cannot. The upper level by the door stays clear for cooking and coming and going, while a lower level, even one step down, becomes the lounging or fire-watching zone. On a sloping lot, levels also follow the ground honestly instead of fighting it with tall posts and deep digging at the low corner. Mark each level change clearly with a contrasting board or a strip of lighting, because the step that hosts forget is the step guests find in the dark. Keep level changes to one or two comfortable steps, or the deck starts to feel like a staircase with furniture on it.
4. Hug the ground with a low platform where you can. A deck that sits just above grade is the friendliest design in this whole roundup. Entry is a single easy step, railings may not be needed at all depending on your local rules, and the whole structure reads as part of the garden rather than a stage attached to the house. Low decks suit leased land and small lots especially well. Their one real enemy is damp: timber close to soil needs airflow, a weed membrane and gravel beneath, and boards you can lift or reach for inspection. Choose ground-contact-rated lumber for anything near the soil, and never let mulch or soil build up against the frame over the seasons.
3. Built-In Deck Seating: Storage Benches and Perimeter Benches
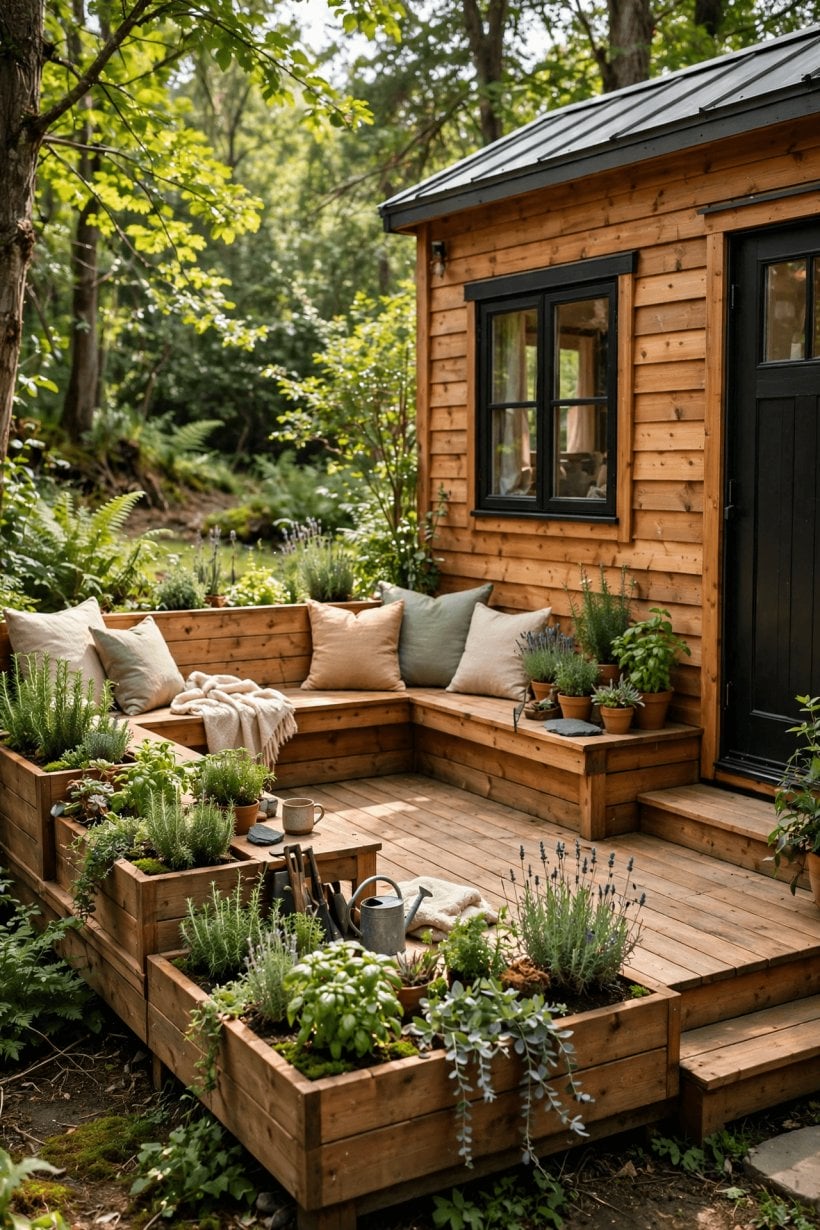
5. Build benches that store the deck’s clutter. A hinged-lid bench along the house wall is seating, storage, and a side table in one footprint. It swallows cushions before rain, holds the broom, the watering can, and the string-light tangles, and gives guests somewhere to sit that never needs dragging out of a shed. Ventilate the box so damp cushions do not sour, fit a lid that stays open safely, and use exterior hardware from day one. Size the bench for sitting first and storage second: a seat at comfortable chair height with a slight back angle in the cushions will be used daily, while a storage crate with a lid at knee height will mostly be walked around.
6. Run a bench along the open edge. Perimeter bench seating turns the deck’s boundary into its biggest asset. It seats a crowd without a furniture Tetris problem, keeps the middle of a small deck open for a table or a rug, and gives the platform a finished, built look that loose chairs never quite achieve. On a low deck, an edge bench is simple and safe. On a raised deck, think carefully: a bench is not a railing, and where a fall is possible, local rules and plain caution may require a proper guard behind or instead of the bench. If in doubt, put the bench along the house wall or the low edge and keep railings where the drop is real.
4. Deck Board Materials: Composite and Timber, With Honest Care
7. Choose composite boards for the lowest routine care. Composite and capped boards suit owners who know they will not oil a deck every year. They resist rot and insects, hold their color more evenly than bare timber, and need little more than washing. Be honest about the downsides, though: they generally cost more up front, some products get hot underfoot in full sun, and a damaged board is a replacement, not a sanding job. Spacing and hidden fasteners matter because these boards expand and contract with temperature, so follow the maker’s guidance for your climate rather than copying a neighbor’s gaps. For a small deck, the price gap over timber is narrower than people expect, simply because there are fewer boards to buy.
8. Choose timber if you will actually maintain it. Real wood is warm, forgiving, and repairable board by board with basic tools, which is why it still wins on small decks. Its price is a routine: sweep it, wash it, and renew the oil or stain when water stops beading on the surface. Skip that routine for a few years and silvering, splinters, and soft spots follow. Pressure-treated lumber handles ground proximity best, while naturally durable species cost more and need less chemical help. Keep wash-down water in mind as you plan: our walkthrough of the tiny house plumbing layout and DWV design is a good reminder that outdoor taps, drainage, and cleanouts should stay reachable, not trapped beneath a beautifully finished platform.
5. Deck Steps, Railings, and Gates: Safe Daily Access
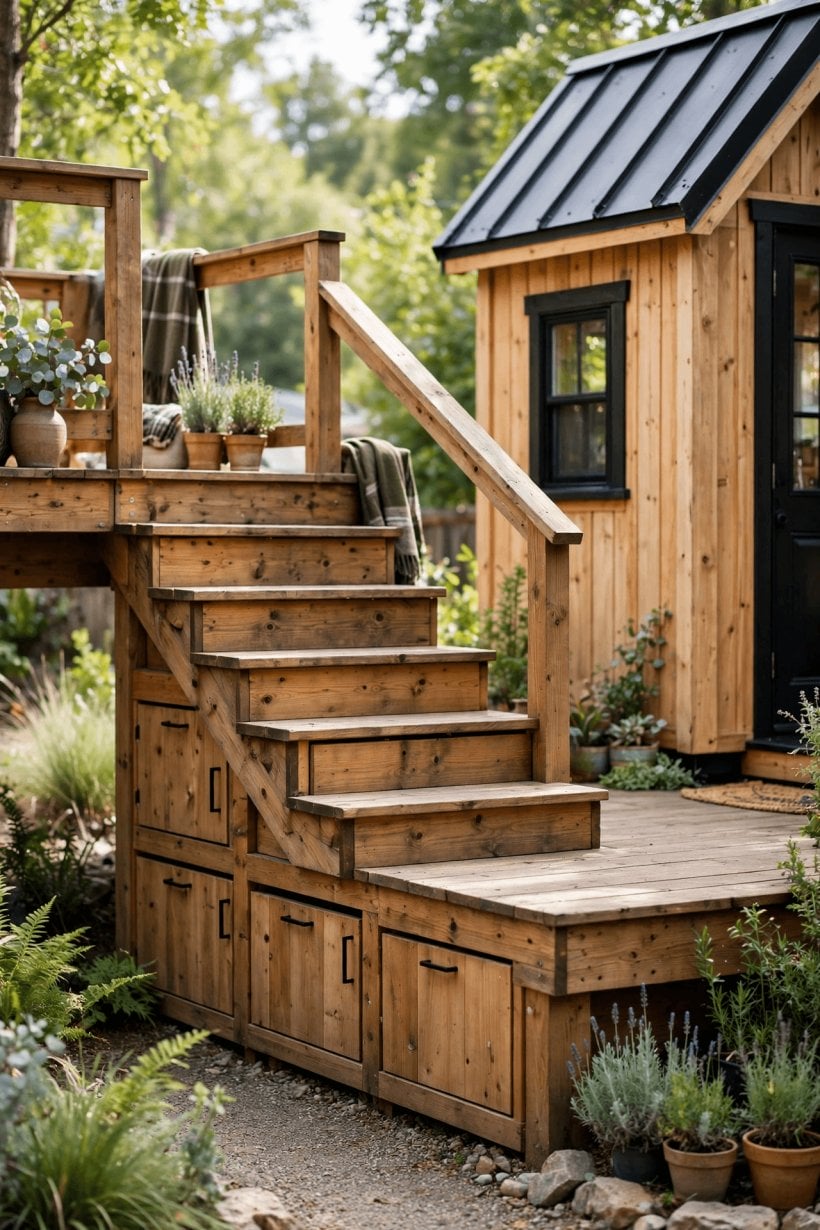
9. Make steps wide, low, and boring in the best way. The best deck steps are the ones nobody notices: generous treads, identical risers, and a surface that grips in wet weather. A wide staircase doubles as casual seating and as a landing for groceries, plant pots, and conversation. Where the step meets the ground, give it a path that drains rather than a mud patch. Two proven approaches from our own project guides are a gravel path with rock borders as a DIY walkway and a dry-stack stone path laid without mortar; both suit small lots, modest budgets, and decks that may one day move.
10. Add railings where the drop is real, and a gate where life needs one. Railings are part safety device, part room definition. Slim balusters or cable keep the view open, while a solid or planted edge feels calmer where privacy matters more than the outlook. A simple gate at the top of the steps keeps toddlers and dogs on the deck and deer off the planters, and it is far easier to fit during the build than after. Railing heights, spacing, and the heights at which railings become required all vary by locality, so check your local rules before ordering materials rather than copying a photo. Whatever the rules say, build the railing stiff: a wobbly rail teaches everyone to distrust the whole deck.
6. Deck Shade: Pergolas, Sails, and Awnings
11. Put a pergola over the part you use at midday. A pergola gives a deck architecture: posts that define the dining zone, a top that filters sun, and a frame for climbers, lights, or a fabric panel on the hottest days. It does not stop rain and its shade is partial, which is exactly the honest expectation to set. Over the seasons, a deciduous climber makes the shade seasonal too, leafing out when you want cover and letting low winter sun through when you do not. Anchor the posts to the deck frame or their own footings, never just to the boards, and keep the structure clear of the home’s roof drip line so the pergola is not standing in a waterfall.
12. Stretch a shade sail or fit a retractable awning for flexible cover. Where a pergola is too much structure, a tensioned sail or a wall-mounted retractable awning shades the same chairs with far less commitment, which suits rented sites and indecisive owners equally. Sails need genuinely strong anchor points and a slight slope so rain runs off instead of pooling into a suspended pond. Awnings come in before storms and high winds, and that small chore is the price of their flexibility. Watch the sun for a full day before fixing anchor positions: the patch of shade you need at four in the afternoon is rarely above the spot that felt hot at noon.
7. Deck Evenings: Lighting and a Fire Beyond the Edge
13. Layer lighting low and warm. Decks earn half their hours after dark, and lighting decides whether those hours feel magical or municipal. Combine small step lights or post-cap lights for safety, a warm light over the dining zone, and something portable, a lantern or two, at table height. Shield bulbs from direct view, aim light down at boards and treads rather than out into eyes, and put the step lighting on a dusk sensor if you can, so the safest lights are the ones that are always on. Solar fittings handle the decorative layer with no wiring, while anything hardwired belongs in the hands of a qualified electrician where local rules require it.
14. Keep flame in the yard, not on the boards. A fire bowl or pit placed just beyond the deck edge gives you the glow, the warmth, and the gathering point without heat, sparks, and ash on your decking. The deck becomes the viewing gallery: benches face outward, drinks stay on the railing cap, and the fire zone itself sits on gravel or stone where embers do no harm. For a seating ring that matches that setup, see fire pit seating built from boulders, stumps, and logs. Always follow local fire rules and seasonal restrictions, keep clearances generous, and never leave a fire to burn down unattended just because the evening went long.
8. Deck Planting and Edges: Planters and a Tidy Under-Deck
15. Plant the edges, not the middle. Planters belong at the deck’s perimeter, on the steps’ wide side, and flanking the door, where they soften the structure without eating the living space. Big pots grouped in twos and threes look deliberate and are easier to water than a scatter of small ones drying out at different rates. Put herbs in the planter nearest the kitchen door, trailing plants where they can spill over an edge safely, and anything heavy on the ground rather than hanging from a railing. For a characterful container that suits a timber deck, the hollowed trunks in creative log planters, hollowed and tiered are hard to beat, and they weather to match the boards around them.
16. Close the under-deck gap neatly. The shadow gap beneath a low deck collects leaves, toys, and occasionally a skunk. A simple skirt of lattice, vertical boards, or stone tidies the view and discourages critters, as long as it includes a removable panel for access and does not seal the space airtight, because trapped damp under a deck rots frames quietly. At ground level, finish the surround with stone or gravel rather than soil piled against timber. The techniques in small backyard rockscaping for tiny spaces translate directly: rock edges shed water, stay put under drip lines, and make the deck-to-garden transition look designed instead of accidental.
9. Deck Zones: Dining, Lounging, and the Clear Path Between
17. Zone the deck by routine, then furnish each zone lightly. Even a small deck usually hosts three routines: eating, lounging, and passing through with arms full. Give each one a defined patch. Dining wants the flattest, most sheltered spot, ideally under the pergola or awning and within a few steps of the kitchen door. Lounging wants the view and the late sun, which usually means the far edge, with the bench doing double duty as the boundary. The path between door, steps, and gate must stay empty, and this is where discipline matters, because planters, boxes, and spare chairs all migrate into walkways if they are allowed to. Use an outdoor rug to draw the lounge zone rather than walls or screens, keep furniture movable so the whole deck can become one party space twice a year, and be honest about numbers: seating for six that fits is worth more than seating for ten that requires climbing over a bench to reach. If a piece of furniture has not earned its place in a month of real life, it belongs in storage, not on the deck.
10. Deck Rules and Upkeep: Local Checks and a Small Seasonal Routine
18. Check the rules first, then keep a short seasonal routine. Decks touch more rules than most outdoor projects: local building codes may cover footings, structure, and railings, while setbacks, lot coverage, homeowner association rules, park agreements, and leases can all limit size, height, or permanence. On a tiny house on wheels, the deck usually must stay a separate, removable structure, which is one more reason the freestanding approach in section one is the default. Treat this article as a prompt for questions, and make the calls to your local building or planning office and your site manager before buying a single board, because requirements genuinely vary by locality. After the build, upkeep is refreshingly small: sweep and wash the boards each season, check the frame and footings after winter, tighten anything that has worked loose, renew timber finish when water stops beading, and clear leaves from beneath a low deck so air can move. An hour twice a year is the real price of a deck that still feels solid, safe, and worth sitting on in year ten.
Final Considerations
The right deck for a tiny home is the one matched to its ground and its routines: freestanding where the home must stay mobile, removable where the land is borrowed, low where access matters, and shaded where the afternoon sun actually lands. Spend first on structure, steps, and drainage, because those are miserable to retrofit, and let benches, planters, and lighting arrive as the budget recovers. A smaller deck built honestly will be used more than a grand one built on hope.
Above all, keep the deck’s promises modest and kept. Boards you will maintain, footings you can adjust, storage you can reach, and rules you checked before the first cut: that combination is what outdoor living actually runs on. Build that, and the deck stops being an accessory to the tiny house and becomes the room where the good hours happen.


0 Comments