

The best media room ideas are not about buying the biggest screen. They are about a dark, quiet room, seats in the right place, sound that matches the picture and light you can control down to a glow.
These 75 are grouped into ten sections, from choosing the room and planning the layout to seating, screens, sound, lighting and the small finishing touches that make film night feel like an event.
1. Media Room Ideas at a Glance
A home theatre is an entity defined by a handful of attributes that must agree with each other: the room and its darkness, the screen size relative to viewing distance, the seating position, the sound system, the lighting layers, the acoustic treatment and the budget order in which all of it is bought. A huge screen in a bright room disappoints, and reference-level speakers cannot fix seats pushed against the back wall. Start from the summary below, spend first on the things that are hard to change later — cables, seating position, screen wall — and let the decorative layers come last.
| Room | Dark, quiet and closable, with light you can fully control |
|---|---|
| Screen | Sized to the viewing distance, not to the wall |
| Seating | Main row centred on the screen, clear of the back wall |
| Sound | Front pair and centre channel first, or a good soundbar to start |
| Lighting | Dimmable and layered, with no glare falling on the screen |
| Colour | Matt and dark around the screen, calmer tones elsewhere |
| Power and cables | Enough sockets on the screen wall, cable routes planned early |
| Budget order | Screen, then sound, then seats, then light and decor |
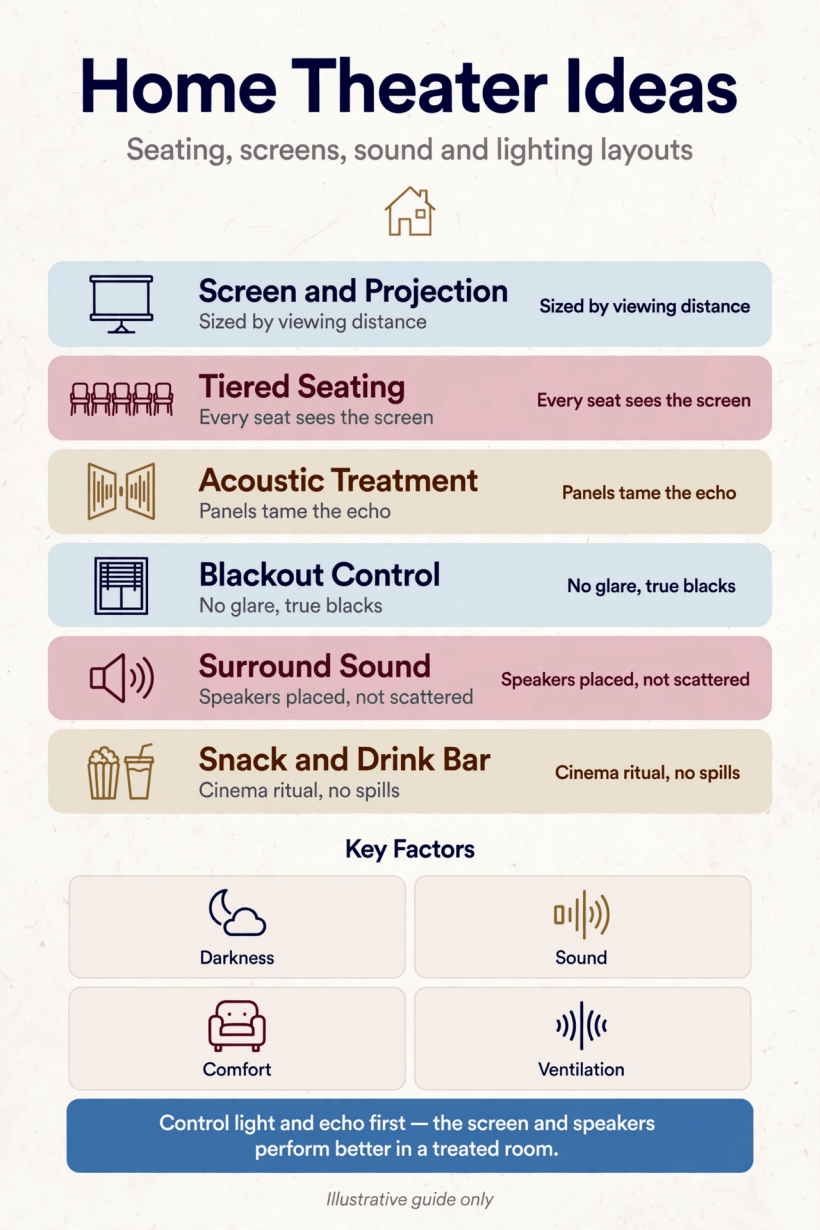
The whole cinema on one page: room, screen, seating, sound, lighting, colour, cables and budget order.
Eight planning moves that decide whether the room works:
- 1. Choose the room for darkness. The best theatre room is the one whose windows you can black out and whose door closes; a spare room beats a bright open-plan space almost every time.
- 2. Measure viewing distance first. Fix where the main seats will sit, measure to the screen wall, and let that distance, not a sale price, choose the screen size.
- 3. Draw the plan to scale. Seats, screen, speakers, door swing and walkways on paper will catch the classic errors: seats against walls, screens too high, speakers blocked by furniture.
- 4. Spend in the right order. Screen, sound, seating, lighting, decor: that sequence protects the experience, because nobody remembers paint colours during a great film.
- 5. Run cables before decorating. Speaker wire, HDMI and power are cheap and invisible when installed before the room is finished, and painful to retrofit afterwards.
- 6. Count the sockets. Screen, receiver, players, subwoofer, chargers and lamps all need power on the screen wall; plan more sockets than the list suggests.
- 7. Decide TV or projector by light. Projectors win on size and cinema feel in a dark room; a large television wins in rooms that keep some daylight or double as living space.
- 8. Keep the experience central. One main row of excellent seats beats three rows of compromised ones; build around the people who will watch most often.
Clean-lined, built-in looks suit these rooms well, and many of the same joinery and lighting tricks appear in our round-up of modern tiny house interior ideas for calm, uncluttered rooms.
2. Room Choice, Size and Layout Basics
Almost any room can host films; the layout decides whether it hosts them well. Rectangular rooms are easiest, with the screen on a short wall and seating along the length. Keep the main seats off the back wall, leave a walkway that does not cross the picture, and think about sound escaping to bedrooms before you think about wallpaper. Smaller spaces reward the same discipline, as our notes on tiny house interior design ideas that make small rooms feel planned show in a different setting.
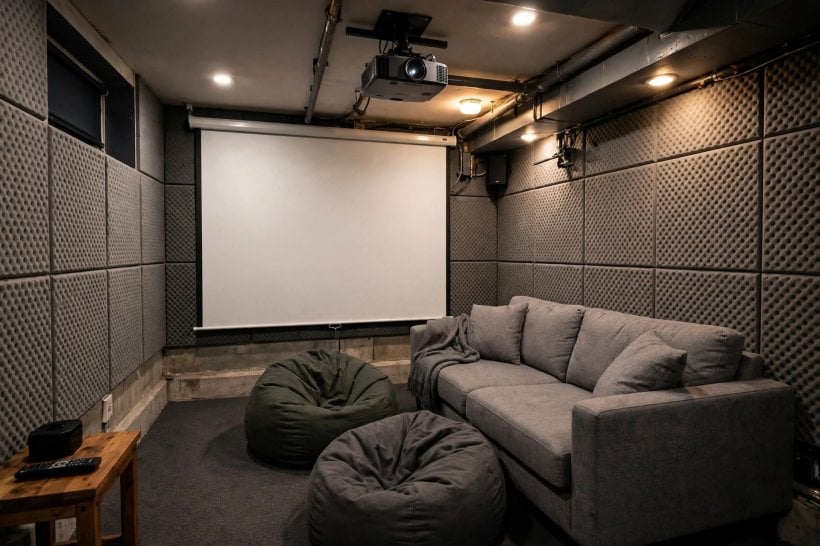
- 9. Spare bedroom conversion. A spare room already has a door, power and blackout potential, and converts with nothing more structural than paint, seating and a screen wall.
- 10. Garage conversion. Garages offer size and separation, but budget honestly for insulation, heating and a raised floor so the room feels like part of the house.
- 11. Basement theatre. Basements are naturally dark and cool; check damp, ceiling height and an escape route first, then enjoy the easiest blackout in the house.
- 12. Screen on the short wall. In a long room, putting the screen on the short end wall gives the longest throw, the best seat rows and the neatest speaker geometry.
- 13. Two-zone L-shaped room. Use one leg of an L for the screen and seats, the other for a bar, games table or library corner, divided by a rug or bookcase.
- 14. Attic under the eaves. Sloping ceilings focus sound and feel cocoon-like; mount the screen on the gable end and keep seating low so heads stay clear of the slope.
- 15. Open-plan theatre corner. Where a dedicated room is impossible, claim one end of an open-plan space with a rug, dark paint zone and curtains that close the cinema off visually.
- 16. Sound buffer by the door. A heavy door, a small lobby or even a thick curtain at the entrance keeps film sound in and household noise out, in both directions.
3. Seating That Suits Long Films
Seating is where the budget becomes comfort. The main row should be centred on the screen at the measured distance, every seat should see the whole picture without turning, and there should be somewhere for drinks, remotes and feet that is not the floor. Test chairs by sitting in them for twenty minutes, not two: a film lasts far longer than a showroom visit.

- 17. One centred sofa row. A single wide sofa, dead centre, is the simplest excellent layout for couples and small families, with the best seat always available.
- 18. Two tiered rows. A low platform under the back row lifts sightlines over heads in front and gives the room a genuine cinema silhouette.
- 19. Recliners with cup holders. Cinema recliners with wide arms, cup holders and room to stretch suit long films and sport, provided the room fits them without crowding.
- 20. Curved sofa for wide rooms. A gently curved sofa wraps a wide screen better than a straight one and keeps every viewer angled towards the picture.
- 21. Pairs of loveseats. Two-seat sofas with an aisle between them let people come and go mid-film without climbing over a whole row.
- 22. Bean bags as the front row. Large floor cushions or bean bags make a flexible front row for children and overflow guests, and store away in a corner afterwards.
- 23. Chaise and daybed corner. One chaise longue or daybed at the side gives a lie-down option for daytime viewing, reading and naps between film nights.
- 24. Bar row at the back. A narrow counter with stools behind the main sofa adds casual seats, a place for snacks, and a perch for latecomers.
4. Screens, Televisions and Projectors
The screen is the room’s reason to exist, so size it to the seats, mount it at seated eye level, and give it a dark, matt wall to live on. Bigger is only better when the viewing distance supports it: sit too close and the picture dissolves into pixels and head-turning. Leave space at the sides for the front speakers, and never let a window sit opposite the screen.

- 25. Television sized to distance. Choose the largest TV whose picture still looks sharp and comfortable from the main seats, and wall-mount it with cables hidden in the wall.
- 26. Projector with fixed screen. A ceiling-mounted projector and a fixed, tensioned screen deliver the true cinema scale that televisions cannot match at sensible budgets.
- 27. Pull-down screen over a TV. A retractable screen that drops in front of a television gives daytime TV and film-night scale in the same dual-use room.
- 28. Ultra-short-throw projector. A projector that sits on a sideboard just below the screen removes ceiling mounts and long cable runs, suiting rented or finished rooms.
- 29. Light-rejecting screen. Screens designed to reject ambient light keep projector pictures watchable in rooms that cannot be fully darkened at sensible hours.
- 30. Dark screen wall. Painting the screen wall a deep, matt colour focuses attention, kills reflections and makes even a modest screen feel like an event.
- 31. Curtain reveal. Simple side curtains that draw back when the film starts cost little, hide the screen by day and add a whisper of theatre ritual.
- 32. Dual display setup. A TV for news, sport and gaming plus a projector screen for films is the pragmatic best of both worlds in family rooms.
5. Sound: Speakers, Soundbars and Subwoofers
Sound carries at least half the emotion of a film, and placement matters more than price tags. Front speakers belong at ear height flanking the screen, the centre channel that carries dialogue sits just under or over it, and surround speakers go to the sides of the seats, never in the ceiling corners behind you. Start simple, place it properly, then upgrade in steps.

- 33. Start with a soundbar. A good soundbar under the television is the fastest upgrade from TV speakers, needs one cable and suits small rooms and rented homes.
- 34. Build a front three. Left, right and centre speakers matched from one range give clear dialogue and a wide front stage, the foundation every bigger system builds on.
- 35. Add surround speakers. Side surround speakers at ear height, slightly behind the main row, wrap effects around the audience the way the mix intends.
- 36. Ceiling speakers for height. Dedicated ceiling or height speakers add rain, aircraft and atmosphere from above in rooms wired for them during the build stage.
- 37. Place the subwoofer by ear. Bass varies wildly by position; try the subwoofer in a corner and along the front wall, and keep the spot where films sound fullest.
- 38. Wireless rear speakers. Where running cable is impossible, wireless surrounds trade a little perfection for a system that actually gets installed and used.
- 39. Headphone station. A pair of good headphones on a stand by the door, with a long cable or wireless link, saves late-night viewing from the volume police.
- 40. One receiver as the hub. Route every source through one AV receiver and one remote replaces four; label the inputs once and guests can drive the room too.
6. Lighting and Blackout Control
Light control is the difference between a room with a screen and a cinema. The goal is total darkness when you want it, soft guided light when you pause, and never a reflection on the picture. Layer it: blackout at the windows, dimmers on the walls, a gentle wash behind the screen and practical light for finding seats and snacks.
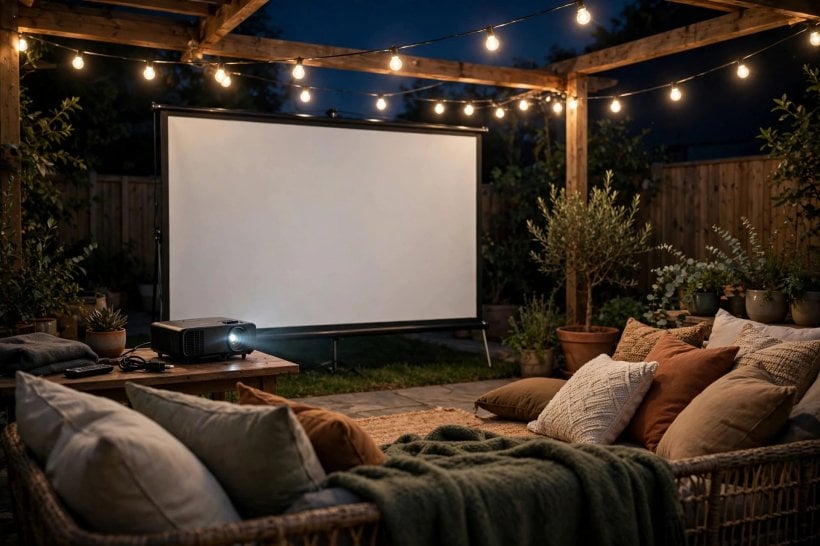
- 41. Layered blackout. Blackout blinds inside the window reveal plus heavy curtains over them close the last light gaps that single products always seem to leave.
- 42. Dimmable wall sconces. Sconces on the side walls, on dimmers, give the room its pre-film glow and interval light without ever shining on the screen.
- 43. Bias light behind the screen. A soft light strip behind a television eases eye strain in dark rooms and makes the picture’s blacks look deeper by comparison.
- 44. Star ceiling. Fibre-optic star points in a dark ceiling panel are pure cinema romance, invisible by day and magical during quiet scenes.
- 45. Step and riser lights. Low lights on platform steps and along the walkway keep trips to the kitchen safe without waking the room’s darkness.
- 46. One-button scenes. Program the lighting into scenes — Arrival, Film, Interval, Cleaning — so the room changes mood from a single press or voice command.
- 47. Kill the screen reflections. Shade or reposition any lamp that the screen can see; a glossy picture full of reflected lampshades is the cheapest fault to fix.
7. Acoustics, Walls and Colour
Rooms echo more than their owners realise. Bare parallel walls, hard floors and a big screen make dialogue splashy and tiring, while soft furnishings calm everything down. You do not need a studio: the rule is to cover a good share of the floor, break up one pair of walls, and keep the colour scheme dark and matt so the room disappears when the lights go down.
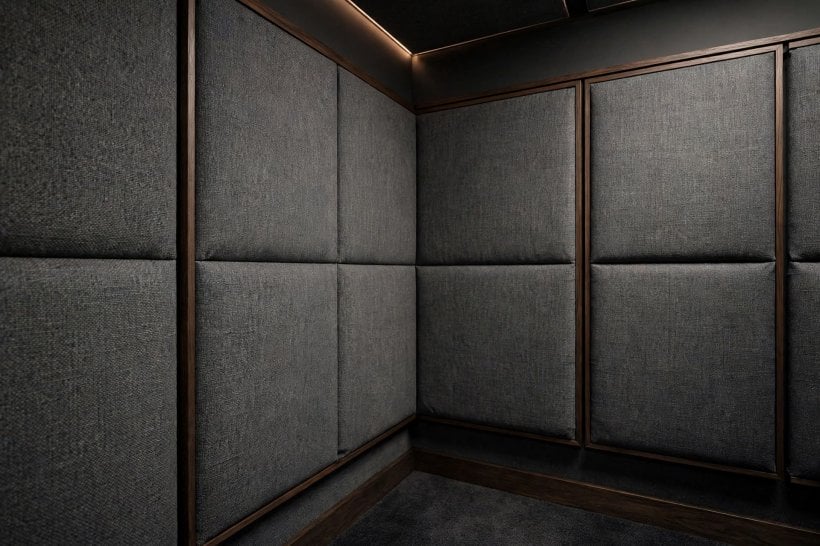
- 48. Dark matt screen end. Deep charcoal, navy or black in a flat finish around the screen absorbs stray light and makes colours on screen appear richer.
- 49. Acoustic panels as art. Fabric-wrapped panels printed with film art or plain colours tame first reflections while looking like decoration rather than equipment.
- 50. A serious rug. The thickest rug the budget allows, over underlay, between seats and screen calms floor reflections and warms the room’s whole feel.
- 51. Bookshelf back wall. A bookcase wall behind the seats scatters sound pleasantly, stores the film and game library, and needs no specialist products at all.
- 52. Curtains that work twice. Full-length curtains along one wall black out windows, absorb echo, and add the swish of luxury every time they are drawn.
- 53. Ceiling treatment. A darker ceiling, soft panels or even stretched fabric overhead stops the slap echo between floor and ceiling in tall rooms.
- 54. Seal the door. A solid door with simple seals keeps bass in the room, arguments out of it, and dialogue clear at lower volumes.
8. Storage, Snacks and Comfort Extras
The extras decide whether the room gets used weekly or monthly. Equipment needs ventilation, remotes need a home, and snacks need a station that is not a balancing act on a sofa arm. Build a small refreshment point into the plan: our list of tiny house coffee bar design ideas for a compact drinks corner translates directly to a film-night drinks and snack bar.

- 55. Ventilated media unit. House players and the receiver in a low unit under the screen with open or mesh backs, so heat escapes and remote signals arrive.
- 56. Drinks fridge corner. A small quiet fridge at the back of the room ends the mid-film kitchen trips that break every tense third act.
- 57. Snack trolley. A wheeled trolley loaded before the film — popcorn, drinks, sweets — serves the whole room and parks out of sight afterwards.
- 58. Blanket basket. Throws and cushions in a basket by the door make the room the warmest seat in the house on winter film nights.
- 59. A side table per seat. Every viewer needs a surface within reach; narrow tables between seats or a ledge behind the sofa solves the lap-balancing problem.
- 60. Storage ottoman. A lidded footstool hides remotes, chargers, game controllers and the blanket overflow, and doubles as an extra seat for guests.
- 61. Framed film art. Two or three framed posters or stills, hung on the side wall at standing eye level, give the room its identity without visual noise during films.
9. Small Rooms, Corners and Dual-Use Spaces
Most homes have no spare room to give to cinema, so the theatre has to share: with the living room, the home office, the guest bed or the garden room. The trick is a room that transforms in minutes — screen away, lights down, seating turned — and transforms back just as fast. For the everyday version of the room, borrow from our guide to tiny house living room ideas for shared family spaces, and if a desk shares the room, from these IKEA home office ideas for a tiny house desk corner.
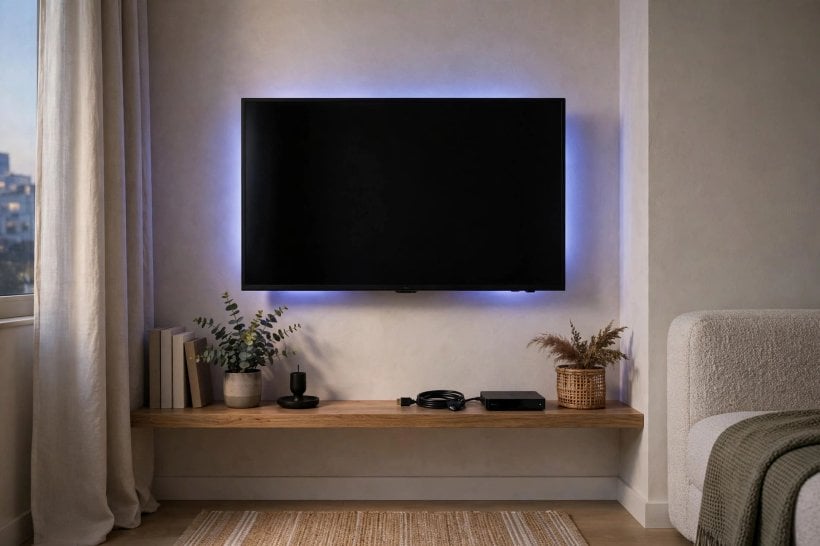
- 62. Living-room hybrid. A large TV on a media wall, a soundbar and blackout-lined curtains turn the family living room into a respectable cinema after dark.
- 63. Angled corner setup. In square or awkward rooms, angle the sofa and screen across a corner to gain viewing distance and free the walls for doors and storage.
- 64. Sofa bed cinema. A good sofa bed as the main seating lets the theatre host overnight guests, provided the screen height works from a bed’s lower eye line.
- 65. Desk by day, screen by night. Mount the work monitor and the film screen on adjacent walls of a small room, with one swivelling chair serving both lives.
- 66. Bedroom media wall. A television on the wall facing the bed, blackout blinds and a headphone each turns a main bedroom into a private late-night cinema.
- 67. Under-stairs snug. The dead space under a staircase fits a small screen, two armchairs and thick curtains for a children’s cinema den with real charm.
- 68. Garden room cinema. An insulated garden building makes an ideal theatre: dark, separate and sound-contained, with the walk down the path as part of the ritual.
10. Controls, Cables and Finishing Touches
The last ten percent is what guests notice: one remote that works, cables nobody can see, kit that never overheats and a room that is simple to clean. Connected control helps here — the same thinking behind smart tiny house design ideas for connected living applies: automate the routine, keep manual overrides, and choose systems someone local can service.
- 69. One universal remote. Program a single remote or app to power the screen, receiver and player in sequence, and hide the four originals in a drawer.
- 70. Cable channels in skirting. Hollow skirting or a simple trunking run hides speaker and HDMI cables around the room with access for future swaps.
- 71. Labelled cables and a spare. Label both ends of every cable and run one spare HDMI in the wall; future-you, mid-upgrade, will be quietly grateful.
- 72. Ventilation for equipment. Kit cupboards need air: mesh doors, a quiet fan or simple vents top and bottom stop receivers cooking themselves into an early grave.
- 73. Surge protection. One quality surge protector feeding the whole equipment rack is cheap insurance for the most expensive electronics in the house.
- 74. A calibration afternoon. Run the receiver’s setup routine, set speaker distances and levels, choose the picture mode closest to accurate, and the whole system steps up a class.
- 75. A yearly care rhythm. Dust projector filters, check lamp or laser hours, update firmware and re-tighten the snack-station stock once a year, before the big holiday films arrive.
Final Considerations
Build the room in the order this guide follows: choose and darken the room, fix the seats and screen size together, place sound properly, then add light control, softness and storage. Resist buying decor before the first film has been watched in the room, because the picture and the seats will tell you what it still needs. A theatre that is dark, quiet, comfortable and simple to operate will be used for years; one that is merely impressive will be used twice.


0 Comments