
The best lower-ground play spaces are planned, not just filled. Get the layout, light and damp checks right first, and every game night afterwards feels easy.
These seventy-five ideas walk through the whole project in order, from measuring and moisture to the final scoreboard, so you can build a room that stays fun, dry and comfortable for years.
1. Planning First: Measure, Check Damp and Set the Brief
Start with honest measurements: ceiling height, the position of posts, ducts, meters and the route furniture must travel down the stairs. Then deal with damp before decoration, because no finish survives a wet wall for long. Look for tide marks, musty smells and peeling paint, and check what your local rules require for habitable lower rooms, escape routes and ventilation before you spend anything. A basement game room succeeds when the brief is clear: who plays, how late, how loud, and how the space should flex for guests, homework or film nights. Write the brief down and test every later choice against it. If colour decisions are also in play upstairs, our guide to tiny house interior paint colours explains how test patches behave in different light, a habit worth copying downstairs too.
| Check | Why It Matters | Simple First Step |
|---|---|---|
| Ceiling height | Cue sports and raised arms need clearance | Measure at the lowest duct or beam |
| Damp signs | Moisture ruins finishes and games | Inspect corners after heavy rain |
| Access route | Large tables must fit down the stairs | Measure turns, doors and landings |
| Power points | Screens and lamps need safe supply | Map sockets before placing furniture |
| Noise path | Sound travels up through floors | Note bedrooms directly above |
| Ventilation | Busy rooms need fresh air | Check vents, windows and airflow |
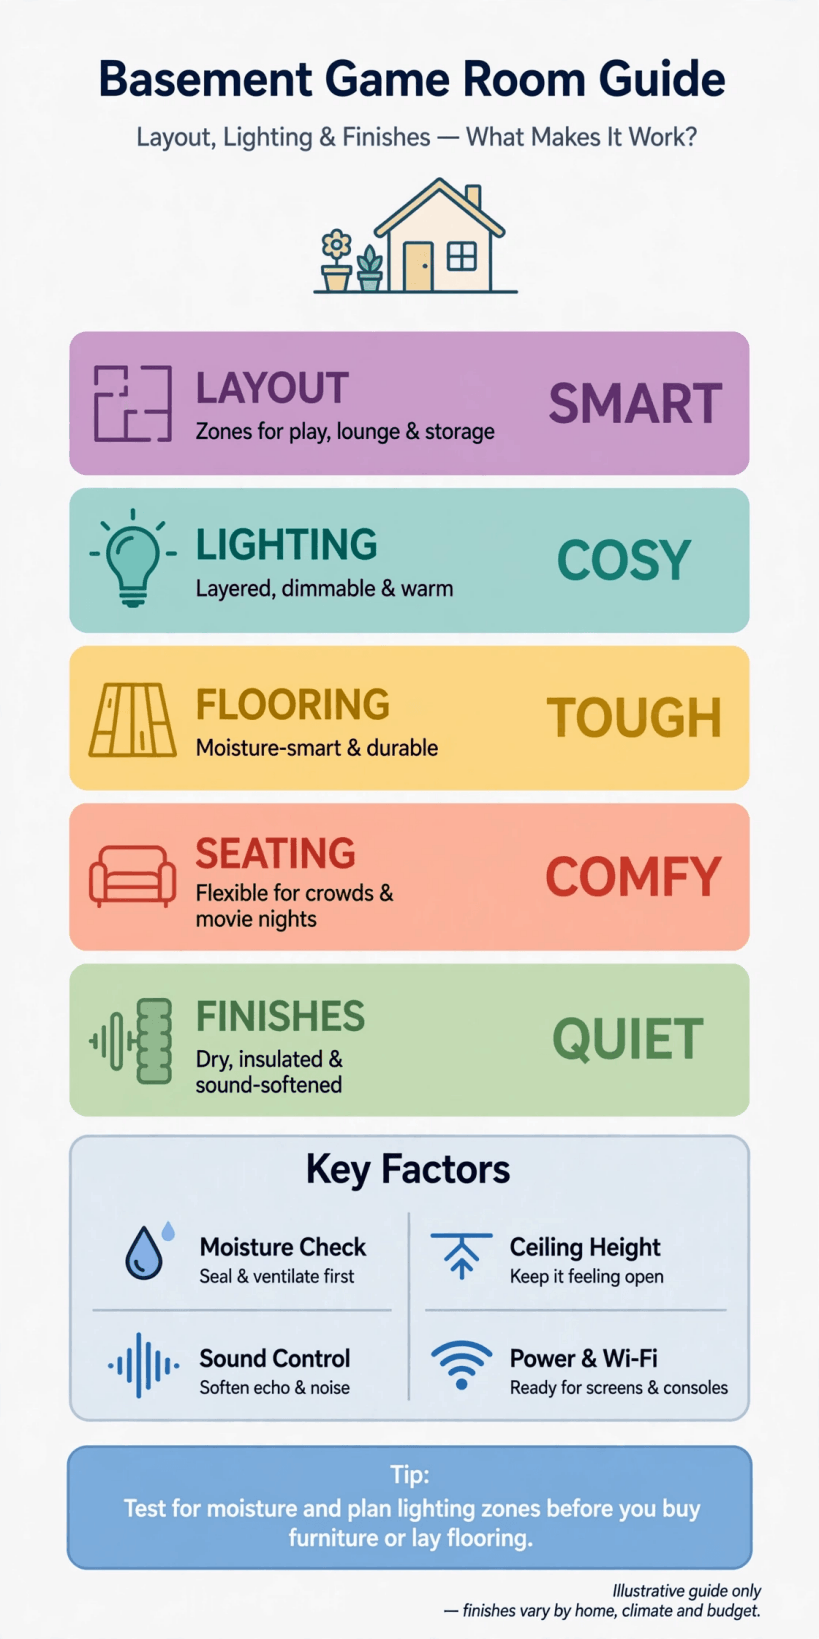
The planning order in one glance: measure, dry, wire, light, then play.
2. Layouts That Put the Big Pieces First
Place the largest game first and let everything else orbit it. A table sport needs clear space on all sides for cues, elbows and spectators, while screen play needs distance measured from sofa to display. Keep walking routes along one edge so nobody crosses a shot or a screen at the wrong moment. The zoning logic in our tiny house home theater ideas works just as well here: one anchor activity, one relaxed edge, and storage where the mess actually happens.
1. Centre-table layout. Put the biggest table in the middle with even clearance all round, seating pushed to the walls, and a single storage unit for cues, balls and spares.
2. Screen-at-the-end layout. Place the display on the short end wall, sofas facing it, and quieter games behind the seating where their players are not in the viewing line.
3. Two-zone split. Divide the space into lively and calm halves with a rug and a low shelf, so darts and cards can run at different volumes.
4. L-shaped flow. Use the natural L of many lower floors: active play in the long arm, lounging in the short arm, snacks at the corner where they meet.
5. Wall-hugging tables. Choose games that live against walls, like table football, and keep the centre open for dancing, VR play or a temporary tournament table.
6. Spectator bench spine. Run a long bench along one wall so watchers, bags and spare players sit in one tidy line instead of stealing chairs from every game.
7. Post-friendly plan. Treat structural posts as zone markers rather than enemies, wrapping one as the scoreboard post and another as the display mount.
8. Flexible centre. Keep the middle deliberately empty with foldable games at the edges, so the room can host parties, exercise or a spare bed when needed.
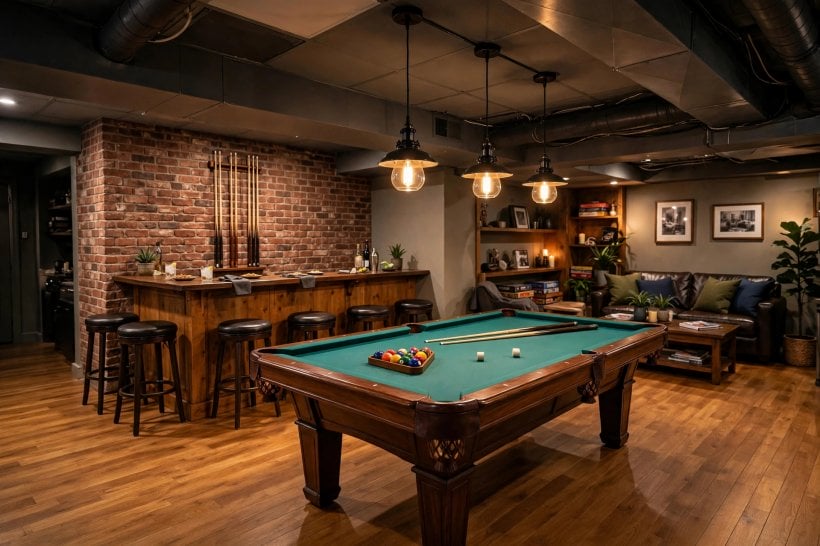
9. Guest-ready corner. Reserve one corner with a sofa bed, a lamp and a curtain track, so overnight guests do not dismantle the whole play space.
3. The Main Attractions: Tables and Classic Games
Choose fewer, better games rather than many cramped ones. A single generous table that everyone uses beats three squeezed games nobody can play properly. Think about who actually visits: small children, teenagers and grandparents rarely want the same table at the same height. Leave room to stand back, celebrate and walk away mid-game, because comfort around the game matters as much as the game itself.
10. Full-size cue table. Only commit if the room gives honest cueing space on every side; otherwise a smaller table plays better and looks less like a mistake.
11. Convertible dining-gaming table. A topped table that flips between meals and play earns its footprint twice, especially where the lower floor doubles as a family dining space.
12. Table football. Fast, loud and friendly, it needs elbow room at both ends and a floor finish that forgives enthusiastic footwork and the odd spilled drink.
13. Table tennis top. A folding top stored flat against a wall turns almost any sturdy table into a tournament venue, then disappears when the evening changes mood.
14. Air hockey corner. Give it its own corner with a socket nearby, because the blower hum carries and the puck always escapes toward the nearest skirting board.
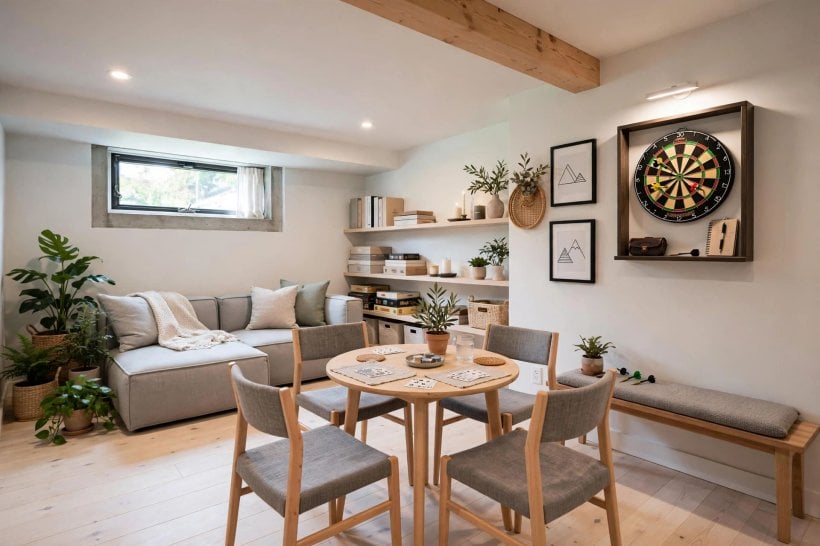
15. Dartboard with a safe surround. Mount on a backboard that protects the wall, mark the throwing line on the floor, and keep the walk-past route well away from the flight path.
16. Shuffleboard along the long wall. A narrow table game suits leftover strips of space and gives older guests a skilful, seated-friendly option between louder activities.
17. Chess and strategy nook. A small table, two good chairs and a warm lamp create a quiet magnet for slower games that balance the room’s energy.
18. Board-game library wall. Shelve the collection visibly with a proper table beneath, because games that can be seen get played, while boxed-away games get forgotten.

4. Screens, Sound and Arcade Corners
Digital play needs darkness control, tidy cables and seating at the right distance. Mount the screen at seated eye height, hide wires in trunking you can reopen, and keep a spare controller charger where players actually sit. Sound deserves respect in both directions: speakers placed well at modest volume beat a huge system turned up against thin ceilings and patient neighbours.
19. Projector and pull-down screen. A ceiling projector with a retractable screen gives cinema scale on film nights and vanishes for table games, keeping one room genuinely multi-purpose.
20. Console bay with ventilation. House consoles in an open-backed unit with airflow space, because enclosed cabinets cook electronics and shorten their working lives considerably.
21. Retro arcade cabinet. One upright cabinet delivers nostalgia, a focal point and short-burst play that guests of every generation understand within seconds of stepping up.
22. Racing seat rig. A fold-away wheel stand and seat create a thrilling driving corner that packs flat when the room needs its floor back.
23. VR play square. Mark a clear, padded-edge square on the floor, move low tables out of it, and store the headset on a wall hook at adult height.
24. Karaoke-ready setup. A simple mixer, two microphones and lyrics on the main screen turn any gathering into a performance, with volume limited for upstairs sanity.
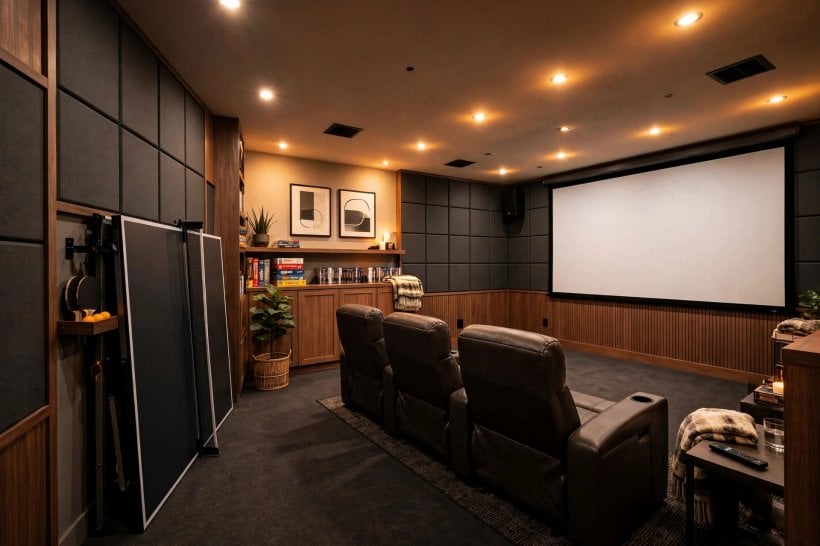
25. Sound-softening panels. Fabric-wrapped panels or heavy curtains at reflection points calm echo, improve film dialogue and stop game noise bouncing around hard lower walls.
26. Headphone hooks for late play. A row of hooks and a small charging shelf let night owls keep playing after the house sleeps, without arguments about volume.

5. Lighting in Layers for Day and Night Play
Lower rooms live or die by their lighting. Work in layers: an even base so nobody trips, focused light over tables where balls and cards must be read clearly, and low warm accents that make the space feel like an evening destination rather than a cellar. Put each layer on its own switch or dimmer, and test glare from every seat, because a light that looks fine standing up can blind a player mid-shot.
27. Dimmer everything. Dimmers on every circuit let one room shift from homework-bright to film-night low without changing a single bulb or moving a lamp.
28. Pendant over the main table. A wide, low pendant gives shadow-free table light and a visual anchor; hang it high enough that raised cues never meet it.
29. LED strip under shelves. Concealed strips wash walls with soft light, show off the games library and remove the cave feeling that single ceiling lights create.
30. Bias light behind the screen. A gentle glow behind the display reduces eye strain in dark rooms and makes film nights feel polished rather than improvised.
31. Window-well dressing. Sheer layers or light shelves at small windows bounce daylight deeper while keeping the privacy lower windows often lack.
32. Colour-true bulbs over cards. Where colours must be judged, choose bulbs known for honest colour rendering so red suits and green baize read correctly.
33. Floor-level path lights. Low guide lights along the route to the stairs keep midnight exits safe without flooding the room and ruining the film.
34. A statement neon-style sign. One playful sign in efficient LED gives the room its identity and its photograph moment; keep it to one wall only.
6. Floors That Survive Spills, Stamps and Chair Legs
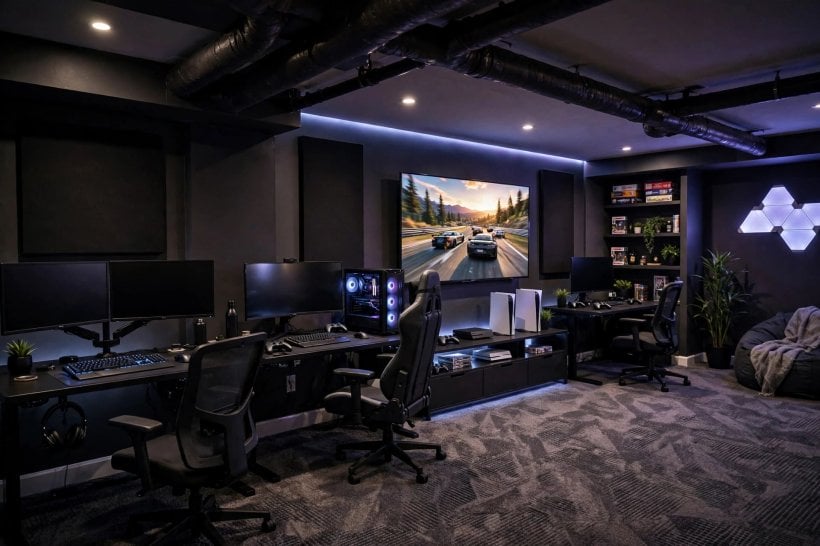
Choose flooring for the worst evening, not the best photograph. It must shrug off drink spills, dropped darts, chair casters and the occasional flood scare, while still feeling warm under socks. Raised or breathable constructions suit lower floors better than anything glued directly to cold concrete, and a large washable rug can soften the centre while protecting the finish beneath. Take the same practical view as our colourful tiny house interior ideas: bold is welcome, but only where it can be cleaned.
35. Luxury vinyl planks. Water-tolerant, warm-looking and forgiving, planks handle spills and can be replaced singly when life inevitably damages one corner.
36. Rubber tiles in the active zone. Interlocking rubber softens dropped weights and dart bounce near the board, and lifts easily if the floor beneath ever needs inspection.
37. Low-pile carpet tiles. Warm, quiet and replaceable square by square, carpet tiles forgive the famous red-drink incident better than any fitted carpet can.
38. Painted concrete with rugs. A sealed, painted slab with big washable rugs is honest, cool in summer and the easiest floor to rescue after a plumbing surprise.
39. Raised subfloor panels. A ventilated raised layer adds warmth and a safety margin against minor moisture, making every finish above it feel more like upstairs.
40. Cork underlay comfort. Cork beneath a hard finish adds softness and sound control, so marathon tournaments end with happier knees and quieter footsteps overhead.
41. Defined rug zones. One rug per activity keeps chairs from wandering, catches debris where it falls and lets you redecorate a zone for very little money.
42. Threshold ramps at the door. A gentle ramped strip where the new floor meets the stairs removes the trip line that every guest will otherwise find in the dark.
7. Walls, Colour and Ceilings That Lift the Space
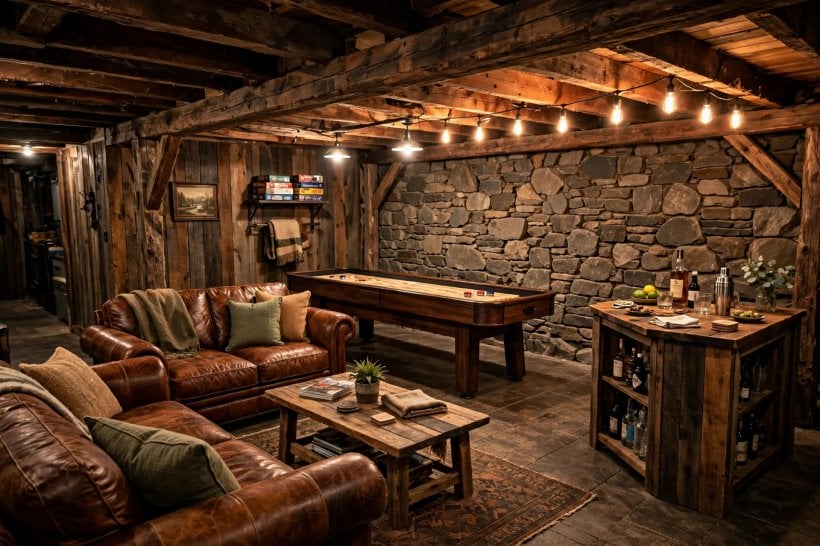
Treat walls as the room’s largest light reflector. Pale, warm tones bounce scarce light around, while one deeper wall behind the screen adds cinema focus without darkening the whole space. Ceilings matter too: painting exposed services one colour turns a tangle into a deliberate industrial look. Keep spare paint labelled, because lower walls earn scuffs faster than any other room in the house, as the relaxed schemes in our tiny house living room ideas also prove.
43. One dark screen wall. A deep tone behind the display deepens perceived contrast and hides cable shadows, while the remaining walls stay light and friendly.
44. Wipeable mid-height paint. A tougher finish at chair and hand height survives leaning, scuffing and enthusiastic celebrations, and wipes clean in seconds.
45. Acoustic slat panel section. A run of slatted panels behind seating softens echo and adds the tailored look guests associate with boutique games lounges.
46. Exposed brick sealed, not painted. Sealing real brick keeps its character, stops dusting and gives one wall all the texture the room needs without extra decoration.
47. Ceiling painted as one field. Beams, ducts and joists in a single colour read as intentional architecture and visually raise the ceiling by removing visual clutter.
48. Scoreboard wall. A chalk or whiteboard section makes tournaments official, keeps league tables alive between visits and gives children a wall they may draw on.
49. Framed poster rhythm. A measured row of framed prints at one height looks curated; scattered heights look accidental, so measure the line once and reuse it.
50. Mirror to borrow light. A mirror placed to catch the window or a lamp doubles perceived light, but keep it out of dart and ball flight paths.
8. Seating, Storage and the Snack Question
Comfort decides how long people stay. Mix proper seats with back support, a few perches for spectators and floor cushions for children, then give every game a home within arm’s reach of where it is played. Snacks need a defined landing zone with a tray and a bin, or crumbs will colonise the baize. The hidden-storage discipline in our tiny house closet design ideas translates perfectly to cues, controllers and card boxes.
51. Bench with storage inside. A hinged bench swallows board games and blankets, seats three spectators and keeps the floor clear for play in one move.
52. Stackable stools. Light stools stack in a corner for everyday tidiness and multiply seating instantly when a tournament crowd arrives unannounced.
53. Two proper armchairs. Not every guest plays; two supportive chairs with a side table honour the watchers, readers and grandparents in every family.
54. Cue and controller rack. A wall rack at the room’s natural entry point stops long items leaning, falling and chipping paint in doorways.
55. Drinks ledge, not drinks on games. A narrow ledge along one wall gives every glass a legal home, which is the cheapest insurance a felt table can buy.
56. Mini fridge on a tray. A small fridge on a waterproof tray with a towel nearby handles cold drinks and the condensation they bring with them.
57. Labelled spares box. Batteries, bulbs, chargers, chalk and one spare ball set in a single labelled box end the mid-game scavenger hunt forever.
58. Coat and shoe landing. Hooks and a mat at the stairs keep outdoor clutter from migrating across the play floor during busy evenings.

9. Moisture-Smart Finishes and Healthy Air
Damp is the long game. Even a currently dry lower floor can turn humid in summer, so finishes should tolerate moisture, allow inspection and never trap water against cold walls. Leave access panels where valves and junctions live, choose furniture with legs rather than solid bases, and keep a simple humidity gauge on the wall so trends are visible before damage is. When in doubt, check with your city or a local specialist what your home’s construction actually needs.
59. Breathable wall finishes. Finishes that let masonry breathe reduce the risk of moisture building silently behind a sealed surface and appearing as blistered paint later.
60. Furniture on legs. Raised furniture lets air circulate beneath, makes leak-spotting easy and protects upholstery from the first millimetres of any water event.
61. Dehumidifier on a drain. A plumbed-in or auto-drain unit works quietly in the background; a bucket model only works on the days somebody remembers it.
62. Humidity gauge habit. Check the reading weekly for the first season and note it on the scoreboard wall, so seasonal patterns become familiar, not frightening.
63. Removable skirting sections. One or two discreetly removable skirting lengths let you inspect the wall base after storms without dismantling the room’s finish.
64. Mould-resistant bathroom-grade paint in corners. The coldest corners earn the toughest finish; modern moisture-resistant paints suit these small, hard-working patches well.
65. No cardboard storage on the floor. Games and spares live in lidded plastic boxes on shelves, because cardboard drinks floor moisture and passes it straight to contents.
66. Fresh-air routine. Ventilate whenever weather allows and run extraction during big gatherings, because twenty breathing, laughing people humidify a room surprisingly fast.
10. Finishing Touches, Rules and Room Rituals
The last layer is culture. A room with a house trophy, a results board and a five-minute reset routine stays lovely far longer than a room relying on goodwill. Photograph the finished layout so furniture drifts back to its marks, keep a small repair kit in the spares box, and review the space each season with the same practical eye you’d use for the calm, layered schemes in our smart tiny house design ideas.
67. House championship trophy. One ridiculous, beloved trophy rotated between winners gives every gathering a storyline and every shelf a centrepiece.
68. Five-minute reset rule. Music on, timer set: cushions, glasses, games and chairs return to their homes before anyone leaves for the night.
69. Guest book of scores. A notebook of results, dates and disputed victories becomes the room’s favourite reading material within a single year.
70. Playlist per game. A low background playlist for cards, another for tournaments; agreed music prevents the volume wars that start so many arguments.
71. A real clock. A visible clock helps tournaments run, films end and teenagers surface for dinner without a single shouted negotiation upstairs.
72. Spare lighting scene for cleaning. One bright, honest lighting preset reveals crumbs and dust weekly, so the moody scenes can stay flattering the rest of the time.
73. Labelled cable spares. One spare cable of each type, coiled and labelled, saves the evening the projector lead inevitably chooses to fail.
74. Seasonal deep check. Each spring and autumn, move the big pieces, inspect behind them, refresh batteries in detectors and re-read the humidity notes.
75. Photograph the winning layout. When a layout finally works, take wide photographs from every corner; future-you will reset the room in minutes instead of months.
Final Considerations
Build the dry, safe, comfortable room first and the exciting room second, in that order, and the second will take care of itself. Measure honestly, respect moisture, light in layers, and give every game both space to play and a home to return to. Check local requirements for escape, ventilation and electrical work with the relevant professionals before you start, keep finishes replaceable where life is hardest on them, and let the room evolve one proven idea at a time. A lower floor treated with this much care stops being spare space and becomes the address every friend and cousin asks for by name.


0 Comments