

A bathroom that works for everybody is not a special bathroom. It is simply a well-planned one, where reaching, turning, sitting and standing have all been thought about in advance.
Whether you are planning for a wheelchair user, an older parent, a recovering hip or your own future self, these accessible ideas for a handicap bathroom cover layouts, support, showers and the small fixtures that make daily routines calmer and safer.
1. Accessible Bathrooms at a Glance
Good accessible design rests on four ideas: clear floor space to move and turn, support exactly where bodies need it, controls that are easy to reach and operate, and surfaces that stay grippy when wet. Every measurement in this article is offered as typical guidance drawn from common practice — your own needs, your installer and your local building codes are the final word, so verify dimensions before building.
| Priority | Typical guidance | Always check |
|---|---|---|
| Doorway | As wide as you can manage; many aim for a clear opening around 32 inches or more | Local code and the user’s chair or walker width |
| Turning space | An open circle of roughly 60 inches where possible | The turning circle of the actual mobility aid |
| Grab bars | Beside the toilet, in the shower and by the bath, fixed into structure | Bar ratings and solid fixing, professionally if unsure |
| Shower | Level or low-threshold entry with a seat and handheld shower | Drainage falls and waterproofing details |
| Basin | Space beneath for knees, lever or sensor taps | Pipe insulation so legs cannot touch hot pipes |
| Lighting | Bright, even and glare-free, with a gentler night option | Switch reach from door and from a seated height |
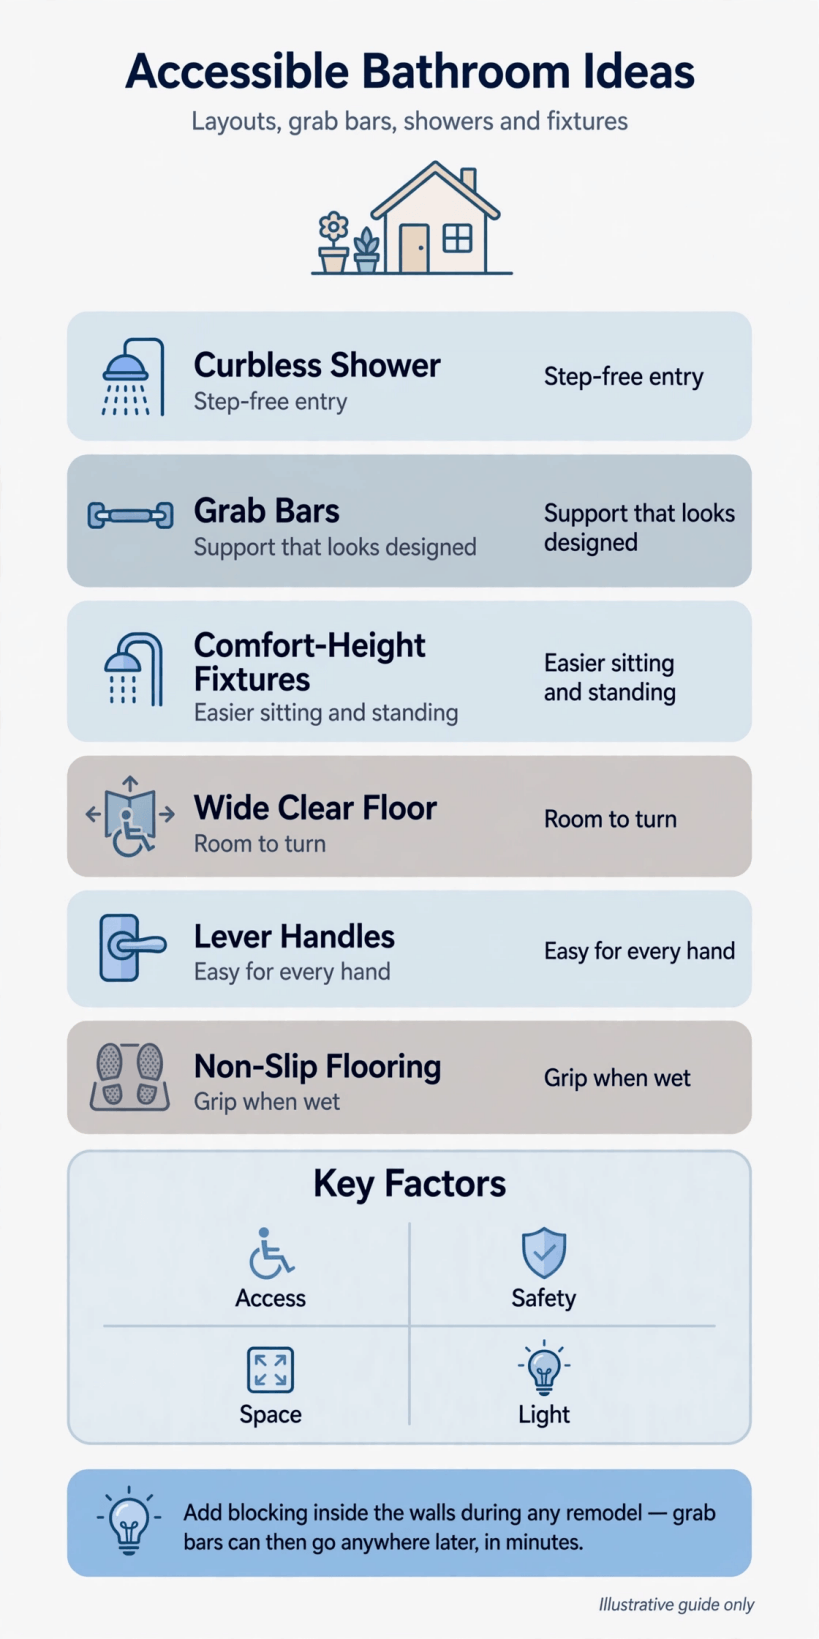
The essentials in one view: room to turn, support where it counts, a level shower, and controls nobody has to stretch for.
Many of these principles are simply good small-space design; the layouts in smart tiny house design ideas show how clear floors and dual-purpose fixtures help every household.
2. Layouts and Turning Space
Layout is accessibility. Before choosing a single fitting, map how the user enters, turns, transfers and reaches each fixture, ideally with the person themselves talking you through their routine. A room that flows in that order will feel effortless; a room planned fixture-by-fixture rarely does.
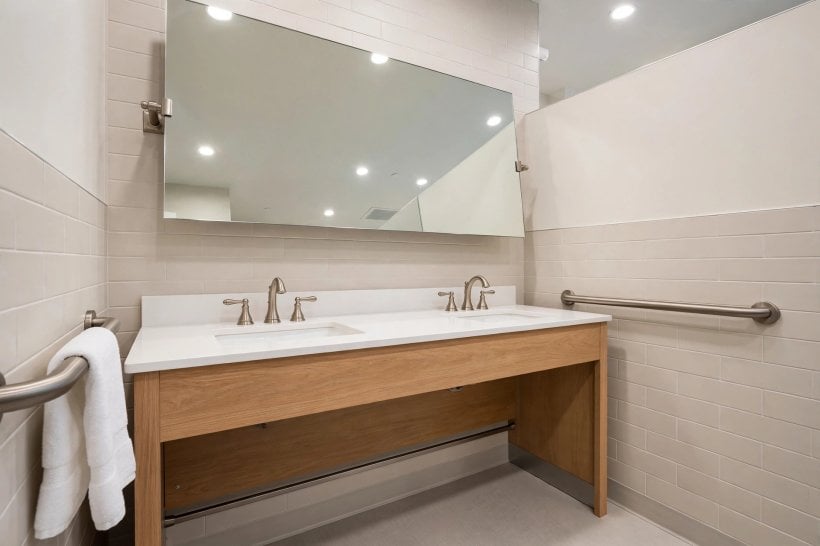
- Keep one clear turning zone. An unobstructed area — commonly planned around a 60-inch circle as typical guidance — lets a wheelchair user turn without three-point shunts; verify against the chair’s own turning needs.
- Place the toilet for a side transfer. Many users transfer from the side, so open space beside the pan matters as much as space in front of it.
- Run fixtures along one or two walls. An L-shaped arrangement keeps the centre of the room free and shortens every journey between basin, toilet and shower.
- Choose the door carefully. Outward-opening, sliding or pocket doors never trap floor space inside the room, and can be opened in an emergency if someone falls against them.
- Widen the doorway if you can. When renovating, a wider door is one of the highest-value changes; many projects aim for at least a 32-inch clear opening, subject to local code.
- Keep thresholds level. Flush transitions between hallway and bathroom remove the small lip that catches wheels, walkers and unsteady feet alike.
Sketch the plan at full size on the floor with tape before any plumbing moves. Sitting in the actual chair, in the actual taped room, settles arguments that drawings cannot.
3. Grab Bars and Support Rails
Support is the signature of an accessible bathroom, and it deserves more thought than a single bar beside the toilet. Think in journeys: every place a person sits, stands, turns or steps over deserves a steadying point within easy reach.

- Fix bars into structure, always. Bars must anchor into studs, masonry or proper reinforcement and be rated for the load; a bar that moves is worse than none. If in doubt, hire a professional.
- Beside and behind the toilet. A side bar for pushing up and a rear bar for steadiness cover the two moves toilet users make most.
- An L-shaped bar in the shower. Vertical for entry, horizontal for seated and standing support — the L covers the whole shower routine in one fitting.
- Fold-down rails where space is tight. Hinged rails beside the toilet support transfers, then fold away so a helper or a second user has room.
- Choose grip-friendly finishes. Slightly textured or matt bars are kinder to wet hands than mirror-polished chrome, and warm-to-touch finishes exist for sensitive skin.
- Plan bars before tiling. Reinforcement inside the wall, fitted during the build, lets you place bars exactly where the user reaches — not just where the studs happen to be.
Ask the user to mime their routine and mark reach points with painter’s tape on the wall. Bars placed by habit beat bars placed by guesswork every time.
4. Showers: Level Access, Seats and Controls
The shower is where accessible design most improves daily life. A level entry, a secure seat, water that can be directed by hand and controls reachable before the water starts — together these turn a risky chore into a private pleasure again.

- Choose a level or low-threshold entry. A wet-room style floor, or the lowest tray lip you can achieve, removes the step that causes most bathroom falls; get drainage falls designed properly.
- Build in or add a sturdy seat. A fixed bench or quality folding seat lets the user shower sitting down; confirm the seat’s rating and fixings suit the user.
- Fit a handheld shower on a slide rail. Adjustable height serves seated and standing users, helps carers assist, and makes cleaning the enclosure far easier.
- Put controls within seated reach. Valves placed where a seated hand falls — and operable with a closed fist or elbow — keep temperature adjustment independent.
- Prefer thermostatic valves. Stable temperature protects users who move slowly or have reduced sensation from sudden hot surges; discuss options with your plumber.
- Use a curtain or a well-planned screen. Curtains give carers the easiest access; if you choose glass, ensure the opening is generous and the door never traps the turning space.
A seat inside the shower deserves its own research into materials, slopes and waterproofing before you commit to a built-in design.
5. Baths, Toilets and Basins
The other fixtures each have accessible versions and simple upgrades. The goal is always the same: approach easily, transfer safely, use independently, and clean without a struggle.

- Comfort-height toilets. A slightly higher pan — many find a seat height around 17 to 19 inches easier as typical guidance — reduces the effort of sitting and standing; test heights in a showroom where possible.
- Wall-hung pans free the floor. A wall-hung toilet with a concealed frame clears floor space for wheels and cleaning, provided the wall and frame are properly specified.
- Walk-in and low-step baths. For bath lovers, walk-in models with a door and seat, or a very low-sided bath with transfer space beside it, keep bathing possible; weigh filling and emptying time honestly.
- Basins with knee space. Wall-hung or shallow basins with clear space beneath let a seated user get close; insulate or box in hot pipes underneath.
- Lever, crosshead or sensor taps. Taps that work with a palm, a fist or a wave beat small round knobs for grip, strength and arthritic hands.
- A raised or tilted mirror. A mirror that reaches lower, or tilts, serves seated users and children without anyone standing on tiptoe.
Keep toiletries, spare rolls and the bin within seated reach of each fixture. Independence is usually lost to a badly placed shelf, not a badly chosen toilet.
6. Space-Saving Fixtures for Small Accessible Bathrooms
Accessible does not have to mean large. With compact fixtures and honest measuring, even a small family bathroom can gain turning room, a level shower and proper support — the trick is choosing fittings designed for tight footprints.

- Short-projection toilets and basins. Compact ranges that project less from the wall can return precious inches to the turning circle in a small room.
- Corner basins where they truly help. A corner basin can free a wall for a fold-down rail or a wider shower entry in very tight plans.
- Sliding and pocket doors. Recovering the door swing is often the single biggest space gain available in a small bathroom.
- Fold-down everything. Seats, rails and even a small changing bench that fold flat let one room serve a wheelchair user and standing family members in turn.
- A combined wet-room layout. Levelling the whole floor and letting the shower share the room’s drainage removes tray lips and screens, maximising usable space — with professional waterproofing throughout.
- Slimline storage towers. Tall, shallow storage at the room’s edge keeps floors clear, unlike deep cupboards that eat the turning zone.
Small-room discipline travels well: tiny house bedroom ideas use the same fold-away, dual-purpose thinking for sleeping spaces.
7. Floors, Walls and Slip Resistance
Surfaces decide how safe the room feels at 6 a.m. in bare feet. Prioritise grip underfoot, walls that tolerate splashes and cleaning, and visual contrast that helps everyone judge edges, steps and seats.

- Choose slip-resistant flooring. Look for flooring sold and rated for wet, barefoot areas, in matt finishes; test a sample wet before committing the whole floor.
- Keep floor tone calm and even. Very dark or strongly patterned floors can be misread as holes or steps by some users with low vision or dementia; a mid-tone, low-contrast floor feels steadier.
- Contrast where it helps. A seat, grab bar or toilet seat in a tone that stands out from its background is easier to find at a glance.
- Prefer large tiles or sheet flooring. Fewer grout lines mean smoother rolling for wheels and easier cleaning; sheet vinyl made for wet rooms is a practical classic.
- Round the hard edges. Softened corners on vanity units and tiled upstands reduce the cost of an accidental knock.
- Make walls wipeable throughout. Splashes travel further in assisted showering; full-height tiling or wet-wall panels around the shower pay for themselves in upkeep.
Colour and contrast choices echo through the house; tiny house interior paint colours covers gentle palettes that keep small rooms feeling light without glare.
8. Lighting, Heating and Ventilation
Comfort systems carry extra weight in an accessible bathroom: users may spend longer in the room, sit lower in it, and notice glare, chill and steam more. Design all three systems from a seated eye level as well as a standing one.

- Layer bright, even light. Ceiling light plus mirror lighting at face height removes the shadows that make transfers and shaving guesswork.
- Avoid glare on wet floors. Diffused fittings and matt surfaces keep bright reflections from dazzling users with sensitive vision.
- Add a gentle night light. A low-level light on a sensor makes night trips safer without waking the whole household.
- Warm the room, safely. Underfloor heating keeps floors dry and warm and removes radiators that block walls; towel rails should be positioned so they never double as grab bars — they are not rated for it.
- Ventilate properly. An effective extractor keeps steam off mirrors and floors drier, which is a safety feature as much as a comfort one.
- Put switches within reach. Light, heat and fan controls at a height and position reachable from the doorway and from a chair keep the room independent to run.
Layered light transforms other compact rooms too; the lamp-at-several-heights approach in tiny house living room ideas translates directly, because a warm, evenly lit room always feels larger and safer.
9. Storage, Details and Dignity
The final layer is about dignity: a room that stores medicines discreetly, keeps aids tidy rather than clinical, and looks like a bathroom its owner chose — not a ward they were assigned.
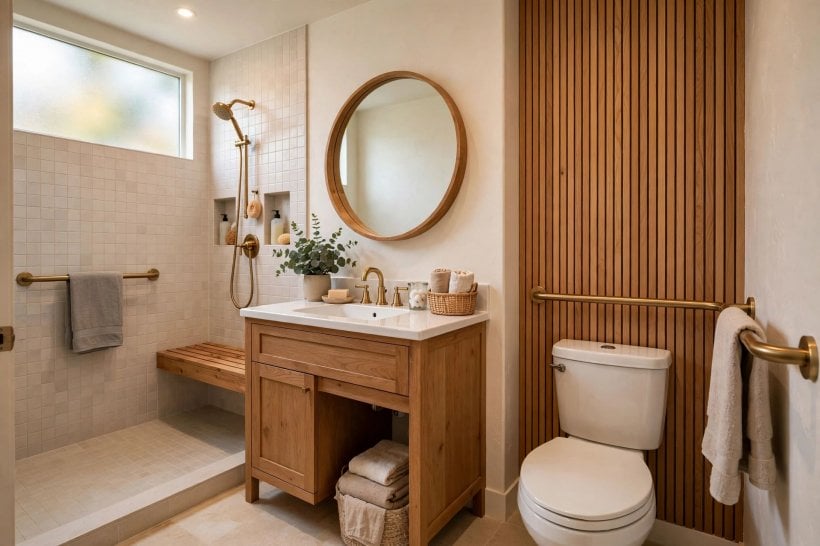
- Store daily items at seated reach. Toothbrush, medicines and towels between knee and shoulder height, in the order the routine uses them.
- Choose closed storage for supplies. Cupboards or baskets keep bulk medical and cleaning supplies out of sight and the room feeling like home.
- Add a place for the carer’s things. If help is part of the routine, a hook and a small shelf for the helper respect everyone’s comfort.
- Style it like any other room. A plant that likes humidity, a picture in a sealed frame, towels in a colour the owner loves — beauty is not a luxury extra here.
- Keep an aid kit tidy. A basket for the shower chair’s cushion, spare batteries and chargers prevents the scatter that makes small rooms feel chaotic.
- Plan a laundry route. A lidded basket on wheels or a chute nearby keeps towels and clothes from becoming floor obstacles.
Small, thoughtful storage is a theme across our favourite compact homes — see tiny house closet design ideas for zoning tricks that work in any room, and modern tiny house interior ideas for level-access thinking across a whole home.
10. Costs, Trades and Doing It in Stages
Accessible renovations range from a few rails and a seat to a full wet-room rebuild, and costs vary enormously by region and scope — so think in stages and in value, not in headline figures. Independence bought in the right order is money well spent at every stage.
- Stage one: safety and support. Grab bars, a shower seat, better lighting and slip-aware mats transform daily risk for the least disruption.
- Stage two: fixtures. Comfort-height toilet, lever taps, a handheld shower and a knee-friendly basin usually fit the existing layout.
- Stage three: structure. Door widening, level shower floors and layout changes belong to a planned renovation with proper trades and permits where required.
- Use experienced installers. Ask fitters about previous accessibility work, check references, and confirm who is responsible for waterproofing and for bar fixings.
- Ask about grants and support. Depending on where you live, local authorities, charities or health services may help with assessment or funding — ask locally rather than assuming.
- Involve the user at every stage. An occupational therapist’s assessment, where available, targets spending at the changes that will actually be used.
- Keep records of products and fixings. Note where wall reinforcement sits and what everything is rated for; future adjustments become simple instead of exploratory.
Done well, an accessible bathroom quietly stops being a topic at all — it is just the family’s bathroom, working for everyone who uses it, every single day.
Final Considerations
Design from the person’s routine outward: how they enter, turn, sit, reach and rest. Verify every dimension against the user, the equipment and your local codes, fix support into real structure, and never trade dignity for a clinical look. A bathroom planned with that respect gives back privacy, confidence and calm — and those are worth more than any single fixture in this article.


0 Comments