

A heavily textured stucco wall can make a home look dated and can trap dirt in every ridge, but a smoother finish is achievable without tearing the walls back to the frame. This guide explains stucco resurfacing in calm, practical steps: how to judge the existing finish, prepare and repair it properly, apply new coats evenly, and finish with paint that protects the work for years.

1. At a Glance: Is a Smoother Finish Right for Your Walls?
Smoothing stucco means adding new, finer coats over a sound existing finish rather than removing everything and starting again. Done well, stucco resurfacing can modernise the look of a house, make future repainting easier and give tired walls a clean, even background for colour. It is not a cover-up for failing walls, though. If the existing finish is crumbling, hollow-sounding in large areas, or wet from a leak, those problems must be diagnosed and fixed first, because new coats cannot rescue a base that is letting go.
Work through the checks in the table below before you buy materials. Look at the walls in raking morning or evening light, when texture and cracks show clearly, and photograph each elevation so you can plan sections and compare quotes fairly. Decide how smooth you actually want the result to be: a fine, sanded-look finish still hides minor unevenness, while a near-flat finish shows every wave in the wall beneath, and demands the most careful application. For exterior character ideas while you plan, this tiny barn house interior tour shows how simple surfaces and honest materials work together.
| Check | What to look for | Why it matters |
|---|---|---|
| Soundness | Firm finish that does not crumble when rubbed | New coats need a base that is staying put |
| Cracks | Hairline versus wide, moving or stepped cracks | Different cracks need different repairs first |
| Moisture | Damp patches, staining, peeling paint | Trapped moisture will spoil a new finish |
| Access | Room for ladders or a tower, safe footing | Even coats need steady, unhurried work |
| Weather window | Mild, dry days for application and curing | Rain and heat extremes ruin fresh coats |
| Finish goal | Fine texture versus near-flat | Decides coats, materials and effort |
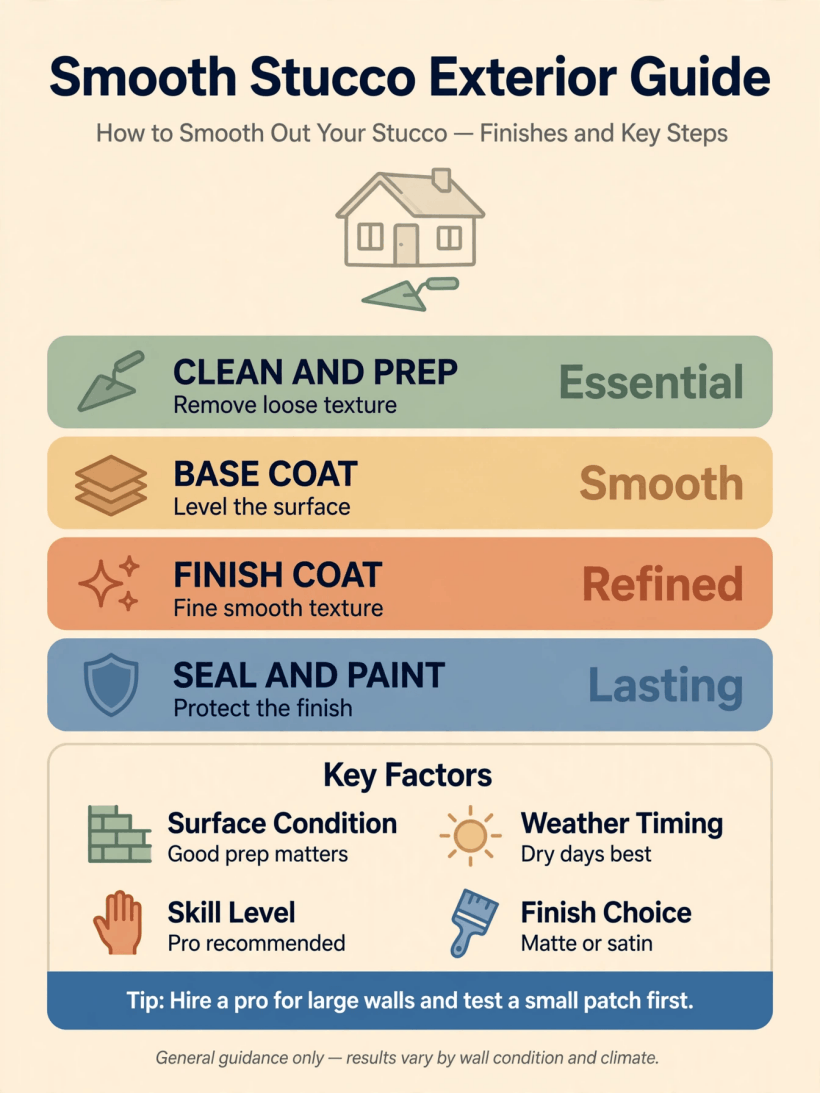
A quick visual summary of the assessment, preparation, coating and finishing steps covered in this guide.
2. Assess the Existing Finish and Find the Cause of Problems
Start with a slow walk around the whole building, notebook in hand. Tap the walls with your knuckles or a screwdriver handle as you go: sound stucco answers with a solid tap, while delaminated areas sound hollow and need marking with chalk. Note cracks and sort them mentally into fine surface crazing, which is usually cosmetic, and wider or stepped cracks, which can point to movement and deserve professional assessment before any cosmetic work. Photograph everything, including the junctions at windows, doors and the base of the wall.
Track down moisture sources next, because water causes most stucco failures. Check gutters and downpipes for leaks, look for soil, paving or planting built up against the wall base, and inspect around window sills where water can sit. Ground levels and drainage around the house matter here; these tiny house landscaping ideas cover paths and planting that keep water away from walls. Inside, matching damp patches on the same walls are a warning to fix the cause, not the symptom. Only when the wall is sound, dry and explained should smoothing begin.
3. Tools, Materials and Safety Gear to Gather First
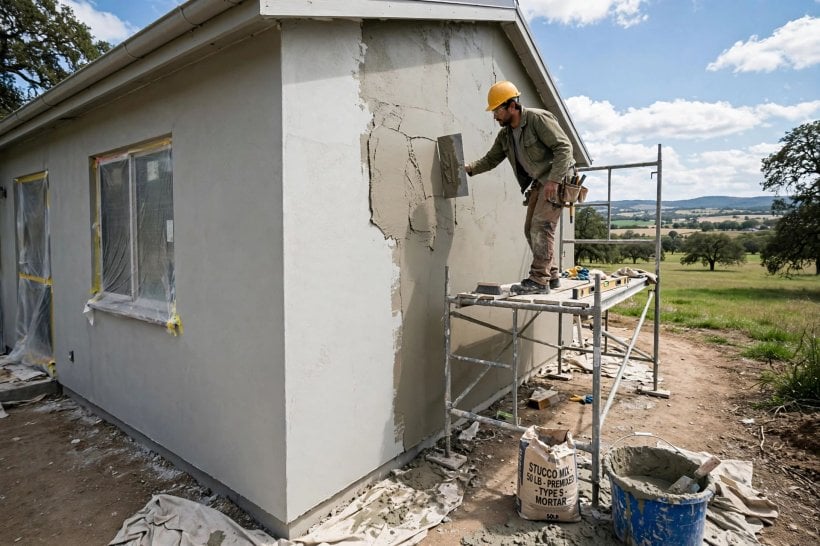
Good resurfacing is mostly preparation, and preparation needs the right kit ready before you mix anything. For cleaning and repairs you will want a stiff brush, a pressure washer used with care, buckets, a drill with a mixing paddle, hawks and trowels in a couple of sizes, a float suitable for your chosen finish, masking tape, dust sheets and protection for windows, doors, paths and planting. Buy repair mortar, bonding agent and finish coats that are made to work together, and follow the manufacturer’s instructions for each product rather than improvising mixes.
Safety deserves the same planning as materials. Resurfacing involves dust, alkaline wet mixes, working at height and repetitive arm work. Wear gloves, eye protection and a suitable dust mask when cutting, mixing or sanding, and follow the safety guidance printed on every product. Set up ladders or a work platform properly on firm ground, and never overreach to finish a patch; moving the platform takes a minute, while a fall costs far more. Keep children and pets away from the work area and from wet materials, and plan where you will wash tools so residue does not end up in drains or garden soil.

4. Clean and Prepare the Surface Thoroughly
New coats stick to clean, sound surfaces, not to dirt, algae or flaking paint. Start by brushing down loose material, then wash the walls to remove dust, grime and organic growth, allowing everything to dry fully afterwards. A pressure washer can speed this up, but use a gentle setting and keep the jet moving: blasting at close range can drive water behind the finish and damage the very surface you are trying to keep. Treat any mould or algae growth appropriately and rinse as directed, because growth left under a new coat can show through or push it off.
Preparation continues with protection and edging. Mask window frames, door furniture, lights and meter boxes, and lay sheets over paths and plants. Remove or tape around anything that would interrupt a trowel stroke, because a smooth finish is hardest to achieve around obstacles. Check the wall again once it is clean and dry; washing often reveals fine cracks and weak patches that dirt was hiding, and it is far better to find them now than after the first coat. Mark every repair on your photo plan, and let the wall dry completely before moving on, since moisture under new coats is a classic cause of blistering.
5. Repair Cracks, Patches and Loose Areas Before You Smooth
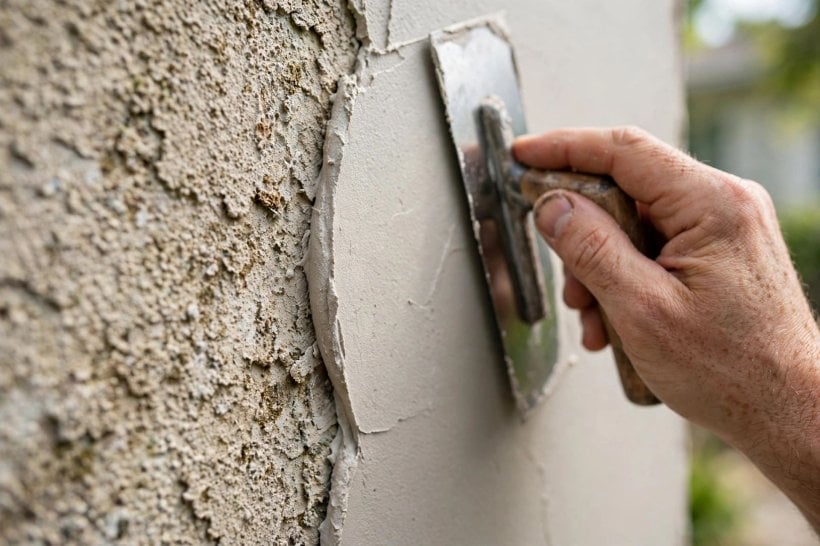
Repairs come before cosmetics. Cut out hollow or crumbling areas back to a firm edge, following product guidance for the repair system you are using, and fill them in layers if they are deep rather than in one thick lump that can slump and crack. Hairline cracks can often be filled with a suitable exterior filler or incorporated into the first coat, while wider cracks may need raking out and flexible repair so they do not telegraph straight through the new finish. Allow every repair to cure for the time the manufacturer states, not the time your schedule prefers.
Feather repair edges carefully so patches do not print through as visible islands under the smooth coat. Where patches meet sound texture, a slightly blended edge is more forgiving than a sharp step. The patience required is familiar to anyone who has prepared a bathroom wall for tiling, and these tiny house bathroom ideas show the same principle indoors: finishes only look good when the substrate is honest. If you uncover extensive hollowness, deep structural cracking or signs of water inside the wall as you repair, stop and get a professional opinion; those findings change the job from cosmetic to structural.

6. Apply a Bonding or Levelling Coat to Unite the Wall
With repairs cured, a bonding or levelling coat evens out the old texture and gives the finish coat something consistent to grip. Mix only what you can use within the product’s working time, to the consistency the manufacturer describes, and let it stand and be remixed if instructed. Apply the coat in manageable sections, working from the top of the wall down, pressing material firmly into the old texture so there are no trapped air pockets, then level it with long, even strokes. The aim at this stage is flatness and coverage, not final smoothness.
Keep a wet edge as you move across the wall, because joins between dried and fresh material can show as lines in the finished surface. Work in shade where you can, or follow the sun around the house, since a wall baking in direct sun can dry the coat before you have levelled it. While coats cure between stages, protect interior rooms nearby from dust when you sand or brush down, and take a moment to enjoy planning the inside too; these tiny house living room ideas are a pleasant contrast to ladder work. Check the levelling coat once dry for misses and ridges, and correct them now rather than hoping the finish coat will hide them.

7. Apply the Smooth Finish Coat in Manageable Sections
The finish coat is where the wall becomes smooth, so slow down. Work one elevation, or one natural section of an elevation between corners and openings, at a time, so you can keep a continuous wet edge from start to finish. Spread the coat thinly and evenly, then float or trowel it with consistent pressure and overlapping strokes to close the surface. Change your angle of view often; standing back and looking along the wall in raking light reveals trowel marks and hollows that are invisible face-on.
Consistency is everything. Mix each batch the same way, apply at the same thickness, and time your floating the same way, because small variations in any of these can dry into visible patchiness across a smooth surface. Avoid working in rain, frost risk or strong drying wind, and follow the product’s guidance on conditions rather than gambling a whole wall on the forecast. If a section goes wrong, it is usually better to correct it while the material is still workable than to sand and patch endlessly later. Keep edges at corners crisp by working to a straight edge or batten where the system allows, and clean tools frequently so dried lumps never scratch the fresh surface.

8. Let It Cure, Then Prime and Paint for Protection
Fresh stucco needs time. Protect new coats from rain, frost and rapid drying while they cure, following the manufacturer’s timings for recoating and painting rather than the temptation of a free weekend. Painting too soon can trap moisture and cause peeling, while leaving a finished wall unpainted for too long exposes it to weather it was not designed to face alone. When the wall is ready, use a primer or first coat suited to masonry and to the finish beneath it, applied as directed, because this layer is the handshake between the new surface and the paint.
Colour choice is the enjoyable part. Pale colours feel crisp and show the smoothness best in bright light, mid-tones are forgiving of dust and splashes, and deeper shades can look striking on simple house shapes. Test large areas on the least visible elevation and view them at different times of day before committing. The cheerful schemes in this colourful tiny house interior tour are indoor inspiration, but the lesson transfers: live with samples before you decide. Apply paint evenly, keep a wet edge, and record the exact products and colours you used, with dates, in a house file for future touch-ups.

9. Maintain the New Finish and Spot Problems Early
A smooth exterior is easier to look after than a deeply textured one, because dirt has fewer ledges to sit on and cracks are easier to see. Walk the walls once or twice a year with the same care as your first inspection: look for hairline cracks, staining under sills, growth in shaded corners and any impact damage at the wall base. Wash gentle dirt away with a soft brush and water, and deal with small cracks promptly with suitable filler and matching paint before water gets a foothold.
Keep the wall’s enemies at bay. Maintain gutters and downpipes so water never sheets down the finish, trim planting back so foliage does not hold damp against the surface, and keep soil and mulch below the base of the render. These tiny house landscaping ideas will help you plan beds and paths that protect walls rather than soak them. After storms, check for new cracks or chips, especially around openings and at corners. Small, early maintenance is quick and inexpensive; neglected damage is how a sound resurfacing job turns back into a repair project, so treat the annual walk-around as part of owning the finish.

10. Costs, Time and the Mistakes That Spoil a Smooth Finish
Budget honestly by separating the job into stages: access equipment, cleaning and preparation, repairs, coats, primer and paint, and your own or a professional’s labour. Get written quotes that describe the same stages and products, because a single vague figure hides where money is being saved, and in resurfacing the savings usually come out of preparation, which is exactly where quality lives. Keep a contingency for what inspection cannot see, such as larger hollow areas found during repairs, and remember that doing one elevation well beats rushing the whole house badly.
The common mistakes are consistent: smoothing over damp or hollow walls, skipping curing times, mixing inconsistently, working in harsh sun or rain, and choosing the smoothest possible finish for a wall that is not flat. Avoid them by slowing down at assessment and preparation, which together decide most of the result. If your walls are part of a bigger home project, this overview of how to build your own tiny house shows how exterior decisions fit into a whole build sequence. And know when to hand over: large areas of delamination, structural cracking, or work at height beyond your safe access are professional jobs, and a good contractor’s quote is information, not defeat.
Final Considerations
Smoothing a stucco exterior is less about a magic product than about a disciplined order of work: assess honestly, find and fix the causes of damage, clean and repair thoroughly, level, finish in calm sections, cure properly and protect with paint. Respect the timings on the products you choose, keep safety in view at every height, and maintain the result with a short annual inspection. Do that, and tired, heavy texture gives way to a clean, quiet finish that makes the whole house look cared for, and stays that way.



0 Comments