

Every log cabin builder should start with a shed. An 8×10 garden structure teaches the whole craft — notching, settling, chinking, roofing — at a scale where mistakes cost a weekend instead of a season, and when it is done you own the best-looking tool shed in the county. This guide scales the cabin craft down to garden size, course by course.
1. DIY Log Cabins at a Glance
DIY log cabins begin, sensibly, at shed scale: a small round-log structure of 8×10 to 10×12 ft that teaches every skill the full cabin needs — notching, settling, chinking, roofing — on a building that is genuinely useful from the day the roof goes on. The small round-log shed is the perfect cabin apprenticeship: a forgiving scale, real techniques, and no wasted work, because the finished structure stores tools, dries firewood, or works as a garden office. The table gathers the whole build in one place; the sections after it take the foundation, the design, the notches, the raising, the roof, the sealing, the finish, the uses and the progression apart in turn.
| Attribute | Detail |
|---|---|
| The Structure | A small round-log shed or garden structure — the cabin craft in miniature, and the rehearsal for a full cabin |
| The Size | 8×10 to 10×12 ft — big enough for tools, firewood, or a garden office; small enough to build solo with a helper |
| The Logs | 6–10″ diameter — 8″ is the sweet spot: manageable weight, reasonable course count |
| Wall Height | 6–7 ft at the eaves, with the ridge at 9–10 ft for the roof pitch |
| The Foundation | Concrete piers (the standard), stone piers (the traditional) or skids (the movable shed) — level within 1/4″ |
| The Notches | Full-scribe or saddle-notch (the authentic); butt-and-pass (faster, more forgiving — the beginner’s notch) |
| Corner Overhang | 12–18″ where the logs cross — the signature log-cabin corner |
| Settling Allowance | 1–2″ as green logs shrink — door and window openings framed with slip joints |
| The Roof | 8/12 minimum pitch, 18–24″ overhangs — metal roofing (40-year) or cedar shakes |
| The Chinking | Mortar or synthetic chink between the logs — applied after one heating season, once the logs have settled |
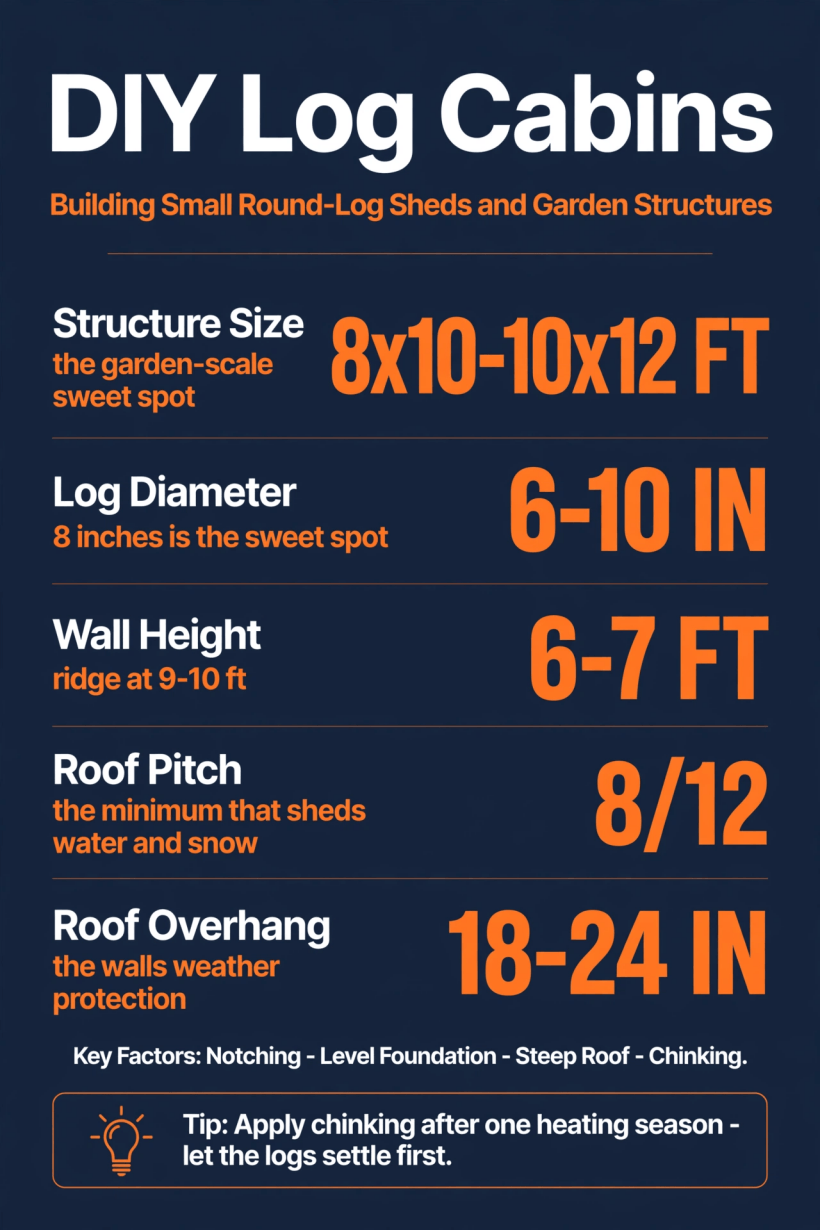
Eight by ten feet, eight-inch logs, an 8/12 roof and chinking after the first heating season — the whole shed build on one card.
Read the table as a dependency chain. The foundation’s level decides whether the walls rise true; the log diameter decides the course count and the lifting work; the notch decides how the corners hold and how the building settles; and the roof’s pitch and overhang decide how long the logs below them survive the weather. Each attribute is small on its own — a quarter-inch of level, an inch of settling allowance — but on a log building they compound course by course, which is why the checks in this guide are scheduled as often as the work itself.
2. Foundation: The Sill Logs’ Bed
Three foundation options carry a small log structure, and each is honest about what it is. Concrete piers are the standard: 6–8 piers, sonotubes, above grade, with the sill logs sitting on the piers. Stone piers are the traditional: flat fieldstones stacked dry-laid, the foundation log buildings have stood on for centuries. Skids are the third way: two treated timbers on gravel — the movable shed, not a permanent foundation but honest about it, and the right choice where the structure may one day move or where permanence is not wanted.
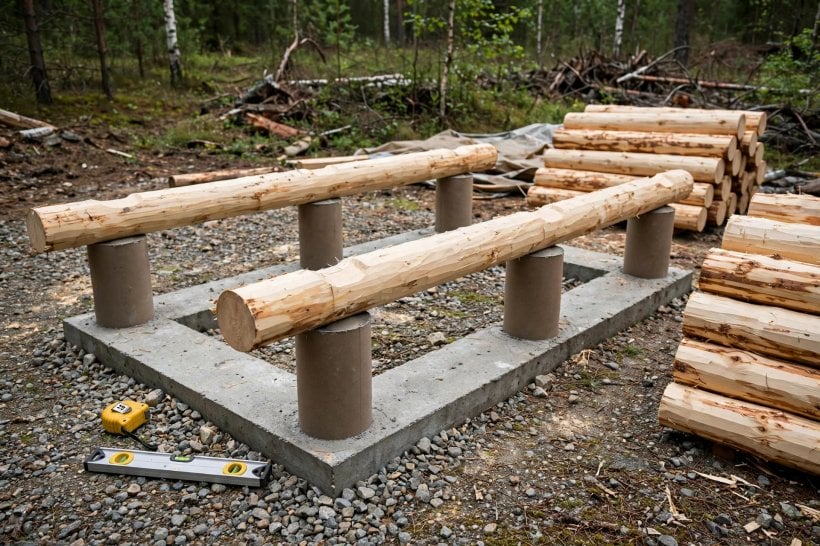
Two tolerances govern whichever option you choose. Level comes first: within 1/4″ across all piers, because the log walls forgive little — an unlevel foundation telegraphs up every course, and a corner that starts low finishes low. Moisture comes second: 6″ or more of clearance under the sill logs, for airflow. The sill is the most vulnerable log in the building; keep it dry and it lasts, keep it damp and it rots first. The sill logs themselves are the biggest, straightest logs you have — the foundation course, half-logs or full logs, bark peeled, ends sealed, chosen with the same care as the bench logs in the rustic log cabin bench build, where one good trunk becomes the whole project.
3. Design: Sizing the Small Structure
The sweet spot for the structure itself is 8×10 to 10×12 ft: big enough for tools, firewood, or a garden office; small enough to build solo with a helper. Wall height runs 6–7 ft at the eaves — stand comfortably — with the ridge at 9–10 ft for the roof pitch. Log diameter runs 6–10″: smaller logs mean more courses and more work, and 8″ is the sweet spot, manageable weight with a reasonable course count. Style is the design’s other decision, full-scribe or saddle-notch for the authentic build, or butt-and-pass, faster and more forgiving — the beginner’s notch, detailed in §4.
Permits are the design step nobody wants and everybody needs: check local rules before building, because many jurisdictions exempt structures under 100–200 sq ft — the shed loophole, and at 8×10 or 10×12 ft the building is sized to sit inside it. Verify before building, not after. Siting follows the same garden logic as the structure’s rustic relatives: the shed belongs in the same round-log material family as the rustic log fencing that may one day run beside it, and a structure planned with its fences, paths and beds reads as one designed corner of the property rather than an afterthought dropped on the lawn.
4. Notching: The Joints That Hold
Three notches cover the craft, from the classic to the craftsman’s. The saddle notch is the classic: each log notched to straddle the one below, held by gravity and friction, cut with chainsaw and chisel — the interlocking corner. Butt-and-pass is the beginner’s: log ends butted against the perpendicular log and pinned with rebar, no notching at all — faster, slightly less weathertight. Full scribe is the craftsman’s method: the entire log scribed to fit the one below, the tightest and most beautiful fit, and the slowest. Whichever you choose, the corners alternate the overhang — the log-cabin cross, 12–18″ of overhang at the corners, the signature of the whole building type.
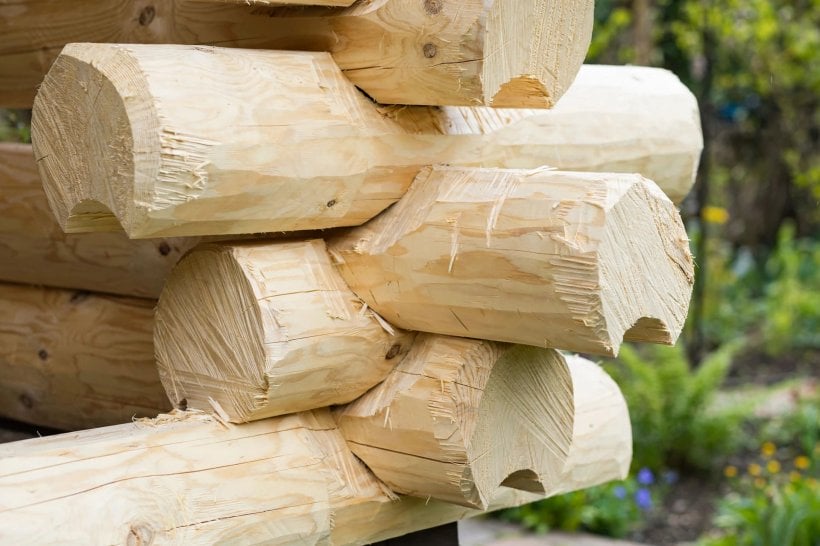
Settling is designed into the joints, not discovered later. Allow 1–2″ of settling as green logs shrink, and frame door and window openings with slip joints: the cabin settles, the openings don’t bind. A door framed tight into a green-log wall is a door that sticks shut by the second season; a door hung in a slip joint rides the wall down and swings free for decades. The behaviour of green wood — how it moves as it dries, and how a builder works with the movement instead of against it — is the same material lesson the carvers learn in green wood carving, where the wood is shaped fresh and the drying is planned from the first cut.
5. Raising the Walls: Course by Course
The walls rise in a rhythm: sill logs, then course 1 front and back, then course 1 on the sides, then alternate — opposite walls, then the other pair — so the box rises evenly. Lifting is traditional tackle: log ramps and a peavey, rolling logs up inclined skids; a helper and a cant hook move 200-lb logs safely, and the ramps turn a lift that would need a crew into a roll that needs two people and patience. Between courses goes the insulation: foam gasket or oakum, the compressible strips that form the air seal before the chinking, the chinking’s precursor laid course by course as the walls rise.
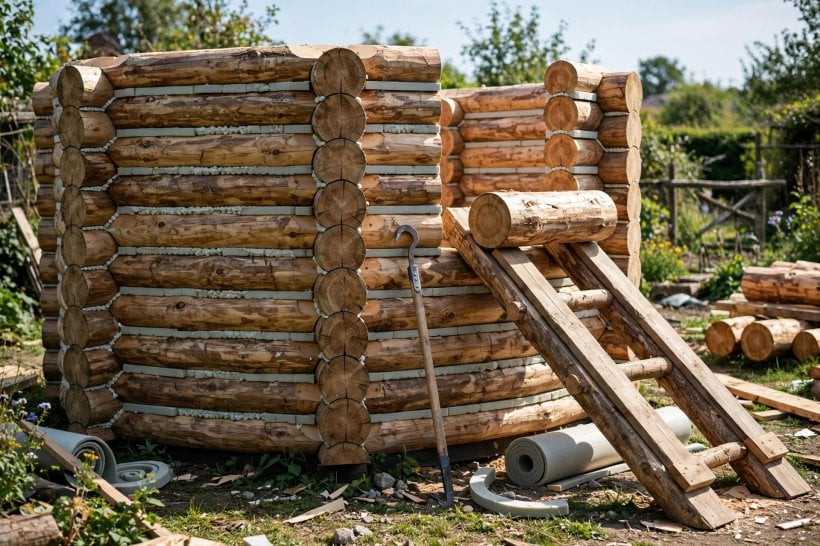
The checking discipline is as regular as the rhythm: plumb and level every 2 courses, because the drift compounds — a 1/2″ lean at course 3 is a 2″ lean at course 10, and correcting early costs a nudge where correcting late costs a rebuild. Openings come last: cut the door and window openings after the walls are up, chainsawing them through the finished courses while the surrounding logs hold everything in place, then frame them with the slip joints of §4. It feels backwards to build a solid wall and then cut holes in it, but the log wall is strongest uncut, and the openings inherit their squareness from the wall around them.
6. Roof: The Cap
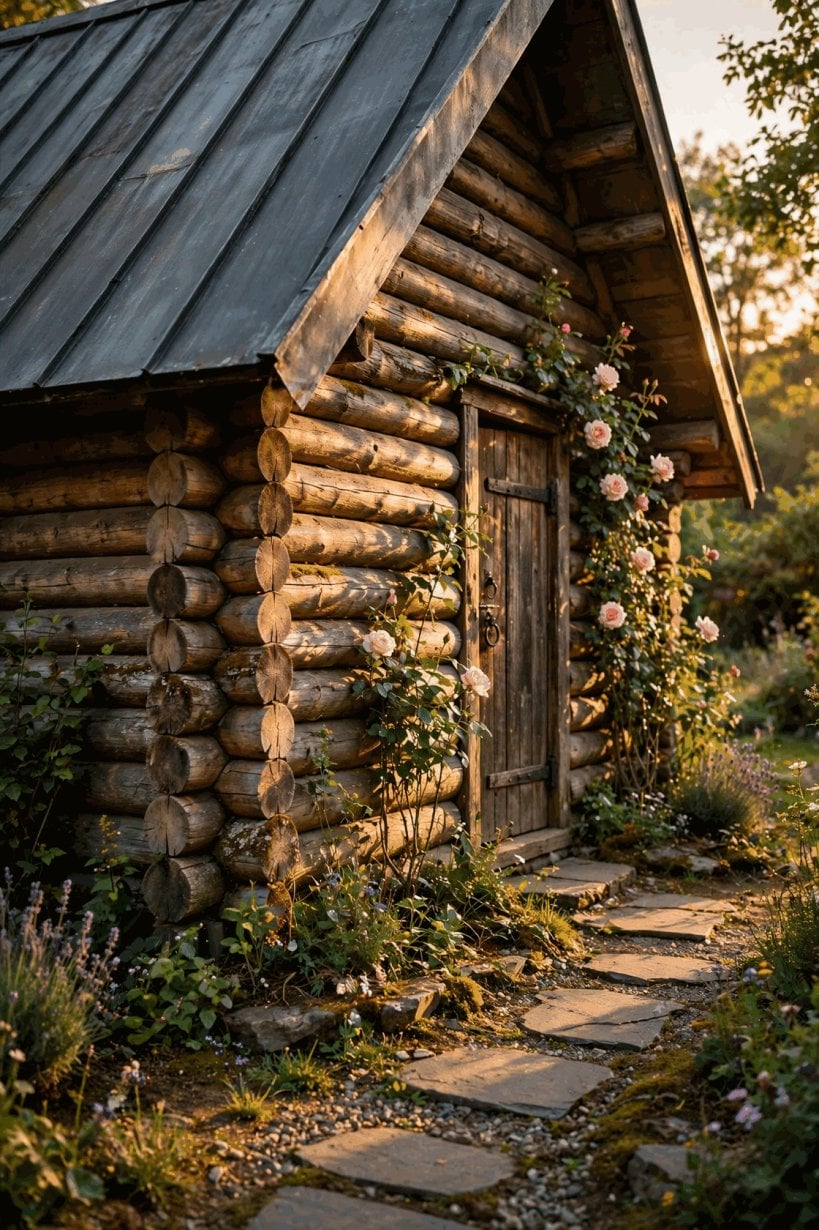
The roof structure is a ridge beam and purlins, or rafters: the ridge log spans the gables and purlins run eave-to-ridge, or conventional rafters do the same work as the hybrid. Pitch is non-negotiable at 8/12 minimum, because shallow log roofs leak — the steep pitch is the waterproofing, shedding water and snow before either can sit and work at the seams. Decking is 1× boards or plywood, the substrate under the covering. The covering itself is a three-way choice: metal roofing, the practical option at a 40-year life that sheds snow; cedar shakes, the traditional and beautiful; or a living roof, the garden shed’s crown — but heavy, so engineer for it.
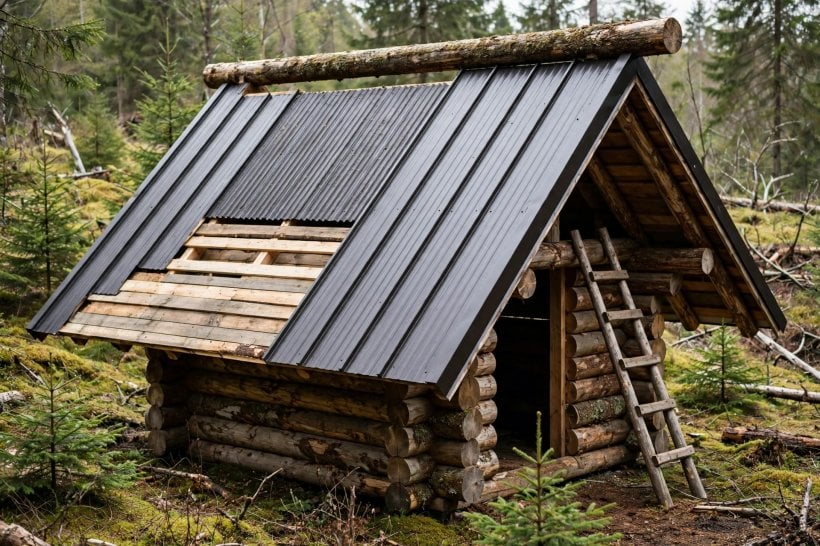
The overhang is the roof’s gift to the walls: 18–24″, protecting the log walls below, because the roof’s overhang IS the wall’s weather protection — generous eaves double log life. Every inch of eave is an inch of rain thrown clear of the logs, the chinking and the foundation, and on a building whose walls are its structure, that protection is not styling. It is the single cheapest longevity decision in the whole build, made once at the roof and paid back every storm for the life of the shed.
7. Chinking and Sealing: The Weatherproofing
Chinking fills the gaps between logs — the traditional lime mortar or the modern synthetic chink such as Perma-Chink — and its timing is the section’s first rule: apply it after one heating season. Let the logs settle first, through the 1–2″ of movement designed into §4, and the chink goes into gaps that have reached their working width; chink a green wall in its first month and the settling tears the seal you just paid for. The end grain is sealed as its own step: the checks start at the log ends, so the ends get the end-sealer or the finish system’s end treatment before the weather finds them.
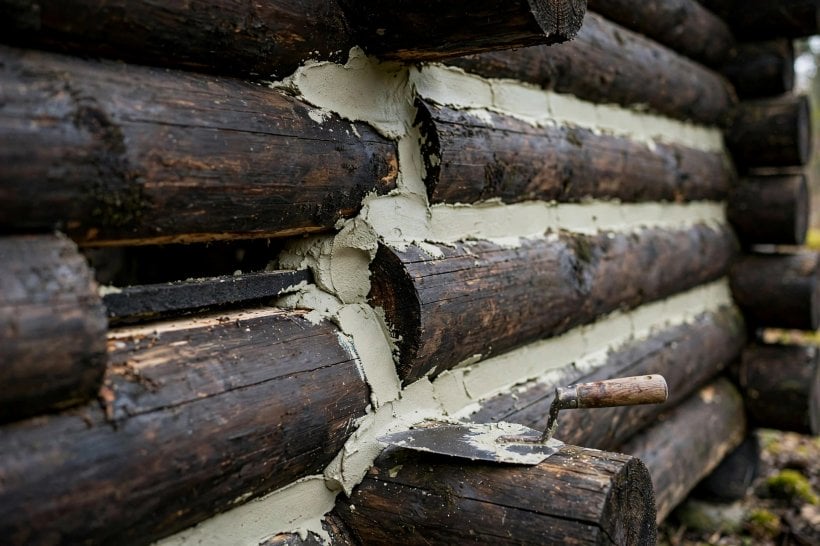
The sealing system around the chinking is where a log shed meets the wider craft of keeping outdoor wood alive. The exterior finish — a borate treatment plus stain, the log-home finish system — is the same protective logic worked through for smaller pieces in the guide to protecting outdoor log crafts, scaled up from benches and planters to a whole building. And the stain decision itself, film versus penetration and what each asks in maintenance over the years, follows the trade-offs laid out in the paint vs stain comparison — on a log wall the answer matters more, because the wall cannot be taken indoors to dry.
8. Finishing the Interior: The Log Wall Is the Finish
Inside, the rule is restraint: leave the logs exposed. The interior log wall is the finish — seal it with a clear matte and stop, because the round-log surface that took the work to raise is the room’s whole character, and covering it would pay twice for one wall. The exterior finish of §7 is reapplied per the manufacturer, the maintenance rhythm of the building: borate and stain against rot and UV, end treatment on the log ends, and the chinking inspected where the settling season tested it. A log shed asks for this attention on a schedule of years, not weekends — the dividend of building the weather protection into the roof overhang and the foundation clearance in the first place.
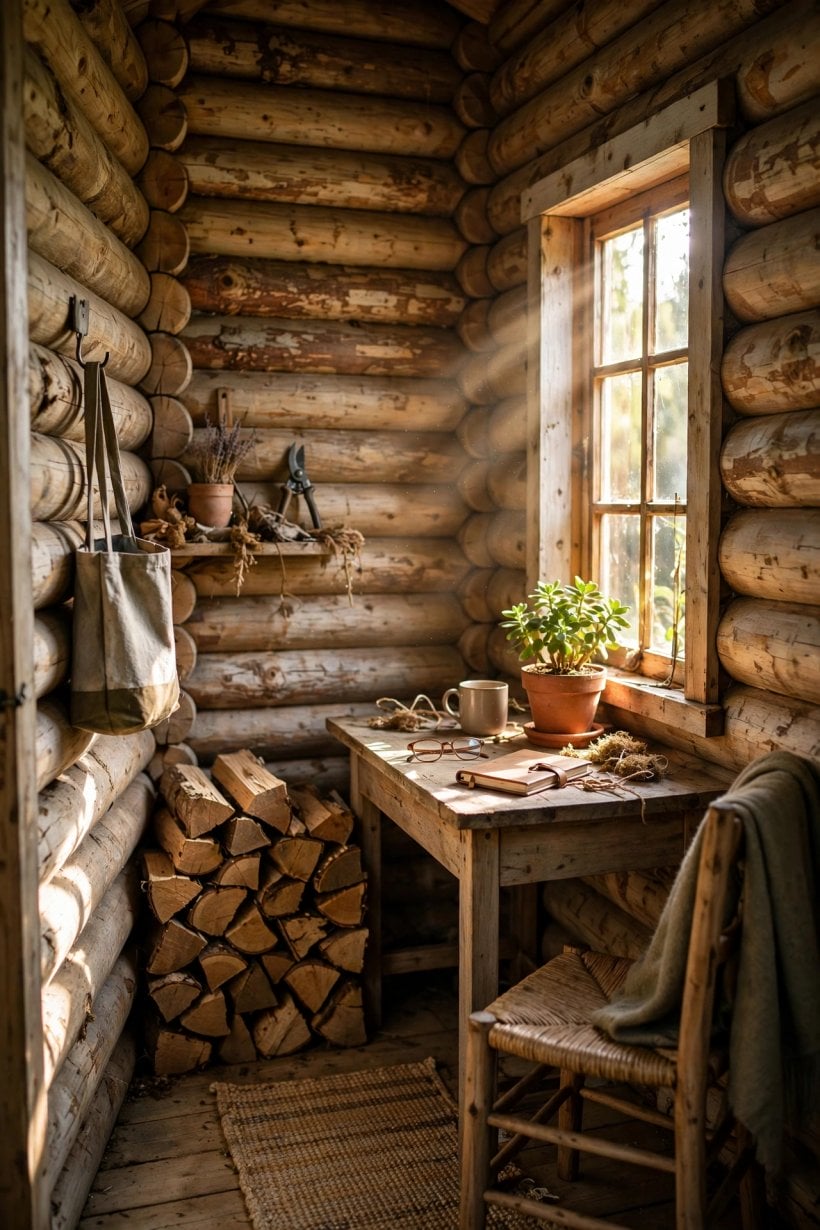
The interior’s usefulness is designed at this stage too. A garden office version adds interior framing and insulation inside the log shell — the cabin that pays rent, in the original’s phrase — while the working shed keeps its walls bare for hooks, shelves and the potting bench. Either way, the offcuts of the build feed the smaller craft: the short log ends and rejected rounds become the candle holders, coasters and planters of the log craft ideas collection, so even the waste pile of a shed build comes out furnished.
9. Uses: What the Small Cabin Becomes
The finished structure earns its ground five ways. The garden shed is the obvious: tools, pots, the potting bench — the working shed. The firewood store is the woodshed: one side left open, the drying shed, where the log construction breathes around the fuel stack. The garden office is the insulated version of §8, interior framing and insulation turning the shed into the backyard office. The sauna is the traditional: small log structures ARE saunas in Finland, needing only the heater and benches to become the authentic thing. And the playhouse is the kids’ cabin, the small scale perfect — the childhood memory, built at a size where a child stands in a real log building.
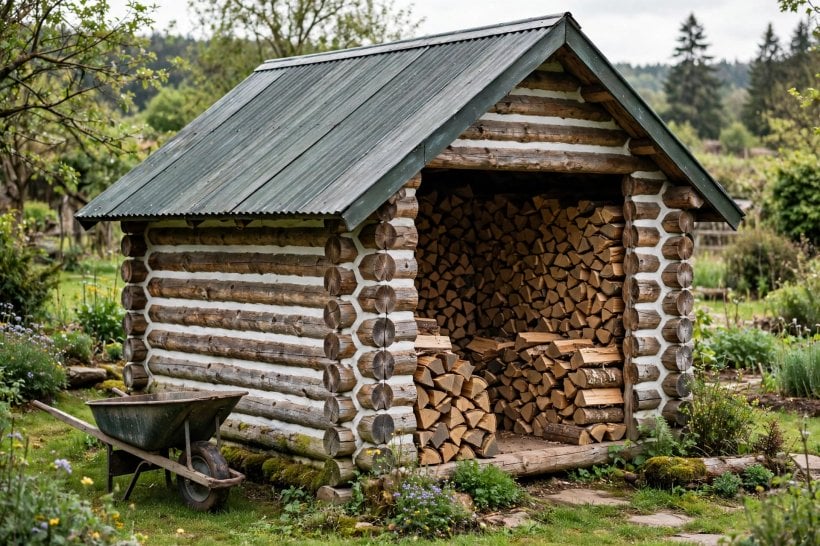
What unites the five uses is that none of them was an afterthought: the 8×10 to 10×12 ft footprint, the standing-height walls and the steep weatherproof roof serve each of them without alteration, which is the quiet argument for building the shed properly in the first place. A structure raised to cabin standard can become anything on the list as life changes — shed this decade, office the next, sauna after that. The outdoor pieces that gather around it, planters and furniture and garden structures of the same material, are developed in the guide to log projects for outdoor furniture and garden planters, where the shed stands as the largest member of the family.
10. The Progression: Build the Shed, Then the Cabin
The progression is the point of the whole exercise: build the shed, then the cabin, because every skill transfers — the shed is the rehearsal. The notching you learned at 8″ diameter is the notching of a full cabin wall. The settling you allowed for, the slip joints you framed, the chinking you timed to a heating season, the roof you pitched steep and overhung generously: all of it is the cabin craft entire, performed once at garden scale where a mistake costs a weekend instead of a season. A builder who has raised the small structure knows the sequence in their hands, not just on the page.
The shed also answers the question the full cabin asks before it starts: whether this craft is your project at all. Some builders finish the shed and know the cabin is next; others finish it, look at the best-looking tool shed in the county, and know their apprenticeship graduated them exactly as far as they wanted to go. Both answers are successes, and both were bought at shed prices. That is the small structure’s final attribute: it is the cheapest honest way to find out, with a useful building as the tuition either way.
Final Considerations
Size it 8×10 to 10×12, found it on level piers with airflow under the sills, notch honestly — saddle for beauty, butt-and-pass for speed — raise it course by course checking plumb every two, roof it steep at 8/12 or better with 18–24″ overhangs, chink after one heating season of settling, and finish the exterior against rot and sun. The small log structure is the cabin craft in miniature: build it well, and the full-size cabin is just more of the same.


0 Comments