

A white vinyl fence around a country property looks like an apology. A wooden one built from the land’s own timber looks like a signature. This guide builds both classic forms — the posted split-rail run and the round-log fence — from the riving bench to the final gate, with every dimension taken from the traditional build.
1. Rustic Log Fencing at a Glance
Rustic log fencing is the craft of enclosing country land with split rails and round logs instead of milled lumber or manufactured panels. The fence is a system of interdependent attributes: the species decides the lifespan, the post depth decides whether frost moves the line, the spacing decides the rhythm the eye reads, and the assembly method — zigzag, mortised, pinned or stacked — decides how much labor the land asks of you. The table gathers the whole build in one place; the sections after it take the two fence dialects, the riving, the post-setting, the assembly, the livestock question and the upkeep apart in turn.
| Attribute | Detail |
|---|---|
| The Two Forms | Split-rail — the farm dialect — and round-log fences — the homestead dialect |
| Fence Height | 3–4 ft — a boundary marker; rails alone contain aesthetics, not livestock |
| Posts per 100 ft | 10–13 posts, 6–8″ diameter, 5–6 ft long |
| Rails per 100 ft | 20–30 rails, 10–11 ft long, split halves 4–6″ wide |
| Post Depth | 2.5–3 ft — below the frost line, set in tamped earth or gravel, never concrete |
| Post Spacing | 8–10 ft — rail length minus overlap; the spacing is the fence’s visual rhythm |
| The Rail Log | Straight-grained, 8–12″ diameter, 10–11 ft long — oak, cedar or ash |
| Riving Yield | 4–8 rails per log — halves, then quarters; split green, never dry |
| The Species Ladder | Black locust and cedar 20–30 years, oak 15–20, pine just 5–8 |
| The Finish | None — weathered gray is the look; the fence is left to silver |
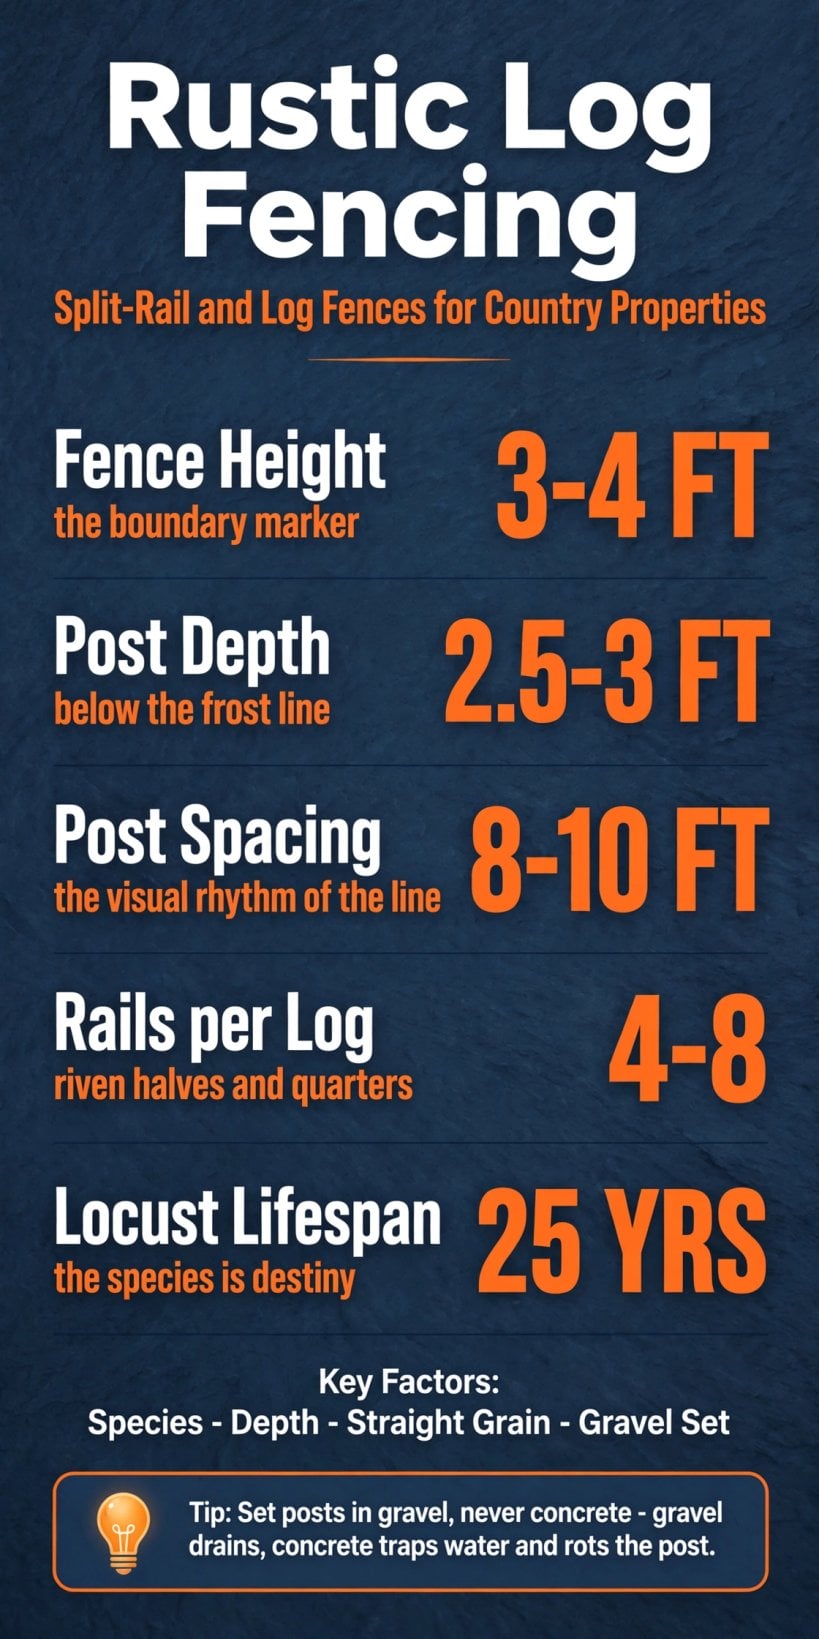
Three to four feet high, posts three feet down and a quarter-century in a locust rail — the whole fence on one card.
Read the table as a chain of consequences rather than a shopping list. The species you fell decides how long the fence stands; the depth you dig decides whether it stands straight; the spacing you measure decides whether it looks deliberate. Every later section is one link of that chain, and the chain begins — as the fence itself does — with choosing which of the two traditional forms your land is asking for.
2. The Two Dialects: Farm Split-Rail and Homestead Log
A rustic fence speaks one of two dialects, and the original guide names the difference plainly: log fences read “homestead” where split-rail reads “farm.” Split-rail is the American classic — horizontal split rails carried on vertical posts — and it has marked farm boundaries for three centuries because it belongs to the landscape it encloses: weathered, honest, and built from the very woods it borders. The round-log forms — stacked, vertical and post-and-log — bring the same honesty in rounder form, reading as settlement and shelter rather than pasture and crop.
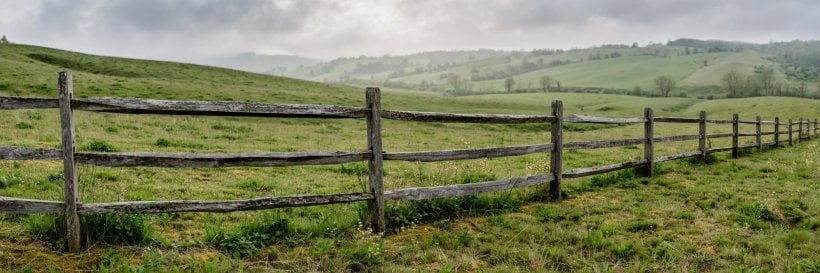
Both dialects are buildable with basic tools, local timber and a weekend, and both sit inside the same family of work as the wider log projects for outdoor furniture and garden planters — one timber supply, one set of hand skills, and a whole property furnished from its own woodlot. The smaller offcuts and rounds feed the household end of the craft in the log craft ideas collection, and the seat that belongs inside the finished fence line comes from the same timber and the same tradition — the rustic log cabin bench. Choosing the dialect is therefore not a technical decision first; it is a statement about what kind of place this is, made in timber, at the boundary, where every visitor reads it before they reach the door.
3. Riving the Rails: Splitting Logs the Traditional Way
Every rail begins as a round log, and riving — splitting along the grain rather than sawing across it — is the craft that turns one into the other. The log specification is strict: straight-grained, 8–12″ in diameter and 10–11 ft long, in oak, cedar or ash. The reason is in the wood itself: straight grain splits, while twisted grain fights, and a rail riven along its fibers keeps the log’s full-length strength, because no fiber is cut short the way a saw cuts it.
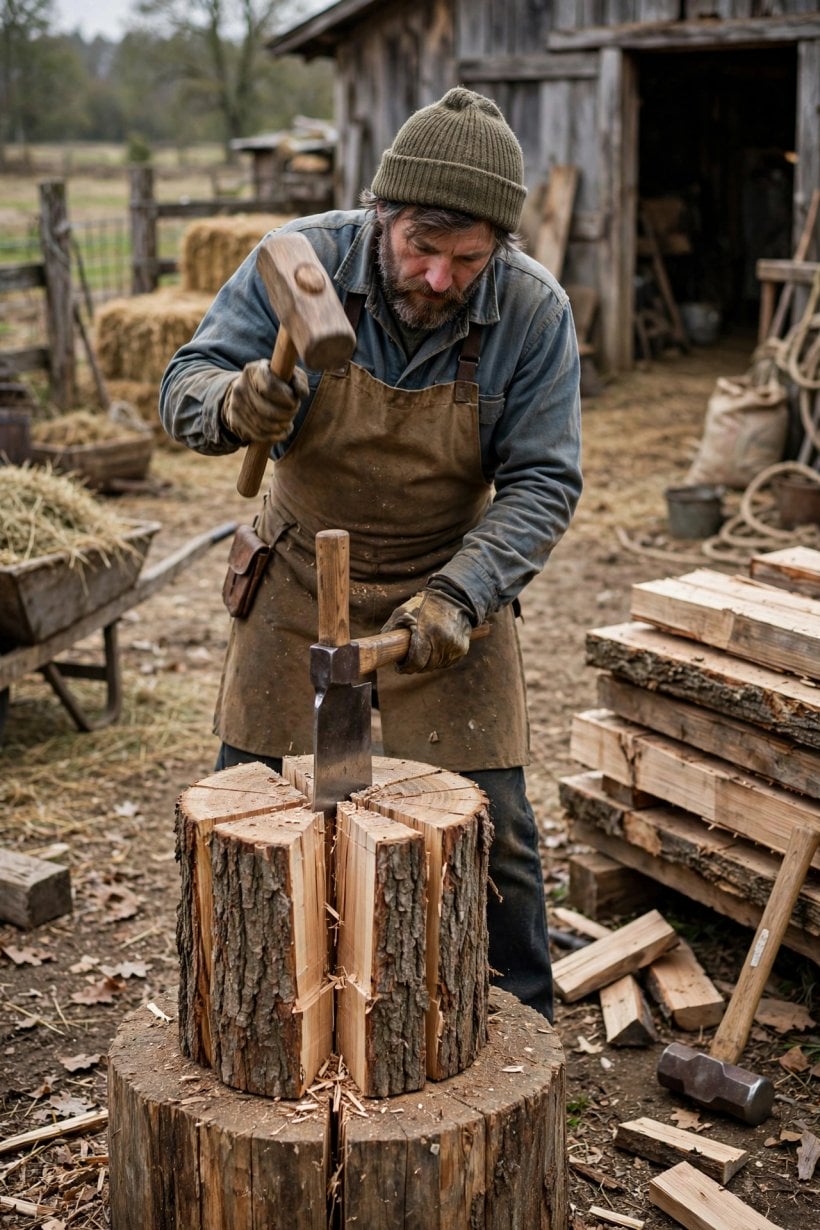
The traditional kit is two tools: a froe with its mallet, and wedges with a sledge — $80 total in the original’s costing. The technique starts at the log’s end: the froe is driven in and levered, following the grain, because the wood tells you where it wants to split. From there the wedges leapfrog down the length, opening the split a little at a time. Patience beats force — forcing a split across the grain ruins the rail. The yield is the craft’s quiet economy: 4–8 rails per log, split first into halves and then into quarters, so the riving multiplies the timber. And the timing rule is absolute: split green. Fresh logs split easiest because the fibers separate willingly; dry logs are stubborn. The splitting discipline is shared with the crosscut side of the craft — the guide to slicing wood cookies without cracking works the same green logs from the other direction, and both crafts reward the builder who works the timber while it is fresh.
4. Setting Posts: Depth, Gravel and the Frost Line
If the species is the fence’s lifespan, the post hole is its posture. The depth specification is 2.5–3 ft — below the frost line — because the fence’s longevity is in the post depth: a post founded above the frost line is lifted a fraction every winter, and a line of lifted posts leans a little more each year until the whole run looks neglected. Dig to the full depth, every post, even when the digging gets hard near the bottom of the line.
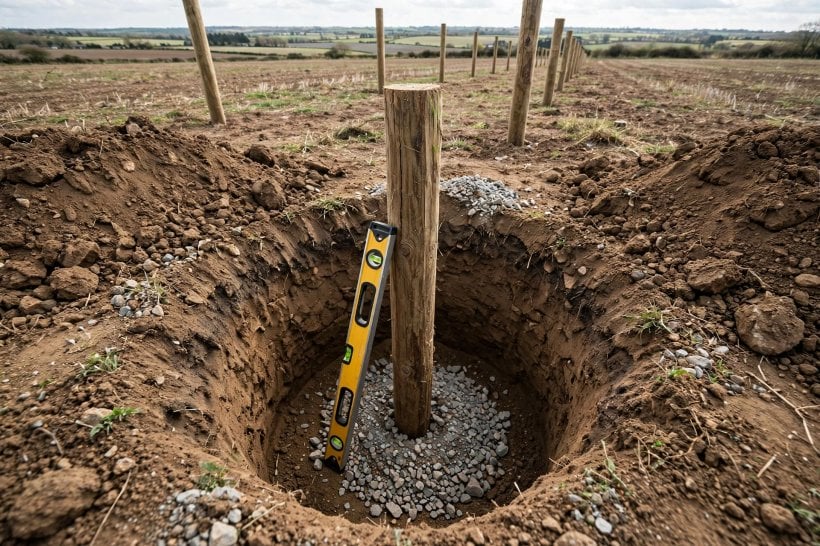
The setting method carries the section’s hardest rule: tamped earth or gravel — NOT concrete. The gravel-set post drains, and a post that drains lasts; concrete traps water against the wood and rots the post faster. It is the same drainage lesson the rustic log arbor build applies to its own uprights, and it holds for every wooden post that goes into the ground. Spacing runs 8–10 ft — rail length minus overlap — and consistency is the point: the spacing is the visual rhythm of the finished fence, so measure it, don’t eyeball it. Every post is set plumb with the level, because a leaning fence line looks neglected from day one. And the post tops are finished against the weather: bevel them at 45° or cap them with cedar, so the top sheds water — the flat-cut post top is a rot invitation, and the small angle adds years.
5. Assembling the Fence: Hanging Rails and Stacking Logs
With the posts standing, the rails go up — and the assembly sequence is an assembly line: set all posts first, then hang rails bottom-up, posts one day and rails the next. The straight split-rail run stacks its rails 2–3 high against the posts. Four joining methods cover the range from purist to practical. Mortised posts are the traditional joint: holes chiseled into the post to receive the rail ends, no fasteners at all, the rails’ own weight locking them — the most beautiful and the most labor-intensive. Pinned rails are the practical modern answer: rails through-bolted or lag-screwed to the posts, 2 rails per post face, at offset heights for the rustic stagger.
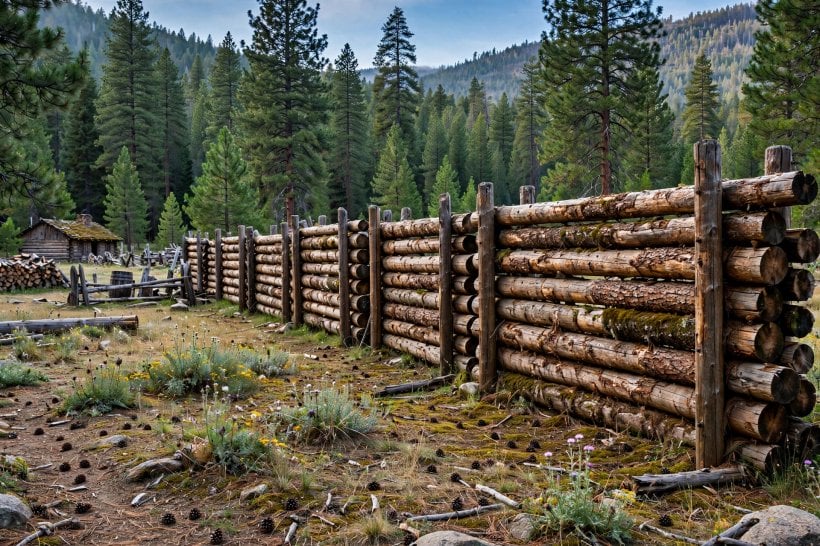
The round-log forms assemble differently: whole logs stacked 3–4 high between paired posts — the Lincoln-log fence, massive and rustic, the frontier look. Its crossings are joined with the log-cabin technique, saddle-notched so the stack is stable without fasteners, or pinned with 1/2″ rebar driven through the stacked logs — the invisible strength inside the rustic face. The saddle notch is borrowed directly from cabin building, and the small-structure version of the same joinery is worked through in the DIY log cabin shed guide, where the notch carries a roof instead of a boundary. Whichever method you choose, the principle underneath is the same: the fence holds itself together by weight, notch and gravity first, and by hardware only where the modern pinned method trades a little purity for a lot of speed.
6. The Palisade: Vertical Logs for Privacy and Security
The third form turns the log on end. The palisade stands its logs upright, shoulder to shoulder, with 4–5 ft exposed above the ground — the fort, in the original’s word — and it trades the open boundary-marking of rails for maximum privacy and security. A palisade does not suggest a boundary; it encloses one, blocking sightlines as completely as it blocks passage, which makes it the form for the garden side of a property, the yard around a house, or any ground where what is inside is meant to stay unseen and undisturbed.
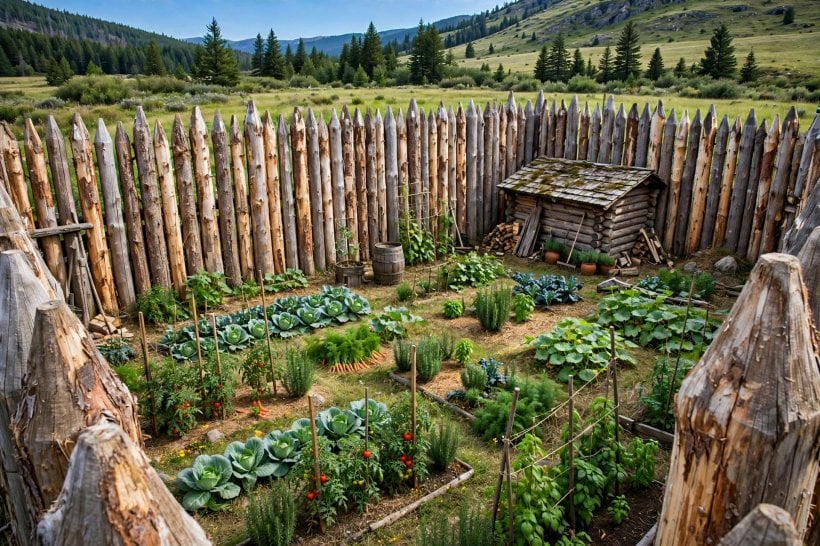
It is also, honestly, the most timber-intensive of the forms: a solid wall of upright logs consumes far more wood per foot than rails stacked 2–3 high or logs stacked 3–4 high, and every one of those uprights goes into the ground, so the post-setting discipline of §4 — full depth, gravel drainage, water shed from the tops — applies to every single log in the run, not just to posts at 8–10 ft intervals. Choose the palisade where its two gifts, privacy and security, are worth that timber bill; everywhere else, the open forms do the boundary’s work at a fraction of the wood.
7. Livestock and Function: Wire, Electric, Height and Gates
Here the guide tells the truth about its own subject: rustic fences alone don’t contain animals. A 3-rail fence is a suggestion to a determined horse, and the 3–4 ft height that makes split-rail a perfect boundary marker makes it a poor barrier. The fence declares the boundary beautifully; keeping livestock inside it takes one of three functional upgrades, each invisible enough to leave the rustic face intact.
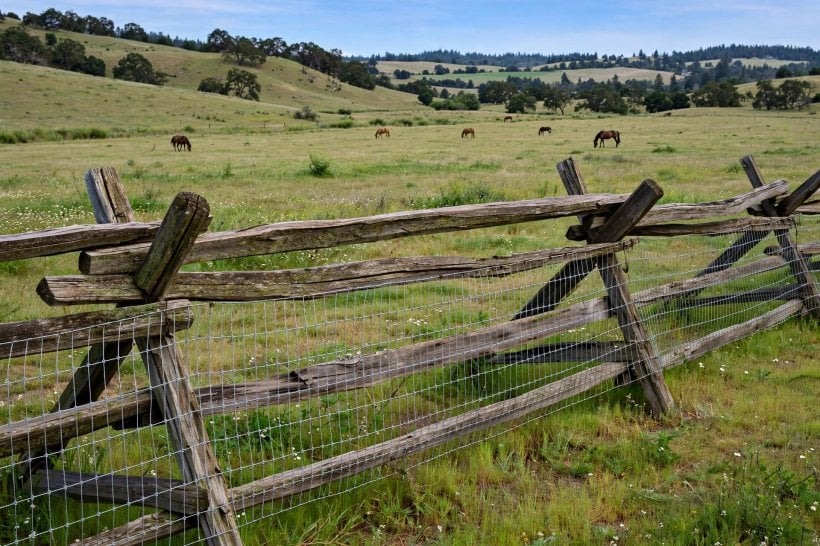
The first is woven wire on the inside: 4-ft field fence stapled to the posts, rails outside — the invisible upgrade, rustic look plus real containment. The second is electric: a single hot wire, the psychological fence, which trains livestock to respect the rails; solar chargers make it the off-grid solution, needing no mains power at the fence line. The third is height: 4–5 rails for cattle, the ranch fence — taller and tighter. And every run needs its opening built to match: a split-rail gate, frame plus diagonal brace. The gate is the fence’s handshake — the part every visitor touches — so build it well.
8. The Zigzag: The Post-Free Worm Fence
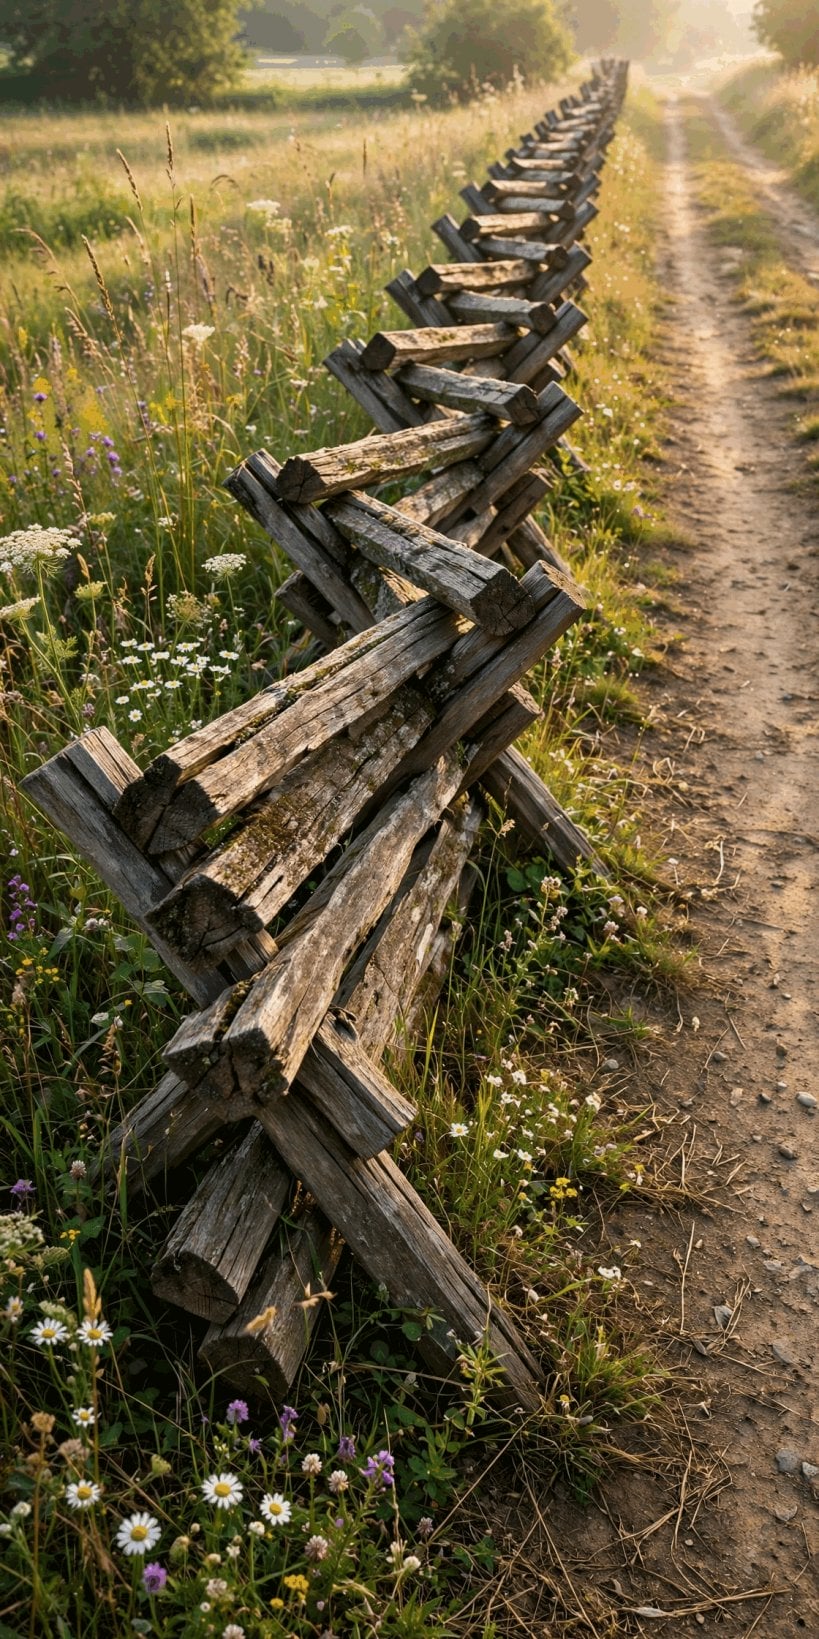
The oldest form needs no posts at all. The zigzag — the worm fence, the Civil War-era classic — stacks its rails in an alternating zigzag, each joint supported by the next, the whole run standing by interlock alone. It is the only fence in this guide that skips §4 entirely: no holes, no frost line, no gravel, no plumb line. Where the ground is rocky, rented, or needed back next season, a fence that simply sits on the land it crosses has an obvious appeal.
The trade is stated in one figure: the zigzag uses 30% more rail than the posted run. The angles consume length, and every corner of the worm is timber a straight run would not need. It also gives up the posted fence’s tidy footprint — the zigzag wanders a wide path across the ground it fences. But it asks nothing of the ground in return: no digging, no setting, and when the boundary moves, the fence moves with it, restacked in a day. On land rich in timber and poor in digging, the arithmetic has favored the worm fence for as long as it has been built.
9. Maintenance: The Yearly Walk and the One-Rail Rule
A rustic fence asks for one habit: the annual walk. Walk the line once a year, tighten the pins, and replace the one rotted rail — because the fence fails one rail at a time, and the yearly walk catches it at that size. Vegetation is kept clear for a practical reason: vines and brush hold moisture against the rails, and moisture is rot, so the line gets a 1-ft clear zone, maintained with a string-trimmer pass. The walk, the tightening and the trimming are the whole calendar.
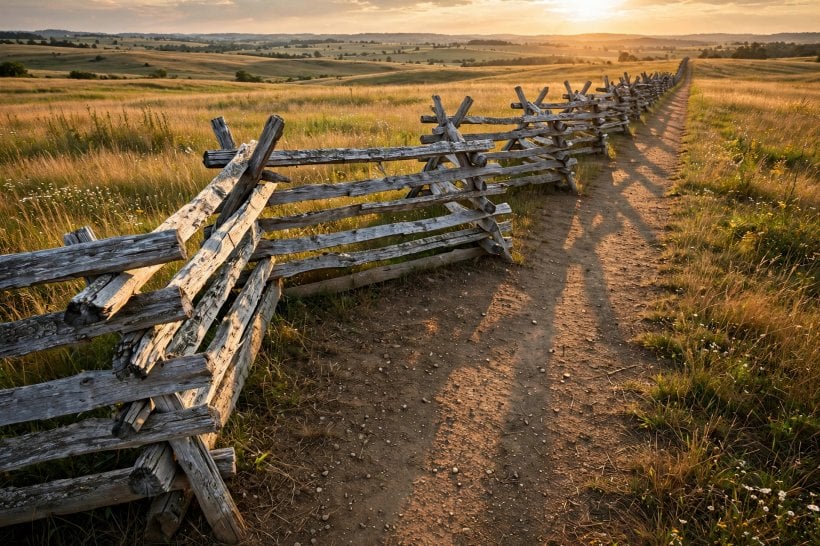
The finish question is answered by refusal: none needed. Weathered gray is the look, and the original is blunt about the alternative — oiling a 200-ft fence is a fool’s errand; let it silver. Where other outdoor log work does call for sealants and stains, that is a different maintenance contract, covered in the guide to protecting outdoor log crafts; the fence’s contract is simpler. Repairs complete the picture, and they are the design’s modular advantage: rails replace individually, one at a time, so unlike a privacy fence, one bad rail doesn’t condemn the run. A fence maintained this way is never rebuilt — it is renewed, a rail a year, indefinitely.
10. Species and Lifespan: The Timber Math
The last section returns to the first decision, because species is destiny. The ladder is exact: black locust and cedar stand 20–30 years; oak stands 15–20; pine is gone in 5–8. The original states the contrast at its sharpest for posts: pine posts rot in 5 years, locust lasts 25. That single comparison is the math that justifies the timber choice — the extra effort of finding, felling and riving locust or cedar is repaid in the life of the fence, while the easy pine rail quietly commits you to rebuilding the run inside the decade.
The species rule governs every part, not just the posts. Rails are cedar, black locust or oak because the fence’s life is in the species; the riving logs of §3 are oak, cedar or ash because those split straight and last. The wider discipline of keeping logs sound — how timber is cured and dried so cracks, rot and insects never get their start — is covered in the guide to curing and drying wood logs, and it is the right companion knowledge for anyone stockpiling rails for the yearly replacement. Build with the ladder in mind and the fence’s lifespan stops being a hope: it becomes a number you chose on the day you chose the tree.
Final Considerations
Split green, straight-grained logs for rails; set rot-resistant posts 3 ft deep in gravel; hang rails bottom-up — mortised for beauty, pinned for speed; add wire or electric where animals are involved; walk the line yearly; and let it weather gray. The rustic fence is the property’s signature, built from the land’s own timber — and a boundary built that way stops being a line on the land and becomes a belonging.



1 Comment