
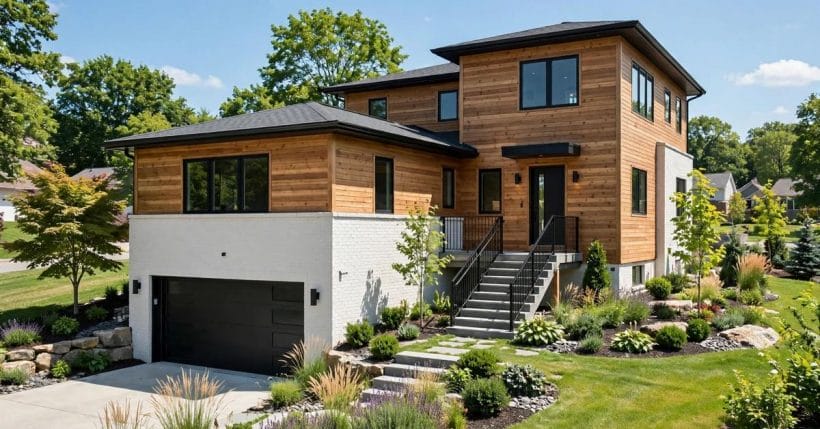
The split-level house wears its floor plan on its face: living rooms at one height, bedrooms half a flight up, garage and family room half a flight down.
These seventy-five ideas work the whole street face of the form — cladding, roofs, windows, colour, the ground-level handshake of entry and garage, and the planting that finishes it — so the steps read as design, not as an accident of the plot.
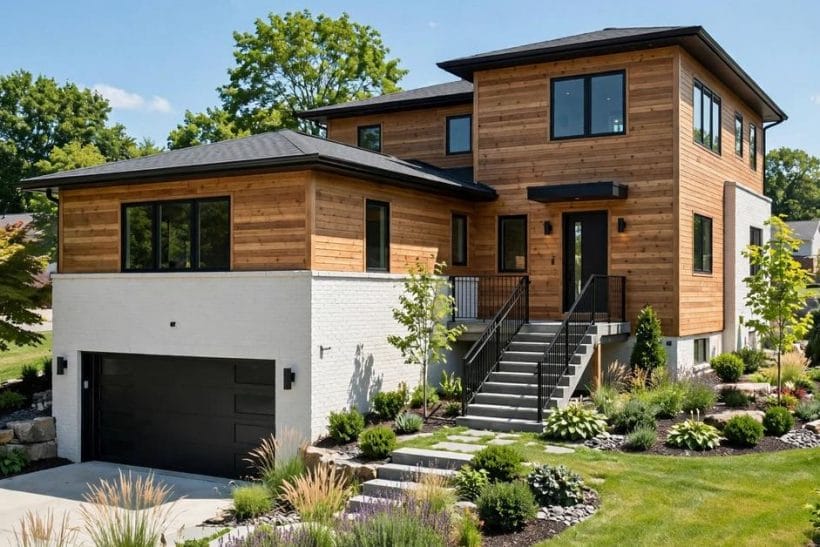
1. Split-Level Exterior Home Ideas at a Glance
A split-level exterior is the stepped facade of a house whose floors sit at half-storey offsets — the same form called a bi-level or raised ranch in some regions.
| Question | Short answer |
|---|---|
| Are split-level and bi-level the same house? | In most regions yes — regional names for the staggered half-storey form. Say so plainly, then plan for the actual house in front of you. |
| Should the levels be emphasised or unified? | Either, deliberately: contrast and shadow lines celebrate the steps; one colour and cladding calm them. Drifting between the two is what fails. |
| What is the biggest split-level mistake? | Piecemeal work — materials and colours changed one level at a time with no whole-elevation design, so each phase argues with the last. |
| How do you fix a hidden front door? | With a legible sequence: path, lit steps, a canopy in the roof’s language, and a large lit house number — plus the palette’s one bright colour on the door itself. |
| What cladding suits the form? | One material per level, changed exactly at the floor line with a proper trim detail; two materials plus trim across the whole elevation is the calm limit. |
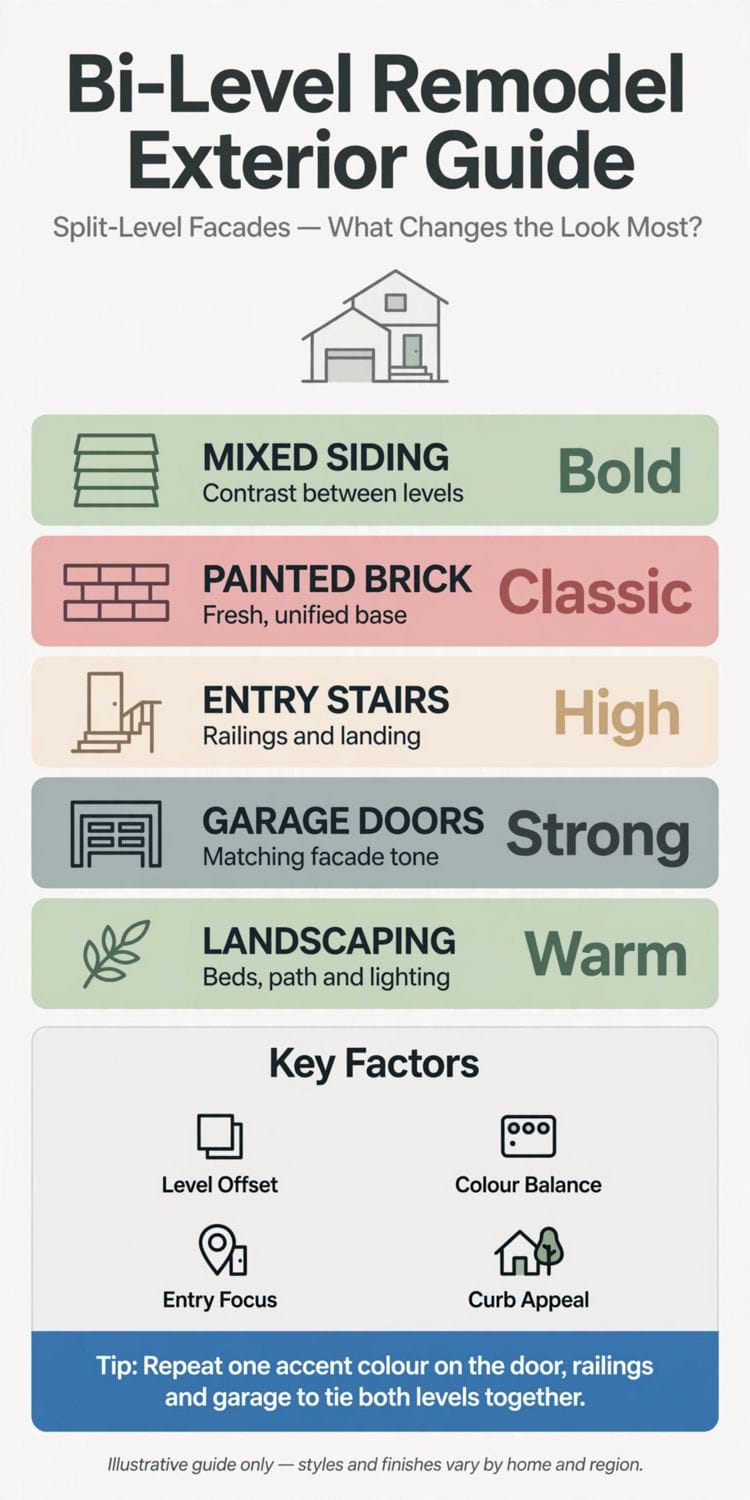
2. Reading the Split-Level Form Before You Touch It
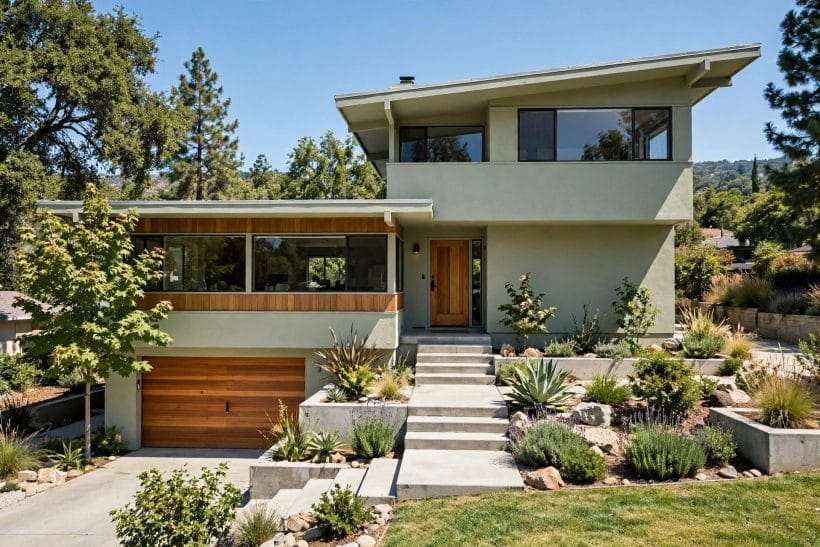
The split-level — called the bi-level or raised ranch in some regions, the same staggered form under regional names — stacks its floors in half-flights, and its exterior shows those levels like steps. The wider survey in exterior home ideas covers every house form; this post stays with the stepped facade and how a remodel makes it look intentional.
1. Say the form’s names plainly and plan for the real house
Split-level, bi-level and side-split are regional labels for one idea: floors offset by half a storey, usually with the garage and family room low, living rooms mid, bedrooms high.
2. Photograph the house from the street’s four corners
A split-level reads differently from every angle because its levels present in different orders. Work from photographs taken where passers-by actually stand, not from the garden — the street view is the design brief.
3. Decide whether to emphasise or calm the steps
The remodel’s founding choice: celebrate the staggered levels with contrast and shadow lines, or calm them into one composition with unified colour and cladding. Both work; drifting between them is what makes split-levels look unresolved.
4. Respect the half-level windows’ rhythm
The form’s windows sit at offset heights because the floors do. Fighting that rhythm with forced symmetry looks wrong; composing with it — aligning what can align, balancing the rest — is the split-level’s native grammar.
5. Treat the garage level as part of the house, not an annex
On most split-levels the garage occupies the whole lower frontage. It is the facade’s ground floor whether you design it or not — its door, cladding and lighting carry the elevation’s first impression.
6. Keep the entry legible from the street
Split-level entries often hide at the junction of levels, up an ambiguous stair. A remodel that makes the front door findable — path, light, canopy, number — fixes the form’s commonest street failing.
7. Work with the roof you have before dreaming of another
The low, wide roofs of the type are hard to change economically and easy to ruin. Most split-level remodels gain more from eaves, fascia and gutter attention than from any re-pitching fantasy.
8. Check how the levels meet the garden’s slope
The house was usually set into its plot’s slope, which is why the levels exist. Exterior work that fights the grading — buried walls, perched terraces — looks wrong and drains worse; follow the land’s logic.
9. Plan the whole elevation as one project
Split-levels punish piecemeal work because every material borders two others at the steps. Even if you build in phases, design the whole street face first, or each phase will argue with the last.
10. Keep one material from the original house
Total recladding can erase a split-level’s character into blandness. Retaining one honest original material — the brick base, the stone cheek wall — anchors the remodel in the house’s own history.
11. Measure the facade’s proportions before choosing anything
The split-level’s long, low proportions flatter horizontal emphasis and punish vertical fuss. Sketch the elevation to scale; the drawing will reject half your ideas for free, before they cost anything.
3. Siding and Cladding Across the Levels
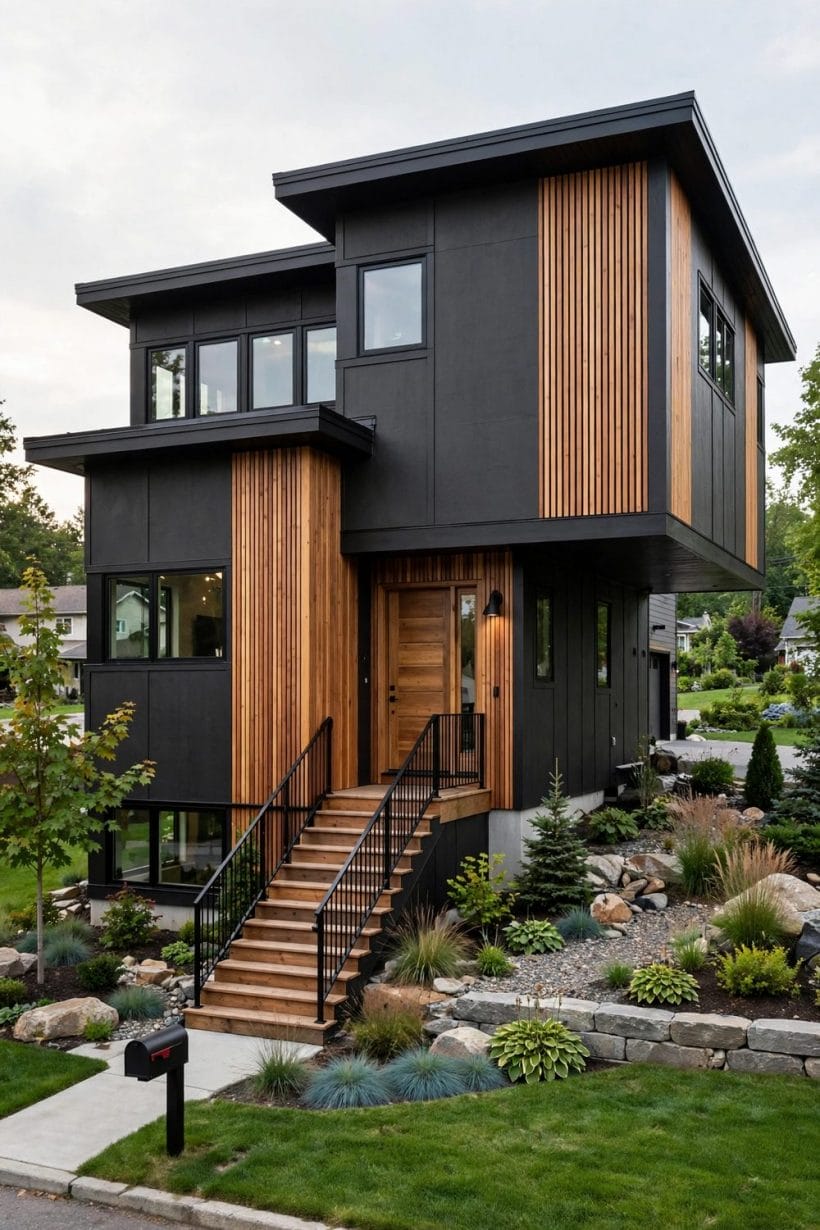
Cladding is where the split-level’s levels either become a composition or a patchwork. The craft is in deciding which level wears what, where materials change, and how the junctions are detailed.
12. Give each level one cladding and keep it there
The cleanest split-level elevations assign a single material per level — brick low, boards above, or the reverse — and let the material change exactly at the floor line. Materials that wander mid-level make the steps look accidental.
13. Run horizontal boards to stretch the house
Horizontal siding emphasises the form’s length and lowness, its natural elegance. On a split-level, long unbroken board runs across the upper level knit the stepped windows into one calm band.
14. Use vertical boards to lift a level that sits low
Where one level feels sunken — often the garage level under a short upper wall — vertical boarding adds perceived height. Use the trick once, on the level that needs it, or the elevation becomes a bar code.
15. Let brick or stone ground the lowest level
A masonry base gives the stepped house its visual foundation and takes the weather and the splashes at ground line. Where the original brick survives, cleaning and repointing usually beats covering it.
16. Detail the material change with a proper trim line
Where cladding changes at a level step, a trim board, flashing line or shadow gap makes the junction look carpentered. Materials butted without a junction detail read as a repair, however new they are.
17. Carry one cladding around the sides
Front-only recladding shows at the first side view. Carry the street materials around the corners at least to the first return, so the house reads whole from the pavement’s angles.
18. Choose fibre-cement or timber with open eyes
Modern boards in either material can serve a split-level well; the choice is maintenance rhythm and local craft, stated generally. What matters is profile and colour discipline, not the showroom’s claims.
19. Avoid three competing textures on one elevation
Brick, stone, boards, render, shingles — the split-level tempts collectors. Two materials plus trim is the calm limit; a third texture needs a strong compositional reason or the facade becomes a sample wall.
20. Match new cladding’s scale to the house’s era
Wide boards suit the form’s mid-century bones; narrow, busy profiles fight them. The split-level’s charm is its period confidence — cladding that respects the era’s scale keeps the house handsome rather than apologetic.
21. Ventilate and flash the steps like you mean it
Every level change is a water junction. Flashings, drip edges and ventilated cavities at the steps are unglamorous and decisive; a beautiful elevation with rotten junctions is a loan against the future.
22. Sample cladding colours on the house, in its own light
Boards read differently on a stepped, part-shaded facade than on a sample card. Fix large samples across two levels and live with them through a day’s light before committing the whole elevation.
4. Roofs, Eaves and the Skyline
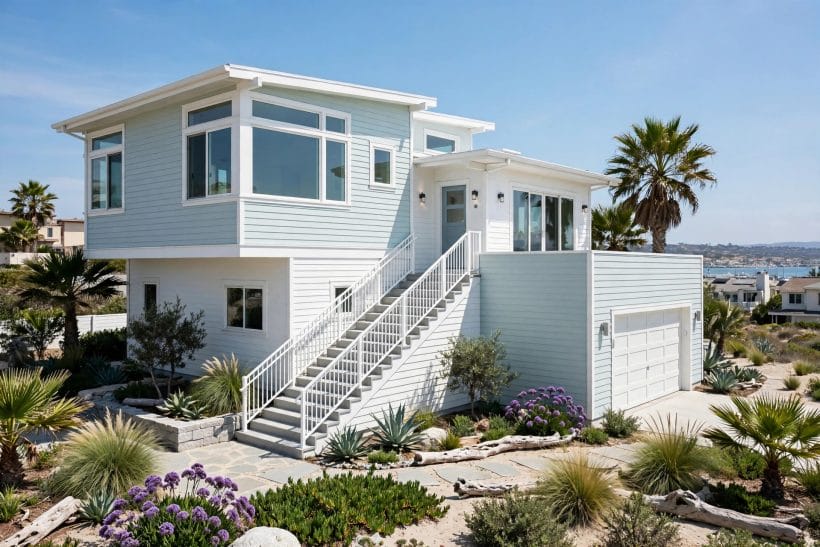
The split-level’s skyline is a conversation between two or three roof planes at different heights. Like the honest gables celebrated in barn homes, the stepped roofs work best when their structure is expressed plainly rather than dressed into something they are not.
23. Let the stepped roofs stay stepped
Attempts to fake a single roof over a split-level produce the form’s worst elevations. Keep the planes distinct, align their eaves where the structure allows, and let the skyline tell the truth about the floors inside.
24. Deepen the eaves for shadow and shelter
Generous eaves throw the shadow line that gives low houses their poise, and they shelter the cladding’s top edge from weather. Where the structure permits extending them, few changes lift a split-level more.
25. Renew fascia and soffits as one crisp line
The eye reads a roof by its edges. Straight, clean fascia and soffit lines — in the trim colour, without sag or stain — make the whole roof look newly built, whatever its age.
26. Keep gutters quiet and correctly sized
Gutters should disappear against the fascia: matched colour, straight runs, downpipes placed at the elevation’s quiet corners. Overflow staining on a stepped facade advertises itself on two levels at once.
27. Choose roof coverings for the low viewing angle
Split-level roofs are seen from below at close range and from upstairs windows above. Coverings with texture and tonal variety forgive both views; flat, uniform surfaces show every flaw to the street.
28. Add a canopy over the entry, shaped like the roofs
A small entry canopy echoing the main roofs’ pitch and covering ties the wandering front door into the composition. It shelters the step, carries the house number and gives the facade its handshake.
29. Consider a gable accent over the living level only
One modest gable or cross-pitch over the main living level can give a long facade its centre. Two competing accents split the composition again — the split-level already has steps enough.
30. Vent the roof voids at the steps with care
The junctions between roof planes collect weather and hide vents. Keep ventilation paths clear and detailed at each step; the stepped roof’s failures begin invisibly at its junctions.
31. Use the roof colour to settle the composition
A single roof colour across all planes calms a busy skyline; it is usually the right call. Split colours belong to houses whose levels are meant to read as separate buildings — a rare and deliberate effect.
32. Light the skyline sparingly, if at all
A wash of light at the entry and path is welcome; floodlit roof planes flatten the steps into a billboard. The split-level’s evening face should glow at its door, not blaze at its eaves.
33. Inspect the step junctions before every winter
Flashings where roofs meet walls at different heights are the form’s maintenance front line. A yearly look and prompt sealing keeps the stepped roof a feature instead of a leak with good proportions.
5. Windows, Shutters and the Front Elevation
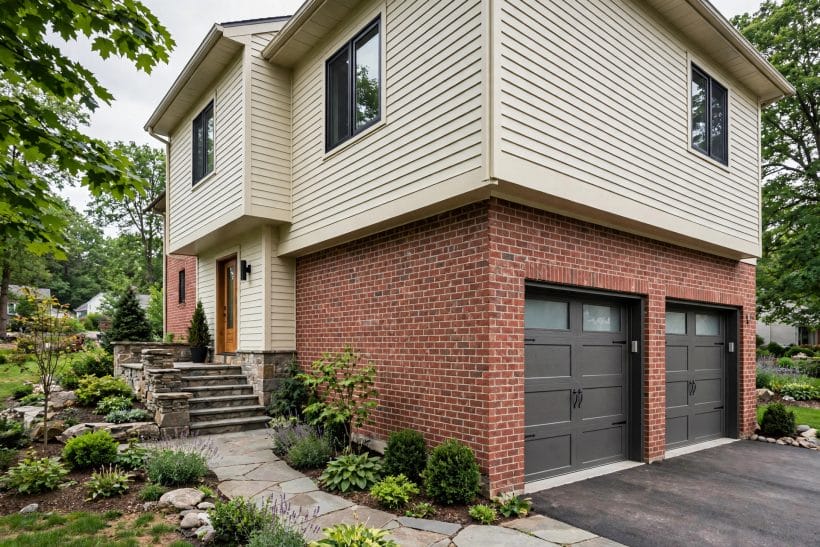
Windows are where the split-level’s interior levels announce themselves outside — offsets, picture windows and small high vents all in one elevation. The design task is balance without false symmetry.
34. Balance the elevation by weight, not by mirror image
With windows at offset heights, symmetry is unavailable and balance is the goal: a large picture window low can answer two smaller windows high. Compose by visual weight across the whole facade.
35. Renew the living level’s picture window with respect
The big mid-century picture window is the form’s signature. Replacing it with a grid of small panes erases the house’s character; renew it large, with modern glazing doing its quiet work inside the original opening.
36. Give the high bedroom windows one treatment
The upper level’s windows should share frames, colour and dressing logic so the level reads as one band. Mixed shutters, awnings and bare glass on the same level scatter the eye.
37. Use shutters only where they could honestly close
Shutters sized to actually cover their window, mounted at its sides, look like equipment; undersized decorative planks look like eyelashes. On many split-levels, clean trim alone is the more honest dressing.
38. Align new trim widths across all levels
One trim width and colour for every window on the street face knits offset windows into a family. Trim is the cheapest unification a remodel buys — spend the consistency, not the money.
39. Add a window box or a sill garden at the low level
The garage and family-room level often sits close to the ground with plain windows. A planted box or a gravel-and-herb sill garden softens the base and gives the lowest level its share of charm.
40. Frost or screen the bathroom window without fuss
The small high vent window is a split-level fixture. Keep its treatment plain — frosted glass, a simple blind — and let it stay the elevation’s quiet note rather than a feature competing with the picture window.
41. Match replacement windows to the originals’ proportions
Frame sightlines and pane divisions carry the era’s look. Replacements that keep the originals’ proportions modernise performance without modernising the house into anonymity.
42. Place one generous window where the entry needs light
Entries at the level junction are often gloomy. A sidelight or a borrowed-light window by the door — detailed with the entry canopy — makes the threshold welcoming and the door findable after dark.
43. Keep curtains and blinds consistent from the street
The elevation includes whatever shows through the glass. One lining colour or blind style across the street face keeps the windows reading as architecture rather than as laundry.
44. Wash the composition at dusk before deciding
Stand across the street at dusk, when the windows glow and the offsets show most kindly. If the elevation composes then — balanced, warm, findable door — the window work is done.
6. Colour That Unifies a Stepped Facade
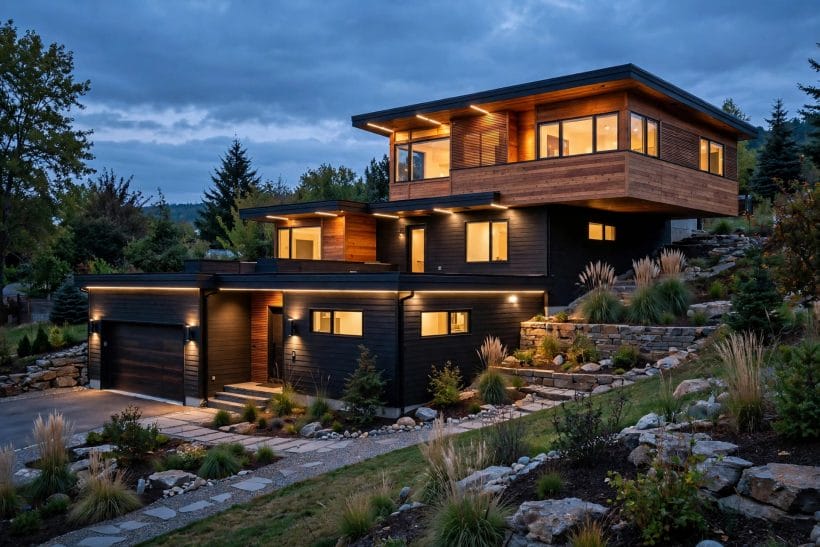
Colour is the split-level’s cheapest remodel and its most powerful unifier. The disciplined palettes in gray exterior home ideas and the warmth in green exterior home ideas both translate well to stepped facades — the rules below are about placement, not fashion.
45. Build the palette from the fixed colours first
Roof, brick and stone are the colours you already own. The palette for everything paintable should be chosen against them, in daylight, on the house — never from a card in a shop’s lighting.
46. Use one body colour across all levels to calm the steps
The single most calming move on a split-level is one siding colour running through every level, letting shadow and form — not paint changes — describe the steps. It suits owners who want the house serene.
47. Or split the palette by level, once, deliberately
The opposite strategy — one colour low, another high — can look tailored when the split falls exactly at a floor line and the two colours are close in depth. Splitting mid-level or by elevation side never works.
48. Let the trim colour do the knitting
One trim colour on every window, fascia and corner board ties a stepped facade together even when body colours differ by level. Trim consistency is the split-level’s visual mortar.
49. Paint the garage door to disappear or to star, not to hover
The big lower door must either blend with its level’s cladding or become the elevation’s deliberate feature in the trim colour. The in-between — a door in a third, unrelated colour — is the commonest split-level mistake.
50. Give the front door the palette’s one bright note
On a calm stepped facade, the door can carry the single saturated colour — the beacon that solves the findable-entry problem in paint. Keep it the only bright note and it will work at fifty paces.
51. Test colours across two levels before committing
The same colour reads lighter on the sunlit upper level and darker in the lower level’s shade. Paint test boards on both levels and judge them together at the same hour.
52. Respect the street’s colour temperature
A palette in conversation with the neighbours’ houses looks intentional; a facade at war with its street looks loud. The split-level’s long frontage shows colour at scale — choose with the whole street in view.
53. Keep the foundation and steps in the palette’s shadow
Foundation walls, entry steps and the garage slab’s edge should sit in the palette’s darkest, quietest tone. Bright foundations lift the house visually off its plot and expose its least lovely concrete.
54. Use planting as the palette’s living colour
Against a disciplined two-colour facade, planting supplies the changing colour — greens, then flowers, then autumn. It is the one part of the palette allowed to be exuberant, because it also grows, softens and forgives.
55. Repaint in the order the eye travels
When refreshing in phases, follow the eye: door and trim first for the welcome, then the upper level, then the lower. Each phase then reads finished, and the house never sits mid-argument with itself.
7. Entries, Garages and the Ground Level
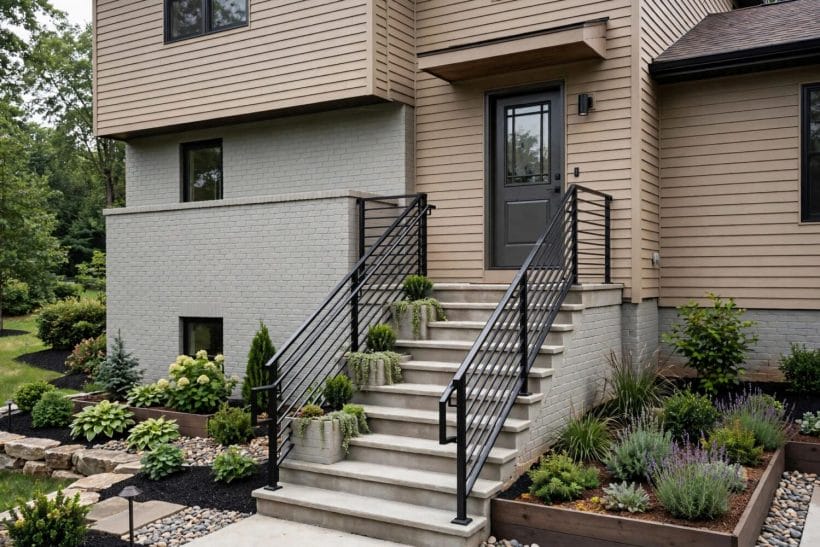
The ground level is the split-level’s handshake zone: the entry stair, the garage door and the path all compete for the same few metres of frontage, and the remodel’s manners are decided here. The door itself — its styles, sidelights and hardware — is treated in its own right in front door ideas.
56. Give the entry stair a landing worth arriving on
A split-level entry stair that lands on a postage stamp makes every arrival a balancing act. Where space allows, a landing deep enough for two people and a opening door transforms the daily homecoming.
57. Rail the stair with the house’s trim language
A handrail in the facade’s trim colour or in black metal, honestly fixed, turns a necessity into a designed line. Check what local rules require for stair rails and keep the design inside them.
58. Light the path, the steps and the number separately
Three small lights do three jobs: the path for feet, the steps for edges, the number for strangers. One floodlight does none of them well and announces the house like a depot.
59. Choose a garage door with the elevation’s proportions
Panel rhythms that echo the house’s window spacing make the big door belong. A door whose panels fight the facade’s other rectangles will look applied, however expensive it was.
60. Add a pergola or trellis over the garage door with care
A slim pergola beam or trellis above the garage door softens the big rectangle and carries a vine. Keep it in the trim colour and structurally honest — decoration here must survive weather and comparison with the real roofs.
61. Screen the bins and meters at the ground level
The ground level collects the house’s utilities. A slatted screen in the cladding’s material hides bins and meters while keeping them reachable — the facade’s tidiness is mostly this, repeated.
62. Pave the forecourt in one material with a border
Mixed patch repairs make the forecourt look borrowed. One surface with a simple border — even gravel, well edged — reads as groundskeeping rather than aftermath, and it flatters every cladding above it.
63. Plant the garage level’s wall base
A narrow bed along the lower level’s frontage, planted with tough evergreens, breaks the long wall’s bareness and softens the step between house and pavement. Keep it narrow; the forecourt still has to work.
64. Make the house number large, lit and boring
Numerals that delivery drivers can read from a moving car are a public service. Choose them plain, in the trim palette, at the door — the split-level’s hidden entries need them more than most.
65. Keep one metre of the entry completely empty
The space before the door is a stage for greetings, parcels and prams. Furniture, pots and bicycles migrate there naturally; defend the empty metre and the entry will always feel generous.
8. Landscaping, Light and the Finished Street Face
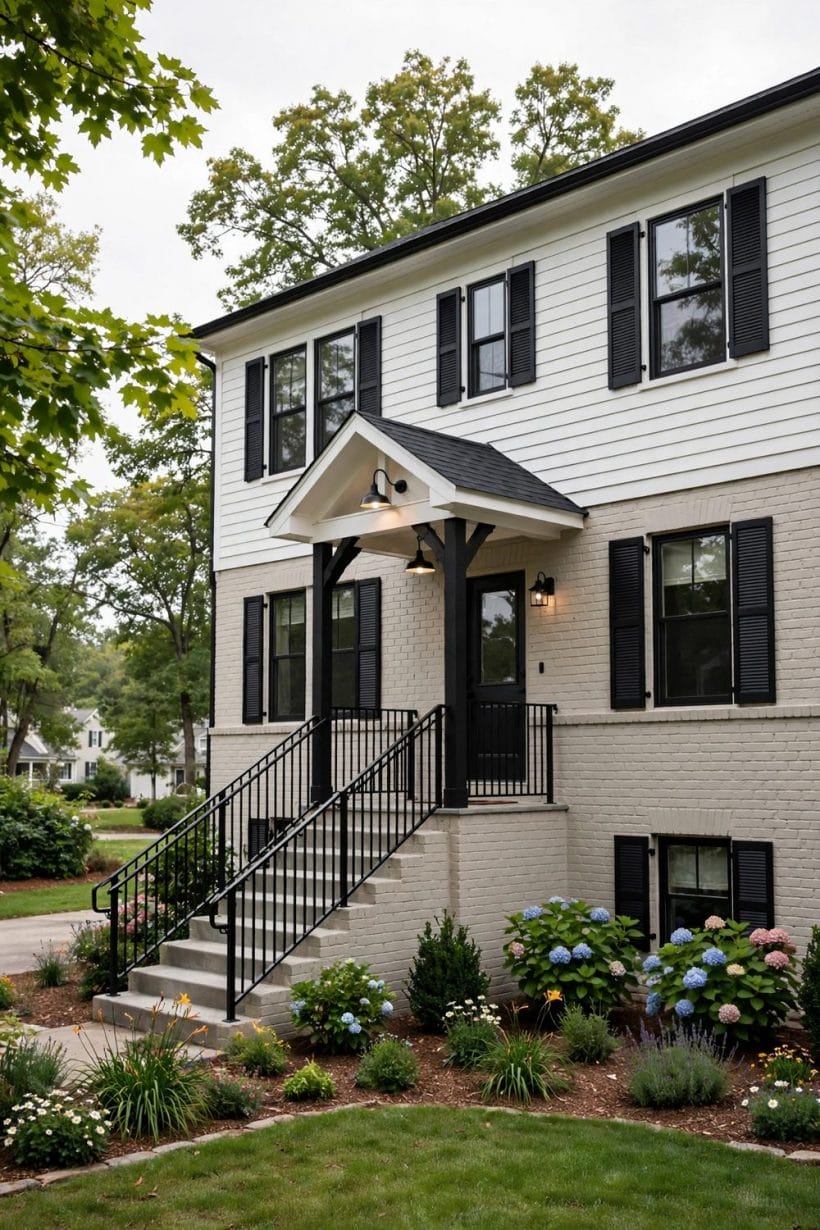
The finished split-level is a composition of house, planting and light that holds together from across the street. The house-wide principles gathered in home design ideas apply here with one twist: every choice is read at two levels at once.
66. Plant in tiers that echo the house’s steps
Low planting at the garage level, taller shrubs at the living level, one small tree answering the bedroom level — a stepped garden for a stepped house. The rhyme between planting and facade is the split-level’s special charm.
67. Use evergreen structure at the level changes
The corners where levels step are the facade’s elbows; an evergreen shrub at each keeps the composition clothed in winter, when deciduous planting leaves the steps bare and the house exposed.
68. Let one tree balance the long facade
A single well-placed tree at the quieter end of the frontage gives the long, low house its vertical counterpoint and its summer shade. Choose for mature size honestly — the tree will outlive the remodel.
69. Edge the lawn and beds with the trim’s discipline
Crisp edges are the garden’s version of the facade’s trim line: cheap, quiet and transformative. A split-level’s grounds read as one design when the edges are as deliberate as the paintwork.
70. Light the garden in pools, not in rows
A lit shrub here, the entry canopy there, the path’s low glow — pools of light let the stepped house emerge from darkness gradually. Rows of identical lights belong to runways, not gardens.
71. Keep the mailbox and boundary in the palette
Mailbox, fence and gate are the facade’s outriders. In the trim colour or the cladding’s material they extend the design to the plot’s edge; in stray colours they announce where the design stopped.
72. Screen the neighbour’s view of the lower level kindly
The lower level’s windows often face the street or the neighbour at close range. Planting that filters rather than walls — layered shrubs, a small tree — keeps privacy without turning the frontage into a bunker.
73. Season the frontage with restraint
One seasonal gesture — spring bulbs along the path, autumn colour in the key shrub — keeps the street face alive through the year. The stepped facade is already busy; its planting should be calm with moments, not a festival.
74. Photograph the finished house like a stranger
The final check is a photograph from across the street, studied cold. If the eye travels calmly — door, levels, roof, tree — the remodel has composed. If it snags, the photograph will show exactly where.
75. Maintain the composition, not just the parts
A split-level remodel decays by small drifts: one shutter lost, one light unreplaced, one shrub grown wild. A yearly walk with the photograph in hand keeps the whole composition — the thing you actually designed — alive.
9. Checks and Mistakes: Before the First Purchase or the First Fitting
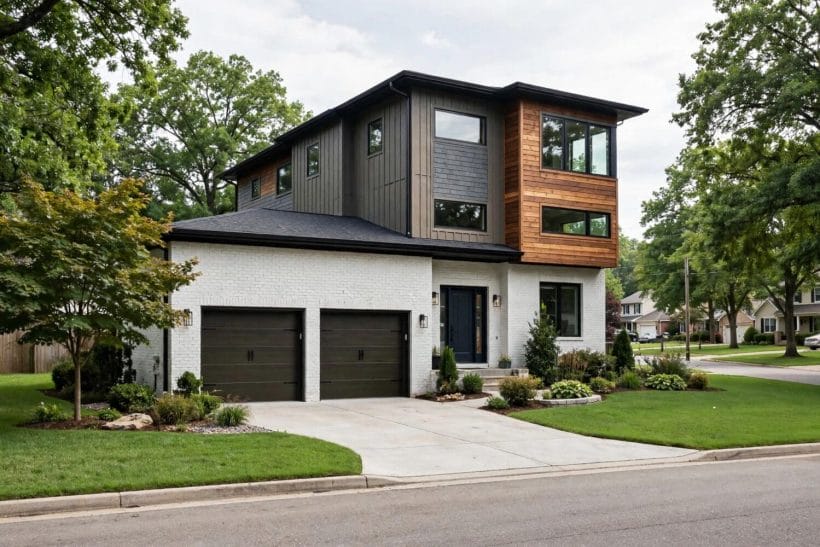
The split-level’s expensive mistakes are structural daydreams: re-pitching roofs, burying the lower level, forcing symmetry onto offset windows. The form rewards owners who design the whole elevation, phase the work, and let the steps be the character they are.
Water is the form’s quiet enemy, and it attacks at the junctions — roof-to-wall steps, cladding changes, the garage level’s ground line.
Finally, judge every decision from across the street, in a photograph, at dusk as well as noon. The split-level is a public composition of unusual geometry; the street’s view is the one the remodel is actually for.
10. Costs and Pulling It Together
Costs on a split-level follow visibility: colour and trim unify for the least, cladding and windows cost by the level, and roof or entry rebuilding is the deep end.
Pull it together with the facade’s three consistencies — one trim language, one roof colour, one palette logic — and let the planting supply the change. A split-level held to its consistencies looks tailored at any budget.
Final Considerations
The stepped house is not a problem to be disguised but a composition to be conducted: levels, roofs and planting all playing the same tune at different heights.
Stand across the street when the work is done. If the eye travels calmly from door to roof to tree, the split-level has become what it always wanted to be — the most interesting house on the road.

0 Comments