

Soil pushes sideways with hundreds of pounds of force, groundwater builds silently behind every wall, and frost heaves like a slow jackhammer. A retaining wall fights all three at once, for decades, and losing that fight means a single wet spring can take the hillside with it. Dry-stack or mortared is not a style choice — it is a decision about how the wall wins.
Natural Rock Retaining Wall: At a Glance
A natural rock retaining wall is civil engineering in miniature: it resists tons of soil pressure, manages the groundwater that collects behind it, and is expected to stand for decades — or fail dramatically. There are two traditions for building one. Dry-stack trusts gravity and friction, each stone held by its own weight and the lean of the wall. Mortared work bonds the stones into a single masonry mass on a concrete footing. This guide works through both in the order a build meets them: the forces every wall fights, how each method works and where each wins, the head-to-head verdicts by project type, step-by-step builds for both methods split into their two halves, the drainage detailing both share, and a closing verdict on matching the method to your wall, your climate and your skills.
| Topic | What It Covers | Key Fact or Figure |
|---|---|---|
| 1. The Forces | Lateral pressure, water, frost and surcharge | Soil pushes 30–40 lbs per sq ft per foot of depth |
| 2. Dry-Stack Method | Gravity, friction and the battered face | Lean back 1 inch per foot of height |
| 3. Mortared Method | Masonry strength on a concrete footing | Footing twice as wide as the wall |
| 4. Head-to-Head | Which method for which project | Garden terraces 1–3 ft suit dry-stack |
| 5. Dry-Stack Build I | Trench, gravel base and first course | Trench 12 inches deep, 24 inches wide |
| 6. Dry-Stack Build II | Running bond, tie stones and the cap | Tie stones every 3–4 feet |
| 7. Mortared Build I | Footing, layout and laying stone | Concrete footing 8–12 inches thick |
| 8. Mortared Build II | Weep holes, joint tooling and curing | Weep holes every 4–6 feet |
| 9. Drainage | The detailing both methods share | 12 inches of clean gravel behind the wall |
| 10. The Verdict | Matching method to wall and builder | Walls over 4 ft need engineering |
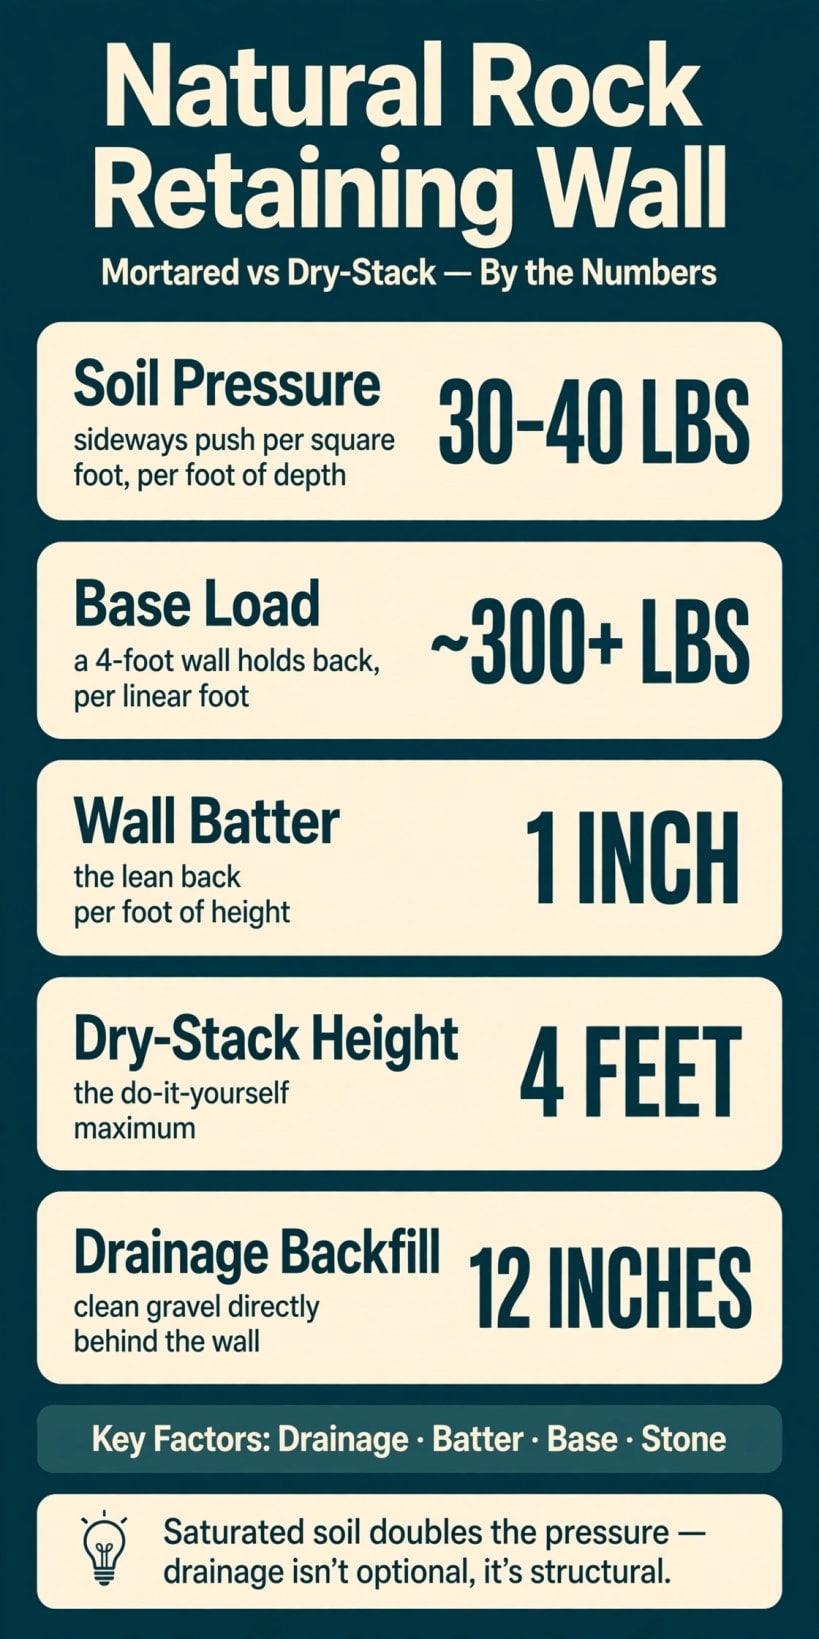
Retaining walls by the numbers: soil pressure of 30–40 lbs per square foot per foot of depth, roughly 300+ lbs per linear foot at the base of a 4-foot wall, a 1-inch-per-foot batter, a 4-foot DIY ceiling for dry-stack, and 12 inches of drainage gravel behind every wall.
1. The Forces: What the Wall Fights
Every retaining wall, however rustic it looks, is holding back a measurable load. Soil pushes sideways with lateral earth pressure of roughly 30–40 lbs per square foot for every foot of depth, and the load concentrates at the base: a 4-ft wall is holding back around 300+ lbs per linear foot where it meets the ground. That is the static problem, and it is the easy one, because the load never stays static for long.
Water is the multiplier. Saturated soil doubles the pressure, which is why drainage is not an accessory on a retaining wall — it is structural, as decisive as the stones themselves. Frost is the third enemy: freezing soil expands and shoves, so a wall either stands on a frost-depth footing or is built flexible enough to ride the movement. The fourth load is surcharge — anything sitting above the wall, a driveway, a structure, the slope itself — and heavy surcharges must be kept back from the crest at a 1:1 minimum, more for tall walls. One rule governs everything in this guide: walls over 4 ft tall, or walls holding surcharge, need engineering. The builds here cover walls to 4 ft; taller is professional territory. The same slope-holding thinking, applied at garden scale, runs through our guide to rock garden terracing for slopes and erosion control.
2. Dry-Stack: Gravity, Friction, and Art
The dry-stack method uses no mortar at all. Each stone is held by its own weight and by friction against its neighbours, and the whole wall leans back into the hill it retains — a batter of about 1 inch back for every 1 ft of height. That lean is the engineering: it turns gravity from the enemy into the ally, so the wall’s own mass presses it into the slope instead of away from it.
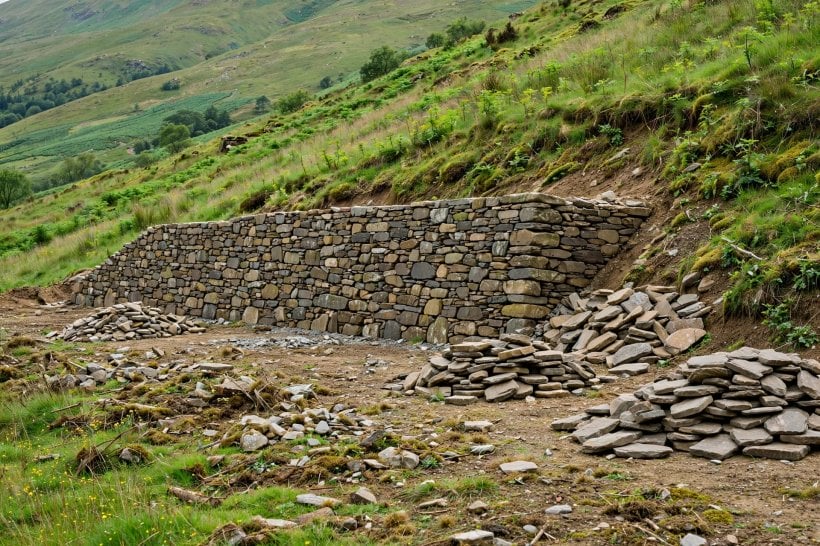
The advantages explain why this is the older tradition. A dry-stack wall is flexible: it moves with frost heave instead of cracking, which is the number-one reason it outlasts mortared work in cold climates. It is self-draining, because water weeps out through the open joints and hydrostatic pressure never builds behind it. It is repairable — pull a stone, reset it, no demolition — and it has the timeless fieldstone beauty the method is loved for. The costs are real, though: it is slower to build, at 2–3× the labor of mortared work, because every stone is a puzzle; it is height-limited to about 4 ft for DIY; and it is rustic by nature, never the choice for crisp modern lines. Stone choice matters more here than anywhere: flat-ish fieldstone or quarried wall stone with two flat faces minimum per stone — the faces are the wall. Round river rock is terrible for stacking. Our comparison of flagstone vs fieldstone for natural stone projects walks through picking stone with the right faces for the job.
3. Mortared: Masonry Strength and Precision
The mortared method beds each stone in mortar — Type S or Type N — on a poured concrete footing, and the mortar bonds the whole mass into a monolith. Where dry-stack is a carefully balanced pile, a mortared wall is a single piece of masonry, and it behaves like one: stronger per foot of thickness, able to handle taller walls and surcharges, and capable of the precise, clean-lined, formal face that dry work cannot give.
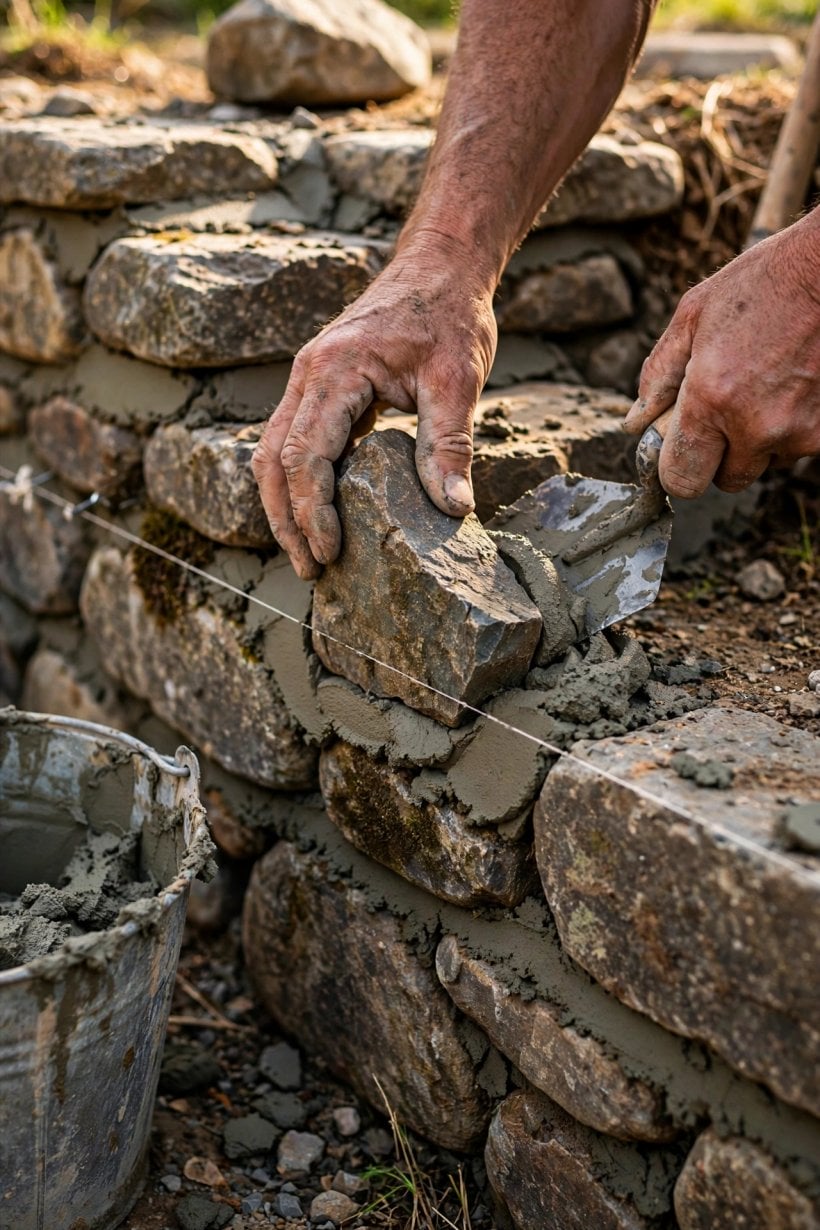
Mortar also forgives irregular stone — round or awkward pieces that dry-stack would reject work fine, because the mortar fills what friction cannot. For a skilled mason it is the faster method, too. But the monolith has two weaknesses the builder must design around. It is rigid: frost heave cracks it, so the footing must go below the frost line, 12 inches or more deep, poured twice as wide as the wall — the foundation the wall’s whole life depends on. And it traps water: a mortared wall must have weep holes and drainage backfill, because hydrostatic pressure destroys rigid walls from behind. Repairs are harder as well — cracked mortar means grinding out and repointing, not restacking. None of this disqualifies the method; it just moves the effort from the stacking to the footing and the drainage, which the build sections below take in order.
4. Head-to-Head: Which for Your Project
With both methods understood, the choice usually makes itself once the project is described honestly. Climate speaks first: in cold country with real frost, dry-stack wins, because it rides the heave that cracks mortared walls built without deep footings. Height and load speak next: a tall wall in the 3–4 ft range carrying surcharge wants mortared, engineered strength — or an engineered dry-stack built with massive stone.
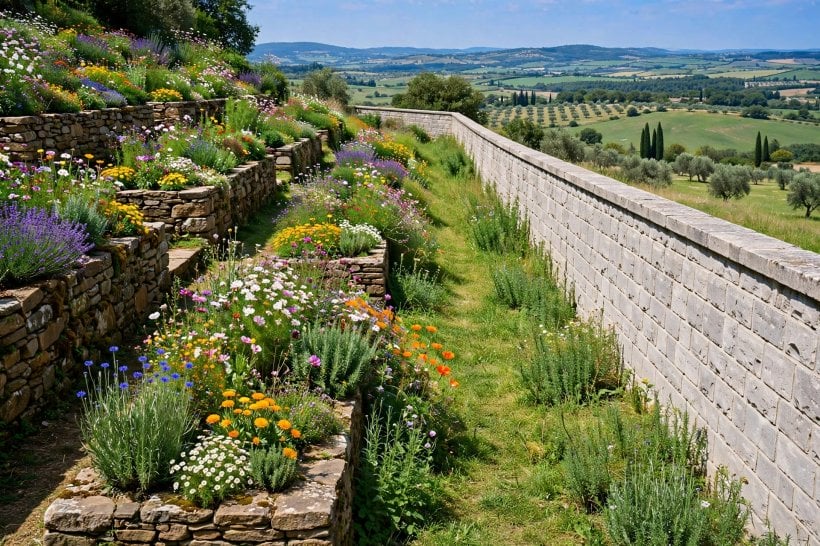
Scale and setting settle the rest. Garden beds and terracing at 1–3 ft are dry-stack’s perfect scale — free-draining, DIY-friendly, and forgiving. A formal or modern aesthetic wants mortared crispness; a rustic, natural setting wants the fieldstone face. The first-timer should start with dry-stack under 3 ft, where mistakes are restackable rather than permanent. And on speed, a mason-built mortared wall is fast, while dry-stack DIY is slow but satisfying. Small-scale terracing of exactly this kind is one of the projects in our roundup of tiny house landscaping ideas for small outdoor spaces — the method scales down as gracefully as it scales up. The two builds that follow give each method its full step-by-step, so the verdict can be applied rather than just admired.
5. Building Dry-Stack I: Trench, Base and First Course
A dry-stack wall begins below ground. Excavate a trench 12 inches deep and 24 inches wide along the wall line, and fill its base with 6 inches of compacted gravel — that gravel pad is the foundation, spreading the wall’s weight and giving the first course a level, free-draining bed that frost and water cannot easily undermine.
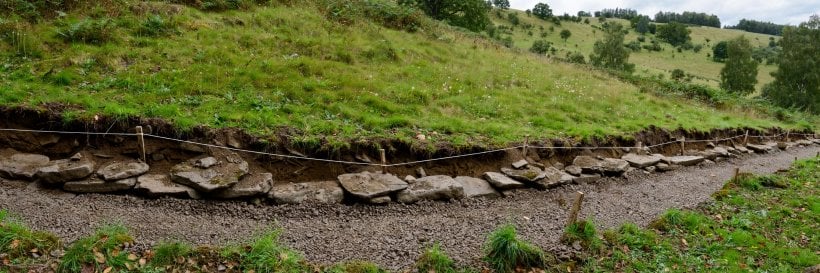
The first course is the foundation course, and it gets the largest, flattest stones you have, set half-buried in the trench. Level each stone front-to-back, and set the wall’s batter from this course onward — the lean established here is the lean every later course follows, so a string line and patience at this stage repay themselves all the way up. Choose foundation stones for their faces, not their looks: the two flat faces the wall stands on matter more than any surface the eye will see. The same dry-laid discipline — a prepared base, the best stone at the bottom, nothing rushed — underlies our guide to laying a dry-stack stone path without mortar, where the base preparation decides how the finished work ages.
6. Building Dry-Stack II: Stacking, Tie Stones and the Cap
Stack in running bond: one over two, two over one, so that vertical joints never align and every stone spans the joint below it. A wall whose joints line up is a wall with built-in fracture lines; the bond is what makes separate stones behave as one mass. Behind and between the face stones, pack hearting — crushed stone, fitted tight. The wall is only as solid as its fill, and one rule is absolute: no soil in the joints, because soil washes out and works loose where crushed stone locks.
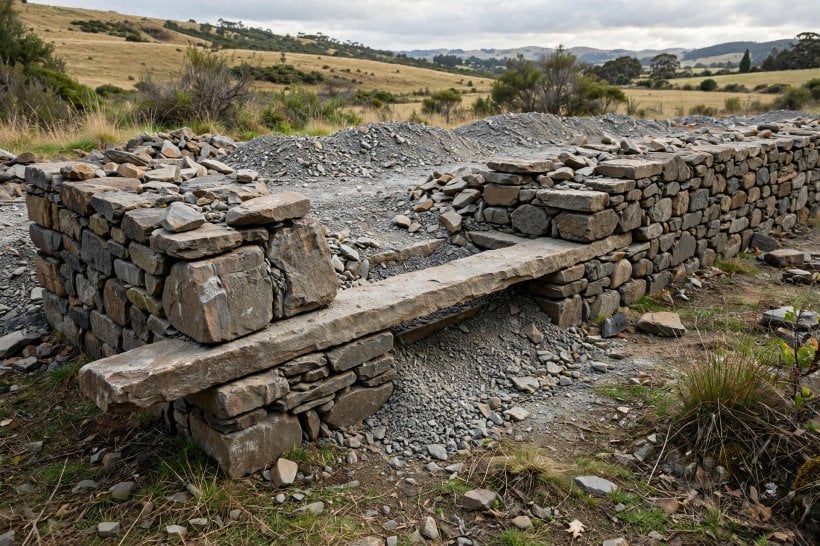
Every 3–4 ft, set a tie stone — a long stone reaching back into the hill. These are the anchors: through-stones that tie the face of the wall to the backfill behind it, so the face cannot peel away from the mass. Keep checking the batter as you rise, about 1 inch back per foot, against a string line run from the base. Finish with the cap: large flat capstones, overhanging slightly — the crown of the wall, shedding water off the face and locking the top course under their weight. Behind the finished wall goes 12 inches of clean gravel, the drainage chimney, then soil beyond it, with landscape fabric between the gravel and the soil to keep the chimney from silting shut.
7. Building Mortared I: The Frost-Depth Footing and Laying Stone
The mortared build starts with the element its whole life depends on: the footing. Excavate below the frost line and pour a concrete footing 8–12 inches thick, twice as wide as the wall, with rebar added for walls over 3 ft. This is the engineered base — it carries the monolith, resists the frost that would crack it, and cannot be corrected once the wall stands on it.
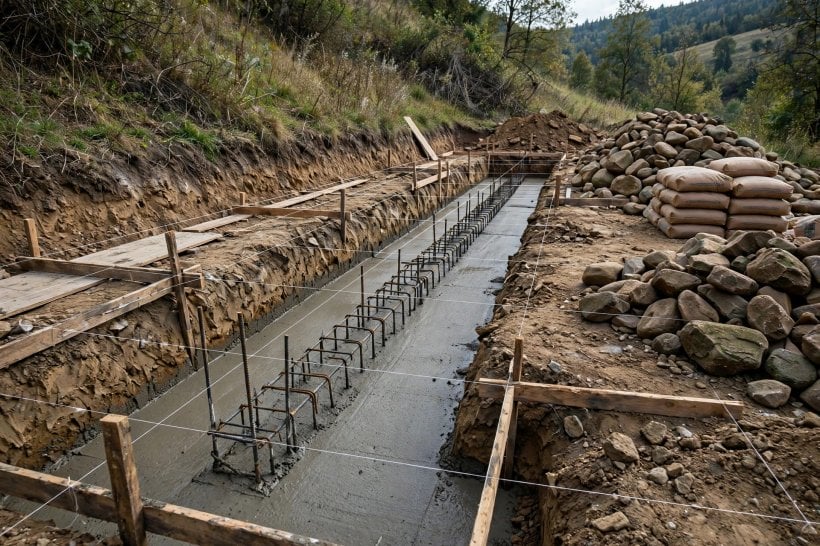
Set out the wall with batter boards and string lines that define the face plane, and check every course against them — a mortared face that wanders cannot be nudged back the way a dry stone can. Lay each stone by buttering its back and bottom with mortar and pressing it into a full mortar bed. The discipline is in the words “full bed”: no voids. A void in the bed collects water, and collected water freezes, and freezing water is the force that cracks rigid walls from the inside. Work stone by stone, keeping the beds complete and the face true to the line, and the wall rises as a single bonded mass rather than a stack of mortared-together regrets.
8. Building Mortared II: Weep Holes, Tooling and the Cure
Because a mortared wall is a sealed face, the water behind it needs deliberate exits. Form weep holes — 2-inch PVC pipe, or simple gaps left in the mortar — every 4–6 ft along the base course. They are the pressure relief, and they are non-negotiable: a rigid wall without them is holding back every storm it will ever meet. Behind the wall, place 12 inches of gravel backfill with a perforated drain pipe at the footing, daylighted out to the side, so the water the weeps miss still has somewhere to go.
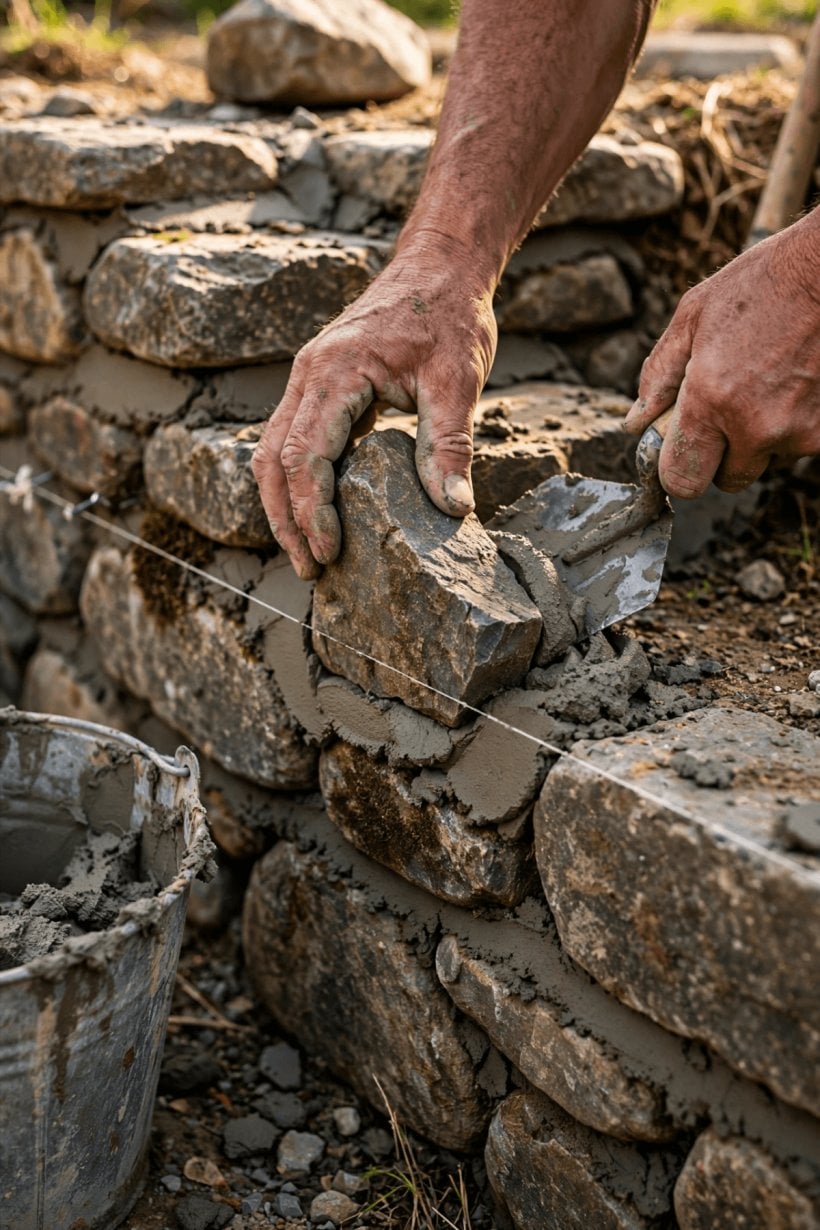
Finish the joints by tooling: strike them when the mortar is thumbprint-hard, in a concave or flush profile, which is the finished look of a well-built wall. Avoid raked joints — the little ledges collect water instead of shedding it. Then cure the work properly: keep the mortar damp for 3–7 days, covering it with plastic in hot sun, because mortar gains its strength wet. A mortared wall rushed through its cure is a wall that never reaches the strength its footing was poured for; the patience at this stage is part of the structure, exactly as the footing is.
9. Drainage: The Wall’s Life Insurance
Both methods live or die by the same detailing. Put 12 inches or more of clean gravel directly behind the wall — the drainage zone — with landscape fabric between the gravel and the soil so fines cannot migrate in and clog it. Then manage the surface water above: grade the top of the slope away from the wall, and use swales or berms to redirect runoff, because a slope that dumps its water onto the wall’s back is loading the wall with exactly the saturated pressure that doubles its burden.
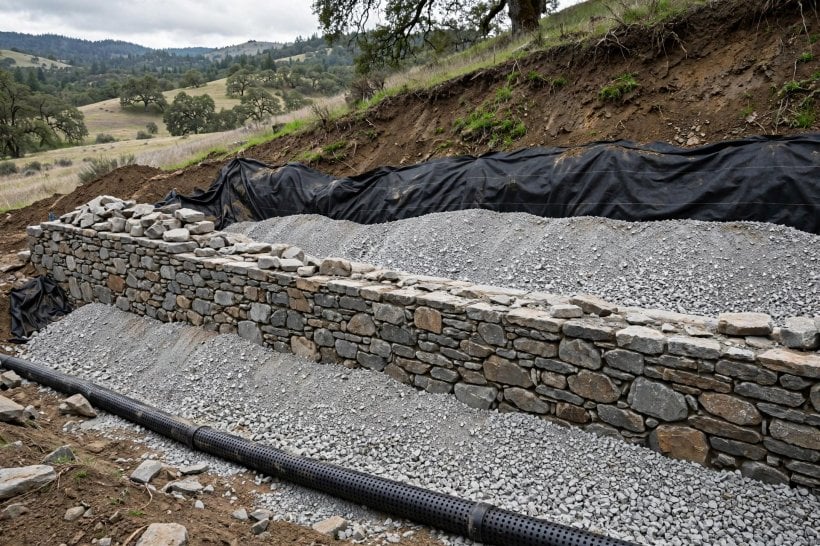
Each method adds its own half. Dry-stack gets a bonus: its open joints drain by themselves, no weep holes needed — the wall breathes. Mortared work carries a requirement instead: weep holes plus the drain pipe, because rigid walls die from trapped water, and this detailing is what separates 50-year walls from 5-year failures. The same move-water-on-purpose thinking shapes our guide to building a river-rock dry creek bed for drainage. Finally, test the wall: after the first heavy rain, inspect it. Water should weep and drain freely and the wall should not move. Any bulging means the drainage has failed — fix it now, while the fix is still small.
10. The Verdict: Matching the Method to Your Wall
The decision compresses to a short specification. Under 3 ft in frost country, choose dry-stack: flexible, self-draining, forgiving of a beginner’s mistakes and of the ground’s movement. Formal in style, tall in the 3–4 ft range, or loaded with surcharge, choose mortared — on a frost-depth footing, with weep holes and drains treated as part of the wall rather than extras. Either way, the shared discipline is identical: a gravel base, a battered face, clean gravel backfill, and water managed like the wall’s life depends on it — because it does.
One caution closes the loop with the first section: this guide covers walls to 4 ft, and anything taller, or carrying real surcharge, is engineered work. Within that honest limit, a well-built wall of either kind outlives its builder; a poorly drained one embarrasses them within five years. The stone itself can be gathered with the patience described in our guide to laying out big landscape rocks and boulder placement, and the wider family of stone choices is compared in our roundup of landscaping rock ideas: lava rock, river pebbles and slate. Choose the method your climate and your wall demand, build the drainage like you mean it, and the hill stays where you put it.
Final Considerations
A natural rock retaining wall succeeds or fails on the unglamorous details: the forces respected, the base prepared, the face battered, the backfill clean and the water given a way out. Dry-stack wins on flexibility, self-drainage and repairability; mortared work wins on strength, precision and height. Neither forgives bad drainage. Build the water management first in your mind and the stones second, keep heavy loads back from the crest, respect the 4-ft line where engineering takes over, and the wall you build this season becomes part of the landscape for whoever owns the hill after you.


1 Comment