

Dusty slats can make a whole room feel neglected, yet the fix is usually gentle and quick once you know how to clean wooden blinds without soaking, scratching or bending them. This guide walks through dry dusting, careful spot cleaning and the small habits that keep real wood and faux wood looking their best.
Start with the lightest method first, work top to bottom, and only move to a damp cloth where dry cleaning is not enough.
1. Cleaning Wooden Blinds at a Glance: Quick Questions and Answers
Most questions about blind care come down to water, timing and tools. Real wood dislikes soaking, faux wood tolerates a little more moisture, and both dislike harsh scrubbing and rushed handling. Use this quick question-and-answer table to choose your method before you touch a slat, then read the matching section below for the full steps. If your blinds hang in a kitchen or bathroom, pay extra attention to the notes on grease and humidity, because those rooms change what a safe clean looks like.
| Question | Short answer |
|---|---|
| Can I use water on real wood blinds? | Use only a lightly damp, well-wrung cloth for spot cleaning. Never soak or spray them. |
| Are faux wood blinds easier to clean? | Generally yes. They usually tolerate a damp cloth better, but still avoid soaking and harsh cleaners. |
| How often should I dust? | Little and often is easiest: a light dust regularly, and a deeper clean when slats look dull or sticky. |
| What should I avoid? | Excess water, abrasive pads, strong solvents and bending slats to reach awkward corners. |
| Should I take the blinds down? | For routine cleaning, no. Cleaning in place is safer for cords, ladders and your patience. |
| What about cords and the headrail? | Dust them as part of the job, and check for wear while you work. |
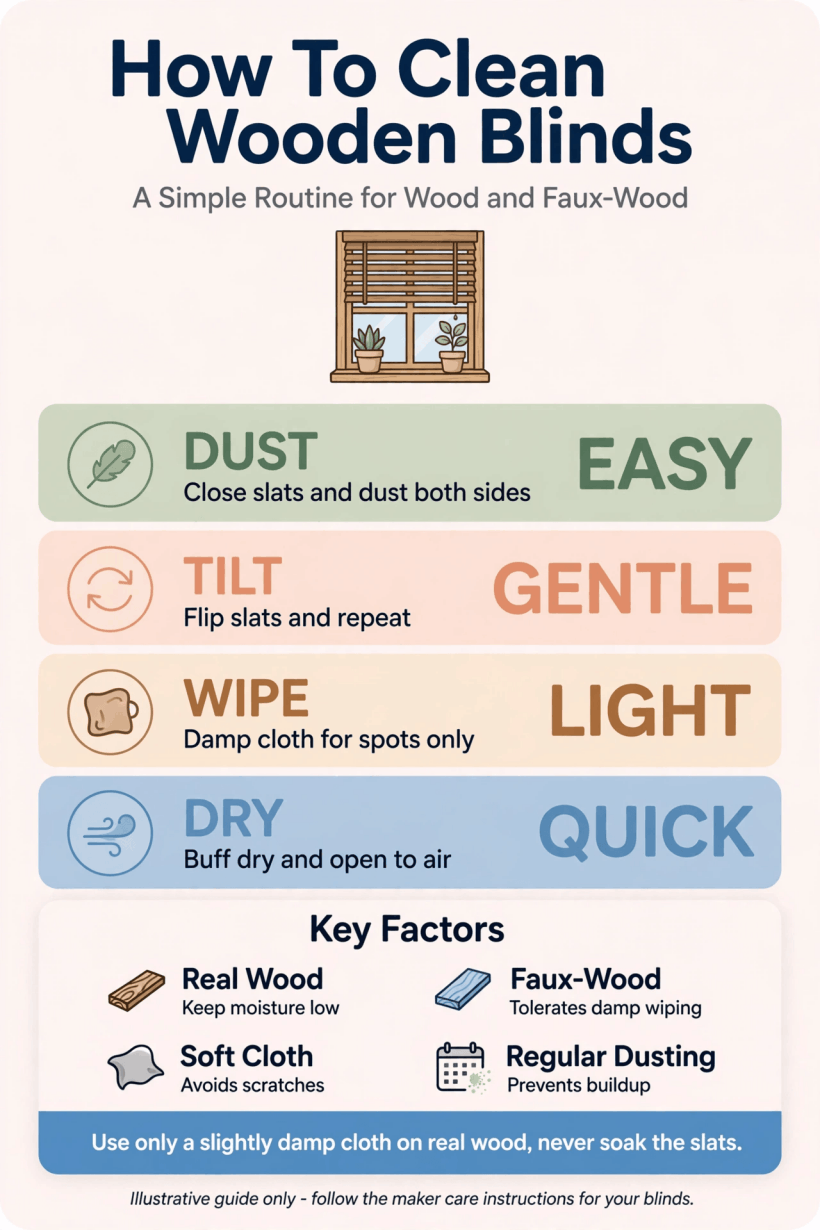
A visual summary of the dry-first method, the damp-cloth rules and the checks to make while you clean.
That dry-first principle is the heart of this guide. Dust is abrasive when it is dragged across a finish with a wet cloth, so removing the loose layer first protects the surface and makes any later spot cleaning easier. It also reveals what you are really dealing with: ordinary household dust lifts away in minutes, kitchen film needs a gentler, more deliberate approach, and anything that looks like damage rather than dirt should be left alone until you know what finish you have. When in doubt, test any cloth or cleaning approach on a hidden slat end first.
2. Gather Gentle Tools Before You Start

You need very little: a soft microfibre cloth or two, a feather or lambswool-style duster if you like one, a clean soft sock or glove-style duster for gripping slats, a vacuum with a soft brush attachment if you use one carefully, a bowl of plain water for damp spot cleaning, and a dry cloth for finishing. A small step stool helps you reach the headrail without stretching and pulling on cords. Lay a towel or sheet below the window if you expect a lot of dust, especially over bedding, a desk or pale flooring.
What you leave out matters as much as what you gather. Put away abrasive sponges, stiff brushes, scouring powders and any cleaner you would not happily use on a wooden table. Blinds have thin edges, a finish that can dull, and cords that trap grit. A soft tool used slowly beats a powerful product used quickly. If you enjoy methodical, room-by-room care, you may also like the practical routines in our tiny house living room ideas, where small surfaces have to work hard and stay easy to maintain.
Before you begin, close the blinds fully one way and look along them in daylight. Note sticky patches, dusty ladders, any slat that sits crooked, and areas near handles or pet height that gather extra grime. That quick survey tells you whether this is a five-minute dust or a slower, section-by-section clean, and it stops you discovering a problem halfway through with wet hands and no plan.
3. Dry Dust First, Working Top to Bottom

Close the slats so they form a mostly flat surface, with the rounded side facing you if your blinds have one. Starting at the top, wipe or dust downward in smooth strokes, supporting the slats lightly with your other hand so they do not flex or clatter against the frame. Work across the width in sections rather than chasing individual dust lines. When one side is done, tilt the slats the other way and repeat, because dust settles on both faces and along the edges you cannot see from one angle.
A glove or sock duster gives you control on individual slats when the flat pass is not enough. Slide your covered hand along each slat from the centre outward, pinching gently, and shake the dust outside or into a bin as you go rather than redepositing it on the next slat. For a vacuum, use only a soft brush head, low suction if you can choose it, and keep the nozzle moving without pressing slats out of shape. Stop if slats rattle, bend or pull at the ladders; hand dusting is slower but kinder.
Do not forget the parts that frame the job: the headrail at the top, the bottom rail, the valance if fitted, and the cords or tapes. Dust collects heavily on the headrail and then rains down onto clean slats the next time the blind moves. A final soft pass over the windowsill catches what fell. Readers who like this kind of satisfying, orderly reset will find similar thinking in our guide to tiny house bedroom ideas, where calm starts with surfaces that are easy to keep clear.
4. Spot Clean Marks With a Barely Damp Cloth
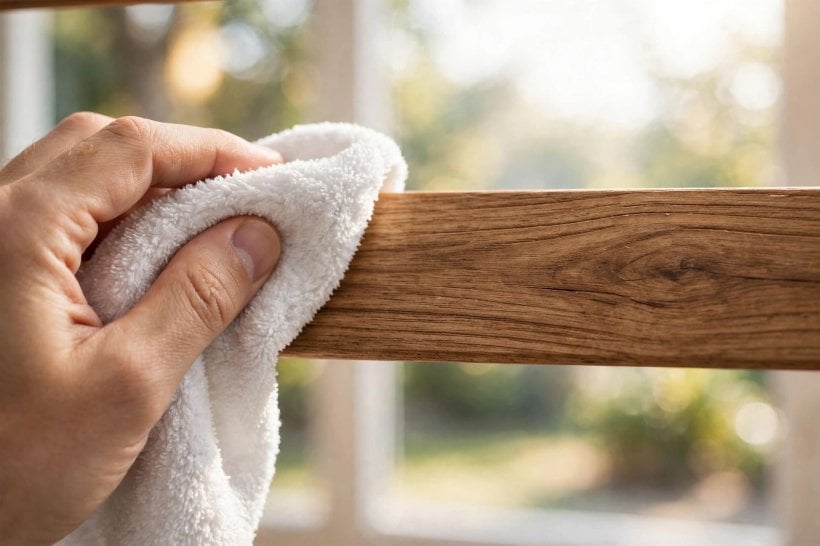
Only after dry dusting should any moisture come near real wood. Dampen a soft cloth, then wring it until it feels almost dry. Wipe the marked slat gently along its length, turning the cloth to a clean area as the mark lifts. Follow immediately with a dry cloth so no moisture sits on the finish or creeps into the edges. Work on one or two slats at a time rather than wetting the whole blind, and never spray liquid directly onto wood, into the headrail or along the cords.
Stubborn spots usually respond better to patience than pressure. Rest the barely damp cloth on the mark briefly, lift, check, and repeat once if needed. Rubbing harder risks dulling the finish, spreading the mark or forcing moisture where it should not go. If a spot does not move with this gentle approach, leave it rather than escalating to stronger products you have not tested. A faint, honest mark is far better than a pale, damaged patch in the middle of a blind.
Keep a clear line between cleaning and refinishing. This guide is about removing dust and everyday marks, not stripping, sanding or recoating. If the finish itself is flaking, sticky all over or worn through, cleaning will not fix it, and water may make it worse. In that case, dust dry only, and seek advice suited to the specific finish before attempting anything wetter or more ambitious.
5. Clean Faux Wood Blinds With a Little More Freedom

Faux wood blinds are made to imitate timber while coping better with moisture and busy rooms, which is why they are popular in kitchens and bathrooms. The routine starts the same way: dry dust first, top to bottom, both faces of the slats. Then, for general grime, a soft cloth dampened with plain water and wrung out well will usually lift far more than it would from real wood. Work in sections, rinse or turn the cloth often so you are not smearing dirt, and dry as you go to avoid streaks.
Even with faux wood, restraint pays. Do not soak slats, flood the headrail or let water pool in the bottom rail and ladder cords. Avoid abrasive pads that can scratch the surface and leave it duller and harder to clean next time. Check the edges and ends of slats as you work, because that is where grime builds and where any swelling, cracking or peeling will show first on older blinds. Catching a failing slat early is more useful than polishing the rest to perfection.
If you are choosing window treatments for a compact, hard-working home, the balance of looks and upkeep matters as much as the purchase itself. Our overview of bedroom interior design for tiny houses returns often to that theme: finishes that forgive daily life keep a small space feeling cared for, while fussy materials quietly become chores. Faux wood, cleaned little and often, is very much in that forgiving camp.
6. Tackle Kitchen Grease and Bathroom Humidity Carefully

Kitchen blinds collect a fine cooking film that turns dust sticky, so a dry duster alone may simply push it around. Dry dust first anyway to remove the loose layer, then use the barely damp cloth method on real wood, one slat at a time, drying each immediately. Expect slow progress and change cloths when they feel tacky. For faux wood in a kitchen, you can be a little more thorough with the damp cloth, but still avoid soaking and still dry behind you. Ventilate the room while you work so surfaces dry promptly.
Bathrooms bring humidity rather than grease. Blinds that stay damp can hold musty dust in cords and corners, so clean on a dry day if you can, open a window or run the extractor afterwards, and make sure slats are fully dry before closing them flat for the night. Wipe the sill and the bottom rail too, since that is where condensation and dust meet. If you spot anything that looks like mould on cords, tapes or the wall around the blind, treat that as a separate problem to address properly rather than something a quick wipe will solve.
Room-specific care is a habit worth building across the home. The same attention to moisture, ventilation and gentle methods runs through our tiny house bathroom ideas, where small, steamy rooms reward materials and routines that dry out fully. Blinds are part of that system: clean them, dry them, and let air reach them, and they will stay fresher for far longer between deep cleans.
7. Care for Cords, Ladders, Rails and Controls

A blind can have gleaming slats and still look tired if its cords are grey, its ladders dusty and its headrail furred. Run a dry soft cloth down accessible cords and along the ladder strings or tapes as part of every deeper clean, supporting rather than tugging them. Dust the headrail and any valance, wipe the bottom rail, and check the tilt wand or cord controls move smoothly. Grit in moving parts is a common cause of stiffness, and gentle dusting often improves the feel without any adjustment.
Cleaning time is also inspection time. Look for frayed cords, slats that no longer sit level, cracked ends, loose brackets and any cord arrangement that seems unsafe, especially in homes with young children or pets, where cord safety deserves particular care and current local guidance. This guide does not replace manufacturer instructions or safety advice for your specific blind, so if something looks worn, tangled or broken, stop using force, keep the blind still, and get the right help or replacement part.
Treat controls kindly afterwards, too. Raise, lower and tilt the blind fully once you have finished, confirming everything travels evenly and the slats stack neatly. A blind that is exercised gently and kept dust-free is less likely to develop the lopsided hang that makes owners pull harder, which in turn wears cords faster. Small, regular kindness is the whole secret of blind longevity.
8. Build a Simple Dusting Routine That Sticks

The easiest deep clean is the one you rarely need because dust never built up. Add blinds to an existing routine rather than inventing a new occasion: a light pass with a duster when you dust shelves, a quick slat wipe when you clean the window glass, a proper top-to-bottom session when you change bedding or rotate seasonal jobs. Keep the duster where the blinds are, not in a distant cupboard, because tools within reach get used and tools that need hunting for do not.
Match effort to the room. Hall and bedroom blinds in a low-dust home may need only light, regular attention. Kitchen, street-facing and pet-shared rooms will ask for more. Rather than following a rigid calendar, learn the look of your own blinds in daylight: when the slats lose their sheen and dust shows as a soft edge along each one, it is time. That visual cue, checked in passing, is more reliable than any schedule printed in a guide, including this one.
Homes that run on small, repeatable systems stay calmer, a principle we return to in how to build your own tiny house, where planning the maintenance matters as much as planning the build. Knowing how to clean wooden blinds is really knowing a system: dry first, damp sparingly, dry afterwards, inspect as you go. Once that rhythm is familiar, a whole house of blinds becomes an hour of steady work rather than a dreaded project.
9. Avoid the Mistakes That Damage Blinds

Most blind damage during cleaning comes from good intentions applied too hard. Soaking real wood, even briefly in a bath, risks warping, swelling and finish trouble, and is never part of a routine clean. Spraying cleaner directly onto slats sends liquid into edges, cords and the headrail where you cannot dry it. Scrubbing with abrasive pads or stiff brushes scratches finishes, and those scratches then hold dirt, making every future clean harder and less satisfying.
Handling causes the rest. Bending a slat to reach behind it, yanking a blind down by one cord, letting slats bang against the frame, or standing on furniture and pulling the blind toward you all shorten its life. Support slats while you wipe, move a stool instead of stretching, and keep children and pets from treating cords as toys. If a blind is very large, high or heavy, cleaning it in smaller sections across two sessions is wiser than struggling through in one tiring pass.
Finally, beware the miracle product. Anything promising to strip, whiten, restore and protect in one wipe deserves a hidden-area test and a sceptical read of its directions, and many blinds need none of it. Plain dusting, a barely damp cloth and prompt drying handle the overwhelming majority of everyday dirt. When a product or method feels out of proportion to a dusty slat, it usually is.
10. Know When a Blind Needs More Than Cleaning
Sometimes the honest answer is that dirt is not the problem. Slats that stay sticky after gentle cleaning, finishes that feel rough or look patchy, cords that fray, ladders that snap, or a headrail mechanism that grinds and sticks all point beyond cleaning. So does a blind that no longer tilts evenly, leaving some slats open and others closed. Continuing to wipe a failing blind wastes effort and can turn a repairable fault into a broken one, so treat persistent problems as a prompt to investigate parts, repair or replacement.
Start with identification. Note whether the blind is real wood or faux wood, keep any original paperwork or maker details you have, and photograph the mechanism and any damage in daylight before changing anything. That record makes it far easier to get the right advice or part. Avoid improvising repairs to cords and mechanisms under tension if you are unsure what you are doing; a blind is a simple object, but its cords and springs still deserve respect.
There is also a design decision hiding here. If a steamy bathroom keeps defeating real wood, or a sunny kitchen window demands constant attention, a different material in that one spot may serve the house better, even if the rest of your blinds stay wooden. Our feature on a colourful tiny house interior shows how mixing materials thoughtfully, room by room, can look intentional rather than mismatched. Clean what can be cleaned, repair what can be repaired, and replace only what has truly finished its work.
Final Considerations
Clean wooden blinds reward a light touch and a steady order: gather soft tools, dry dust from the top down, spot clean with a barely damp cloth, dry as you go, and use the job to check cords, rails and controls. Faux wood allows a little more moisture; real wood asks for a little more restraint; both last longer when dust never gets the chance to become grime.
Keep the routine small and regular, ventilate steamy rooms, and leave damaged finishes and mechanisms to proper advice rather than stronger cleaning. Do that, and your blinds will frame the light beautifully instead of framing the dust.




0 Comments