

A trimmer that idles happily but dies the moment you squeeze the throttle is telling you something specific: it can get just enough fuel and air to tick over, but not enough to work harder. Work through the checks below in order, from the simplest and cheapest first, before you open anything up, adjust anything blindly, or order any parts.
1. At a Glance: What To Check First
Most engines that stall under load are not seriously broken. They are usually starved of fuel, starved of air, or losing spark when demand rises, and each of those causes leaves a slightly different clue. Owners searching for ryobi s430 problems often describe exactly this pattern, but the same logic applies to almost any small petrol trimmer, because the systems involved are broadly the same. Before you begin, note how the engine behaves. Does it cut out instantly, bog down slowly, surge up and down, or only die once it is hot? Those details matter, because an engine that dies instantly points in a different direction from one that fades. Use the table below as a quick question-and-answer map, then work through the sections that follow in order rather than jumping straight to the carburettor.
| Question | What It Suggests and Where To Look |
|---|---|
| Does it die instantly at full throttle? | A sudden cut can point to fuel starvation, a blocked vent, or a spark that breaks down under load. Start with Sections 3, 4 and 6. |
| Does it bog down and then fade? | A gradual fade often suggests a dirty air filter, stale fuel, or a partly blocked fuel filter. Start with Sections 3, 4 and 5. |
| Does it only die when it is hot? | Heat-related stalling can involve fuel flow, a tired spark plug, or a blocked exhaust screen. Work through Sections 3, 6 and 8. |
| Does it run with the choke partly on? | That usually means the mixture is too lean without help, which points towards fuel delivery or the carburettor. See Sections 4 and 9. |
| Has it been stored for a long time? | Old fuel is the first suspect after storage. Drain it and start again with fresh fuel before testing anything else. See Section 3. |
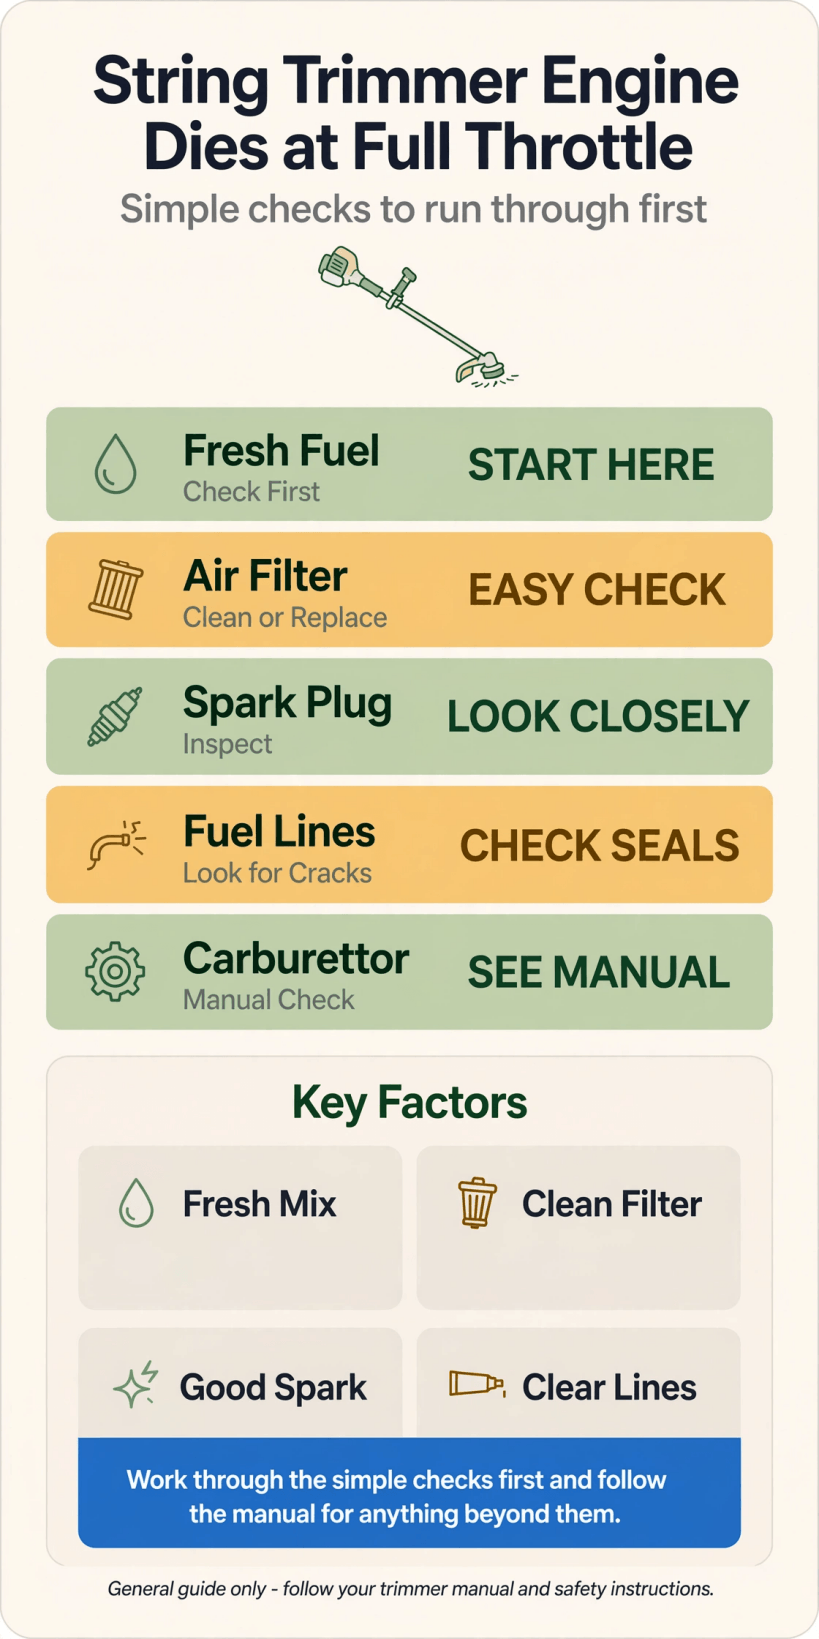
A visual summary of the checking order in this guide, from fuel and filters through to spark, exhaust and the carburettor.
2. Start With Safety and a Clean Baseline
Before any check, let the engine cool fully, work outdoors or in a well-ventilated space, and disconnect the spark plug lead so the engine cannot start unexpectedly while your hands are near moving or sharp parts. Wear gloves and eye protection, keep fuel away from ignition sources, and have a suitable container ready for any fuel you drain. If fuel has spilled, wipe it up and let the area dry before you test-run the engine again.
A clean baseline makes diagnosis far easier. Brush grass, dust and oily debris away from the engine, the fuel cap area and the air filter cover, because dirt sitting around openings has a habit of falling inside the moment you remove a cover. Lay the machine on a stable surface where small parts cannot roll away, and keep a tray nearby for screws. Photograph linkages and hose routes before you disturb them if you go deeper later; a quick photo is the simplest memory aid there is.
Work in the same spirit you would use for weekend jobs around a plot you are shaping with tiny house landscaping ideas: tidy the area, understand what you are looking at, and change one thing at a time. Changing several things at once may fix the problem, but you will never know which change mattered, and that knowledge is what saves you time next season.

3. Check the Fuel Itself Before Anything Else
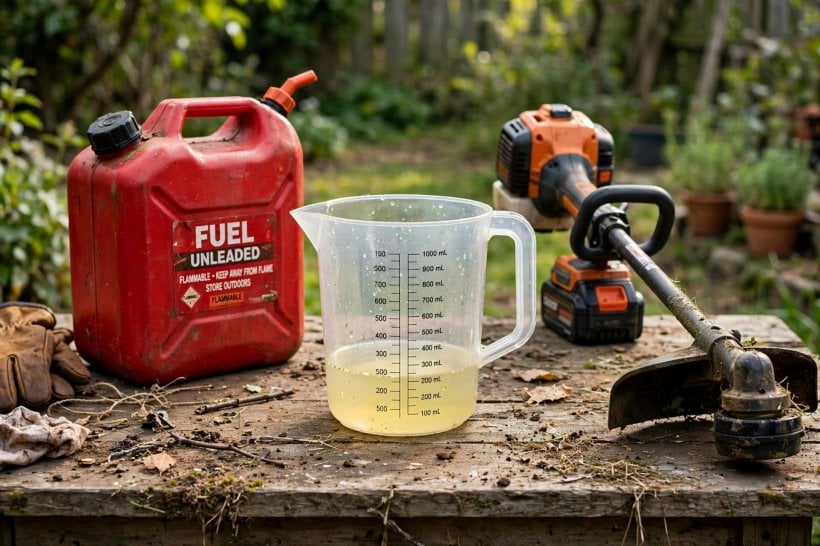
Fuel is the most common cause of this symptom and the cheapest to rule out, so it comes first. Petrol left sitting in a tank or a can through a season can lose its lighter components and absorb moisture, and an engine may still idle on it while failing completely when the throttle demands more. If you cannot remember when the fuel was mixed or bought, treat it as suspect. Drain the tank into an approved container, dispose of the old fuel responsibly through local channels, and refill with fresh fuel mixed exactly as the manual for your engine specifies.
While the tank is empty, look inside with a torch. Debris, a cloudy layer, or a strong varnish smell all tell you the fuel system has been sitting in poor conditions. Check the fuel cap seal as well, because a cap that does not seal properly can let dirt and moisture in over time. Refill, then give the fresh fuel a few minutes of running at idle and gentle throttle before you judge the result; the carburettor and lines still hold some old fuel that needs to work through.
If fresh fuel transforms the engine, stop there and make a note of the date on the fuel can. If nothing changes, you have still removed the biggest variable from the diagnosis, and every later check becomes more trustworthy. Fuel discipline matters just as much on a working plot as it does in a workshop corner of a project like how to build your own tiny house, where tools earn their keep season after season.

4. Inspect the Fuel Filter, Lines and Tank Vent
If fresh fuel does not help, follow the fuel on its journey from the tank to the engine. Inside many tanks, a small filter sits on the end of a flexible fuel line and can usually be hooked out gently through the filler opening with a clean wire hook. A filter that looks dark, clogged or swollen may pass enough fuel for idling but not for full throttle, which matches this symptom exactly. Replacement filters are generic service items on many machines, but match the type to your manual rather than guessing.
Inspect the fuel lines themselves for cracks, stiffness, softness, kinks and loose connections. Aged lines can suck in air instead of drawing fuel, and a line that collapses or stays pinched under the tank routing will starve the engine precisely when demand rises. Look for damp patches around connections, which suggest leaks, and make sure no line is trapped against a hot or vibrating surface.
Finally, consider the tank vent. Many caps or tanks vent through a small passage that lets air in as fuel is used. If that vent blocks, a vacuum builds in the tank and fuel flow fades after a short run. A simple clue is an engine that runs again after you loosen and retighten the cap. Clear or service the vent only as your manual describes, and never enlarge passages or improvise parts. Restoring clean fuel delivery solves a surprising share of full-throttle stalling without touching the carburettor at all.

5. Clean or Replace the Air Filter
An engine that cannot breathe cannot rev. The air filter sits behind a small cover on the side of the engine, and on a working trimmer it collects grass dust, pollen and oily mist surprisingly quickly. A clogged filter richens the mixture and chokes airflow, so the engine may idle roughly yet die as soon as you ask it for speed and power. Remove the cover carefully, note how the filter sits, and lift it out over your tray so trapped dirt does not fall into the intake.
What you do next depends on the filter type your engine uses, so follow the manual. Foam elements are commonly washed gently, dried fully and treated as the manufacturer directs, while paper elements are usually tapped clean or replaced and should never be washed unless the manual says so. Never run the engine without a filter to test it, even briefly, because unfiltered air carries grit straight into the engine. If the filter is torn, collapsed or still grey and stiff after cleaning, replace it.
While the cover is off, wipe out the housing and check that the cover seals evenly when refitted, with no trapped grass holding it open. A surprising number of running problems are really maintenance problems, much like the small regular jobs that keep a compact home comfortable, from the plans in tiny house living room ideas to the storage habits in tiny house bedroom ideas. Clean air in, and the engine has a fair chance to respond.
6. Look at the Spark Plug and Spark
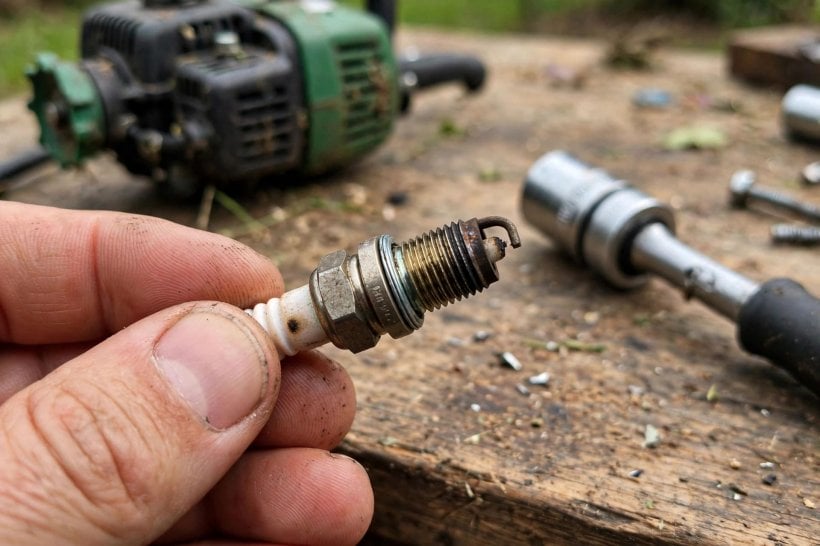
Spark problems often hide at idle and appear under load, because a weak spark that can fire a gentle idle mixture may fail when the cylinder is working harder. With the engine cool and the plug lead disconnected, remove the spark plug with the correct socket and look at its tip. Heavy black soot, oily deposits, a worn or damaged electrode, or a cracked insulator all tell you the plug has been struggling, whatever the cause. A plug is a service item with a limited life, so if it looks tired, fitting a new plug of the exact type the manual specifies is a reasonable, inexpensive step.
Set any gap only to the figure given in your manual, using a proper gauge, and never guess a number from another engine. Refit the plug snugly as directed, without overtightening, and push the lead back on until it seats positively. A loose lead cap is a classic cause of intermittent cutting out that feels exactly like fuel starvation.
If a fresh plug makes no difference, a basic spark check with an inexpensive inline tester, used outdoors and exactly as its maker describes, can confirm whether spark disappears as the engine dies. Do not hold bare ignition parts while cranking, and keep fuel well away from any test. If there is genuinely no spark, the cause may sit deeper in the ignition system, which is a sensible point to involve a repairer rather than replacing parts at random.
7. Watch the Choke, Primer and Throttle Linkage
Sometimes the engine is fine and the controls are lying to it. Start with the choke. After warm-up, the choke should be fully off; a choke plate that stays partly closed because of a stiff lever, a bent link or debris will strangle the engine at full throttle in exactly the way a dirty air filter does. Work the lever and watch the plate or butterfly move through its full travel, and clear away any grass or grit around the mechanism.
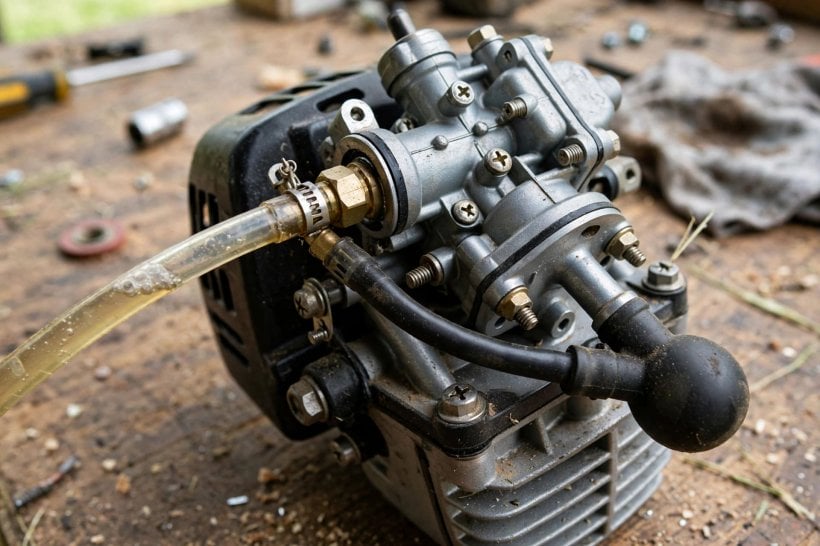
Look at the primer bulb, if your engine has one. A bulb that is cracked, cloudy, stays collapsed or never fills suggests air entering the fuel system or fuel failing to move, and a split bulb can also leak. Press it gently and watch whether fuel visibly moves as the manual describes for priming. Replace a damaged bulb with the correct type rather than sealing cracks, which rarely lasts and sits too close to fuel to improvise safely.
Finally, squeeze the throttle trigger and watch the linkage at the carburettor. The cable or link should move the throttle fully open and let it return cleanly. A frayed cable, a link that has popped out of its hole, or a return spring that has come adrift can all leave the engine under-fuelled at the lever position you think is full throttle. Restore connections to their original holes and routing, using the photos you took earlier, and lubricate nothing unless the manual calls for it. Mechanical honesty from the controls gives every other check a fair test.
8. Consider the Exhaust Screen and Muffler
What goes in must come out. Many small engines have a fine spark arrestor screen at the muffler outlet, and over time it can coat with carbon until exhaust gases struggle to escape. The engine then runs increasingly breathless: it may start and idle, yet refuse to rev or die as soon as load pushes more gas through a blocked outlet. Because this builds up gradually, owners often blame fuel first, which is why this check sits here, after the simpler systems and before the carburettor.
With the engine completely cold, locate the screen or outlet arrangement described in your manual. If the design allows the screen to be removed for cleaning, take it out carefully, note its orientation, and clean it only by a method the manufacturer permits. If it is clogged solid, torn or distorted, replacement is usually the honest answer. Never run the engine with a required screen removed, and never drill out a muffler to improve flow; both defeat a safety feature designed to reduce fire risk around dry grass.
Refit everything securely before testing, because loose muffler fasteners can leak hot gas and noise in the wrong places. If the engine now revs freely, add screen checks to your seasonal routine alongside other outdoor maintenance, the same way a home with character, such as those in colorful tiny house interior tours, still depends on unglamorous upkeep behind the scenes. Breathing out matters as much as breathing in.

9. Move to the Carburettor, In This Order
Only now, with fuel, filtration, air, spark, controls and exhaust checked, should the carburettor enter the picture. Work in a deliberate order so you do not create new problems. First, check the outside: mounting fasteners snug, gaskets seated, no fuel weeping from joints, and all links and hoses back where they belong. An air leak at a loose mounting can lean the mixture enough to stall an engine under load while leaving idle almost normal.
Second, resist the urge to twiddle adjustment screws randomly. If your carburettor has them, note their exact positions before touching anything, and change settings only in small steps described by the manufacturer, returning to your notes if things get worse. Many modern units have limited or sealed adjustments precisely because small turns have large effects. Third, consider cleanliness inside. Stale fuel leaves varnish and grit in tiny passages, and a careful clean by someone equipped for small carburettors, with the correct gaskets and diaphragm parts for that unit, is a recognised service job rather than a failure on your part.
Diaphragms inside metering sections stiffen with age and fuel exposure, and a stiff diaphragm can deliver fuel at idle yet fail at demand, which matches this symptom closely. That is a parts-and-manual job, not a guessing job. Treat the carburettor with the same respect you would give the fitted systems inside a tiny barn house interior: understand the order of work before you open anything, and keep every small part accounted for on the tray.

10. Know When To Stop and Seek Help
There is a point in every diagnosis where continued guessing costs more than help. If you have worked through fuel, filter, lines, vent, air filter, plug, controls and exhaust, and the engine still dies at full throttle, the remaining causes tend to need model-specific information, compression or ignition testing equipment, or internal engine work. None of that is a verdict on your ability; it is simply where general guidance ends and your engine’s own documentation, or a repairer’s bench, begins.
When you hand the machine over, hand over your notes too. Tell the repairer exactly what you changed, in what order, and how the engine behaved after each step. That record saves diagnostic time and prevents repeated work, and it is the practical payoff of the one-change-at-a-time approach used throughout this guide. Keep the same notes for yourself if the symptom ever returns, because a pattern across seasons, such as stalling only after winter storage, points straight back to fuel care.
It also helps to build small habits: run the engine periodically during long projects, store it as the manual directs, and deal with odd behaviour early rather than working around it. The households that run smoothly, whether in a family house or in the compact layouts explored in bedroom interior design for tiny houses and guides to tiny house bathroom ideas, are usually the ones where small maintenance never becomes a big repair.
Final Considerations
An engine that dies at full throttle is rarely mysterious once you think in systems. It idles, so it has some fuel, some air and some spark; it dies under demand, so one of those three cannot keep up. Work from the tank forwards, from the outside inwards, and from the cheapest check to the most involved, and most cases of ryobi s430 problems and similar small-engine stalling resolve before the carburettor ever comes off. Keep notes, keep the manual close, use only the parts and settings your own engine specifies, and let a repairer take over when the checks run out. That patient order, more than any single tip, is what turns a frustrating afternoon in the garden into a trimmer that simply works again next time you pick it up.




0 Comments