

Every fixture in the room sits in the spray zone. The toilet, the sink, the steam with nowhere to go, and twenty square feet of tile standing between your subfloor and rot. Skip one waterproofing layer and you will not discover the mistake for two years, when the floor goes soft underfoot. This walkthrough gives you the right sequence, from subfloor to finished tile.
How to Waterproof a Tiny House Bathroom: At a Glance
Learning how to waterproof a tiny house bathroom starts with a reframing: in a tiny house, the bathroom concentrates every moisture risk of the whole dwelling into 20–30 square feet — shower spray, steam, splashing, and a floor that must drain — and in most tiny houses the bathroom is a wet bath, where the entire room is the shower. That makes waterproofing not a finishing touch but the structural system that keeps the house from rotting. Order of operations is everything: the slope is framed before the floor goes down, the membrane goes on before the tile, and the flood test happens before anything can hide a leak. The ten sections below run the complete protocol in build order — the layout decision first, then framing, the membrane, drains, tile, walls, ceiling and fixtures, ventilation, and finally the failures this sequence prevents and the routine that keeps it all working. Build it like a boat, because functionally it is one.
| Topic | What It Covers | Key Fact or Figure |
|---|---|---|
| 1. Wet Bath vs Dry Bath | The layout decision that sizes the whole job | Wet bath fits in 24–36 sq ft; dry bath needs 35–50 |
| 2. Framing for Water | The structure beneath the waterproofing | Floor slopes 1/4″ per foot to the drain |
| 3. The Membrane | The critical layer — tile is only decoration | Liquid membrane ~$1–2/sq ft, 2–3 coats |
| 4. Drains | The exit strategy for every drop | Linear drain $200–400 vs $30 standard |
| 5. Tiling the Wet Bath | Materials and method that survive the spray | Floor tile 2×2″ or smaller; COF ≥ 0.42 |
| 6. Walls: The Spray Zone | Backing and membrane where water lands daily | Cement board or foam board — never drywall |
| 7. Ceiling and Fixtures | Steam above, spray-rated fixtures below | Marine/RV toilet; no vanity cabinet to rot |
| 8. Ventilation | Drying the room between uses | 50+ CFM fan, run 20+ minutes after showering |
| 9. Common Failures | The six ways wet baths leak | A skipped flood test tops the list |
| 10. Prevention | The routine that keeps it waterproof | 60-second squeegee prevents 90% of mold issues |
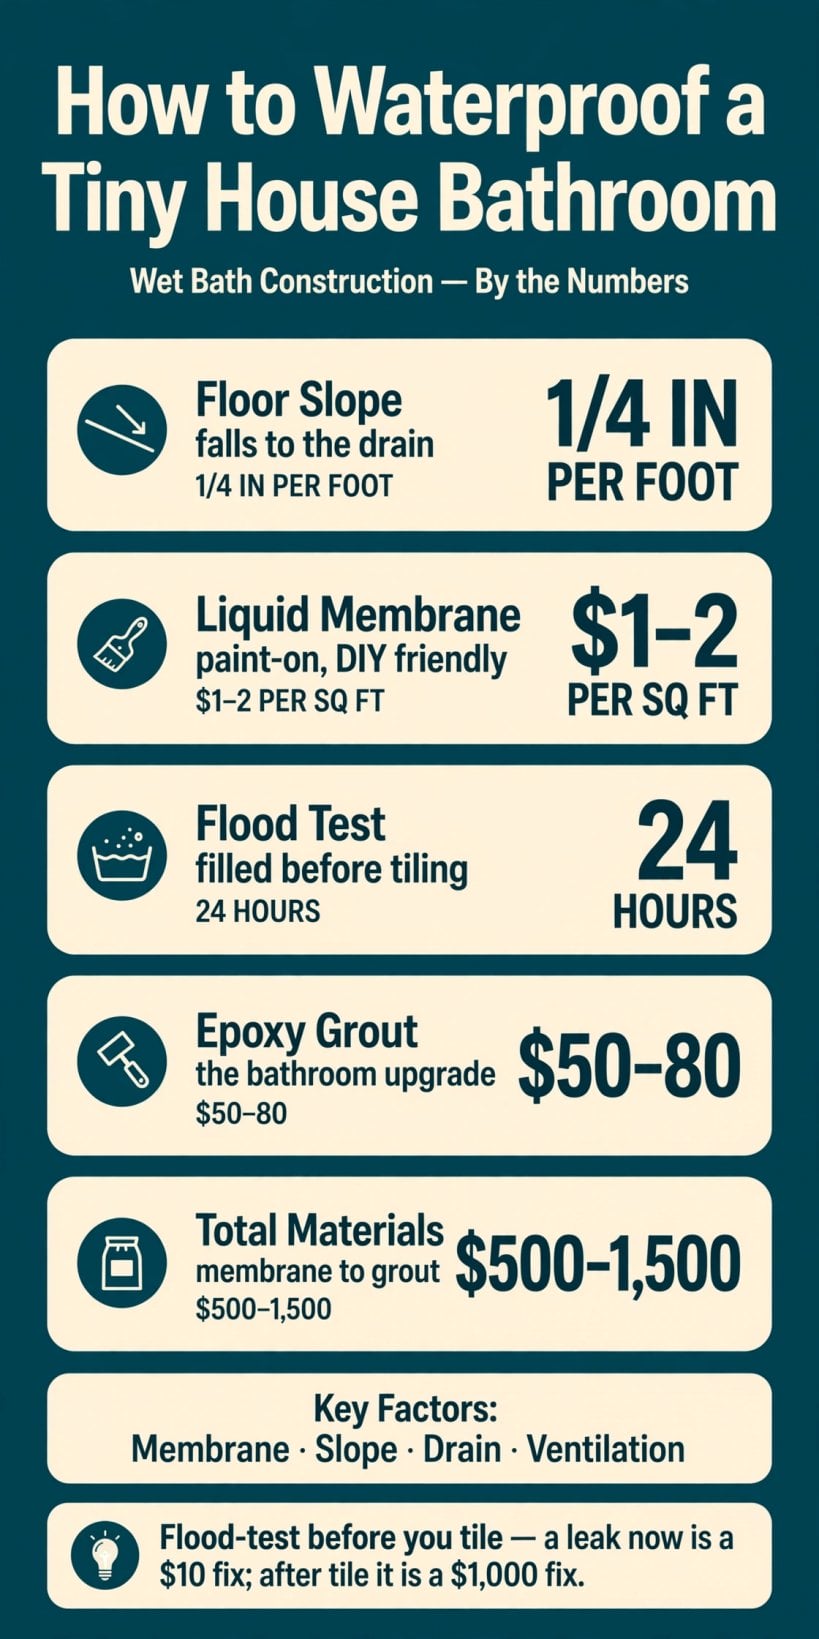
The wet bath by the numbers: a 1/4-inch-per-foot slope, liquid membrane at roughly $1–2 per square foot, a 24-hour flood test, epoxy grout — and $500–1,500 of materials between your subfloor and rot.
1. Wet Bath vs Dry Bath: The Layout Decision
The first decision is what kind of bathroom you are waterproofing. In a wet bath, the entire bathroom is the shower: waterproof floor, walls and ceiling, with the toilet and sink living inside the spray zone as marine or RV fixtures. Its advantages are the ones tiny houses care about — the simplest plumbing, the smallest footprint at 24–36 sq ft total, and no shower door or curtain to fit, swing or clean. Its costs are lifestyle costs: everything gets wet, toilet paper needs a dry box, and the room needs drying time after every shower.
A dry bath separates the shower into its own stall, with the toilet and sink outside it. The fixtures stay dry and the feel is familiar, but the footprint grows to 35–50 sq ft — a luxury in a tiny house — and the build adds a shower pan and a door. The verdict from the original comparison stands: most tiny houses go wet bath for the space savings, and the layouts that make the small footprint work are collected in our roundup of tiny house bathroom designs. This guide assumes a wet bath from here on; the waterproofing principles apply to both, but the wet bath applies them to every surface in the room.
2. Framing for Water: The Structure Beneath
Wet bath framing differs from dry framing in four ways, and all four happen before any waterproofing product is opened. First, pressure-treated bottom plates: the plate sits in occasional standing water, so it is PT lumber or a composite plate, never ordinary framing stock. Second, the framing layout serves the drain: the shower drain location determines the joist layout, so frame the drain opening before the floor goes down, not after. Third, the sloped subfloor: the entire bathroom floor slopes 1/4″ per foot toward the drain, and that slope is built into the framing with tapered sleepers or a mortar bed — not with wishful thinking at tile time.
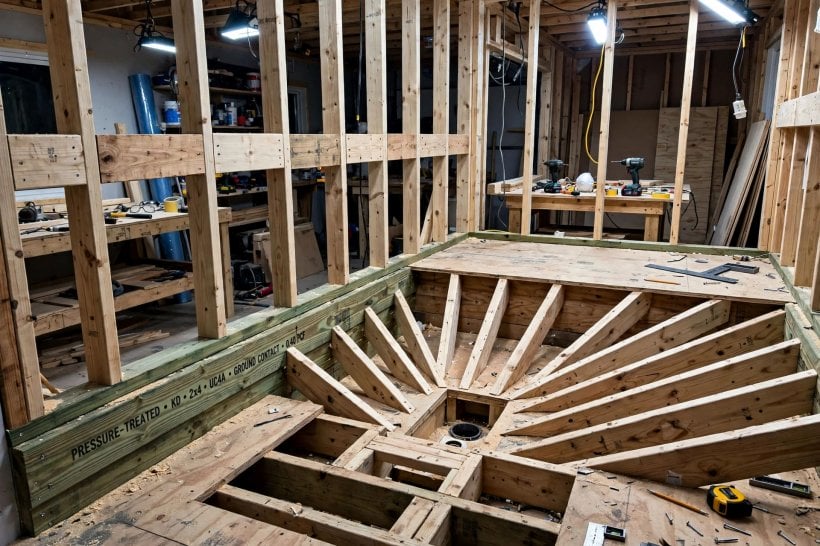
Fourth, blocking for fixtures: grab bars, shower heads and wall-hung fixtures all need solid blocking behind the finished surface, and it goes in now, while the walls are open. Retrofitting blocking through finished tile is miserable work that usually ends with surface-mounted compromises. The discipline of this section is the discipline of the whole build — every later layer assumes the framing decisions were made in this order. Frame it like a shower, because it is one.
3. The Waterproofing Membrane: The Critical Layer
The membrane is the actual waterproofing — tile is decoration. Three families of membrane cover the options. Sheet membranes (Schluter Kerdi, NobleSeal) are fleece-backed polyethylene bonded with thinset; they are the pro standard at roughly $2–4 per square foot. Liquid membranes (RedGard, Hydro Ban) are painted or rolled on in 2–3 coats; DIY-friendly at roughly $1–2 per square foot, they are the most common tiny house choice. Foam shower systems (Schluter Kerdi-Shower kits) supply pre-sloped trays and curbs with integrated membrane — expensive, but foolproof, because the slope and the membrane arrive as one engineered package.
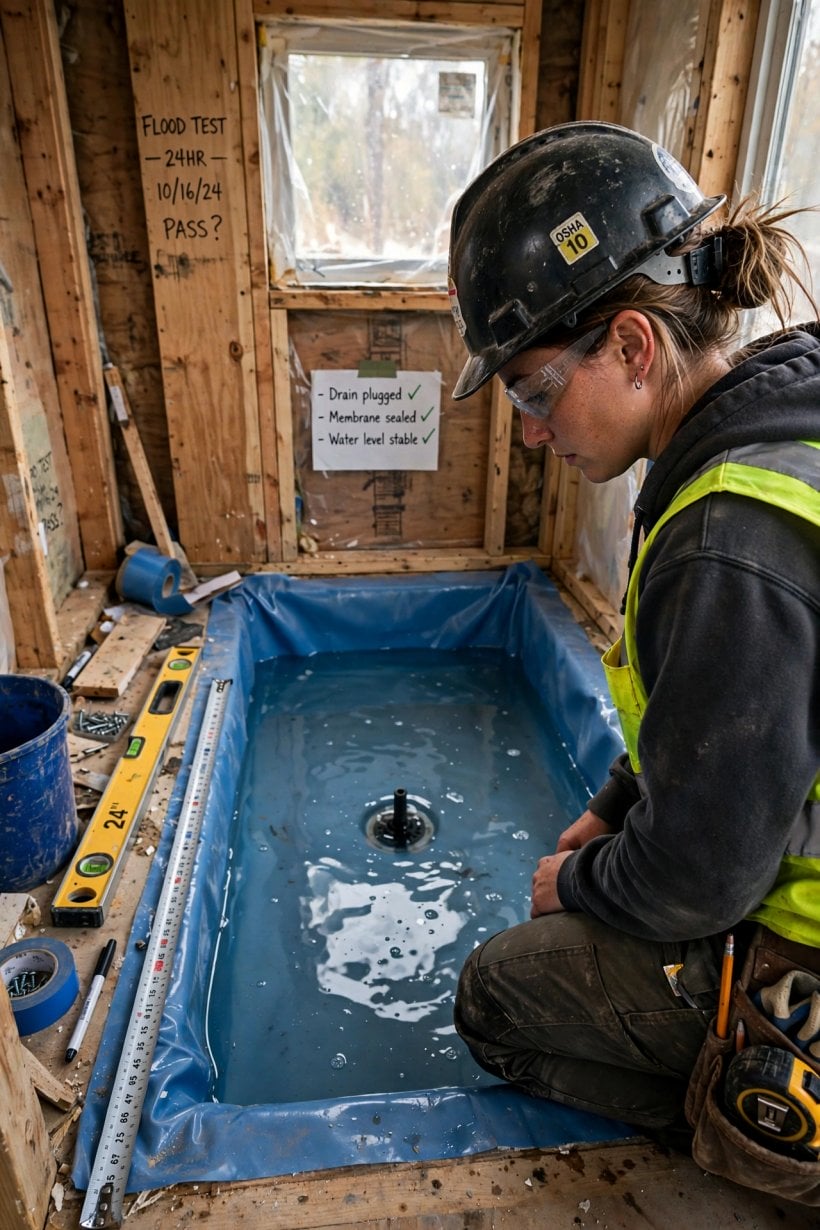
Whichever family you choose, the protocol is the same. Membrane the floor entirely, wall to wall, and turn it up the walls 6 inches or more. Membrane the walls to full shower height — in a wet bath, that means the entire wall. Seal every corner and penetration with membrane banding: inside corners, the drain flange, the shower arm and the valve penetrations, because the corners are where failures start. Then flood-test before tiling: plug the drain, fill the floor 2 inches deep, and wait 24 hours. Any leak found now is a $10 fix; after tile, it is a $1,000 fix. The flood test is not a step in the protocol — it is the protocol’s proof, and section 9 returns to what happens when it is skipped.
4. Drains: The Exit Strategy
Waterproofing keeps water in the room; the drain is how it leaves. The standard choice is a 2-inch shower drain with a clamping ring, which bonds to the membrane — the clamp is the waterproof connection, the single most important joint in the room. The alternative is a linear drain: sleeker, and it allows single-slope floors, at $200–400 against roughly $30 for a standard drain. Placement follows from that choice: a corner drain lets the whole floor slope in one plane, which is simpler; a center drain needs a four-way slope, which is harder to build well in a tiny footprint.
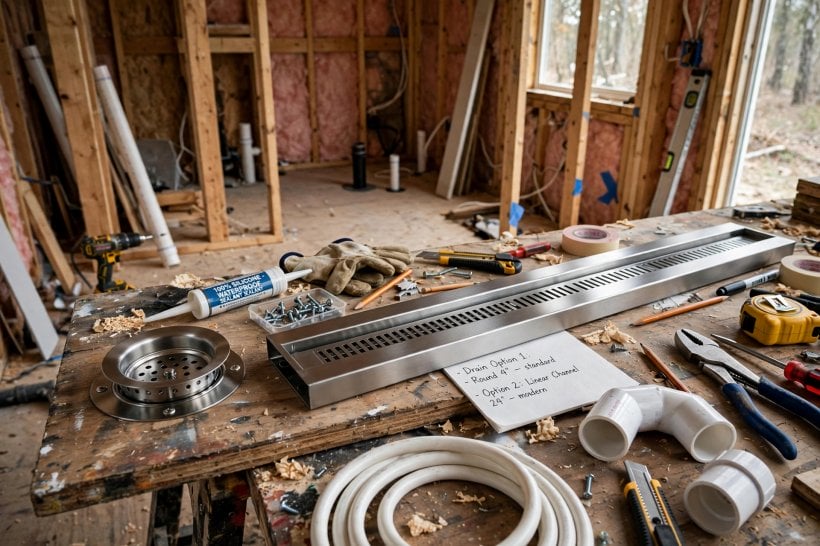
Below the floor, the P-trap needs its own protection: it is the most freeze-vulnerable plumbing in the house, so insulate it and heat-trace it in cold climates — the freeze-protection thinking in our guide to tiny house living in cold climates applies to this one fitting most of all. The drain also has to live inside the house’s wider water plan — the supply, storage and waste decisions worked through in our guide to tiny house utilities for power, water and off-grid sewage. And fit a removable strainer, around $10: the cheapest insurance there is against the number-one drain clog, hair.
5. Tiling a Wet Bath: Materials and Method
Tile choice starts with the material itself: porcelain, not ceramic, because porcelain’s lower water absorption suits a room that is wet every day. On the floor, go small — 2×2 inches or smaller — because small tiles conform to the slope while large tiles bridge it and pond water. Grip matters as much as fit: a coefficient of friction of 0.42 or higher, because wet bare feet need traction. The setting material is polymer-modified thinset — specifically the membrane manufacturer’s approved mortar, because the membrane warranty depends on it — laid to full coverage on the floor, since voids under floor tile collect water and become hidden reservoirs.
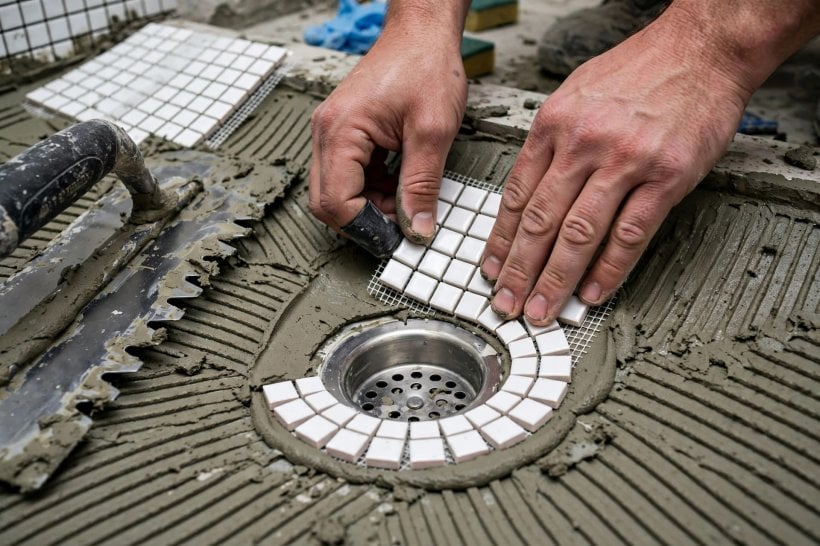
The grout decision is the one upgrade the original guide singles out: epoxy grout, not cement grout. Epoxy is effectively waterproof and stain-proof; at $50–80 for a bathroom against $15 for cement, it earns the original’s verdict as the best $60 in the bathroom. Finally, movement: silicone, not grout, at every change of plane — wall-to-floor and wall-to-wall corners — because grout cracks at corners while silicone flexes. A wet bath floor moves, breathes and vibrates (doubly so in a house on wheels), and the joints are designed to move with it rather than split.
6. Walls: The Spray Zone
In a wet bath the walls get direct spray, so their construction is part of the waterproofing, not part of the decorating. The backing is cement board — not drywall, not green board — or a foam backer board such as Kerdi-Board. Drywall behind tile in a spray zone is a failure scheduled in advance: it disintegrates as it wets, and it takes the tile with it. Over that backing goes the membrane: full wall coverage, liquid membrane rolled over cement board or sheet membrane across the whole surface, banded at every corner and penetration exactly as the floor was.
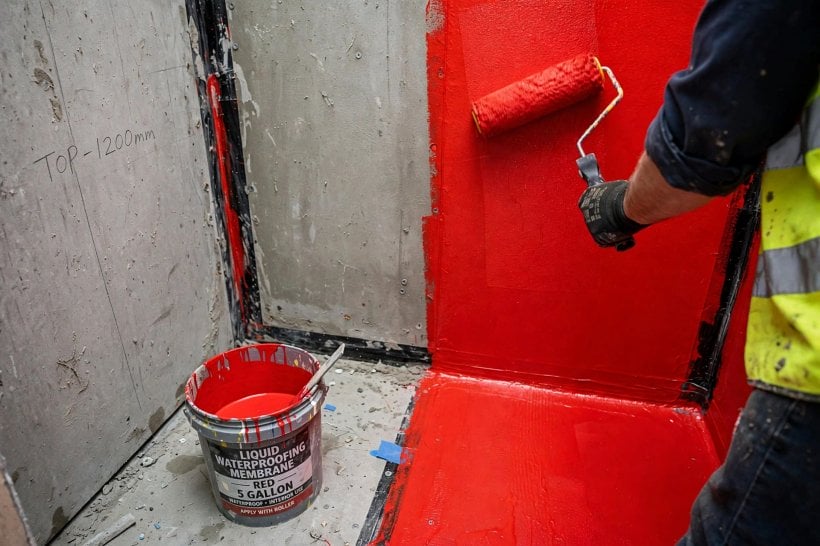
The wall assembly also has to coexist with what is behind it. A tiny house wall is a thin sandwich of insulation, wiring and plumbing, and the moisture discipline that keeps the bathroom dry is the same one that keeps the wall cavity dry — the assembly thinking in our guide to how to insulate a tiny house is the other half of this section’s story. The rule for the spray zone itself is absolute: everything in the room must survive direct water. If it cannot get wet, it does not belong in a wet bath.
7. Ceiling and Fixtures: Steam Above, Spray All Around
The ceiling is the surface builders forget, and steam does not forget it: steam condenses on the ceiling, so the ceiling must be waterproof, not merely water-resistant — membrane plus tile, or a solid-surface panel. Below it, the fixtures are chosen for the spray zone they will live in. The toilet is a marine or RV model: porcelain RV toilets are built to handle the spray zone, while residential toilets corrode in it. Owners weighing a different fixture path entirely will find the waterless alternative compared in our guide to tiny house composting toilets, commercial vs DIY.
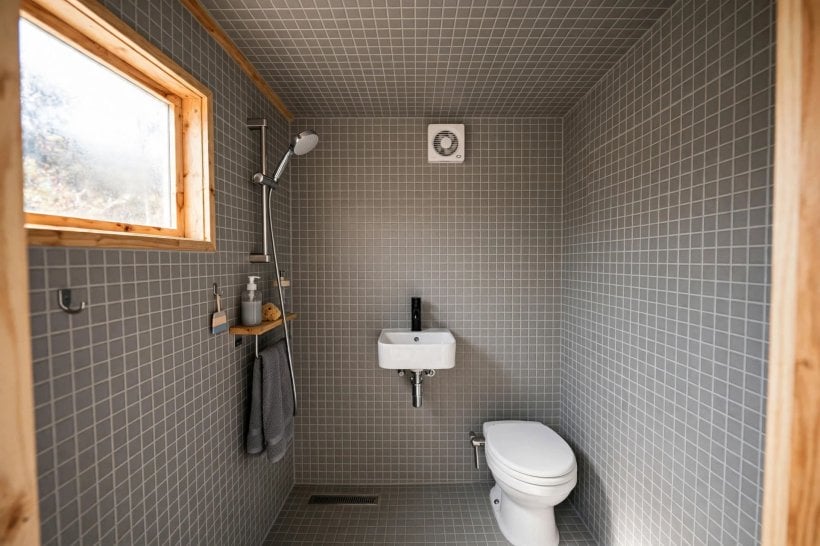
The sink follows the same logic: wall-mounted or compact, pedestal or wall-hung — and no vanity cabinet, because a cabinet is a wooden box waiting to rot at floor level in a room that floods by design every day. Every fixture decision in a wet bath is really the same decision repeated: sealed, elevated or marine-rated wherever possible, with nothing absorbent sitting in the splash path. The room is a shower that happens to contain a toilet and a sink, and the fixtures that thrive in it are the ones specified that way from the start.
8. Ventilation: Drying the Room
A wet bath that never dries grows mold between uses, no matter how perfect the membrane is. The exhaust fan is therefore as important as the membrane: 50 CFM or more, on a humidity sensor or a timer, run for 20-plus minutes after showering. The fan also needs makeup air — replacement air has to come from somewhere, through an undercut door or a vent grille, or the fan spins against a sealed box and moves almost nothing. Whole-house moisture removal is a bigger system question, and the options are compared in our guide to tiny house ventilation with HRV and ERV systems.
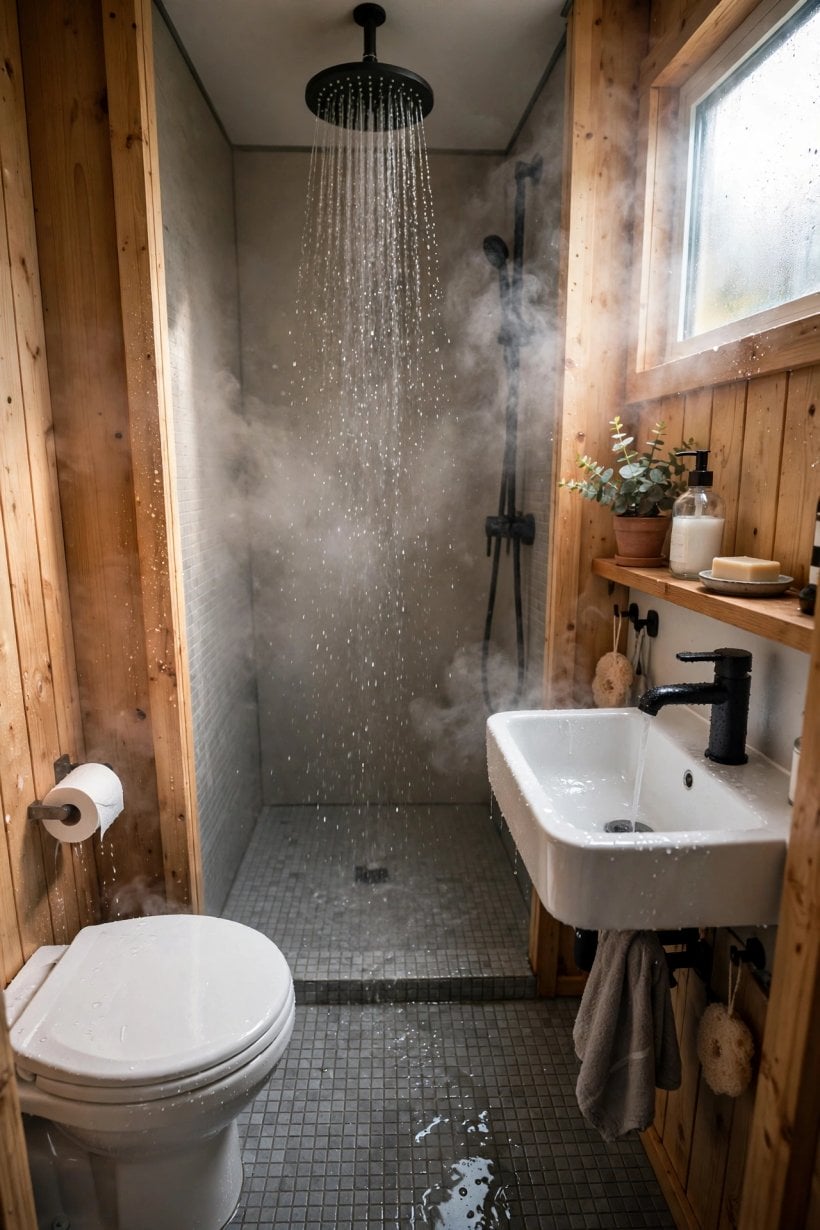
The third element costs nothing: the drying routine. Squeegee the walls after showering — 60 seconds that prevents 90% of mold issues. The division of labour is worth stating plainly, because it organizes the whole guide: the waterproofing keeps water out of the structure, and the ventilation keeps water from lingering on surfaces. Both are mandatory. A builder who membranes perfectly and ventilates never has built a mold farm with excellent bones; a builder who ventilates faithfully over a skipped membrane has built the opposite. The wet bath needs both systems, each doing the half the other cannot.
9. Common Failures (and How They Start)
Six failures account for nearly every wet bath that leaks, and each one is a skipped step from the sections above. The skipped flood test: the leak discovered only after tiling, when the $10 fix has become the $1,000 fix. Grout at the corners: it cracks within months, because corners move and grout cannot — silicone belongs at every change of plane. Drywall backing: it disintegrates behind the tile, silently, until the wall goes soft. A flat floor: it ponds water at the edges, because the 1/4-inch-per-foot slope admits no exceptions.
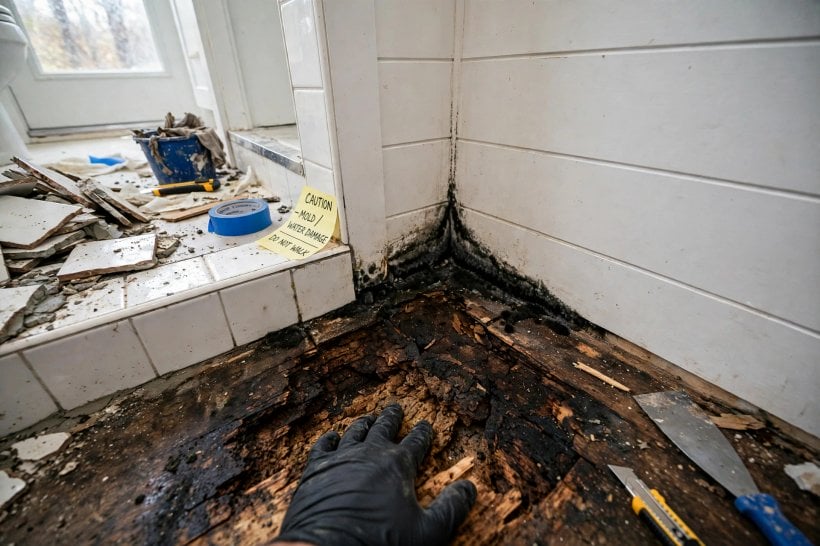
The last two failures are quieter. Unsealed penetrations: the shower arm and the valve leak into the wall cavity, at exactly the points where banding was skipped, and the wall rots from inside while the surface looks fine. And no ventilation: surface mold despite perfect waterproofing, because the room never dries — fan plus squeegee is the fix. Read the six as a checklist in reverse and they describe the build itself: every failure on this list is a section of this guide, skipped. That is not a coincidence; it is the argument for the sequence.
10. Prevention: The Routine That Keeps It Dry
Prevention is the failures list, run forwards as habits. Before tile, the flood test — every time, without exception, because it is the only moment a leak is cheap. At the joints, silicone at every change of plane, inspected as part of the bathroom’s ordinary upkeep and renewed when it ages, since it is a flexible seal doing a permanent job. In the framing and backing, the slope verified and the cement or foam board confirmed before anything covers them. Around the penetrations, banding at each one — shower arm, valve, drain flange — because those are the holes the water is actively looking for.
After the build, prevention becomes the drying routine: the fan run after every shower, the squeegee’s 60 seconds, the strainer kept in the drain. The same discipline extends to the systems feeding the room — the water supply and waste lines reviewed as one system, the way our guide to off-grid tiny house water systems treats them. None of this is expensive or slow. Prevention in a wet bath is not a product you buy after the build; it is the build, plus two small habits — and it is vastly cheaper than the alternative described in the next section.
Final Considerations
A tiny house wet bath is a shower built like a boat: sloped floor, full membrane, flood-tested, epoxy-grouted, ventilated and squeegeed. The materials cost $500–1,500 and the labour is a careful weekend. The alternative — a slow leak rotting the floor framing of a house on wheels — is the most expensive bathroom remodel in tiny house history. The finished room still has to live well as a room, of course, and the layouts and finishes that make a small bathroom feel designed rather than endured are toured in our collection of tiny house bathroom interior design ideas. But the design sits on the waterproofing, never instead of it. That is the whole answer to how to waterproof a tiny house bathroom: waterproof like everything depends on it, because it does.




0 Comments