

A drainage ditch in front of house and road is often the hardest-working strip of the whole plot, and the scruffiest. It carries roof, driveway and street runoff away from the foundations, yet it is also the first thing every visitor, neighbour and passer-by actually sees.
This roundup treats that strip as real landscaping: thirty practical ideas for shaping, planting, crossing and maintaining it, so it drains properly and looks deliberate rather than neglected.

1. Drainage Ditch Ideas at a Glance
Start with what the ditch is for. A front ditch is a shallow channel that collects surface water and moves it, by gravity, to an outfall such as a storm drain, a lower swale or a watercourse. Everything else — stone, planting, culvert pipes, neat edges — is secondary to that one job, and any improvement that slows, blocks or redirects the flow onto a neighbour is a step backwards. Improve the look and the planting freely, but keep the channel open, keep a gentle fall along its whole length, and check who is responsible for it before you alter its shape. The wider picture of collecting and moving water around a plot is covered in our guide to rainwater harvesting.
| Should the ditch stay open or be culverted? | Either can work. An open swale is cheaper to maintain and easy to inspect, while a pipe under a crossing or a short stretch gives level access — many fronts use both. |
| Who owns and maintains a roadside ditch? | It varies. The ditch often falls to the highway or road authority, sometimes to the householder, sometimes shared — check locally before assuming it is yours to change. |
| Can I fill in or move a ditch? | Usually only with permission. Altering a ditch can affect road drainage and neighbouring plots, so get the responsible authority’s agreement first, in general terms wherever you live. |
| How much fall does a ditch need? | A gentle, even fall is the aim — enough that water keeps moving to the outfall without racing and eroding the sides. Avoid flat spots and sudden drops. |
| How do I stop standing water and mosquitoes? | Keep water moving. Clear blockages, correct low spots that pond, and keep the outfall open, so the ditch drains down after rain instead of holding pools. |

At a glance: keep the channel open, keep a gentle even fall, check ownership and permission first, and plant and line the ditch in ways that never slow the water down.
2. Open or Culverted: Understanding the Ditch You Have

Before choosing finishes, decide the basic form. Open and culverted ditches do the same job in different ways, and most frontages end up as a mixture: open channel along most of the boundary, pipe where the driveway crosses, and planting or stone where the flow needs help. The four ideas in this section are the groundwork every later idea depends on.
1. Keep the Open Swale and Tidy It
An open, grassed swale is the simplest and most forgiving form: you can see blockages, clear them with a spade, and regrade a damaged stretch in an afternoon. Tidied — edges trimmed, silt lifted, banks reseeded where they are bare — an open swale reads as a deliberate green fold in the frontage rather than a neglected trench, and it stays the easiest ditch to live with.
2. Culvert a Short Stretch Where Access Needs It
Piping a short stretch makes sense where you need level ground: at the driveway crossing, in front of a gate, or where the post and bins need a firm standing area. Keep culverted lengths as short as the access problem allows, because a pipe hides its own blockages. Every culverted section should stay reachable at both ends for rodding and clearing.
3. Check Ownership and Permission Before You Touch It
Roadside ditches are not always the householder’s to alter. In general terms, a ditch beside a public road is often maintained by the highway authority, a drainage body or the adjoining landowner, and the answer differs by place and even by street. Ask before you dig, fill or pipe anything, keep any agreement in writing, and treat an unanswered question as a stop, not a yes.
4. Follow the Water to a Proper Outfall
Walk the ditch in wet weather and watch where the water actually goes. A ditch only works if it discharges somewhere that can take it — a storm drain, a ditch network, a lower corner of the plot — without flooding a path, a neighbour or the road. If there is no clear outfall, solving that comes before any planting, stone or reshaping elsewhere along the line.
3. Shape, Gradient and Keeping Water Moving

Profile and fall decide whether a ditch drains quietly for years or ponds, silts and smells. The aim is unglamorous: a shallow, even channel, a steady fall in one direction, and no low pocket where water sits after the rain has stopped. These three ideas do more for a front ditch than any amount of decorative work laid over a bad shape.
5. Reshape to a Shallow, Mowing-Friendly Profile
Deep, steep-sided ditches are hard to mow, awkward to cross on foot and quick to erode. Where space allows, easing the sides into a broad, shallow profile makes the whole strip maintainable with the same mower you use on the lawn, in typical cases as one continuous pass. Keep the centre line clear and the shape consistent, so the mower, the water and your eye all travel smoothly.
6. Keep a Gentle, Even Fall Along the Whole Run
Water follows the fall you give it, including the mistakes. A ditch that falls steadily, even gently, drains cleanly, while one high spot can pond everything behind it and one sudden drop can scour a hole. Check the fall with a long level, a string line or simply a bucket of water on a dry day, and correct humps and hollows before you line or plant anything.
7. Keep Water Moving to Avoid Standing Pools
Standing water is a shape problem, not a planting problem. Pools form where silt has built a dam, where a culvert mouth is buried, or where a stretch has settled flat. Lift the silt, clear the pipe ends, and regrade the flat stretch so the ditch empties after rain. A ditch that drains down between storms gives mosquitoes nowhere to breed and banks no chance to turn sour.
4. Driveway Crossings: Culvert Pipes and Headwalls

The driveway crossing is where a front ditch most often fails: a pipe that is too small, set too high, or left with raw, crumbling ends. Done well, the crossing carries cars and water without either noticing the other, and it becomes the neatest, most engineered-looking feature on the whole frontage.
8. Size the Driveway Culvert Pipe to the Ditch
The pipe under a driveway has to pass everything the ditch brings it, including the storm you have not met yet. As a general approach, match or exceed the capacity of the channel either side, set the pipe on the ditch’s own line and fall, and never let the crossing become the narrowest point in the system. Where an authority maintains the ditch, it may specify the pipe — ask first.
9. Add Simple Headwalls at the Pipe Ends
Headwalls — the short retaining faces built around each end of a culvert pipe — hold the bank back, stop soil washing into the opening and give the crossing a finished face. They can be stone, block, brick or precast units, built square and solid either side of the pipe mouth. The detailing overlaps with the small-scale work in our natural rock retaining walls.
10. Finish the Crossing to Match the Driveway
A crossing surfaced differently from the drive always looks like a patch. Carry the driveway material straight over the culvert — the same gravel, pavers or asphalt, at the same width and level — so the frontage reads as one surface with a ditch passing quietly beneath it. The surfacing choices in our permeable driveway surfacing ideas all work over a properly bedded pipe.
11. Keep the Pipe Mouth Clear and Inspectable
More culverts fail from neglect than from size. Leaves, silt and hedge clippings gather at the upstream mouth, and a pipe that is half blocked behaves like a pipe half its size. Keep both ends visible, trim back planting that sheds into them, and look inside after big storms. If you cannot see into it, you cannot know whether your crossing still works.
5. Stone, Riprap and Erosion Control
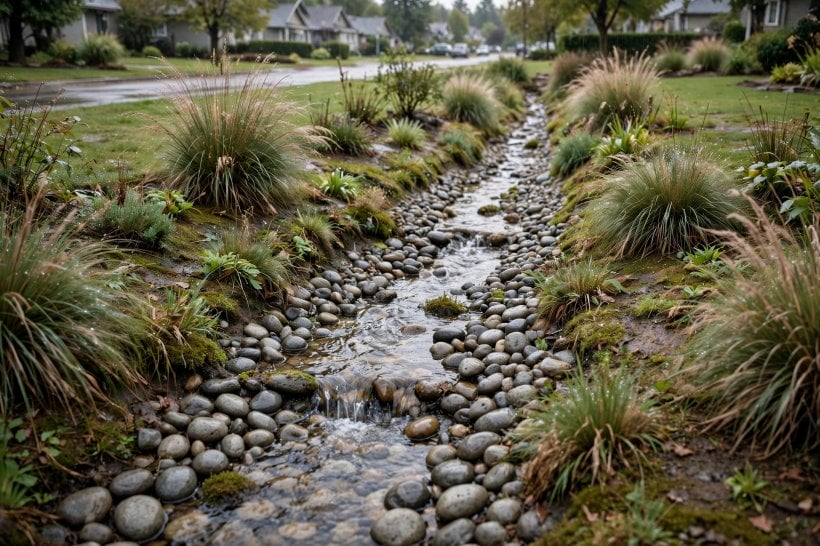
Where grass alone cannot hold — on bends, at pipe outfalls, on steeper stretches — stone takes over. Lining is not decoration first and engineering second; it is armour for the soil, chosen where the water is fastest or the bank is weakest, and laid so it stays put when the ditch runs full.
12. Line Busy Stretches With Stone
A stone lining along the busiest stretch — typically below a downpipe discharge, at a bend, or where several flows join — protects the bed and sides from constant wear. Bed the stone on a firm, shaped surface, pack it tightly so individual pieces cannot rock free, and blend the lined stretch back into grass at both ends so the channel keeps one smooth, continuous profile.
13. Use Riprap Where the Flow Is Fastest
Riprap, the rough angular stone tipped and settled along banks, earns its place where water arrives with energy: at culvert outlets, on the outside of bends and below any drop in level. Its roughness is the point — it breaks up the flow instead of speeding it. Use pieces large enough to stay settled in a full flow, and extend the protection a little beyond the fast patch.
14. Build Check Dams to Slow Erosion
On a ditch with more fall than it needs, small check dams — low ridges of stone or timber set across the channel at intervals — step the water down gently instead of letting it race and dig. Each one slows the flow, drops a little silt behind it and protects the stretch below. Keep them low and broad; a check dam that ponds water permanently has become a blockage.
15. Edge the Ditch So the Lawn Stays Neat
A defined edge is what separates a landscaped swale from a rough verge. A single row of setts, a soldier course of brick, or a clean cut turf edge along the top of each bank tells the mower where to stop and the eye that the shape is intended. Keep edging flush and out of the flow line, so it frames the channel without narrowing it.
6. Planted Swales and Rain-Garden Ideas
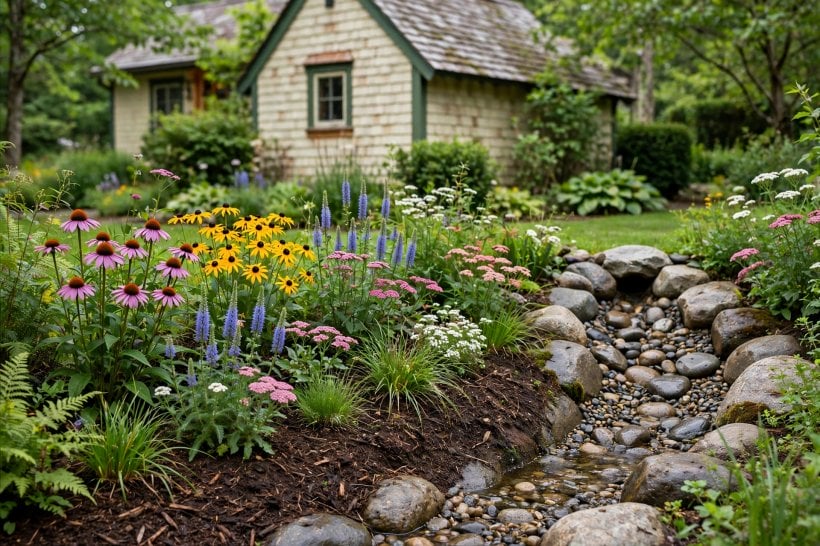
Planting is where a drainage ditch in front of a house stops apologising. Roots hold the banks, foliage hides the engineering, and the right plants treat passing water as irrigation rather than a threat. The rules are simple: plant the banks and edges generously, keep the flow line itself clear or very low, and choose plants that tolerate both wet feet in winter and dry spells in summer.
16. Plant the Banks With Deep-Rooted Grasses
Ornamental and native grasses are the workhorse planting for ditch banks: deep, fibrous roots that bind the soil, foliage that sways rather than snaps in a flow, and a tidy winter skeleton. Plant them along the upper banks where they are wettest only in storms, in drifts rather than rows, and cut them back once a year. The centre of the channel stays grass-free or in low turf.
17. Turn a Low Stretch Into a Rain Garden
Where a stretch of ditch naturally holds water a little longer — a widening, a flatter reach, a spot fed by a downpipe — formalise it as a planted rain-garden pocket that fills in storms and drains down afterwards. Moisture-loving perennials and rushes suit these pockets; choose locally native species where you can — our guide to native plants for rock gardens covers the selection logic, adapted here to a linear frontage.
18. Add Flowering Edges That Still Let You Mow
A flowering strip along one top edge gives the frontage its colour without complicating maintenance: a band of sturdy perennials or a sown meadow mix, set back from the channel, with a mown path between planting and ditch. That mown strip matters — it is your access for clearing silt, your inspection walk, and the visual frame that makes the flowers read as a border, not a tangle.
19. Use Shrubs Sparingly, Away From the Flow Line
Shrubs belong at the ends of a ditch run, at the back of a bank, or flanking the driveway crossing — never in the channel, where they trap debris and shade out the bank-binding grass. Choose compact, tough varieties that will not need constant cutting back from the road, and give each one room to reach its full size without leaning across the water’s working space.
7. Making the Ditch Look Intentional From the Road
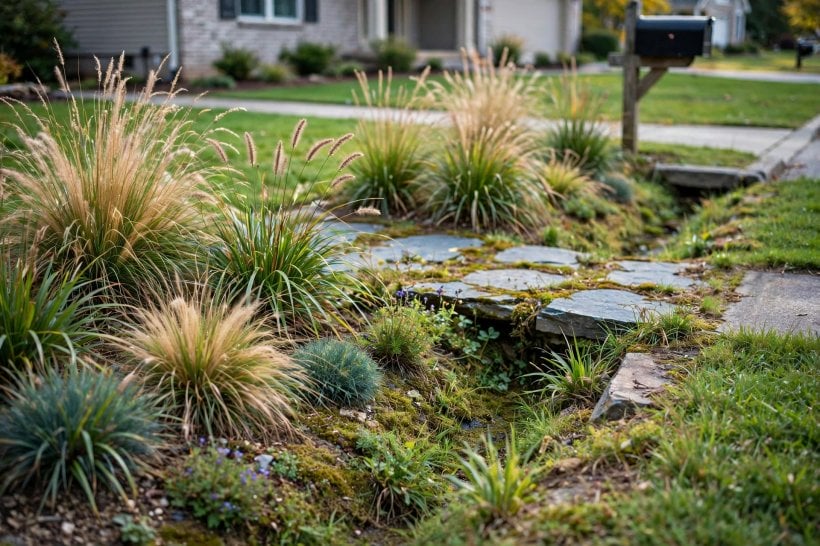
From the pavement, a good front ditch reads as a designed feature of the front garden — a creek line, a planted swale, a stone-edged channel — and only secondly as drainage. That shift in perception is mostly framing: consistent materials, one clear crossing point for visitors, and planting that connects the ditch to the rest of the front yard rock landscaping behind it.
20. Run a Dry Creek Bed Along the Ditch Line
Where the ditch runs dry for much of the year, a dry creek treatment — a bed of rounded stone and gravel in graduated sizes, with larger boulders at the edges — makes the channel look like a designed stream bed that happens to flow in storms. Follow the approach in our river rock dry creek bed drainage guide, but keep the bed shaped as a working channel, not a flat ribbon of pebbles.
21. Add a Simple Timber or Stone Crossing
Visitors, the post and you on bin day all need a way over the ditch that is not the driveway. A simple flat crossing — sleepers, stone slabs or a small arched bridge where the style suits — set at a natural walking line from gate to front door, turns an obstacle into a feature. Keep it non-slip, keep its supports out of the flow, and keep the channel beneath it fully open.
22. Frame the Entrance With Planting and a Clear Sightline
The driveway mouth is the ditch’s public face. Flank the culvert headwalls with matching planting, a house number or a pair of low shrubs, so the entrance reads as composed. Keep that planting below sightline height near the road: drivers pulling out need to see along the street, and a beautiful entrance that hides traffic is a hazard wearing a disguise.
23. Light and Mark the Edge for Night Safety
A ditch that is obvious at noon can vanish on a dark, wet evening — exactly when it is fullest. Low marker posts, a pale stone edge, or discreet path lighting near the crossing and the pedestrian bridge tell feet and wheels where the channel runs. Keep lights low and shielded so they mark the ground for your visitors without glaring at drivers on the road.
8. Maintenance That Keeps It Working

Ditches rarely fail suddenly; they silt, narrow and choke by degrees until one storm finds the weakness. A light, regular routine costs far less effort than one rescue excavation, and it keeps every improvement in the earlier sections — stone, planting, culverts — working at its full capacity.
24. Trap Sediment Before It Fills the Ditch
Most ditch capacity is lost to silt washed in from drives, paths and bare soil. A shallow sediment pocket or a stone apron where a side flow joins the main channel catches that material in one reachable spot, where a quarterly shovel-out restores it. Stabilising the bare ground that sheds the silt — gravel, planting, mulch kept out of the channel — slows the problem at its source.
25. Repair Scour and Bare Soil Early
A small scour hole below a pipe outlet or a bare patch on a bank is a cheap repair today and an undermined edge next season. Backfill and compact small washouts, reseed or turf bare soil before the next storm, and add stone protection where the same spot keeps failing. Recurring damage in one place is the ditch telling you the flow is too fast or too concentrated there.
26. Set a Simple Seasonal Maintenance Routine
Four habits cover most front ditches: clear leaves and litter from the channel and pipe mouths in autumn, lift silt and check the fall in spring, trim bank planting before it flops into the flow, and walk the whole run during one heavy rain each year to watch it work. Note what you see. A ditch inspected in a storm is understood; one inspected only in sunshine is guessed at.
9. Safety, Neighbours and the Road Edge

A front ditch sits in shared territory — between your garden, your neighbours’ drainage and a public road used by drivers, cyclists and children on foot. The prettiest scheme still has to be safe at the kerb, legal at the boundary and harmless to the flow arriving from uphill and leaving downhill.
27. Keep the Road Edge and Sightlines Safe
Never let ditch work narrow the road, undermine the verge or push water onto the carriageway, where it becomes a hazard and, in cold weather, ice. Keep banks beside the road stable and trimmed, sightlines at the driveway open, and any markers or edging set back from the trafficked edge. If a stretch beside the road is crumbling, treat it as a safety repair, not a cosmetic one, and involve the road authority where it is theirs.
28. Talk to Neighbours Before You Change Shared Flow
A ditch rarely serves one house. Water arrives from uphill plots and leaves towards downhill ones, so raising, piping or regrading your stretch can move a problem onto someone else’s frontage. Walk the line with affected neighbours before work starts, agree what is changing and what is staying, and keep the outfall at least as capable as you found it. Goodwill along a shared ditch is drainage infrastructure too.
10. Final Ideas and Checks Before You Dig
The last two ideas are habits rather than structures, and they are the difference between a ditch project that solves the problem and one that relocates it. Both cost almost nothing, both come before heavy work, and both should be repeated once the work is done and the first storms have tested it.
29. Photograph and Sketch the Ditch Before and After Rain
Take dated photographs along the whole run on a dry day, then again during and just after heavy rain, and sketch where water enters, ponds, runs fast and leaves. That simple record shows you the real system — which may not match the assumed one — and becomes your before-and-after evidence if a change upstream or downstream alters things later. Keep the sketch with any permissions you were given.
30. Start With One Stretch and Prove It in a Storm
Resist rebuilding the whole frontage at once. Improve one stretch — regrade it, line or plant it — then watch it through real rain before copying the treatment along the rest. A proven section sets your levels, your materials and your planting palette, and any mistake is a small, fixable one. The ditch has been learning your plot’s weather for years; work in stages and let it teach you.
Then run the final checks before any digging at all: Ownership — whose ditch is it, and do you have permission to alter it? Outfall — does the water have somewhere proper to go, at least as capable as today? Fall — is there a gentle, even gradient along the whole run, with no ponding spots? Crossings — will every pipe pass the full flow, with clear, inspectable ends? Safety — are road edges, sightlines and pedestrian crossings protected? Flow — does every lining and planting choice leave the channel itself open and moving?
Final Considerations
A front ditch rewards the same thinking as any other part of the garden: understand the job first, then make it beautiful. Keep the channel open and gently falling, culvert only where access demands it, armour the fast water with stone, plant the banks rather than the flow line, and check ownership and permission before altering anything. Shape, flow and permission come first — the planting and stonework that make it lovely only work when those three are right.
Do that, and the strip between your front door and the road stops being the bit of the plot you apologise for. It becomes what it always had the potential to be: a working, planted, stone-edged feature that carries the storm away and gives the house the composed frontage it deserves.




0 Comments