

A lawn that stays spongy for days after rain is not a lawn problem — it is a water problem with nowhere to go. A dry well gives that water a destination: an underground reservoir that collects runoff and lets it soak quietly into the soil.
This guide shows how to build a dry well for lawn drainage properly: how the system works, the soil test that decides whether it will work at all, sizing and siting, the materials that matter, and the step-by-step build.
1. Dry Wells at a Glance
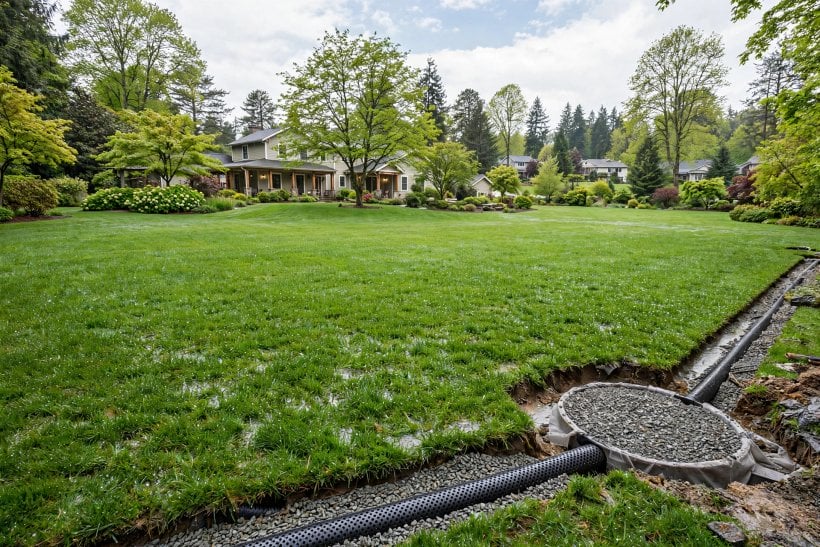
A dry well is an underground structure — traditionally a pit filled with coarse stone, today often a prefabricated perforated chamber surrounded by stone — that receives runoff from downspouts, a French drain or a soggy lawn area, holds it temporarily, and releases it slowly into the surrounding soil by percolation. The entity is simple, but its attributes decide everything: the soil’s drainage rate, the volume of water delivered to it, the pit’s storage capacity, and the fabric that keeps soil from migrating in and clogging the stone. Get those four right and a dry well works invisibly for years; get the soil test wrong and no amount of digging will save it. A dry well is one tool in the wider drainage kit covered by this guide to dry creek bed drainage, which handles the surface side of the same problem.
| What problem does a dry well solve? | Runoff with nowhere to go: downspout discharge that floods beds, low lawn areas that pond, and French drains that need an endpoint away from the house. |
| What decides whether it will work? | Your soil. A dry well is only as good as the ground around it — free-draining soil empties it between storms; heavy clay barely lets it drain at all. |
| Where does it usually sit? | In the lowest practical part of the lawn, well away from the house foundations, the septic system and any drinking-water well — with exact separations checked against local rules. |
| Stone pit or prefabricated chamber? | Both work. A stone-filled pit is the classic build; a moulded chamber gives more empty storage in the same hole and is easier to inspect and clean. |
| What kills dry wells? | Sediment. Unfiltered roof and lawn runoff carries grit and soil that slowly fill the voids — fabric wrapping and a silt trap upstream are the defence. |
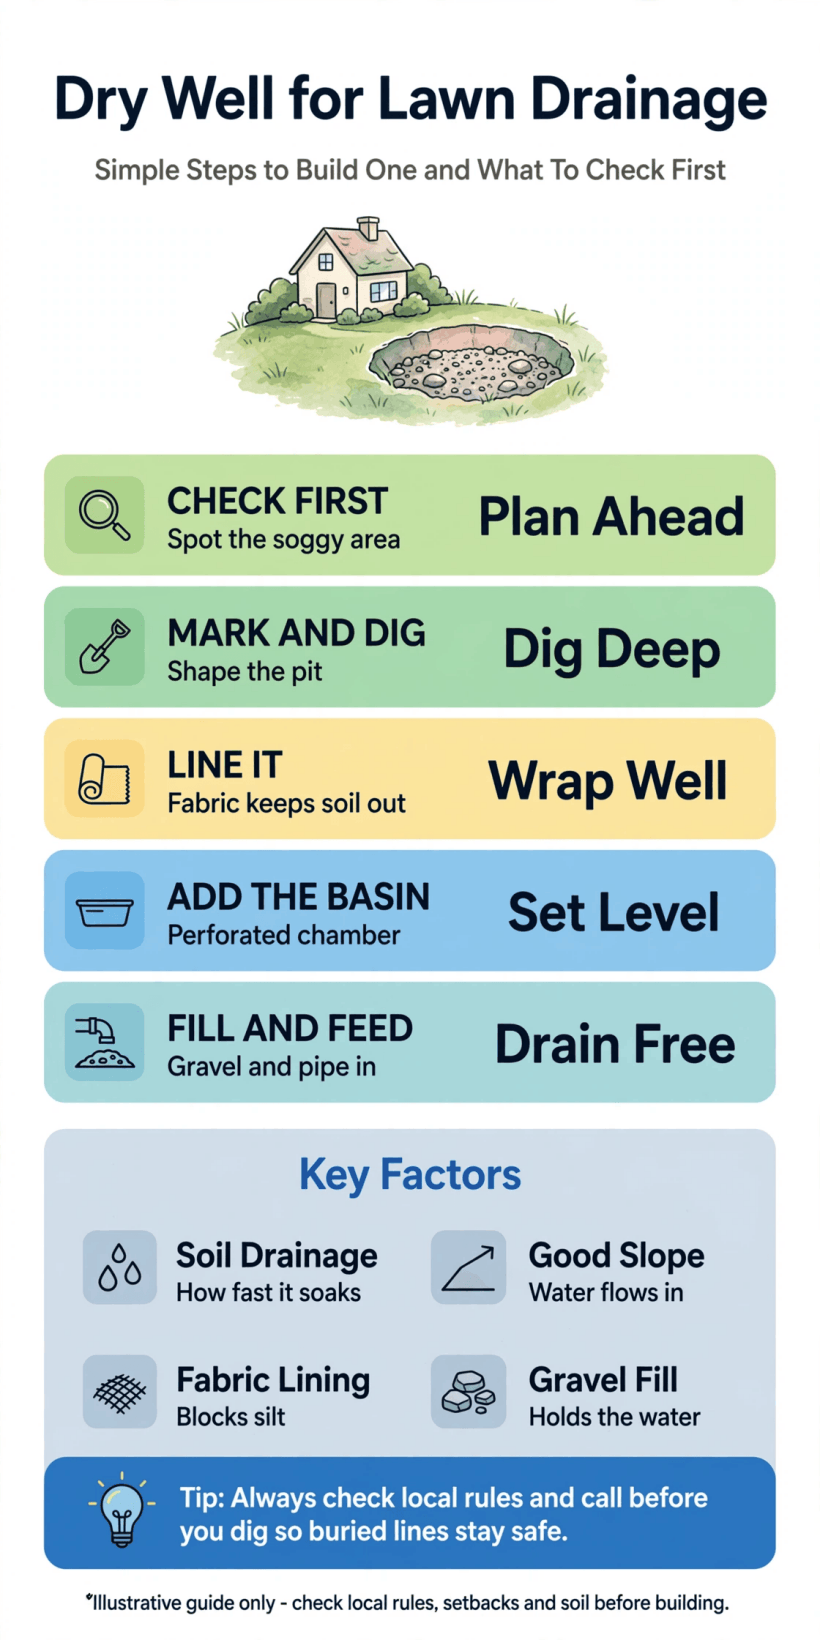
At a glance: test the soil first, size for the water you actually collect, wrap everything in fabric, and give the well an overflow route for the storm that exceeds it.
2. How a Dry Well Works
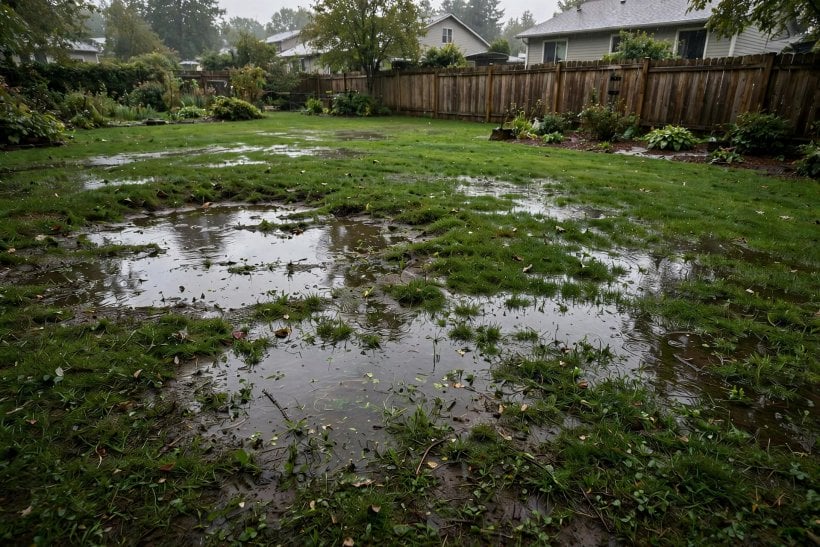
The working cycle has three stages. Collection: a pipe — from a downspout, a channel drain or a French drain — delivers water to the pit below ground level. Storage: the pit holds that water in the voids between its stones, or inside a hollow chamber, so a storm’s worth of runoff can arrive in minutes without flooding the surface. Dispersal: the stored water percolates outward through the pit’s walls and floor into the surrounding soil over the following hours, emptying the well before the next rain. Nothing is pumped and nothing is treated; gravity and soil do all the work, which is why the system has no running costs and almost nothing to break.
Two design consequences follow. First, storage and drainage happen simultaneously — a well in good soil is emptying even as it fills, so its effective capacity is larger than its volume on paper. Second, the well can only ever disperse water as fast as the soil accepts it, so the soil test in the next section is not a formality: it is the measurement the whole design hangs on. Where the water comes from matters too — roof runoff collected through the methods in this guide to rainwater harvesting and roof catchment is the cleanest feed a dry well can get, while lawn runoff carries the most sediment and needs the most protection upstream.
3. The Soil Test That Decides Everything
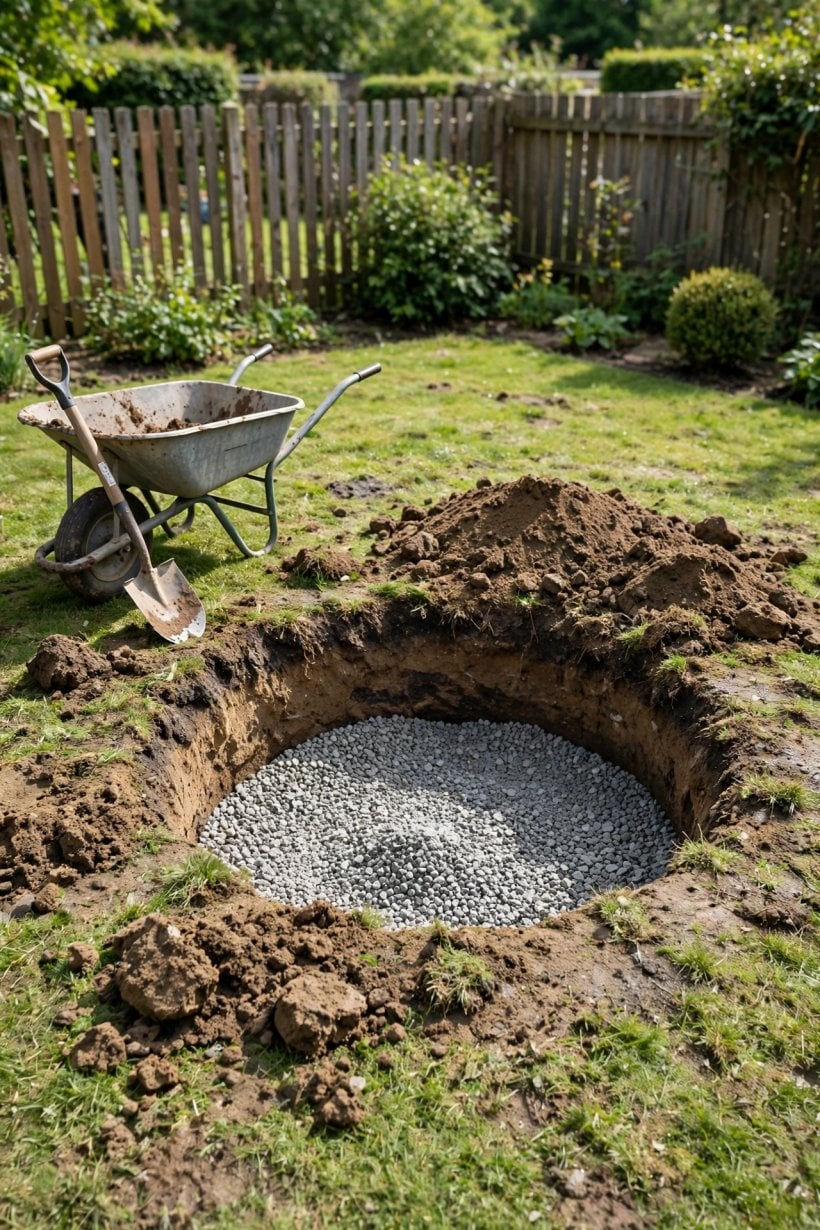
Before buying a single bag of stone, dig a test hole where the well will go — roughly the depth you plan for the pit, typically a modest hole you can work in safely — and run a percolation test. Fill the hole with water, let it drain away completely to pre-wet the soil, then refill it and time how far the level falls in a set period. Sandy and loamy soils drop steadily and are dry-well country. Soil where the level barely moves over hours is telling you the truth early: percolation is too slow, the well will sit full, and the next storm will surface-flood exactly as before.
There are honest responses to a failed test. Site the well in a different part of the plot if the soil varies — it often does over surprisingly short distances. Enlarge the design so storage does more of the work and drainage less. Couple the well to an overflow that carries excess to a swale or a lower part of the garden. Or accept that the plot needs a different answer entirely — a surface swale, a rain garden, or a piped connection to an approved outfall. Also check the water table: dig on a dry-weather day and note any water standing in the hole, because a pit dug into a high water table fills from below and has nowhere to disperse to. The same soil-first logic shapes the plot-wide thinking in these backyard landscaping ideas — drainage is the invisible structure every visible plan stands on.
4. Sizing the Well for the Water It Will Receive
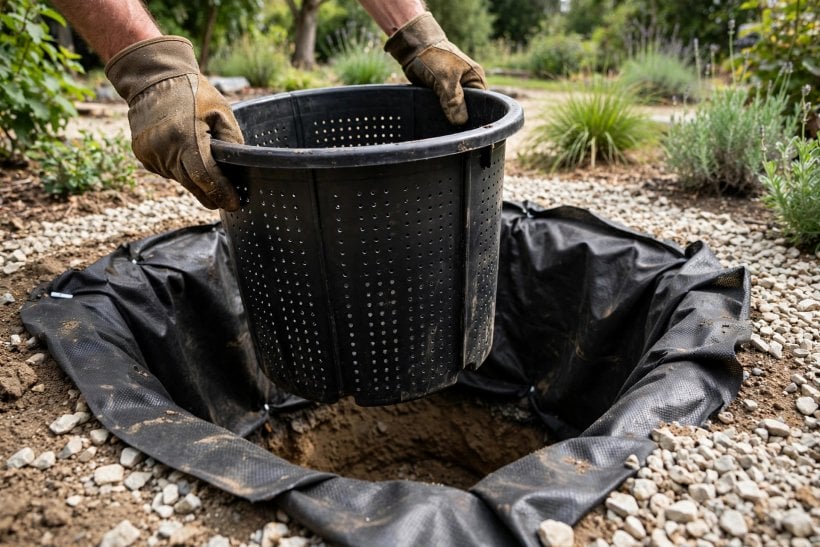
Sizing starts with the catchment: what area of roof or lawn will drain to this well, and how much rain falls on it in a heavy storm? A downspout serving half a house roof delivers a very different volume from a single soggy corner of lawn, and the well’s storage must hold a storm’s delivery long enough for the soil to take it. Roof geometry matters here — the collection principles in this guide to roof pitch for water collection explain how pitch and area combine to decide the volume arriving at a downspout.
Then account for how little of a stone pit is actually storage. A pit filled with coarse stone stores water only in the gaps between the stones — a solid fraction of the pit’s volume is rock, not water — while a hollow prefabricated chamber stores nearly its whole volume. That is the practical argument for chambers on tight plots: the same storage in a smaller, shallower hole. Whatever you choose, build in margin. Undersizing is the most common dry-well failure, because the storm that matters is never the average one — it is the cloudburst that arrives when the soil is already wet from the week before. Plan an overflow route for that storm as part of the design, not as an afterthought: an overflow pipe or a shallow swale that lets excess escape harmlessly across the lawn beats water backing up against the house wall every time.
5. Where to Put It: Siting and the Rules to Check
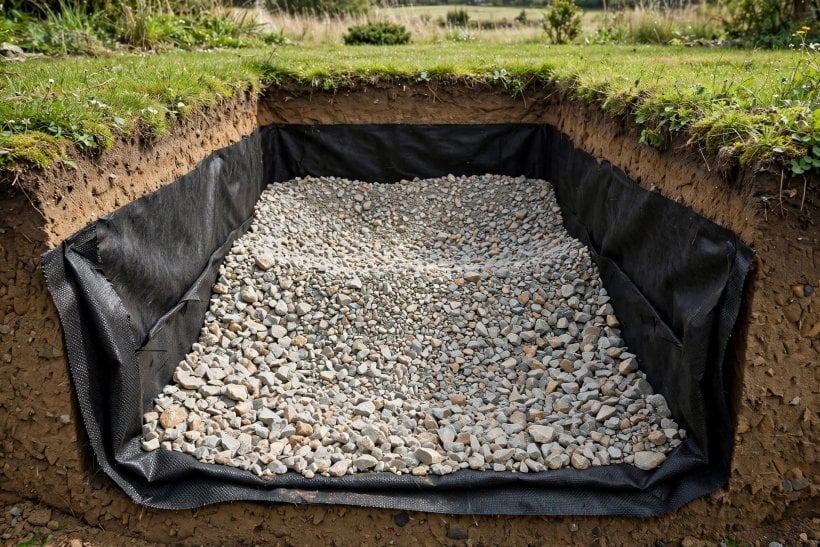
Water flows downhill, so the well belongs in a low part of the plot that the collection pipes can reach with a steady fall — but “low” is the second consideration, not the first. The first is separation: keep the well well away from the house foundations, so dispersing water never soaks the ground your walls stand in; away from septic tanks and drain fields, whose working ground must not be flooded; away from drinking-water wells, for obvious hygiene reasons; and off the boundary, so your drainage never becomes your neighbour’s. Exact separation distances are set by local codes and vary, so treat any number you read anywhere — including in other guides — as a prompt to check your own local rules rather than as a specification.
Two more siting rules are universal. Before any digging, have underground utilities located and marked — the free utility-marking services most regions run exist precisely because a spade through a cable or gas line turns a drainage project into an emergency. And check whether your area regulates stormwater disposal at all: some jurisdictions require permission for new soakaways, some restrict what may be connected to them, and rules on collected rainwater vary in the same way described in this overview of rainwater collection legality. A short check now is cheaper than re-digging later. Finally, think about access: a well you can reach, inspect and one day excavate beats one buried under a new patio.
6. Materials: Stone, Fabric, Pipe and Chambers
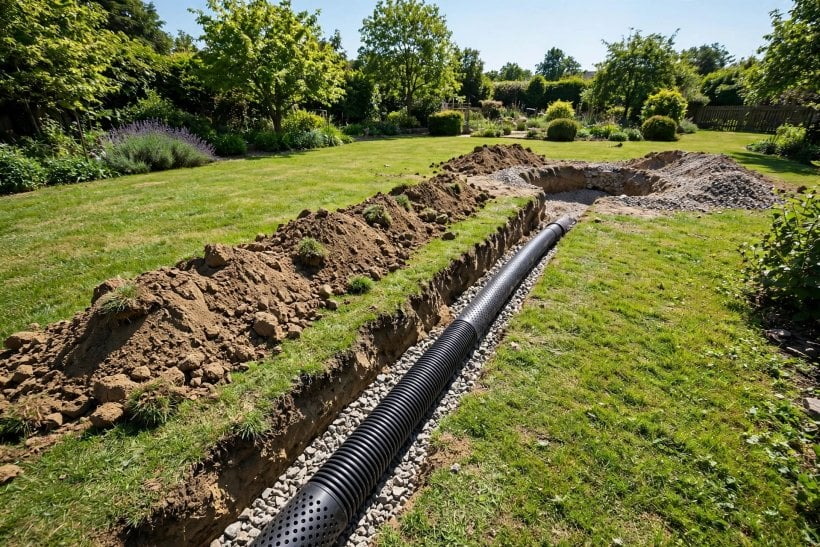
The materials list is short, and every item earns its place. Washed coarse stone is the storage medium for a classic pit — washed matters, because stone dust and fines delivered with unwashed aggregate start the clogging process on day one. Landscape fabric — a proper non-woven geotextile, not weed membrane — wraps the pit: it lets water out into the soil while stopping soil particles migrating in and filling the voids, and it lines the chamber in a chamber build too. Solid pipe carries water to the well; perforated pipe belongs inside the system where dispersal is wanted. A silt trap or leaf filter at the inlet — even a simple accessible catch basin — intercepts the grit that kills wells, and it is the cheapest insurance in the whole build.
Prefabricated chambers deserve their own word. Moulded plastic dry-well units stack or stand in the pit, are wrapped in fabric, and backfilled around with stone; their hollow interior stores far more water per cubic metre of digging, and a lidded inspection opening makes the well maintainable in a way a buried stone pit never is. For most household lawn jobs the choice comes down to hole size and budget: stone pits cost less in materials and more in digging and haulage; chambers reverse that. Either way, buy a little more fabric and stone than the calculation says — running short mid-build, with an open hole and rain forecast, is how corners get cut.
7. Building the Dry Well, Step by Step

Mark the pit and the pipe run, then dig — a squarish or round hole sized to your design, with sides as clean and undisturbed as digging allows, because smeared, compacted pit walls drain worse than fresh-dug ones. Line the hole completely with geotextile fabric, with generous overlaps at the seams and enough surplus at the top to fold over the fill at the end. Run the inlet pipe from your collection point with a steady fall toward the pit, connecting the silt trap or catch basin where the run begins. If the slope of your pipe run is marginal, fix it now: a pipe that ponds will silt itself shut years before the well clogs.
Fill in stages. For a stone pit, add washed stone evenly, keeping the inlet pipe’s entry clear, until the fill reaches the design level; for a chamber, set the unit level on a stone bed, connect the inlet and any overflow, and backfill around it with stone as the maker instructs. Fold the fabric surplus over the top of the fill — this closing layer is the one most often skipped and most often regretted, because topsoil washing down from above is the leading source of silt. Cover with a modest layer of topsoil and turf or reseed. Water systems that move water around a small property — including the approaches in this guide to greywater systems — share the same build discipline: fall, fabric and access decide whether they still work in ten years.
8. Connecting Downspouts and Lawn Drains

The well is only the endpoint; the connections decide how much water it sees. Downspout connections should be sealed, solid pipe — never the perforated type — so water arrives at the well rather than leaking along the run and softening the ground beside the house. Where a downspout previously discharged into an old drain of unknown destination, trace it before connecting: more than one “drainage problem” has turned out to be a blocked or collapsed legacy pipe, and a new well on the end of it inherits the blockage.
Lawn collection works differently. A soggy area usually needs a shallow French drain or a catch basin at its lowest point, piped to the well — the well then does for the lawn drain what it does for the downspout: provides storage and dispersal at the end of the line. Multiple inlets can share one well if the sizing allows for their combined storm delivery; if it doesn’t, two smaller wells on separate runs behave better than one overwhelmed one. Keep every junction and cleanout accessible at the surface — the day you need to rod a blocked inlet, you will be glad the junction is under a small cover and not under a metre of soil.
9. Mistakes That Make Dry Wells Fail

The failure list is short because the same few errors repeat. Skipping the soil test is the original sin — every other mistake is survivable, but a well in clay is a buried pond. Skipping the fabric, or substituting a cheap weed membrane that rots and clogs, lets soil migrate into the stone until the voids are gone. Using unwashed stone pre-loads the pit with the very fines the fabric exists to exclude. Undersizing for the catchment guarantees surface flooding in heavy rain and teaches the owner to curse a system that was never given the capacity its roof demanded.
The quieter failures are siting failures: a well dug too close to the house that keeps foundation soil wet all winter; a well over a high water table that never empties; a well with no overflow, so the exceptional storm backs water up the inlet pipe and out at the downspout — the worst possible place. And the administrative failure: digging without utility marking or without checking local stormwater rules. Every one of these is cheaper to avoid on paper than to fix with a spade, which is why this guide orders the work test, site, size, then build — in that sequence and no other.
10. Maintenance and What It Costs
Costs divide into materials, digging and connections. A stone-pit build’s materials are modest — stone, fabric, pipe and a catch basin — and its real cost is labour: your own weekends or a contractor’s machine and crew. A chamber build raises the materials line and cuts the digging. Connecting distant downspouts or a long French drain can cost more than the well itself, so quote the whole system, not the hole. Ongoing costs are near zero — no power, no consumables — which is the dry well’s enduring appeal against pumped alternatives.
Maintenance is light but real. Keep the silt trap and inlet filters clear — a few minutes a few times a year, and the single most valuable habit you can keep. Watch the lawn above the well after heavy rain: brief ponding during a storm that clears within a day is a working well in slow soil; standing water that lingers for days says the dispersal side is clogging and the pit wants excavating and rebuilding with fresh stone and fabric — a miserable job that the silt trap exists to postpone for as long as possible. Keep trees with aggressive water-seeking roots at a sensible distance, keep vehicles off the ground above the pit, and keep a simple record of where the well and its pipe runs are: the next owner, and your future self, will both be grateful. Set in the wider front-of-house picture, a lawn that drains is the foundation under every other improvement in these front yard landscaping ideas — dry ground is what makes the rest of the design possible.
Final Considerations
A dry well is honest engineering: it stores a storm and hands it to the soil at the soil’s own pace. It asks for four things in return — soil that percolates, capacity matched to the catchment, fabric between the stone and the ground, and an overflow for the storm that breaks the records.
Run the percolation test before you fall in love with the plan. If the soil says yes, build it in the order this guide sets out and it will quietly empty your lawn’s worst corner for decades. If the soil says no, believe it — and spend the same money on a drainage answer your ground can actually support.




0 Comments