

Every garden deserves a doorway — a place where you pause for a breath before stepping in. An arbor does that work, and one built from raw logs does it without looking ordered from a catalogue. Add climbing roses or a row of pole beans and the rough timber becomes the most photographed corner of the yard. This guide builds the whole thing, from sizing to the second decade of service.
Rustic Log Arbor: At a Glance
A rustic log arbor is a gateway built the slow way: four stout posts, two beams and a lattice of poles, joined with notches, pegs, bolts or lashings and then handed over to the climbing plants. Sized for tiny home gardens, it marks the entrance, frames a path and gives roses, clematis or grapes something honest to climb. This guide follows the build in order: why the gateway matters, the dimensions that make it feel like an embrace rather than a squeeze, the two classic styles and where to place them, how to select straight logs, how to set posts that will not heave, how to build the top and lattice, the joinery options from primitive to modern, which climbers earn their place, how to plant and train them, and the light annual maintenance that keeps the structure standing for decades.
| Topic | What It Covers | Key Fact or Figure |
|---|---|---|
| 1. The Garden Gateway | Why an arbor earns its place | A threshold that looks like it grew there |
| 2. Design: Sizing the Arbor | Width, height and depth that feel right | 4–5 ft wide, 7–8 ft clearance, 2–3 ft deep |
| 3. Style and Placement | Four-post or A-frame, set on a path | Must span a path, a gate or a room change |
| 4. Materials: Selecting the Logs | Posts, beams, poles and species | 4 posts at 6–8 in diameter; total cost $0–100 |
| 5. Setting the Posts | Holes, gravel base and bracing | 3 ft deep in gravel — never concrete |
| 6. The Top: Beams and Lattice | Beams, cross poles and side trellis | 12–18 in overhang; poles 8–12 in apart |
| 7. Joinery Options | From primitive lashing to through-bolts | 1/2 in galvanized through-bolts, washers both sides |
| 8. Planting: What Climbs Well | Roses, clematis, edibles and annuals | A mature wisteria weighs hundreds of pounds |
| 9. Planting and First-Year Care | Position, mulch, water and training | Plant 18 in from the posts; water the first year |
| 10. Maintenance and Longevity | Annual checks, oiling and the rebuild | Cedar or locust posts last 15–25 years |
The build in numbers: an arbor 4–5 feet wide with 7–8 feet of head clearance, posts buried 3 feet deep in gravel, a total cost of $0–100 in fallen timber — and 15–25 years of service from cedar or black locust posts.
1. The Garden Gateway
An arbor marks a threshold. It can be the entrance to the garden, the passage between two outdoor spaces, or simply the frame that climbing roses deserve — but it always signals that you are moving from one place into another, and that small pause changes how the whole garden feels. Built from logs rather than milled lumber, the structure looks like it grew where it stands instead of arriving on a delivery truck, which is exactly the quality that makes it suit a tiny home garden: natural materials, human scale, nothing pretending to be something else.
The gateway only works when it is given a job to do. It belongs on a route people actually walk, announcing a transition they already make — a theme running through our wider roundup of tiny house landscaping ideas, where every structure earns its footprint. Give the arbor a path to span and plants to carry, and it stops being an ornament and becomes the garden’s handshake: the first thing a visitor touches, and the thing they remember.
2. Design: Sizing the Arbor
Three dimensions decide whether an arbor feels welcoming or awkward, and the original proportions are worth respecting. Width comes first: 4–5 feet lets you walk through comfortably and even fits a wheelbarrow, while anything narrower feels like a squeeze and anything wider loses the sense of embrace that makes an arbor an arbor. Height follows: aim for 7–8 feet of clearance so nobody ducks, and remember the climbing plants need 2 or more feet above head height to cascade down the way they should.
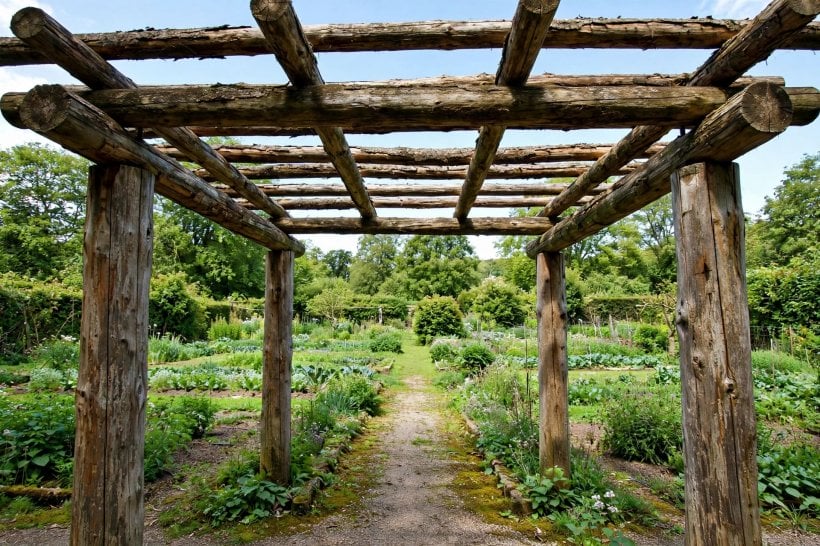
Depth completes the feel. At 2–3 feet the arbor is deep enough for plants to envelop the passage and create that brief tunnel sensation, yet shallow enough to stay airy rather than gloomy. Hold these three numbers together — walk-through width, no-duck height, enveloping but light depth — and the structure reads as generous instead of mean, which is the whole difference between a gateway people love and a frame they sidestep.
Size with the plants in mind, not just the people. That 2-plus feet of space above head height is where the cascade lives: roses and clematis hang their flowering growth down into the passage, and a top set too low forces you to duck through the very display you planted. The wheelbarrow test is the honest check on width — if the barrow passes without scraping the posts, so will two people walking side by side with baskets, tools and harvests in hand.
3. Style and Placement
Two styles cover nearly every garden. The classic is the four-post arbor with a log top: upright, symmetrical, and endlessly adaptable to lattice and planting. The alternative is the A-frame, two slanted sides meeting at the top — simpler to build, stronger by geometry, and the more primitive of the two in character. Neither is wrong; the four-post suits a formal path, the A-frame suits a wilder corner, and both carry climbers equally well once the top is on.
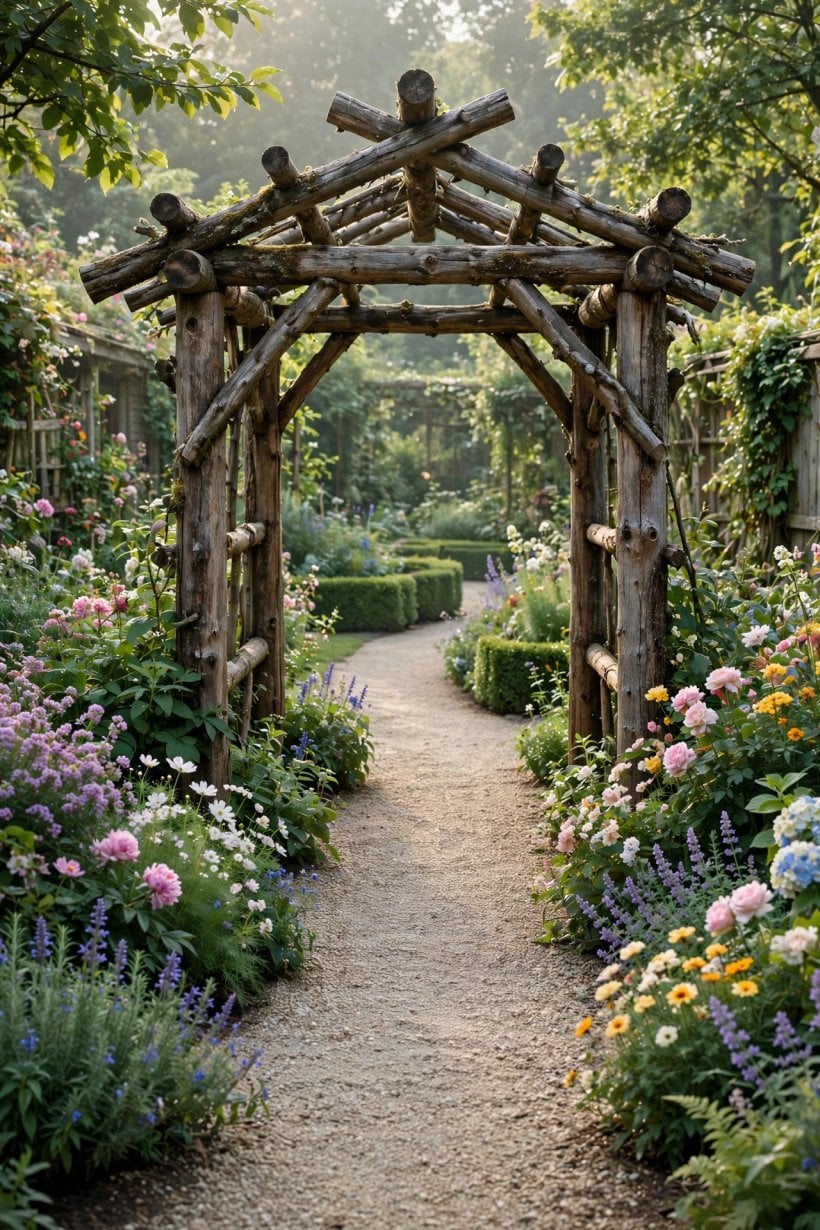
Placement matters more than style. An arbor must span something — a path, a gate, the transition between garden rooms — and it should be anchored visually at both ends so your eye has somewhere to arrive. The one mistake to avoid is plopping it in the middle of the lawn with no reason to exist: a threshold without a crossing is just furniture outdoors. Set it where the wider design already funnels feet, the way the strongest schemes in our collection of backyard landscaping ideas give every structure a route and a destination.
4. Materials: Selecting the Logs
The bill of materials is short enough to memorise. Four posts, 6–8 inches in diameter and 10–11 feet long, give you 3 feet in the ground and 7–8 feet standing above it. Two top beams of 4–6 inches diameter and 6–7 feet long span the post pairs, and 5–7 poles of 2–3 inches form the cross pieces — the lattice the plants actually climb. Species follow the rot rule: cedar or black locust for anything touching the ground, pine or fir happily serving up top where they stay protected.
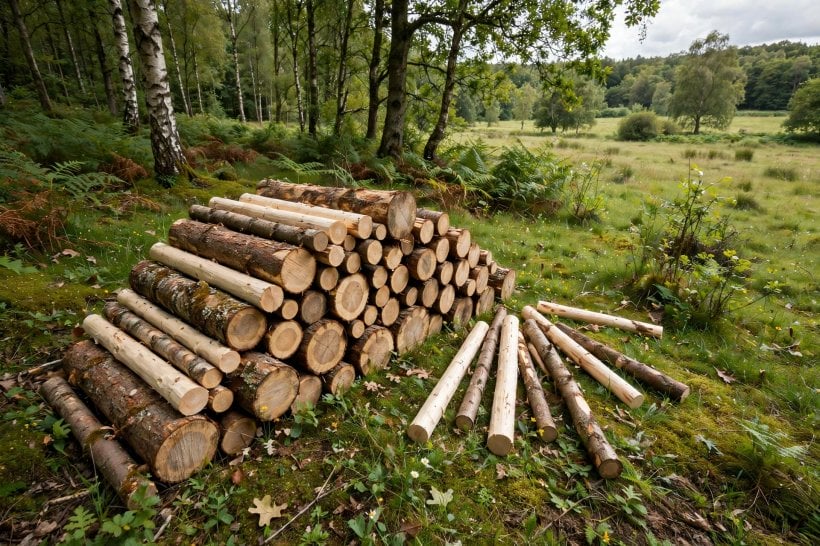
Peel the posts for longevity, but feel free to leave the top poles bark-on if you like the look — they are replaceable, so their finish is a style choice rather than a structural one. The economics are the delight of the whole project: with fallen timber to hand, the arbor costs free to $100, almost pure labour. Fallen wood is a genuine resource rather than waste, as our guide to fallen log landscaping shows, and any sound offcuts left over can go straight into the companion projects in our roundup of log projects for outdoor furniture and garden planters.
5. Setting the Posts: The Foundation
Everything above ground depends on this hour of work. Dig the holes 3 feet deep and 12 inches across — below the frost line in cold climates, because heaving posts lean, and a leaning arbor never recovers its dignity. Tip 6 inches of compacted gravel into the base first: the post bottom must never sit in water, and that gravel bed is the drainage that protects it for the life of the structure.
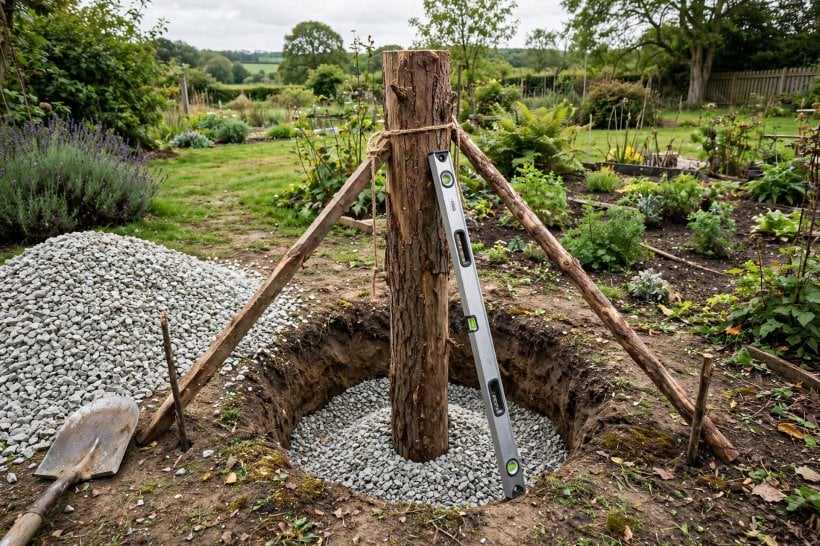
Set each post plumb in two directions, checking both faces with a 4-foot level, because an arbor that is out of plumb looks drunk forever. Backfill with gravel tamped in 6-inch lifts — and no concrete, ever: gravel drains, while concrete traps water against the post, so the gravel-set post lasts longer and, as a bonus, can be lifted out and replaced. Finally, brace every post with temporary diagonal braces and leave them on until the top is complete; posts stand alone poorly, and the braces are what hold your careful plumbing true while the structure comes together.
The gravel choice deserves one more word, because it runs against instinct. Concrete feels permanent, and permanence feels like quality — but around a buried post it behaves like a cup, holding soil water against the wood at exactly the ground-line zone where rot starts. Gravel does the opposite job: it lets water fall away from the post bottom and through the base bed, and the tamping in lifts locks the post firmly enough that the finished structure has no wobble to forgive. Drainage first, grip second — that order is the whole foundation philosophy.
6. The Top: Beams and Lattice
With the posts braced and plumb, the top goes on. Rest the two beams across the post pairs and let them overhang 12–18 inches past the posts — that overhang is the proportional look, and flush-cut ends read as stubby by comparison. Across the beams, lay the 2–3 inch cross poles 8–12 inches apart, lashed with tarred twine or simply screwed down; together they form the plant support grid the climbers will thread themselves through.
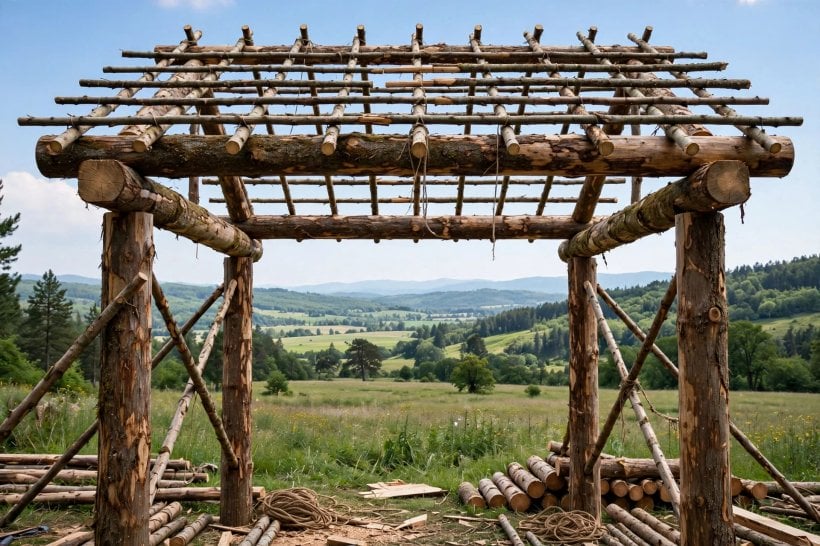
The sides need their climbing surface too: vertical or diagonal poles between the posts on both sides make the trellis, and the diagonal lattice both looks best and gives tendrils more to grab. For the fixings, traditional tarred marline gives the nautical look and lasts years, while structural screws are faster and stronger — 3-inch exterior screws, two per joint. Smaller poles, branches and twigs all have a place in this lattice layer, much as the projects in our guide to fallen limb crafts turn the same material into finished pieces.
7. Joinery Options: From Primitive to Modern
Four ways of joining log to log cover the whole craft. Mortise and tenon is the traditional summit: a post-top tenon fitted into a beam mortise and drawbored with a peg — no metal anywhere, and a lifespan measured in centuries. The saddle notch is the log-cabin answer, the beam notched to straddle the post so gravity and friction do the holding; it is fast work with a chainsaw, and our guide to the best chainsaws for landscaping covers the tools that cut it cleanly. Through-bolts — 1/2 inch galvanized, washers both sides — are the practical modern choice: strong, simple, slightly visible.
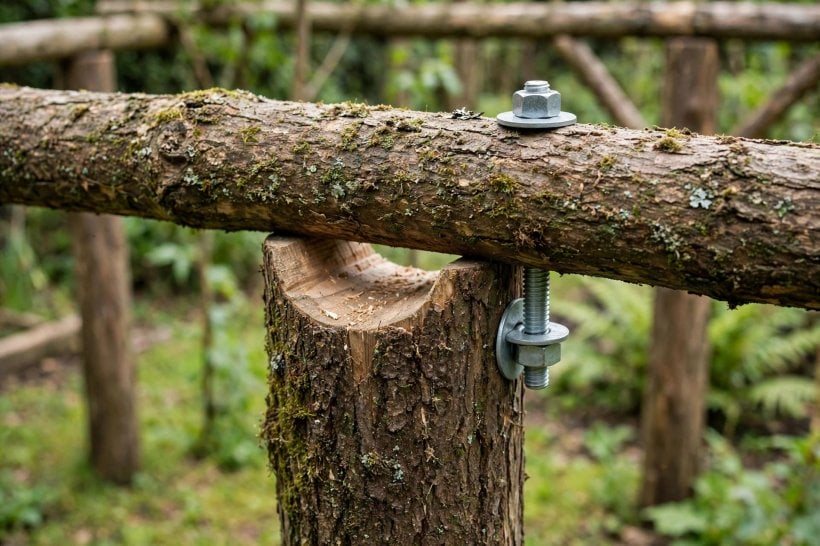
Lashing with rope or wire sits at the primitive end: fine for light trellises, never for the main structure. Whichever you choose, obey the one rule that governs them all — the top connections carry the plant load. A mature wisteria weighs hundreds of pounds, so build the top like it matters, because within a few seasons it will.
In practice, many builders mix the methods without apology: saddle notches or bolts where the beams meet the posts, because those joints carry the real weight, and lashings or screws out on the lattice, where the loads are light and the pieces are meant to be replaceable. That hierarchy — strongest joinery at the structure, fastest joinery at the skin — keeps the build honest and the budget where it belongs.
8. Planting the Arbor: What Climbs Well
The classic planting is a climbing rose — ‘New Dawn’ and ‘Eden’ are the named favourites — bringing thorns and beauty in equal measure. At the rose’s feet goes its traditional companion, clematis, which blooms through the rose and doubles the flower season on the same structure. Together they are the pairing against which every other scheme is judged, and both reward the strong top you built in the previous sections.
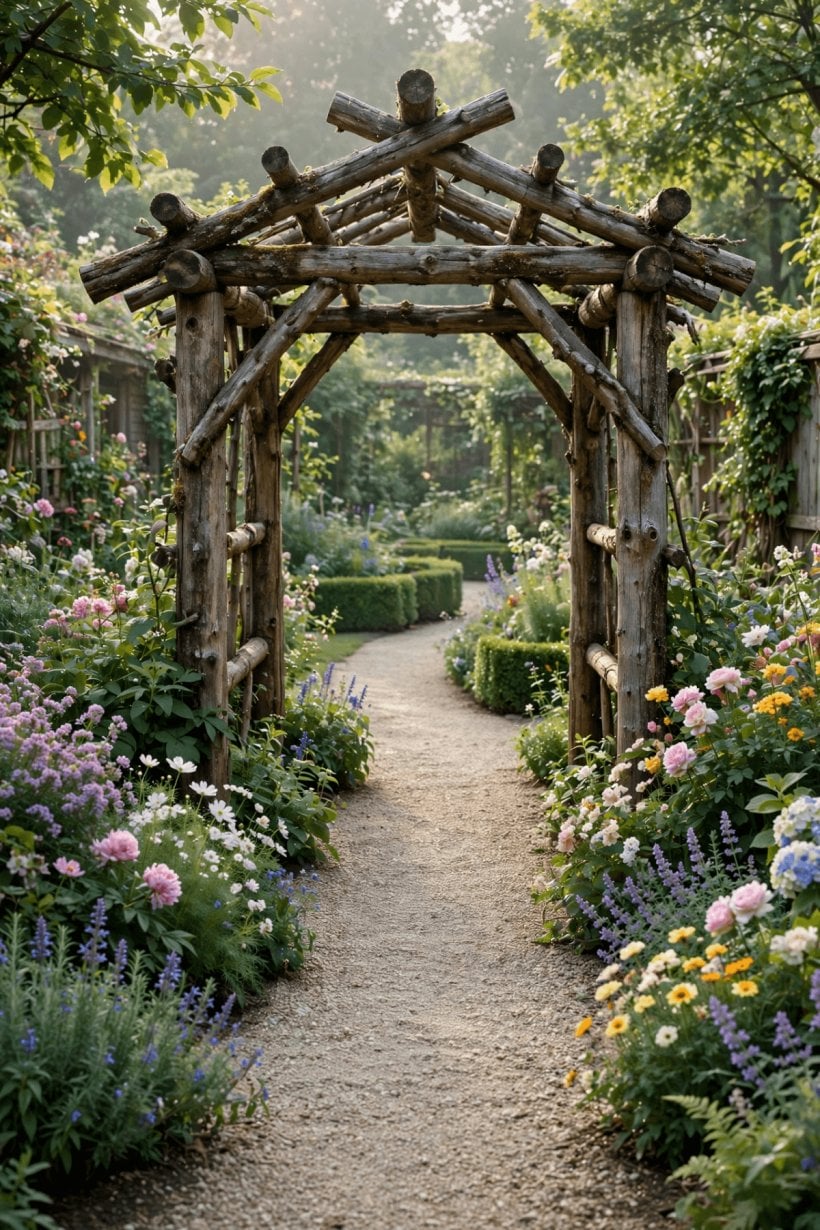
The productive arbor swaps ornament for harvest: grapes, kiwi, pole beans and hops all climb happily and return shade plus food. Wisteria is the dramatic option — magnificent in flower, but heavy and aggressive, demanding the strongest structure and annual, brutal pruning; it is not for light arbors. And for the impatient first year, annuals such as morning glory and sweet peas give instant coverage while the perennials establish. The wider menu of candidates, with their habits compared, is in our guide to climbing plants for outdoor spaces.
9. Planting and First-Year Care
Where you dig matters as much as what you plant. Set every climber 18 inches out from the posts, so the roots grow into honest soil instead of the gravel backfill around the post base. Mulch the bed well to hold moisture and suppress the weeds that compete hardest in year one; where you want that finish to be permanent, the stone options in our roundup of landscaping rock ideas make a tidy, lasting ring around the planting.
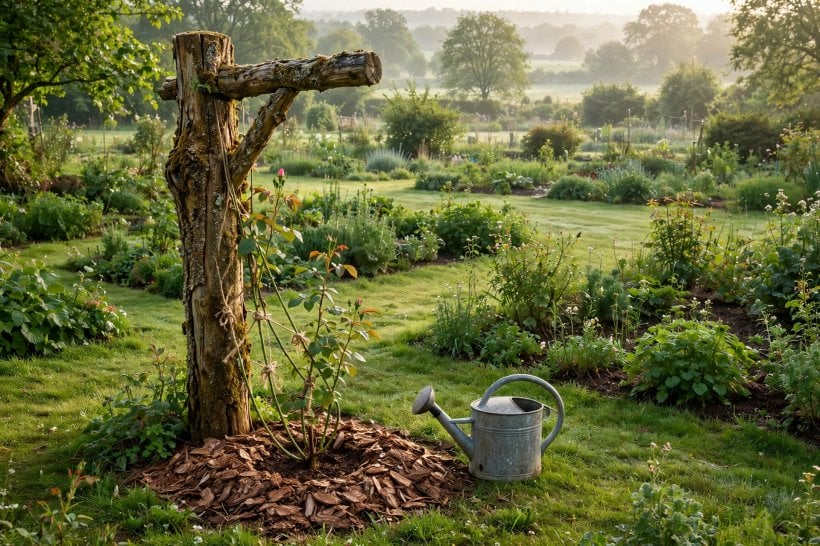
Water faithfully through the first year — after that, established climbers mostly fend for themselves. Training is the other first-season job: tie in new growth as it comes, and train rose canes horizontally wherever the structure allows, because a cane bent toward the horizontal breaks into far more flowering shoots than one left to sprint straight up. An hour of tying-in each month is all it takes to turn a planted arbor into a covered one.
10. Maintenance and Longevity
The annual round is short. Check the top connections once a year, because plant weight and wind work joints loose: re-tighten bolts, renew lashings, and prune the climbers before their growth becomes a structural load of its own — the wisteria rule, applied to everything. Inspect each post at the ground line, the rot zone, probing with a screwdriver; a post that has gone soft gets a sister post bolted alongside it, or is replaced outright. Re-oil the timber every 2–3 years with a penetrating oil for UV protection.
Done this way, cedar or black locust posts deliver a lifespan of 15–25 years, and the design plans for its own ageing: the top poles are replaceable one at a time without dismantling anything. When the posts finally do go, the story still is not over — the top often survives intact. Lift it off, set new posts in the same gravel holes, and reset it: the second arbor is faster than the first, because everything except the digging is already built.
That rebuild is the deepest argument for the gravel foundation and the replaceable top. A structure designed to be maintained in pieces never has to be demolished as a whole; it just gets renewed, joint by joint and post by post, for as long as someone keeps walking through it — which, if the planting was chosen well, is a very long time indeed.
Final Considerations
Size it for the path — 4–5 feet wide, 7–8 feet tall, 2–3 feet deep — set rot-resistant posts 3 feet deep in gravel and never concrete, notch or bolt a top with a generous overhang, lattice the sides for tendrils, and plant roses with clematis at their feet, or grapes if you would rather harvest. Then inspect the joints yearly and re-oil on schedule. A rustic log arbor is the garden’s welcome, built from what the land already dropped: build it like you mean it, plant it with ambition, and walk through it daily.

0 Comments