

A basement bathroom asks more of design than any upstairs room: the ceiling is lower, the light is borrowed, the plumbing works against gravity, and yet it is the bathroom guests and teenagers often use most. Get the below-grade basics right and it stops feeling like a compromise.
These 75 basement bathroom ideas stay strictly below grade — layouts around the slab and the stack, plumbing positions in plain terms, compact vanities, brightening tiles, showers and tubs that fit, light without windows, moisture and air, and the small fixtures that make a tight room feel generous.
Related Guide: 30 Shelving Above Toilet Ideas: Floating Shelves, Cabinets and Storage That Fits
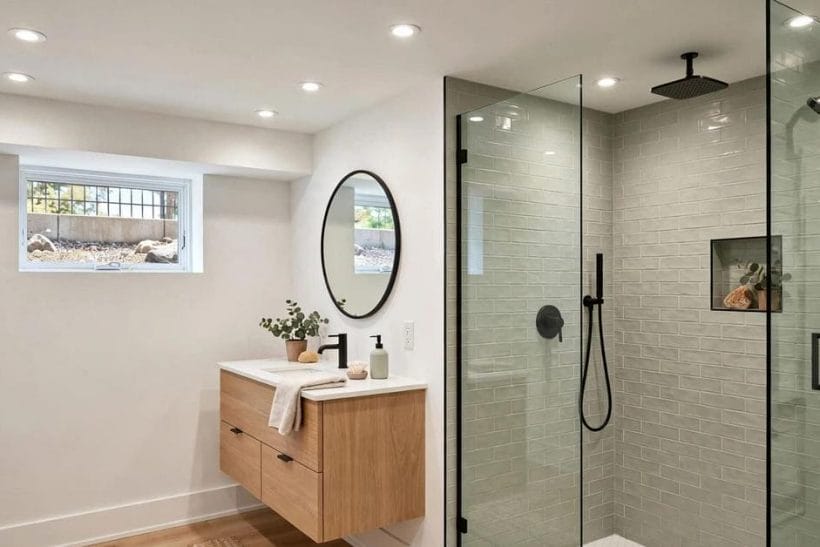
1. Basement Bathroom Ideas at a Glance
Scope first, because the bathroom pile-up on this site is deliberate. This post owns the below-grade bathroom only. The wider basement plan lives in the basement ideas pillar, the general bathroom canon in bathroom ideas, and the finishing stage before this one in partly finished basement ideas. Within bathrooms, the air-and-moisture companion is the home dehumidification guide, the compact wet-room split is small shower ideas, and whole-room below-grade styling beyond the bathroom sits in basement interior design ideas. Here, everything serves a bathroom under the ground floor.
Three realities shape every idea below. The waste stack’s position decides where fixtures can sensibly go, because below-grade drainage often needs help from an ejector or up-flush arrangement rather than plain gravity. The ceiling carries ducts and beams that cap your height in places. And moisture is a permanent neighbour: ventilation, air movement and surface choices matter here more than in any bathroom upstairs. Plumbing is described in general terms throughout — the design decisions are yours, the pipework itself is a licensed tradesperson’s job.
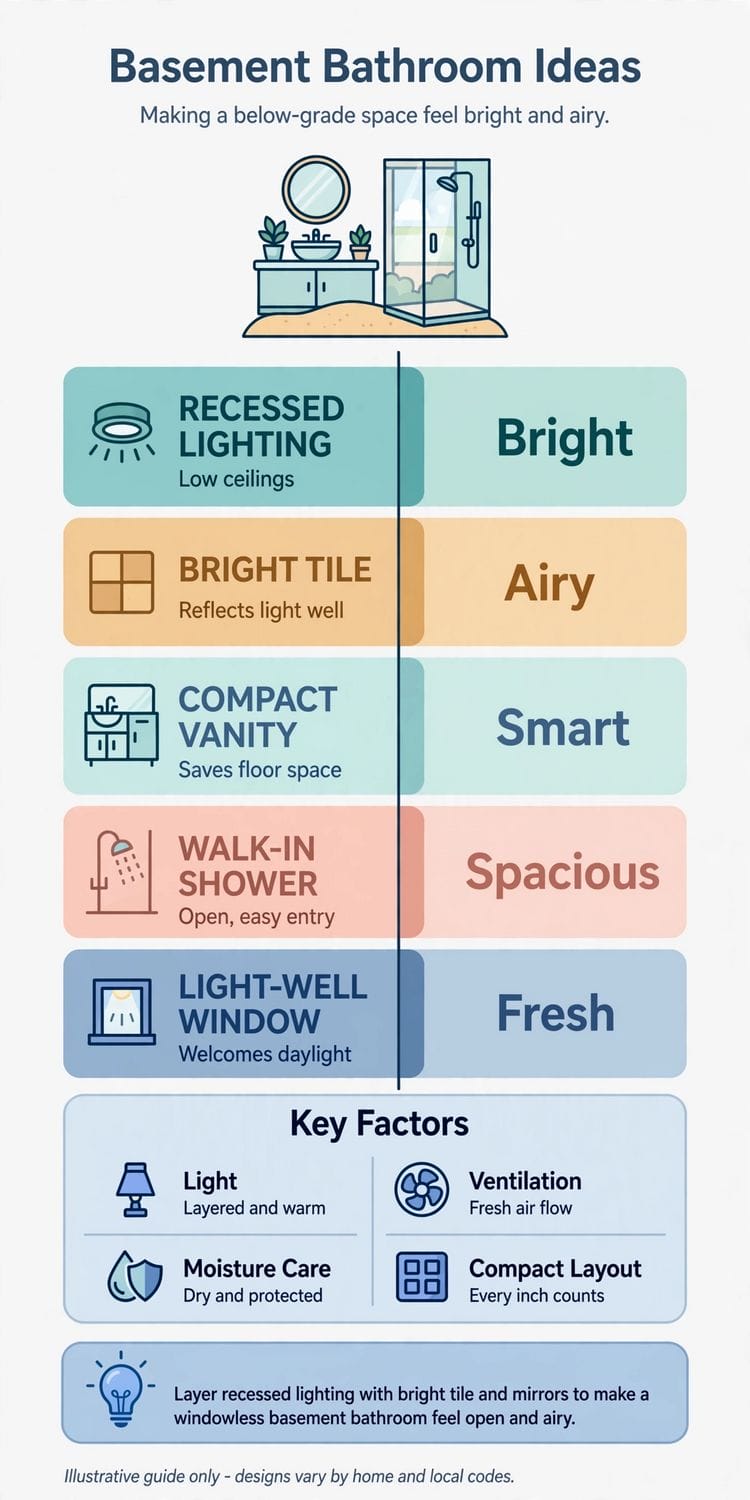
| Decision | What to settle | Why it matters |
|---|---|---|
| Layout | Fixtures grouped near the stack | Short, simple drainage runs below grade |
| Vanity | Floating or compact, with storage planned | Floor area is the scarcest resource |
| Tile | Light, large and gloss-leaning | Below-grade rooms borrow brightness |
| Light | Layered, warm and shadow-free | Most basement bathrooms have little or no window |
| Air | Extraction plus dehumidification | Moisture has nowhere to drift to |
2. Layouts That Respect the Slab and Stack
Every basement bathroom layout begins with a question upstairs bathrooms never ask: where does the waste go? The main stack and the depth of the sewer line set the map, and the layouts that work are the ones drawn around them rather than despite them.
Height is the second survey. Ducts, beams and pipes cross most basement ceilings, and the honest layout puts tall uses — the shower head, standing room at the vanity — under the high parts of the ceiling and lets storage and the WC live under the low runs.
1. Line every fixture along the stack wall
The classic below-grade answer: WC, vanity and shower in a row on the wall nearest the main stack. Drainage runs stay short and simple, and the rest of the room stays free for a clean, open floor.
2. Put the shower where the ceiling is highest
Survey the ceiling before you place anything. A shower needs standing height and head clearance, so it claims the tallest bay; the vanity and storage take the duct-crossed corners.
3. Tuck a powder room under the stairs
The dead space beneath a basement stair often fits a WC and a small basin exactly. It is the cheapest extra bathroom in the house, using volume nothing else wants.
4. Choose a wet-room layout to save partitions
In a very small footprint, one waterproofed room with the shower open in the corner removes doors and partitions entirely, and the whole floor becomes usable turning space.
5. Split WC and shower into two micro-rooms
Where two people need the room at once — a guest suite or a teen basement — a tiny separate WC beside a shower room doubles the usefulness without doubling the floor.
6. Borrow the corner for an L-shaped plan
An L-shaped room wraps fixtures around a corner, keeping the wettest uses in the short leg and the vanity and door swing in the long one. It suits the odd corners basements specialise in.
7. Plan the door swing before the fixtures
In tight below-grade rooms the door decides what fits. An outward-opening or sliding door can rescue a layout that an inward swing makes impossible, and it is safer in a small room too.
8. Keep the centre of the room empty
Resist filling the middle. A clear centre is what makes a small basement bathroom feel like a room rather than a cupboard of fixtures, and it keeps the space flexible for laundry baskets and drying racks.
9. Group the bathroom beside other plumbed rooms
If the basement also holds a laundry or a small kitchenette, cluster them on the same wall. Shared plumbing walls simplify everything below grade and keep the noisy machinery in one zone.
3. Plumbing Positions, in Plain Terms
This section names the plumbing facts that shape the design, in general terms only. How any of it is achieved in your slab is a professional’s assessment — the designer’s job is simply to place fixtures where the drainage story is shortest and simplest.
The governing fact is gravity. Upstairs, waste falls to the sewer by itself; below grade, the fixtures may sit lower than the line they must reach, which is why below-grade bathrooms involve ejector or up-flush arrangements far more often than their upstairs equivalents.
10. Ask where the sewer line leaves the house
One question unlocks the whole layout: how deep is the line the bathroom must join? A deep line may let fixtures drain by gravity; a shallow one means the waste needs mechanical help, and the design should know early.
11. Understand the ejector basin’s role
Where gravity cannot do the work, waste collects in a sealed basin and is pumped up to the main line. The basin needs floor space and access, so the layout must give it a home rather than discover it later.
12. Consider an up-flush WC for a light-use room
For a powder room or occasional guest use, an up-flushing WC unit handles its own waste removal behind the fixture. It suits retrofits where breaking the slab for one WC feels disproportionate.
13. Keep new fixtures close to existing rough-ins
Many basements were roughed in for a bathroom during construction. Building near those capped pipes — even roughly — is almost always simpler than starting a new drainage map across the slab.
14. Raise the shower on a low plinth when drainage needs it
A shallow step up into the shower is a common below-grade solution where the drain needs height to reach its run. Designed deliberately — tiled, lit, generous — it reads as a feature, not a fix.
15. Plan access panels you can actually open
Pumps, valves and cleanouts need reaching for the life of the room. A layout that hides them behind sealed tile is a future demolition; discreet, openable panels are the grown-up choice.
16. Vent the room’s air separately from its waste
Two different systems share the word: the waste venting a plumber handles within the pipework, and the room ventilation that clears steam and odour. A basement bathroom needs both, planned as separate decisions.
17. Let a plumber confirm the layout before finishes
The cheapest plumbing conversation happens before tile. A short professional check of fixture positions against the actual stack and line depth prevents the most expensive sentence in basement building: the floor has to come up.
4. Vanities for Low, Tight Rooms
The vanity is the hardest-working furniture in a basement bathroom: basin, storage, mirror wall and the room’s main visual anchor in one piece. Below grade it must also survive damp air and make a low room feel taller, which narrows the field to a few strong strategies.
Proportion is everything. A vanity a few centimetres shallower than standard can transform the walking line in a tight room, and a top that runs wall to wall makes even a small unit feel bespoke rather than squeezed in.
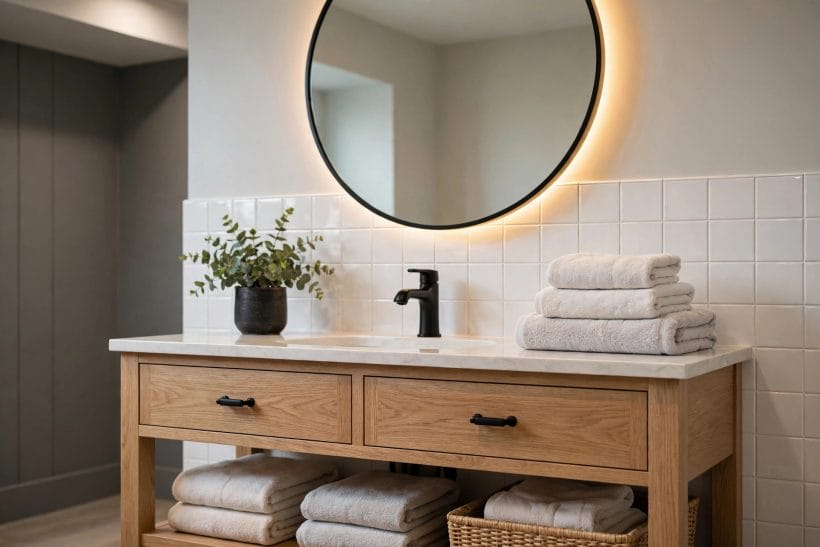
18. Float the vanity to open the floor
A wall-hung vanity shows the floor running beneath it, and the eye reads the room as bigger. It also shrugs off the damp floor contact that below-grade rooms threaten, and cleaning under it takes seconds.
19. Choose a shallow-depth unit for the walking line
Reduced-depth vanities and basins exist precisely for small bathrooms. In a basement room where every step of floor counts, the shallower profile can be the difference between a squeeze and a stroll.
20. Run the worktop wall to wall
A continuous top across the full width, with the basin set into it, removes the awkward dirt-catching gaps at the sides and gives a small vanity the calm of a fitted one.
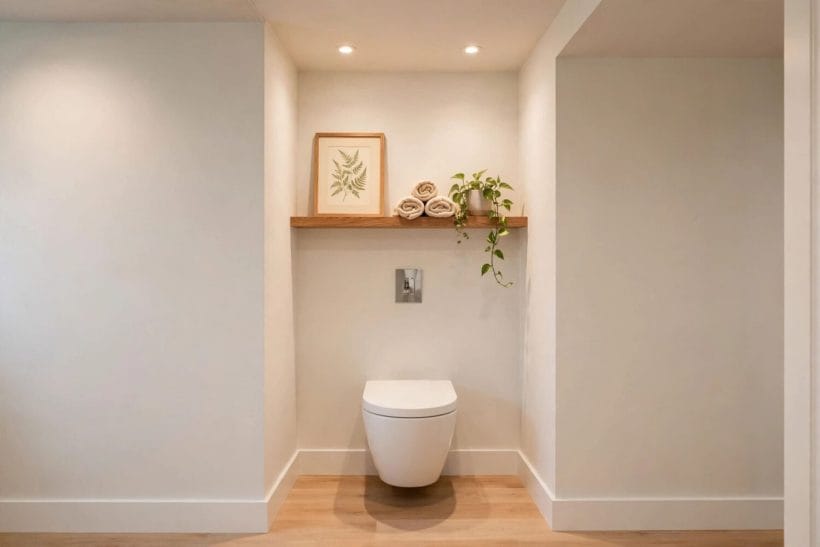
21. Prefer drawers over cupboard doors
Drawers bring the contents to you; cupboards make you kneel on a cold floor and reach. In a compact vanity, two deep drawers store more usable bathroom clutter than any door-and-void arrangement.
22. Add a tall, narrow cabinet for the overflow
Where floor area is precious, go vertical: a slim tower cabinet beside the vanity swallows towels and bottles while taking almost no footprint, and it uses the height the room does have.
23. Pick moisture-tough cabinet finishes
Below-grade air is damper air. Cabinets in moisture-resistant construction with sealed edges and a durable finish outlast prettier but thirstier materials in a basement bathroom’s climate.
24. Set a round mirror to soften the box
Most basement bathrooms are all right angles and low lines. One generous round or oval mirror breaks the grid, reflects light kindly, and makes the vanity wall feel composed rather than installed.
25. Light the mirror from both sides
A single downlight over a basement mirror carves shadows into every face. Flanking lights or a lit mirror edge give the flat, kind illumination a windowless room has to manufacture for itself.
5. Tiles That Brighten Below Grade
Tile carries a basement bathroom visually, because it covers more surface than anything else and the room has little natural light to forgive a dull choice. The strategy is consistent: light values, generous formats and a finish that returns light to the room.
Grout is the quiet half of every tile decision. Fewer, narrower joints read calmer and clean easier, and a grout colour close to the tile keeps the wall reading as one bright surface rather than a grid of lines.
26. Choose large-format tiles to calm small walls
Big tiles mean fewer joints, and fewer joints mean a wall that reads as one continuous surface. In a small below-grade room that continuity is worth more than any pattern.
27. Lean gloss or polished on the walls
A light-reflecting wall finish bounces the artificial light a basement bathroom depends on. Save the matte, grippy textures for the floor, where they earn their keep under wet feet.
28. Carry one pale tile from floor to ceiling in the shower
Wrapping the shower in a single pale tile, full height, makes the wet zone feel taller and larger, and removes the visual shelf where a half-tiled wall cuts the room’s height in two.
29. Use a soft colour rather than stark white everywhere
Pure white under warm artificial light can read clinical below grade. Pale sage, warm stone, powder blue and blush tints keep the brightness while giving the room a designed temperature.
30. Lay floor tiles on the diagonal in a boxy room
A diagonal layout tricks the eye about a small square room’s true dimensions and softens the box. It costs a little more cutting and repays it every time you walk in.
31. Match grout closely to the tile
Contrasting grout turns every wall into graph paper. A close-matched grout lets the tile’s surface — not its grid — be what the room shows, which is the brighter, calmer read.
32. Add one patterned floor for character
If the walls go quiet, the floor can sing: a small patterned tile underfoot gives a basement bathroom its personality without darkening the walls that carry the light.
33. Waterproof the substrate, not just the surface
Below grade, what sits behind the tile matters as much as the tile. Proper waterproofing boards and membranes in the wet zones are the unglamorous decision that decides whether the room lasts.
6. Showers and Tubs That Fit
The wet fixture is where basement dimensions bite hardest: ceiling height over the shower, floor depth for drainage, and the simple question of whether this room is for quick showers or long soaks. Most below-grade rooms answer that question with a shower — but not all.
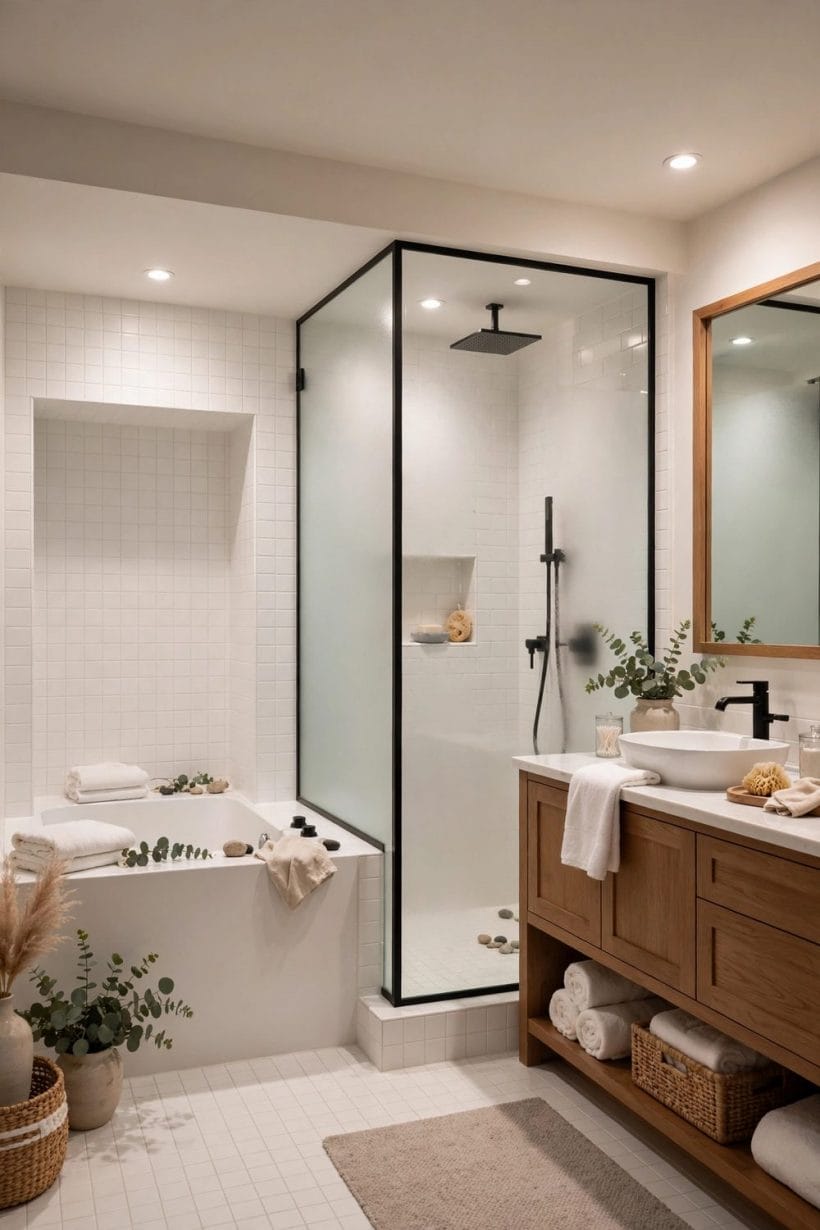
Whatever the fixture, glass beats curtains and doors beat both for light. In a room rationing brightness, every solid partition steals some, and a clear screen keeps the whole space visually in play.
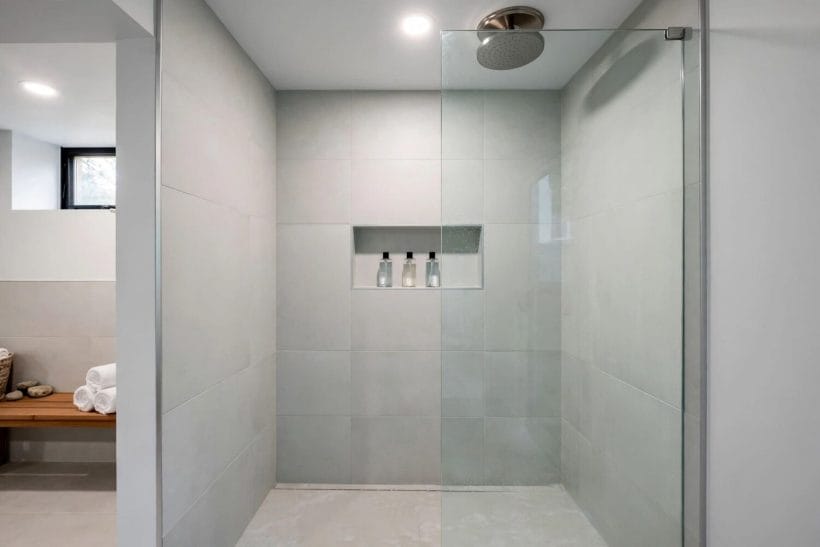
34. Make a walk-in shower the default
A walk-in shower with a glass screen fits odd corners, needs no door swing, and keeps the room’s light undivided. For most basement bathrooms it is the fixture the room was asking for.
35. Choose a corner neo-angle unit for the tightest plans
Where the footprint is truly small, a corner shower with an angled entry gives a workable washing space without claiming the middle of the room, and kit units make the fit predictable.
36. Raise the shower tray deliberately, if you raise it
When drainage needs a raised tray, treat the step as architecture: tile the riser to match, keep it shallow, and let it define the shower’s threshold rather than apologise for it.
37. Fit a compact soaking tub where the suite demands one
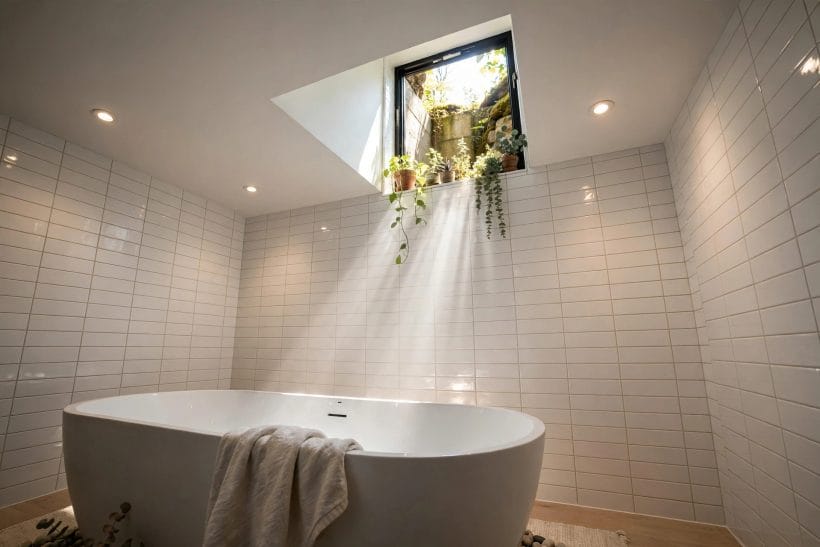
A guest suite or a family basement may genuinely want a bath. Short, deep tubs soak an adult in a footprint a standard bath would waste, and they suit below-grade rooms well.
38. Combine a tub with an overhead shower for flexibility
In a one-bathroom basement, the tub-shower combination covers children, guests and daily showers alike. A glass screen rather than a curtain keeps the arrangement looking fitted, not makeshift.
39. Set the shower head for the real ceiling height
Measure the finished ceiling, not the joists. In a low bay, a well-placed wall-mounted head at an honest height beats a rain head mounted so low it feels like a tap.
40. Tile a niche instead of fitting shelves
A recessed niche keeps bottles inside the wall’s thickness, out of the elbow zone. In a compact basement shower that reclaimed space is felt every single morning.
41. Keep fittings in one finish family
Black, chrome or brushed metal — choose one and hold it across taps, shower, flush plate and accessories. A single finish family is what makes a small room read as designed rather than assembled.
7. Light Without Windows

Some basement bathrooms inherit a small light-well window; most inherit none at all. Either way, the lighting has to be designed the way upstairs rooms design windows — in layers, for tasks and for mood — because there is no daylight to cover a lazy scheme.
The other job of light below grade is reassurance. A bright, warm, shadow-free room simply does not feel underground; a dim, single-bulb room always will, whatever the tiles cost.
42. Layer three kinds of light
Ambient light for the room, task light at the mirror, and a low accent for evenings. Three modest layers outperform one bright fitting at every hour of the day.
43. Use recessed ceiling lights to protect head height
Flush and recessed fittings keep the low ceiling clear of pendants and shades, and a grid of small downlights spreads even light without hotspots or dark corners.
44. Make the most of a light-well window
If the room has one, treat it as treasure: keep it unobstructed, use sheer privacy film rather than a blind that stays shut, and let pale surfaces carry its light deeper into the room.
45. Add a backlit or edge-lit mirror
A halo-lit mirror gives shadowless face light and a gentle glow that flatters the whole vanity wall — the closest thing a windowless room has to a sunrise.
46. Put the lighting on dimmers
A basement bathroom serving a guest suite or a midnight household needs range: full brightness for cleaning and shaving, low warmth for a late-night visit that should not wake the house upstairs.
47. Light the shower as its own zone
A sealed, shower-rated fitting over the wet zone stops the shower reading as the room’s dark cave and makes the pale tile in there do its brightening work.
48. Choose warm-white lamps throughout
Colour temperature is mood. Warm-white light flatters skin and stone alike, while cold blue-white light is the fastest way to make a basement feel like a facility rather than a home.
49. Slip a low night-light line under the vanity
A soft under-vanity glow on a sensor or separate switch lights the floor for night visits without full brightness — a small luxury that suits a basement guest suite perfectly.
8. Moisture, Air and Warm Floors

Below-grade air is still, cool and damp-prone, and a bathroom adds steam to it daily. The rooms that stay fresh are the ones where extraction, air movement and warm surfaces were designed in, not added after the first musty smell.
None of this needs to be elaborate. A properly sized extractor that actually gets used, a plan for dry towels, and surfaces chosen for a damp room carry a basement bathroom comfortably through decades.
50. Fit an extractor fan and run it properly
The extractor is the room’s lungs. Size it for the room, vent it outside — never into a ceiling void — and let it run on after the shower, when most of the steam is still in the air.
51. Add a humidity-sensing fan control
Fans fail socially more than mechanically: people switch them off. A humidity sensor switches the fan on and off by the room’s actual need, which removes the human from the system entirely.
52. Keep a small dehumidifier in the wider basement plan
The bathroom’s moisture joins the basement’s general humidity. Whole-level dehumidification, covered in depth in the site’s dehumidification guide, keeps the bathroom’s own defences from fighting alone.
53. Heat the floor if the budget allows one luxury
Underfloor heating is the basement bathroom luxury that earns its place daily: it takes the slab’s chill off bare feet and gently dries the floor, helping the whole room’s moisture balance.
54. Hang a heated towel rail
Towels dry slowly in still basement air. A heated rail keeps them genuinely dry between uses, adds background warmth, and removes the damp-towel smell that gives basement bathrooms their reputation.
55. Choose mould-resistant finishes in the wet corners
Paints, grouts and sealants are made in bathroom formulations for a reason. In the corners where steam lingers longest, the mould-resistant choice is the one that still looks clean in five years.
56. Leave an air gap behind freestanding furniture
Furniture pushed hard against a cold below-grade wall traps damp air behind it. A small breathing gap, and a preference for wall-hung pieces, keeps air moving where mould would like to start.
57. Ventilate the room you are in, and the void behind it
Access panels, boxed pipework and the space under a raised shower all hold still air. Where the design boxes things in, discreet ventilation of the void keeps hidden damp from becoming hidden damage.
9. Space-Saving Fixtures and Storage

Basement bathrooms are rarely large, and their storage problem is specific: everything a bathroom needs, in a room the house gave its leftover footprint. The solutions below share one logic — use the walls, the voids and the height, and let the floor stay clear.
Fixture choice is the first storage decision. Wall-hung and compact versions of the standard pieces return floor area the room can spend on movement, which in a small bathroom is worth more than any cabinet.
58. Hang the WC on a concealed frame
A wall-hung WC with its cistern hidden in the wall thickness returns precious floor depth, cleans underneath in one wipe, and gives a small below-grade room a calm, architectural line.
59. Choose a short-projection basin for narrow rooms
Basins are made in shallow projections for cloakrooms and compact rooms. In a narrow basement bathroom, those saved centimetres are the difference between passing the basin comfortably and sidling past it.
60. Recess a mirrored cabinet into the wall
A cabinet set into the studwork hides its depth inside the wall, storing bottles behind the mirror without stealing a centimetre of room. It is the single best storage move in a small bathroom.
61. Build shelves into the boxed pipework
Basements box in pipes and ducts whether you plan it or not. Designing those boxes with open shelves or a cupboard door turns dead boxing into the room’s linen store.
62. Use the wall above the WC
The stretch of wall over the cistern is found space: a shallow shelf or slim cabinet there holds the spare rolls and bottles that otherwise colonise the floor and the cistern top.
63. Fit a vanity with a towel rail front
A rail built into the vanity’s face keeps the hand towel at the basin, off the door handle and off the floor — a small fixture decision that tidies the room’s daily life.
64. Keep cleaning supplies in the room, slimly
A tall, narrow pull-out or a slim cabinet by the door stores the spray bottles and cloths in the room they serve, so the bathroom can be freshened without a trip upstairs.
65. Choose a sliding or pocket door
A door that slides into the wall or along it returns its whole swing area to the room. In the tightest basement bathrooms that returned area is where the vanity or the storage tower finally fits.
66. Mirror a whole wall section to double the feel
A generous mirror wall above the vanity doubles the room visually and doubles its light. Below grade, where no window competes, the effect is closer to magic than decoration.
10. Finishing Details That Lift the Room
Finishes are where a basement bathroom stops apologising. The room’s bones — layout, drainage, air — may be constrained, but nothing below grade constrains colour, hardware, scent or softness, and those are what a guest actually remembers.
Work the details as one scheme. Hardware finish, textile colour, plant choice and artwork should feel chosen together; in a small room there is nowhere for a clashing decision to hide.
67. Paint the ceiling a true, bright white
In a low room the ceiling is always in view. A clean bright white lifts it visually and returns light downward; save the adventurous colour for the walls or the vanity.
68. Dare one deep-coloured wall outside the wet zone
A single deep green, ink or plum wall behind the vanity gives a windowless room the drama daylight usually provides, and pale tiles elsewhere keep the balance bright.
69. Warm the floor story with a washable runner
A low-pile, washable runner over the tile takes the chill and the echo out of the room and adds the one soft surface a tiled bathroom lacks.
70. Choose plants that accept low light
A fern, a pothos or a cast-iron plant tolerates the basement’s light levels and repays the room with the one thing tile cannot give it: something alive.
71. Hang art as you would upstairs
A framed print in a moisture-safe frame tells everyone the room is a real bathroom, not a facility. Choose pieces that tolerate humidity, and hang them where the mirror does not reflect the door.
72. Decant bottles into matching dispensers
Five mismatched product bottles shout in a small room; three matching dispensers whisper. It is the cheapest visual upgrade in any bathroom, and it works at every budget.
73. Fit soft-close everything
Seats, drawers and cabinet doors that close softly make a compact room feel expensive and keep a quiet basement quieter, especially with sleepers on the other side of the wall.
74. Scent the room deliberately
A reed diffuser or a eucalyptus bunch on the shower head answers the first doubt every guest has about a basement bathroom before they have finished forming it.
75. Stock it like a guest bathroom, always
Spare towels folded, a small basket of essentials, a hook for a robe. A basement bathroom kept guest-ready is the one that never feels like the house’s second thought.
Final Considerations
A good basement bathroom is won in the unglamorous order: drainage first, height surveyed honestly, air planned as carefully as tile, and only then the pleasures — the floating vanity, the pale sage tile, the warm floor. Nothing in these 75 ideas needs the room to be large; they need it to be deliberate. Design for the slab you have and the stack you can reach, keep the moisture strategy boring and reliable, and the room below grade will earn the same affection as any bathroom in the house.




0 Comments