

Some buildings are assembled; stone cottages are grown out of the ground they stand on. A framed house is a kit of parts with a lifespan; a stone wall is a landscape decision with a postcode. The work is slow, heavy and unforgiving of shortcuts — and the result outlives everyone who laid it. Here is the complete starter kit, from footing to ridge.
How to Construct a Tiny Stone Cottage: At a Glance
Learning how to construct a tiny stone cottage means unlearning the tiny house on wheels: nothing here is light, mobile or quick. A stone cottage is permanent, massive, and built from the ground it stands on — two faces of shaped stone tied around a rubble heart, standing on a foundation dug below the frost line and drained like it matters, because it does. Stone construction is ancient, forgiving of imperfect materials, and produces buildings that outlive their builders by centuries. The ten sections below follow the build in ground order: why stone earns its keep, the rubble trench foundation, the wall technique itself, openings and lintels, the roof that caps the mass, and the modern insulation and moisture layers — finishing with the honest costs and the even more honest timeline. Foundations, wall technique, mortar choices and budgeting: build something your great-grandchildren will argue over inheriting.
| Topic | What It Covers | Key Fact or Figure |
|---|---|---|
| 1. Stone Is Forever | Why masonry is the permanent opposite of the THOW | Walls that outlive their builders by centuries |
| 2. Why Stone | Durability, thermal mass, local material, fireproofing | 18–24″ walls moderate temperature swings |
| 3. The Foundation | Rubble trench and stone footings | Below frost line, drained, 1.5–2× wall width |
| 4. The Walls | Two wythes, a rubble heart, through-stones | Through-stones every 2–3 feet tie the faces |
| 5. Openings | Doors, windows and the lintels over them | Keep openings narrow and few |
| 6. The Roof | Wall plate, rafters, tie-downs and overhangs | Overhangs of 18–24″ are the wall’s umbrella |
| 7. Insulation | The framed interior wall inside the stone | Insulate conventionally; stone stays outside |
| 8. Moisture | Lime breathes; you manage the liquid water | Never Portland cement on old, soft stone |
| 9. Costs | The materials math for the shell | $3,000–8,000 in materials; $10,000–30,000 total |
| 10. Timeline | The labour math nobody can shortcut | A pro mason lays 20–40 sq ft of wall per day |
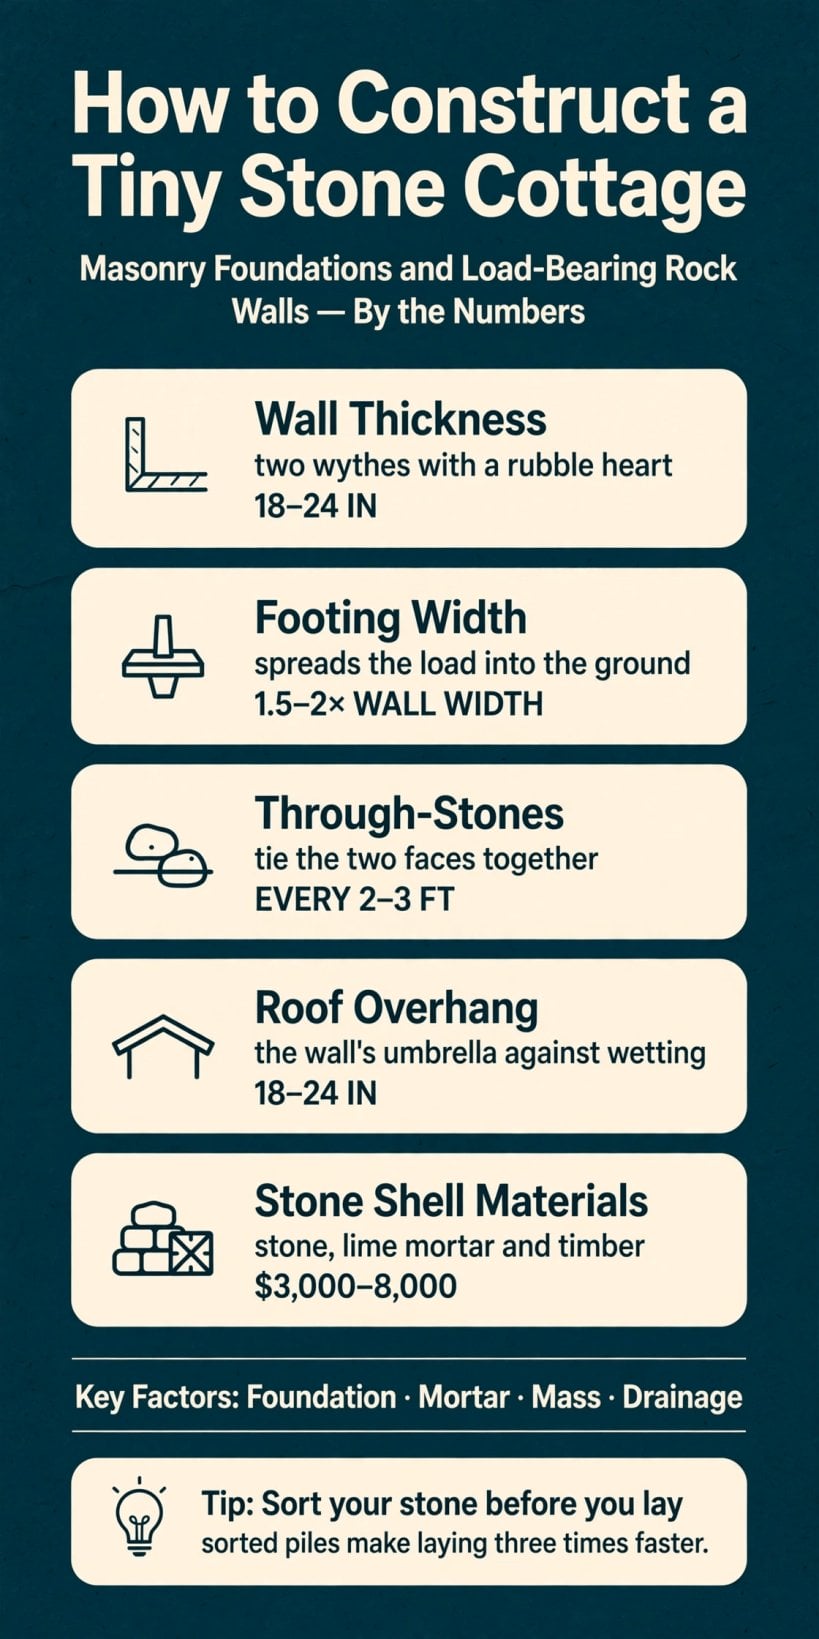
The stone cottage by the numbers: 18–24-inch walls on footings one and a half to two times their width, through-stones every 2–3 feet, 18–24 inches of protective overhang — and a shell that costs $3,000–8,000 in materials.
1. Stone Is Forever (If You Build It Right)
Start with the mindset, because stone punishes the wrong one. A tiny stone cottage is the opposite of a tiny house on wheels: permanent, massive, and rooted. Where a THOW is engineered to move, a stone cottage is engineered to stay — to shrug off centuries of weather that would reduce a framed house to compost. That permanence is the product being bought with all this labour, and every decision in this guide is priced against it.
The good news is that the material itself is forgiving. Stone construction is ancient precisely because it tolerates imperfect inputs: irregular fieldstone, quarry offcuts, even urbanite — recycled concrete — can all become a sound wall in patient hands. What it does not tolerate is a wrong foundation, the wrong mortar, or water managed carelessly, and those three failure points get their own sections below. Stone sits in a family of build-it-once dwelling approaches — the earth-sheltered and alternative builds compared in our roundup of alternative housing options share the same philosophy — but none of them matches stone’s simple claim: build it right, and it is finished forever.
2. Why Stone for a Tiny Cottage
Four properties make the case. Durability first: stone walls last centuries with minimal maintenance — the ultimate buy-once material, in a housing culture built on replacement cycles. Thermal mass second: 18–24″ stone walls moderate temperature swings beautifully, cool in summer and steady in winter, absorbing the day’s heat and releasing it slowly through the night — an effect worth pairing with a deliberate insulation strategy, covered in section 7. Third, the material is local: fieldstone, quarry offcuts or urbanite are often free or cheap near the build site, which collapses the materials budget in a way no shipped product can. Fourth, stone is fireproof: it doesn’t burn, rot, or feed termites.

The trade-offs are just as specific, and honesty about them is what separates a finished cottage from an abandoned wall. Stone laying is slow — 3–5× slower than framing — so the calendar is the real budget. The work is heavy, and the foundation requirements are serious, because mass demands support. And the skill is real: good stonework takes practice. The traditional apprenticeship trick still applies — start with the foundation, where mistakes hide underground, and let your hands learn the stone before the visible walls begin. The thermal-mass behaviour that makes these cottages so steady in winter is the same physics at work in the builds rounded up in our guide to tiny house living in cold climates, where stored heat is the difference between comfort and endurance.
3. The Foundation: Rubble Trench and Stone Footings
Stone cottages need foundations that match their mass, and two approaches cover most small builds. The rubble trench foundation is a trench filled with compacted drainage stone — no concrete — the traditional and eco-friendly option: dig below the frost line, 18–24″ wide, fill with 3/4″ crushed stone compacted in lifts, and top with a stone or concrete grade beam. The hybrid alternative is poured concrete footings — 16–24″ wide, below the frost line — with stone stem walls above: the code-friendly route in most jurisdictions.

Three rules govern whichever you choose, and none of them negotiates. Always below the frost line: heaving destroys masonry, and frost heave is the #1 stone foundation killer. Always drained: a perforated pipe at the footing base, daylighted out of the trench, because water plus freeze equals cracked walls. And always wider than the wall: footings spread the load at 1.5–2× the wall width, so the mass above lands on ground that can carry it. The site work that precedes all of this — clearing, grading, drainage runs, access — is sequenced in our guide to how to prepare land for a tiny house, and on a stone build it deserves extra care: you are preparing ground for a structure that intends to sit on it for centuries.
4. Load-Bearing Stone Walls: The Technique
The wall itself has an anatomy worth memorizing: two faces of shaped stone — the visible wythes — with a heart of rubble and mortar between them, the hidden core. Total thickness runs 18–24″, and the two faces are not decoration on a solid wall; they are a composite structure, and the technique exists to make them act as one.
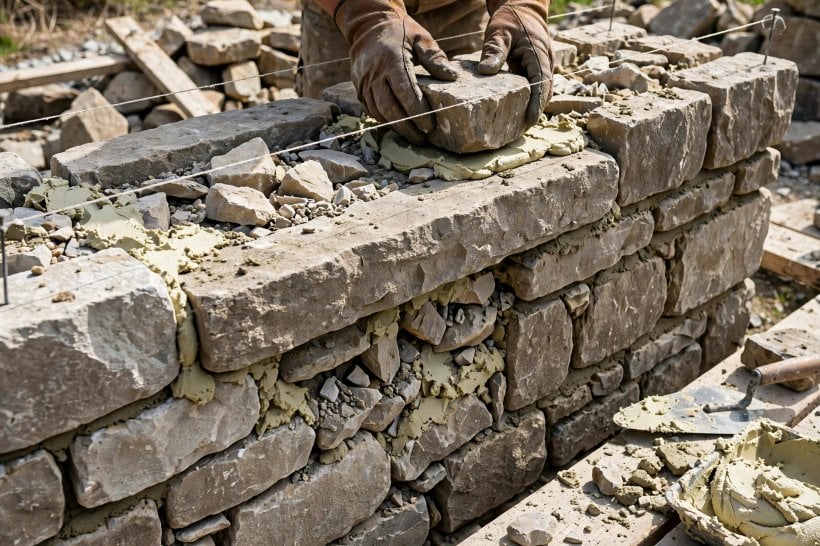
Laying follows rules that read like proverbs because they are. Sort the stone by size first — the golden rule, because laying goes 3× faster with sorted piles. Lay the corners first: the leads, which everything else references. One stone over two: break the vertical joints, no stacked joints, ever, because a continuous vertical seam is a crack waiting for permission. Use through-stones every 2–3 feet vertically — long stones spanning the full wall width that tie the wythes together; they are the structural secret of stone walls, the stitching that stops the two faces drifting apart. And level every 2 feet, with string lines and patience. The mortar is part of the technique, not an afterthought: lime mortar, not Portland cement. Lime flexes with the stone and is repairable; Portland is too rigid and traps moisture. The traditional material is the correct material.
5. Openings: Doors, Windows, and Lintels
Openings are the structural challenge of a load-bearing wall: every hole interrupts the load path, and something must carry the wall across it. That something is the lintel — stone, timber or steel spanning the opening, sized for the load above. A 3-foot window needs a serious lintel carrying the wall over it; when in doubt, choose steel. Arches are the traditional alternative — a properly built arch carries enormous loads — but they require formwork skill, so save arches for the second project.
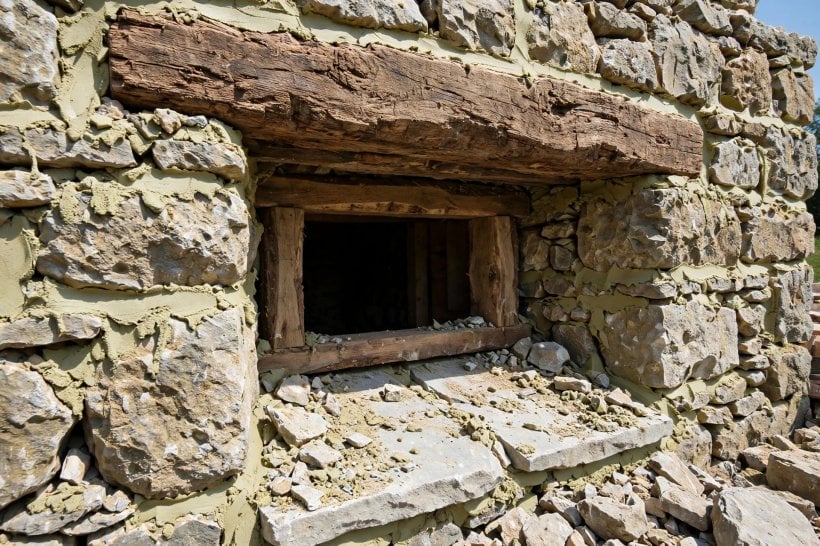
The supporting details matter as much as the span. Sills should be sloped stone: flat sills pond water into the wall, while a slope sheds it. Frames are set as you lay — timber or steel frames built into the wall as it rises; never cut openings afterwards, because the wall must be built around the frame, not breached for it. And the governing rule ties the section together: keep openings narrow and few. Every opening weakens the wall, which is why the stone cottage aesthetic of small, deep-set windows is structural wisdom, not just charm.
6. The Roof: Capping the Mass
The roof begins with the wall plate: a timber plate bedded on the wall top and mortared down, distributing the roof load evenly across the masonry. Above it, the structure is reassuringly conventional — timber rafters or trusses, because stone walls carry roof loads easily; the roof is ordinary carpentry on an unconventional wall. The timber tradition it belongs to is the same one detailed in our roundup of compact cabin floor plans in the timber frame tradition, where the frame does the spanning and the walls do the standing.
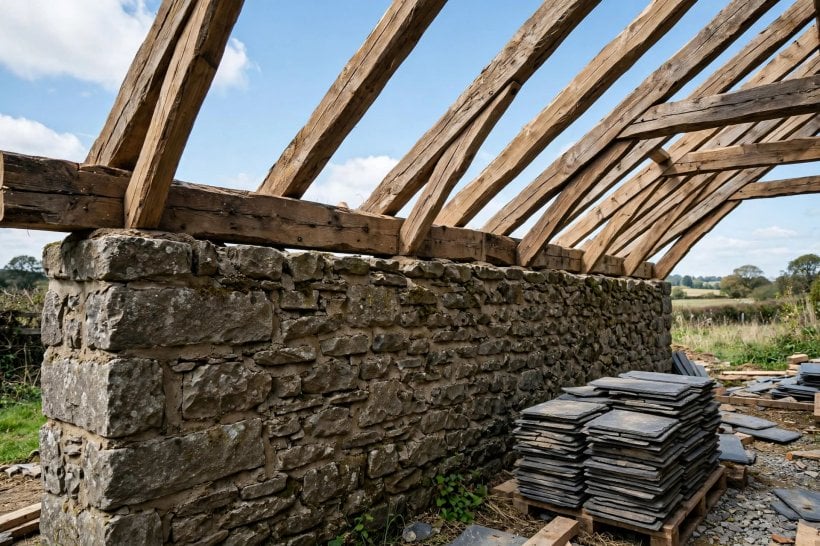
Two details protect the whole assembly. Tie the roof down: hurricane straps from the rafters to the wall plate, because wind uplift on a light roof over heavy walls still matters — the mass below does nothing to hold a roof the wind gets under. And give the roof generous overhangs of 18–24″: stone walls hate constant wetting, and the overhang is the wall’s umbrella. A final weight note: a slate or tile roof suits stone aesthetically, but verify the wall and foundation were sized for it — stone roofs are heavy at 10–15 lbs/sq ft. The structural arithmetic for what any roof must carry, snow included, is worked through in our tiny house snow load calculator.
7. Insulation: The Modern Layer
Stone walls are not insulated walls, and pretending otherwise is how stone cottages earn an unfair reputation for being cold. The standard modern answer is interior insulation: frame a 2×4 wall inside the stone, insulate it conventionally, and run the services — wiring, plumbing — inside that framed wall, keeping the stone as the exterior wythe. The thermal mass then works for you rather than against you: the stone absorbs and releases heat outside the insulation line, while the lived-in layer stays warm and dry.
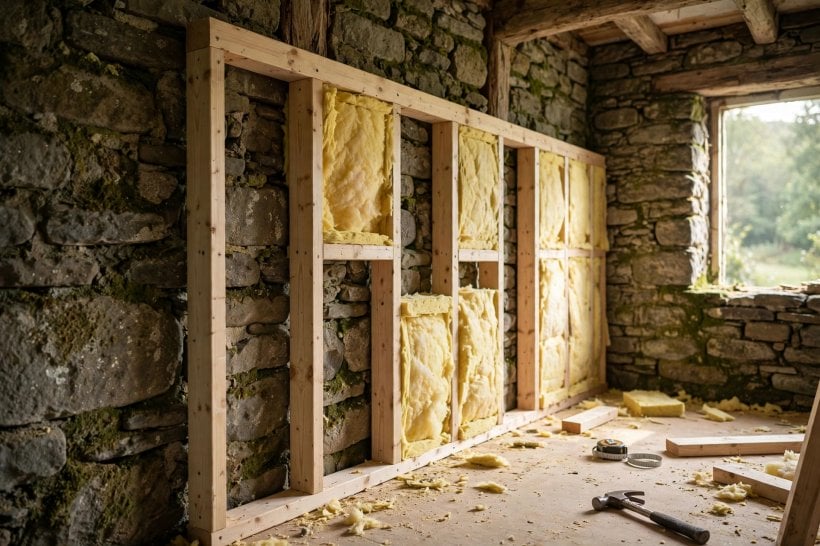
The alternative — exterior insulation, rigid foam outside the stone — is better thermally, and it hides the stone, which defeats the entire aesthetic purpose of building with it. So the interior framed wall is the approach this guide endorses, and its detailing follows the same material logic compared in our guide to how to insulate a tiny house: choose for moisture behaviour and forgiveness, not R-value alone. The cottage gets a modern thermal layer; the stone keeps its face and its dignity.
8. Moisture: Let the Wall Breathe
Moisture management in a stone wall divides cleanly into two jobs. The wall’s job is vapor: lime mortar breathes, so let it — never seal stone walls with impermeable coatings, which trap the very moisture the lime would have released. Your job is liquid water: bulk water is managed by design, not by the wall — the generous overhangs of section 6, the sloped sills of section 5, and the drained foundation of section 3. The wall handles vapor; you handle liquid water.

One mistake deserves its own warning, because it is the classic restoration error: never use Portland cement mortar on old or soft stone. Portland is harder than the stone it touches, so it traps moisture behind the wall face and the stone spalls — the faces shell off, destroyed by the very mortar meant to protect them. Lime, being softer and breathable, sacrifices itself instead and can be repointed. The indoor half of the moisture system — moving humid air out of the living space before it condenses anywhere — follows the principles compared in our guide to tiny house ventilation with HRV and ERV systems. Breathable walls, drained ground, moving air: that is the whole moisture doctrine.
9. Costs: The Honest Materials Math
The stone cottage is cheap in materials and expensive in time — the opposite of a prefab — and the materials side of the ledger is genuinely short. Stone itself runs free to $200 per ton locally, depending on what the land and the quarry give you. Lime mortar costs $15–20 per bag, at roughly one bag per 10 sq ft of wall. Lintels and timber add $500–1,500. Priced out, a tiny cottage’s stone shell lands at $3,000–8,000 in materials — a startlingly small number for a structure designed to stand for centuries.
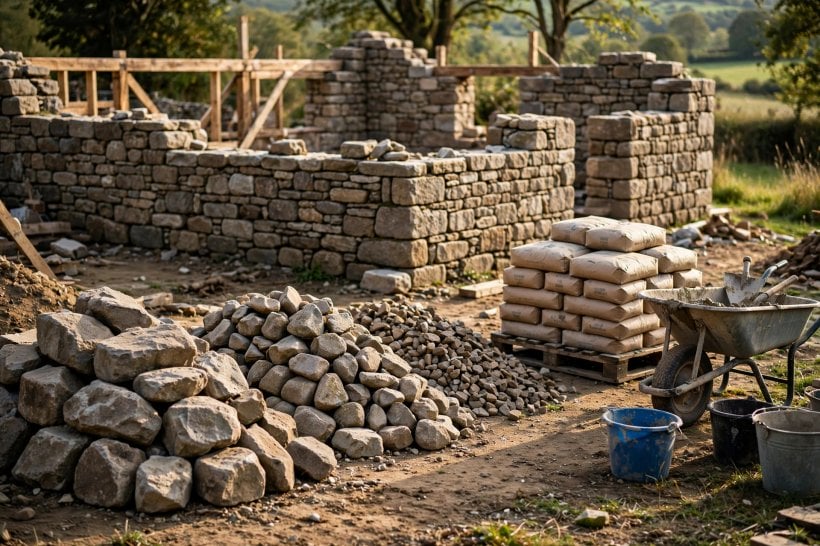
Set against the totals, the shape of the bargain becomes clear. The all-in shell — DIY to hired — runs $10,000–30,000, and the distance between the materials figure and the total is almost entirely labour, which is the next section’s subject. The discipline this imposes on budgeting is unusual: your money buys stone, lime and lintels quickly and cheaply, and then the real currency — days — starts being spent. Builders who understand that trade before the trench is dug finish their cottages; builders who budget only the materials discover it at waist height.
10. Timeline: The Labour Is the Budget
Labour is the real cost, and its arithmetic is unforgiving. A professional stone mason lays 20–40 sq ft of wall per day. A 400 sq ft cottage carries roughly 800 sq ft of wall, which works out to 20–40 mason-days — $8,000–20,000 hired, before the roof is framed or a single service is run. Those numbers are not a warning against stone; they are the honest shape of the material, and they explain why stone cottages were historically raised by communities and seasons rather than weekends.
DIY changes the money, not the physics. Building your own stone cottage is totally feasible — stone is the most DIY-forgiving masonry there is, and mistakes are correctable in a way that a miscut beam or a bad concrete pour is not — but expect 2–4× the professional timeline. The mitigations are the ones this guide has already handed you: start at the foundation where errors hide, sort the stone so laying runs 3× faster, and let the corners teach your hands before the long walls test them. Slow is not a defect of the method. Slow is the method.
Final Considerations
Build the foundation below the frost line and drained, lay two wythes with a rubble heart and through-stones, use lime mortar, keep openings narrow with real lintels, insulate from the inside, and give the walls big overhangs. That short specification is the whole discipline of how to construct a tiny stone cottage, and every clause of it exists because the failure it prevents was learned the hard way by someone, centuries ago. Other dwellings ask to be maintained; this one asks only to be built correctly, once. Builders drawn to structures that grow out of their ground will find a kindred, lighter tradition in our roundup of yurt floor plans — but the yurt is stone’s opposite in every way that matters here: portable where the cottage is permanent, fabric where the cottage is forever. Stone is the slowest fast way to build — the cottage you raise will outlive you, and that is the entire point.



0 Comments