

Green wood is more water than wood. A living tree is essentially a water column wearing bark, and a log cut from it holds 50–100%+ moisture — build with it fresh and the piece cracks, warps or rots as that water escapes on its own schedule. Curing is the unglamorous waiting that separates log crafts that last decades from ones that self-destruct in a year — and patience is the preservative.
1. Cure and Dry Wood Logs at a Glance
To cure and dry wood logs is to manage one slow exit of water so evenly that the wood never tears itself apart on the way out. Nothing in the process is complicated, but every step is a defense against a specific failure: sealing against end checks, stickering against mold, peeling against insects, elevation against rot, and the calendar against all of them. The table gathers the whole cure in one place; the sections after it take the science, the sealing, the stack, the peeling, the protection, the monitoring, the timeline and the accelerators apart in turn.
| Attribute | Detail |
|---|---|
| The Starting Point | Green logs at 50–100%+ moisture content — more water than wood, by weight |
| The Target | 12–20% moisture for outdoor crafts; indoor furniture wants 6–8% |
| The Timeline | 1 year per inch of thickness — an 8″ log needs roughly a year |
| The First Defense | End-sealing within hours of cutting — end grain loses moisture 10× faster |
| The Foundation | Skids or pallets — the stack stands 6″+ off the ground |
| The Spacers | 1×2 stickers between every layer, so air circulates around every log |
| The Cover | A roof, never walls — and never a plastic wrap, which builds a mold factory |
| The Peel | Debark fresh logs — peeled wood cures 20–30% faster and hosts far fewer insects |
| The Shield | Borate sprayed on green logs against borers, beetles and fungi |
| The Proof | A $30 pin meter reading under 20% at the center of the log’s end |
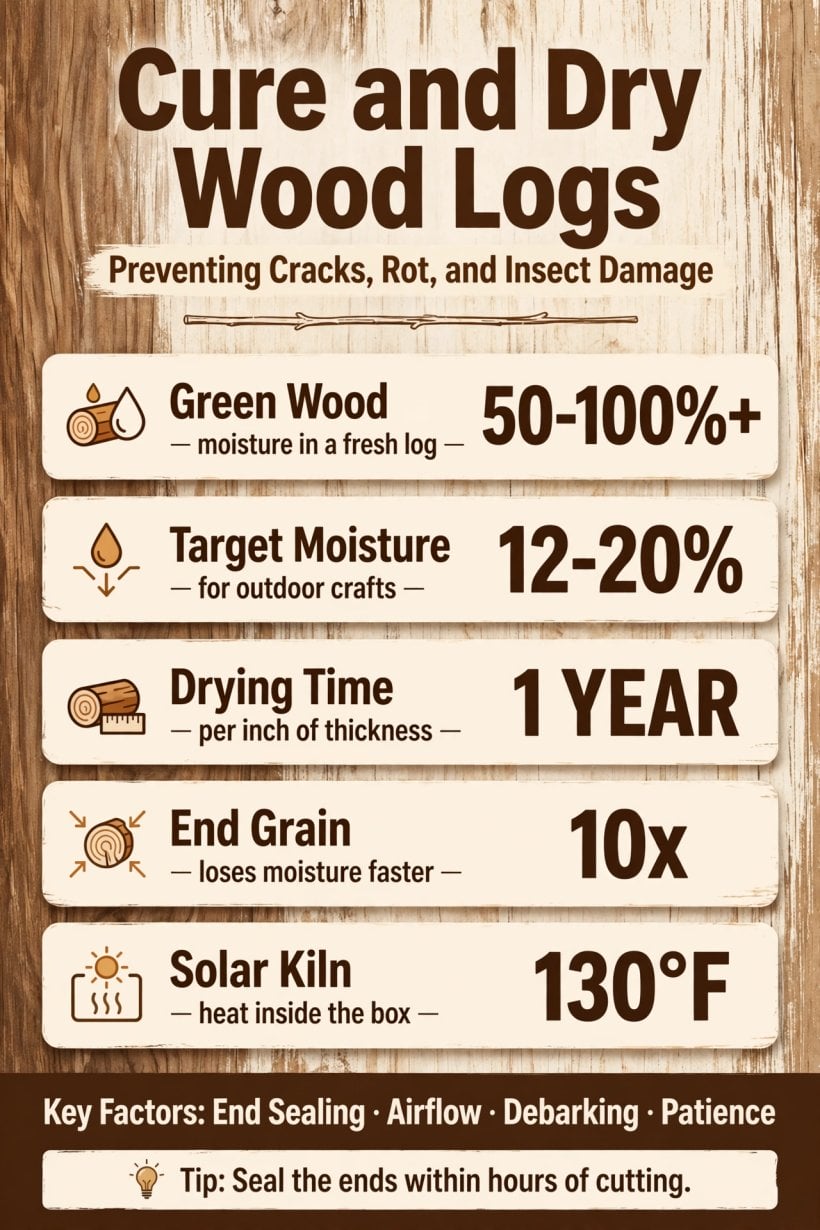
One year per inch, ends sealed within hours, and a $30 meter to prove it — the whole cure on one card.
Read the table as a sequence, not a shopping list. The sealing happens on the day of the saw, the peeling while the bark still slips, and the stacking before the first night on the ground — because the failures each step prevents begin within days, not months. The monitoring and the timeline then govern the long middle: a year in which the stack asks for almost nothing except airflow, a quarterly look, and the discipline not to build with the wood early. Curing rewards the prepared and punishes the hurried, and the preparation is all front-loaded into the first afternoon.
2. The Drying Science: Moisture Content and Why Green Logs Crack
The science starts with a number that surprises most people: green wood runs 50–100%+ moisture content — literally more water than wood, by weight. The living tree is a water column wearing bark, and a fresh log is that column cut to length. Every stage of curing is measured against that starting point, because the destination is just as specific: 12–20% moisture for outdoor crafts, which is equilibrium with outdoor air, and a drier 6–8% for indoor furniture. A log is cured not when it feels dry, but when its moisture has settled into the range its finished life will be lived in.
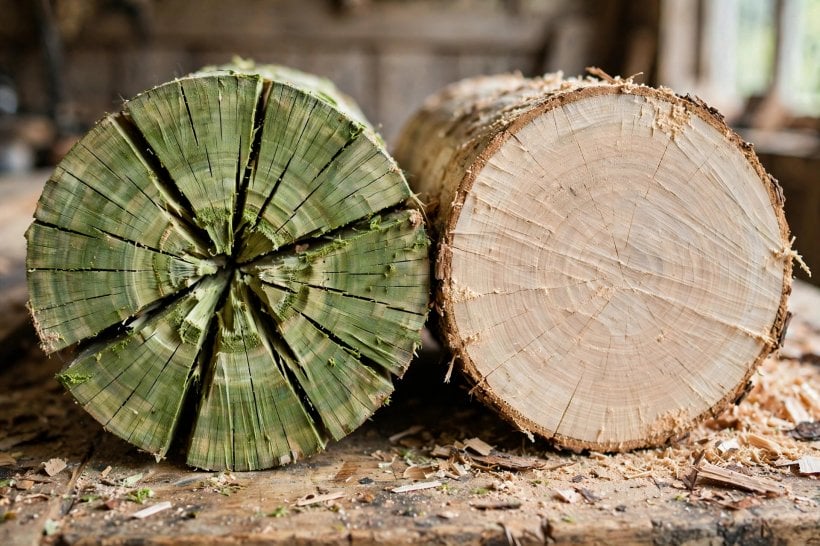
What goes wrong without that patience is uneven drying. The outside of the log dries first and tries to shrink around a core that is still wet and full-sized — and wood caught between a shrinking shell and a stubborn center relieves the stress the only way it can: checks, cracks and warping. It is the same physics that splits an unsealed wood cookie, worked at log scale, and the guide to slicing wood cookies without cracking fights the identical battle on a smaller disc. The reward for drying evenly is the opposite of drama: cured logs barely move, so the craft built from them stays true for decades.
3. End-Sealing: The First Defense Against Checking
The ends are where a log loses its water first and suffers for it: end grain loses moisture 10× faster than the side grain, so the ends dry, shrink and check first and worst. End-sealing exists to slow that one fast exit down to the pace of the rest of the log. The options are three, and the original ranks them plainly: a commercial anchor seal is best, melted paraffin is the traditional coating, and ordinary latex paint works. What matters more than the choice is the timing — within hours of cutting. The clock starts at the saw, because end-checks begin within days on unsealed logs.
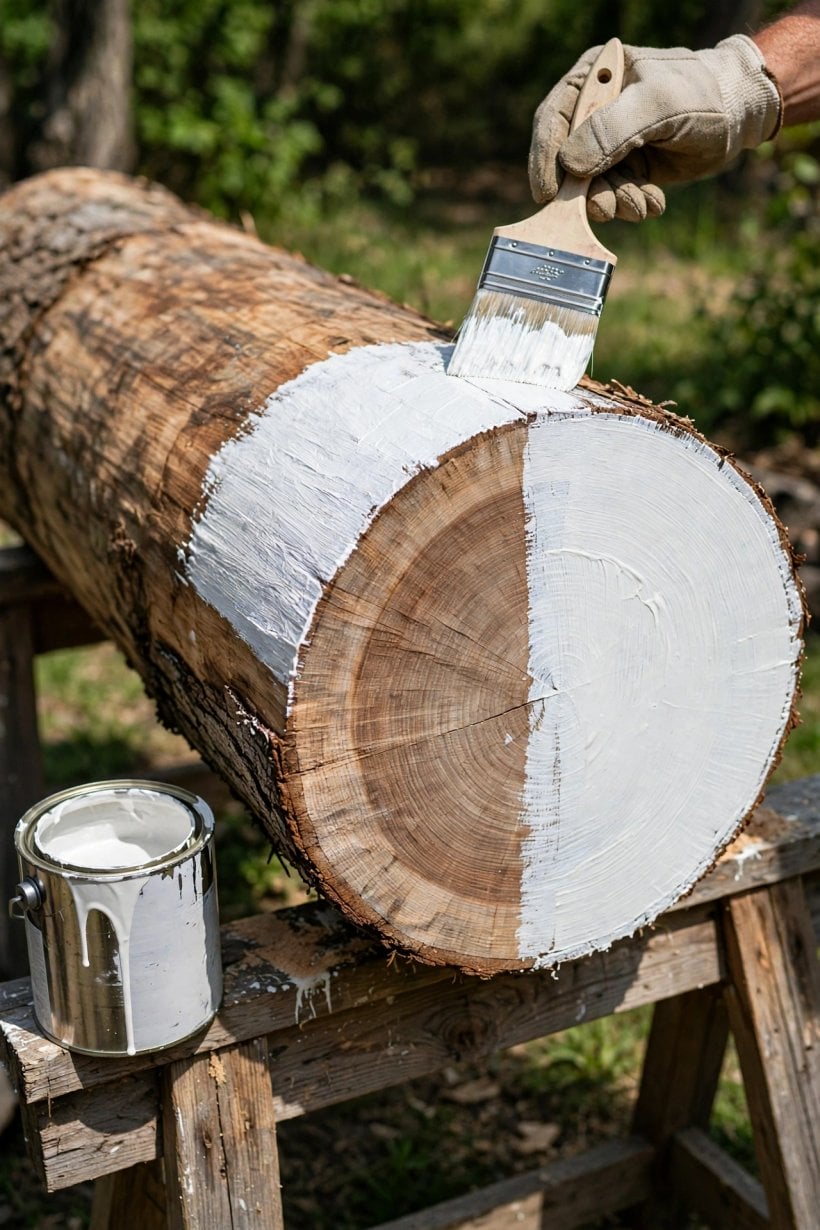
Sealing is also a small ongoing duty rather than a single act. As checks develop during the cure, the new cracks get sealed too — reapplying over a fresh check stops it running deeper, and that vigilance is the whole maintenance the stack’s first defense asks for. The payoff justifies it: sealed ends mean even drying and minimal checking, which is why end-sealing is the single highest-return step in curing — minutes of work on cutting day against cracks that no later craft can undo. The same end-grain logic protects finished work outdoors, where the sealers and stains of the guide to protecting outdoor log crafts take over once the cured log becomes a bench, a planter or a fence rail.
4. The Air-Drying Stack: Skids, Stickers and Airflow
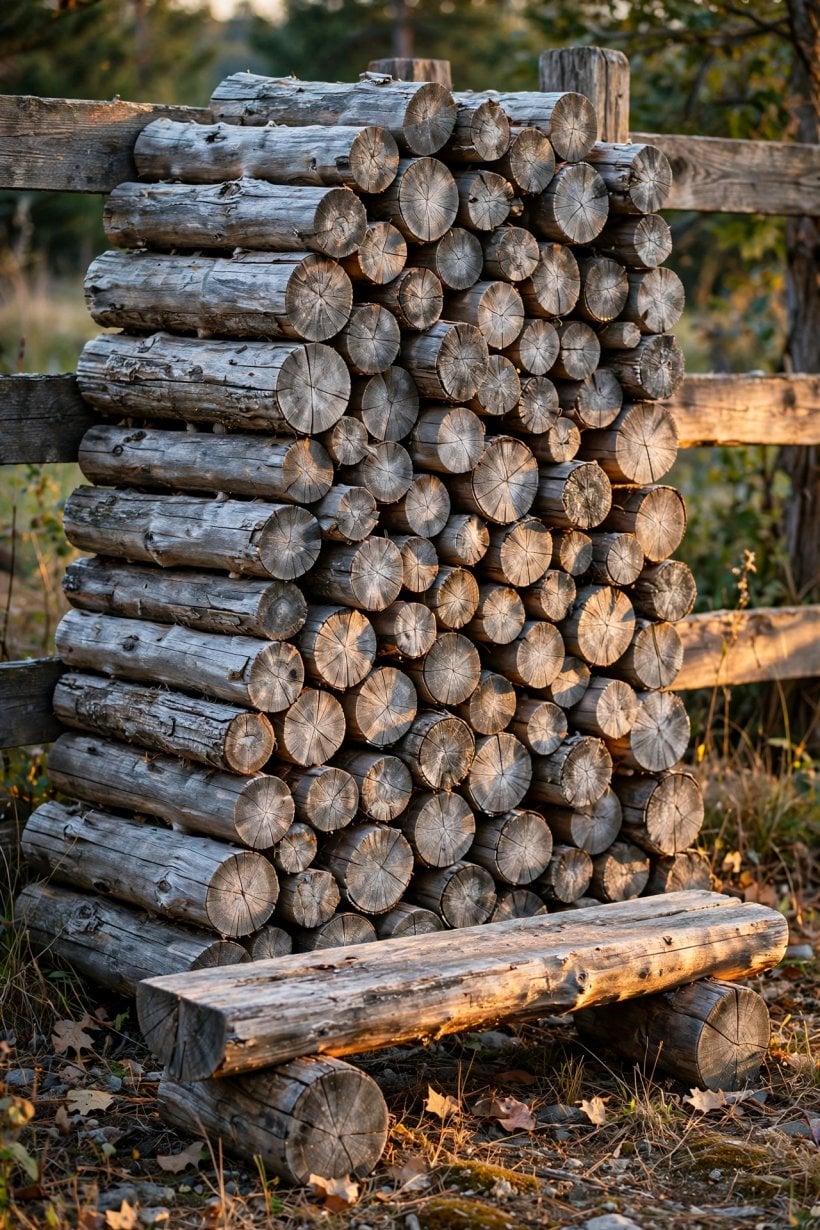
The stack is the curing chamber, and it has three location requirements: shaded, ventilated, and off the ground. Each one answers a failure — direct sun causes checking, still air breeds mold, and ground contact rots. The foundation is skids or pallets holding the pile 6″+ off the ground, so air moves beneath the stack as freely as around it. Between every layer of logs go the stickers: 1×2 strips laid as spacers, so that no two logs touch and air circulates around every single one. A pile without stickers is a pile drying only on its outside faces.
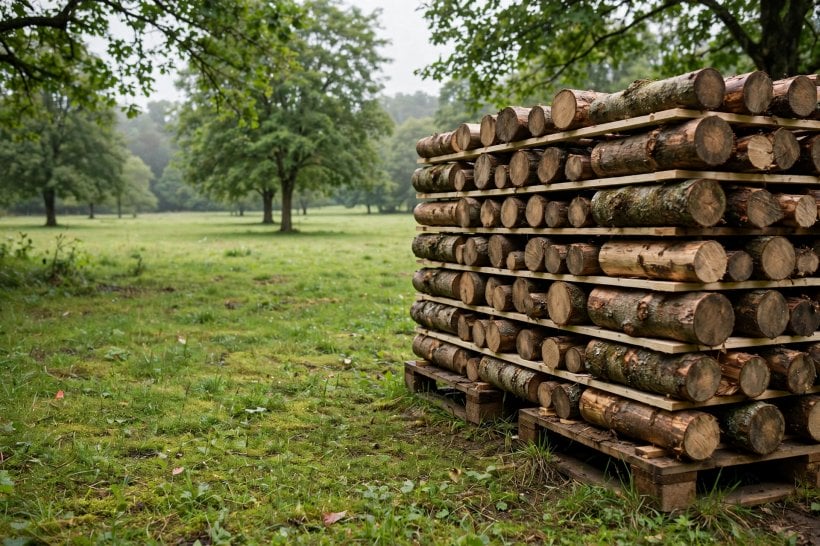
Orientation and cover finish the design. Bark up sheds rain — the traditional argument — though either orientation works if the pile is covered. The cover itself is a roof, not walls: a metal roof or a tarp over the top only, keeping rain off while the sides stay open to the air. The one covering never to use is a full plastic wrap: it traps the very moisture the stack is exhaling and builds a mold factory around the wood. Finally, spacing between piles runs 2 ft minimum — the airflow corridors that let each stack breathe on all sides. Built this way, the pile needs no power, no attention and no adjustment; the moving air does the year’s work for free.
5. Debarking: Peeling Green Logs Before the Insects Move In
Bark is the insect hotel. Borers, beetles and fungi all harbor under it, and a log curing in its bark is offering them a year’s undisturbed lodging pressed against the wood. Debarked logs have dramatically fewer pest issues — which is why peeling is a curing step and not merely a cosmetic one. The timing rule is the same urgency as the sealing: peel soon after felling, while the bark still slips. On a fresh log the drawknife glides and the bark comes away in long curls; wait a year and it is cemented on, and the same job becomes a fight.
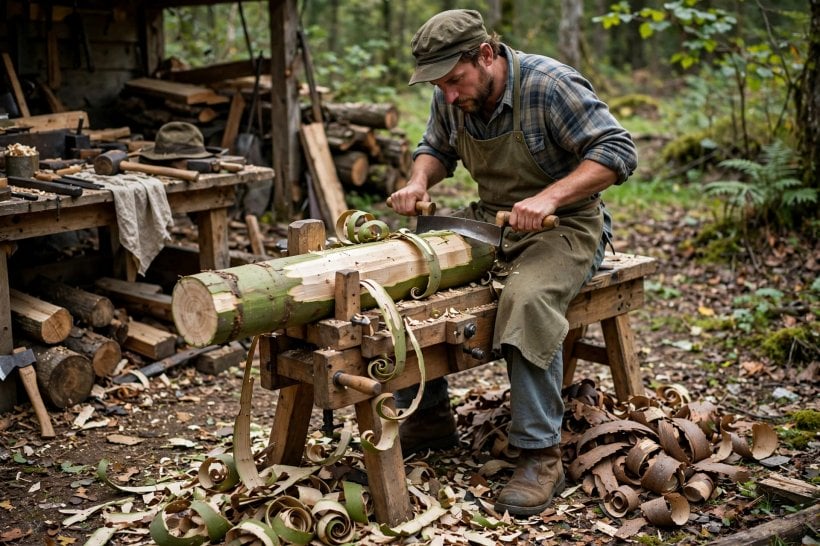
The tools are three, chosen by temperament and scale: the drawknife for control, the spud bar for leverage, or a pressure washer for speed on big logs. There is one honest exception to the peel-everything rule — the bark-on craft. If the design wants the bark, the rustic look itself, then keep it, accept the insect risk knowingly, and treat the log with borate as the trade-off. Peeling pays a second dividend even where insects are not the worry: bark is a moisture barrier, so a peeled log cures 20–30% faster than one drying through its coat. Working logs while they are still green and workable is a theme the carving side of the craft shares — the green wood carving guide shapes bowls and spoons from fresh timber for the same reason the peeler strikes early: green wood cooperates, and dry wood resists.
6. Protecting the Pile: Borate, Elevation and the Quarterly Inspection
A curing stack spends a year in its most vulnerable state — wet wood, sitting still, outdoors — so protection during the cure is its own discipline. The preventive is borate: sprayed on green logs, it diffuses into wet wood beautifully, and it stands as the insect and fungi shield for the whole vulnerable drying year. Elevation is the second rule, and it is absolute: off the ground, always, because ground contact during curing undoes everything the stack was built to do. Ventilation is the third: stagnant air plus damp wood equals mold, and the spaced, stickered stack of §4 breathes precisely so that equation never balances.
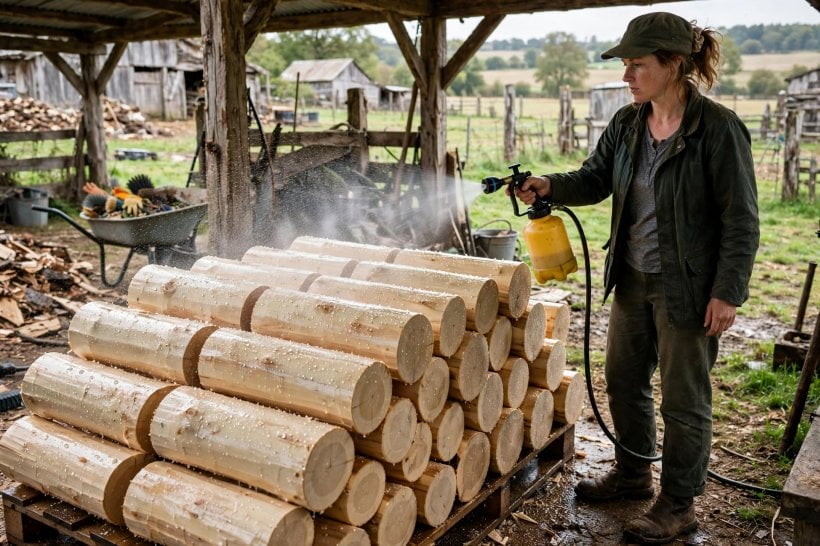
The human part of the system is the quarterly inspection. Every few months, pull a log and look: for borer dust, for soft spots, for fungal fans — the early catch, made while a problem is still one log rather than the whole pile. Affected logs get isolated, away from the healthy stack. And the triage at inspection is forgiving in one direction and ruthless in the other: surface mold is cosmetic and simply sands off once the wood is dry, but deep soft spots mean the log is firewood, not craft timber. Caught quarterly, rot and infestation stay a nuisance; caught never, they become the harvest.
7. Reading Moisture: Meters, Weight, Checks and the Knock Test
Knowing when a log is ready is a measurement, not a feeling, and the first instrument is the moisture meter — the $30 truth-teller. A pin meter is pressed into the center of the log’s end, and the reading that releases the wood for outdoor use is under 20%. The number beats the guess, every time, because a log’s surface can feel bone dry over a core that is still wet enough to crack a finished piece. The meter reads the wood the project will actually meet.
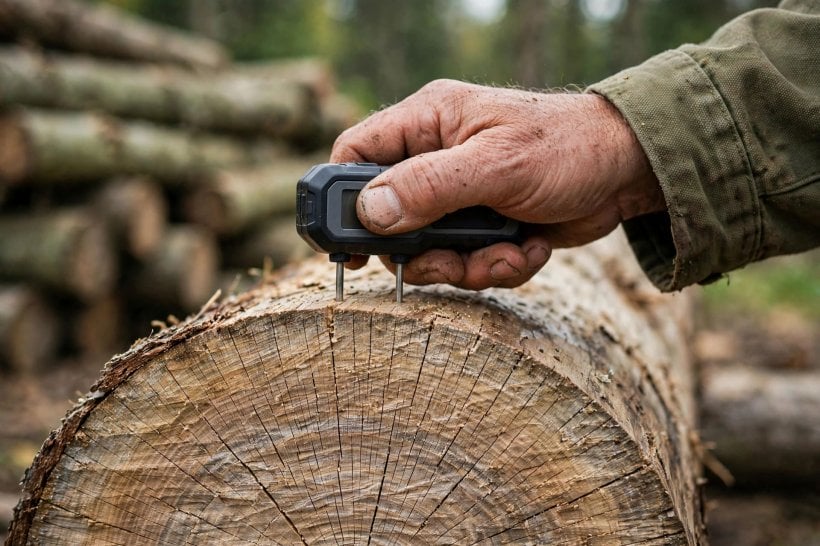
Three older proofs stand behind the meter, and each costs nothing. Weight is the low-tech test: weigh a sample log monthly, and when the weight stabilizes — the plateau — the drying is done, because a log that has stopped losing water has stopped drying. Checks are the visual test: surface checks stabilize as the log settles, and when no new checks have appeared for a month, the wood has finished moving. Sound is the craftsman’s test: knock, and listen — dry logs ring, green logs thud, and the ear that learns the difference is surprisingly reliable. Use the meter for the verdict and the other three for corroboration, and the readiness question that ruins more log crafts than any other is answered with evidence instead of hope.
8. The Timeline: One Year Per Inch, and What the Wait Buys
The calendar of curing is a single rule of thumb: one year per inch of thickness. Under that rule an 8″ log needs roughly a year in the stack — the air-drying patience, stated as a number. There is no negotiating with it, because the moisture leaves through the wood at the wood’s own pace; the stack can protect the process, even it out, and keep it safe, but it cannot hurry it. This is why the original names the calendar itself as the tool: the most important instrument in curing is not the meter or the drawknife but the date.
What the wait buys is stability, the property every log project silently assumes. Cured logs barely move, so the craft stays true — the bench sits flat, the rail runs straight, the joint cut in January still fits in June. It is why the builder of the rustic log cabin bench chooses one good sound trunk and why the rustic log fencing build stockpiles its rails ahead of need: every project downstream is only as stable as the cure upstream. Wait the year-per-inch, and the decades the finished piece lasts are built on wood that has already done all the moving it will ever do.
9. Accelerated Drying: Solar Kilns, Dehumidification, Boiling and the Microwave
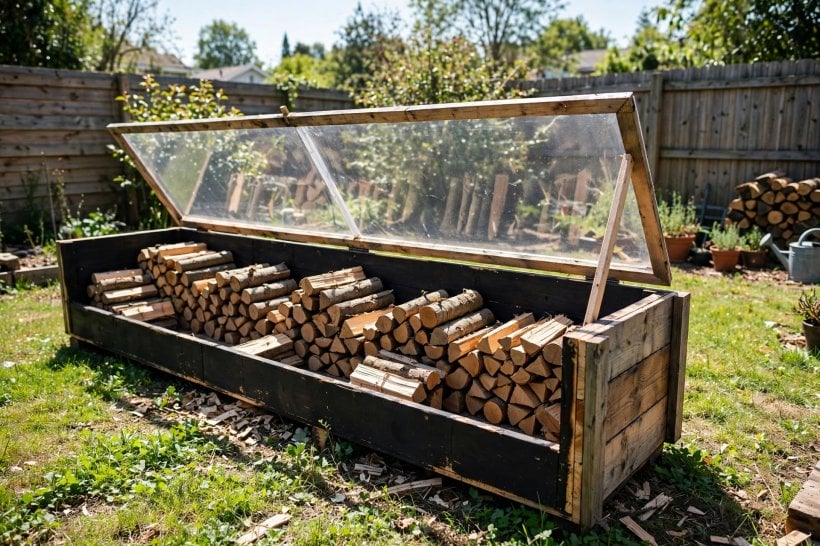
When the calendar truly cannot be waited out, four accelerators exist — each one a trade against the checking risk that speed always brings. The solar kiln is the DIY accelerator: a simple greenhouse box that reaches 130°F inside and dries 2–3× faster than open air, from plans that are free online in a build that runs about $200. The dehumidification kiln is the serious small-scale method — an insulated room plus a dehumidifier — and it turns 2″ stock in 4–6 weeks. Both are whole-log or whole-batch answers, built once and used for years.
The other two methods work at the scale of the individual small piece. Boiling is the old turner’s trick: boil blanks for an hour per inch, which relieves the wood’s stress and accelerates its drying — weird, but true. The microwave is the novelty at the far end of the scale, for tiny pieces only: 30-second bursts, the coaster emergency — and the small blanks it rescues are exactly the scale of the rounds and slices worked in the log craft ideas collection. Over all four hangs the same warning: fast drying risks checking, so accelerated methods demand more end-sealing vigilance, not less. Speed is available; it is simply never free, and the patience premium is the price list.
10. The Mistakes That Ruin Good Logs
Nearly every curing failure is one of a short list of mistakes, and the list is worth reading as a checklist of what not to do. Wrapping the pile in plastic is the mold factory — the stack must shed moisture to the air, never stew in its own. Leaving logs on the ground invites the rot that undoes everything, however good the rest of the setup is. Stacking in full sun trades the roof’s protection for the checking the shade requirement exists to prevent. Skipping the end-seal, or sealing days late, lets the fastest-drying surface crack before the cure has begun. And drying too fast — rushing a kiln, forcing the pace — buys the schedule back with the checks the whole system was designed to avoid.
The largest mistake contains all the others: rushing green wood into projects. It is, in the original’s verdict, the #1 cause of failed log crafts — ahead of insects, ahead of rot, ahead of every accident of weather. A building raised from green logs must be designed around the movement that follows, with slip joints and settling allowances, as the DIY log cabin shed build plans for; a craft project has no such allowances to give, and simply tears. Every mistake on this list is a way of asking the wood to be ready before it is — and the wood’s answer never changes.
Final Considerations
Seal the ends within hours, peel the bark while it is fresh, stack it stickered under a roof and never wrapped, borate against the bugs, monitor with a meter, and wait the year-per-inch. Curing is the unglamorous foundation of every log craft — the invisible year that makes the visible decades possible, whether the wood becomes the furniture and planters of the log projects collection or a structure of its own. Respect the drying, and the wood respects you back.



0 Comments