

At sixty-five miles an hour your house is an airplane with no wings: crosswinds shove it sideways, potholes hammer it upward, and every emergency stop tries to slide it forward off the frame. The only thing between your walls and the highway is a row of bolts most builders never think twice about. Shear one of them, and the story ends badly.
How to Secure a Tiny House to a Trailer Frame: At a Glance
Your tiny house experiences forces no stationary house ever will: 65 mph winds, pothole impacts, emergency braking, and the constant vibration of the highway. The connection between house and trailer is the single most safety-critical joint in the build — and it is just bolts. Learning how to secure a tiny house to a trailer frame means mastering that one joint properly: why Grade 8 hardware is the standard for it, how to read the markings stamped on every bolt head, and the sizing, spacing, placement and torque rules that keep the connection intact for the life of the house. Small parts, enormous consequences. The joint also starts one step earlier than the first bolt: the frame it clamps to has to be the right foundation in the first place, which is why choosing what trailer to use for a tiny house is the decision every bolting decision in this guide rests on. The table below compresses the whole system into ten steps.
| Topic | What It Covers | Key Fact or Figure |
|---|---|---|
| 1. Why Grade 8 | What the bolt grades mean and why Grade 8 is the standard | ~150,000 psi tensile strength |
| 2. Sizing | Diameter and length for the primary connections | 1/2″ minimum; 5/8″ for heavy houses |
| 3. Spacing and Quantity | How many bolts, and how far apart | Every 4 feet along each side, minimum |
| 4. Placement | The connection stack, layer by layer | Through sill plate AND trailer flange |
| 5. Washers and Locking | What keeps the joint tight against vibration | Nyloc lock nuts preferred |
| 6. Torque Specs | How tight is tight, by bolt size | 75–85 ft-lbs for 1/2″ Grade 8, dry |
| 7. The Outriggers | Carrying the wall load out to the frame | Bolt the sill plate to outriggers too |
| 8. Cross-Members and Uplift Straps | The redundant system behind the bolts | Straps over the wall top plates |
| 9. Common Mistakes: Hardware | Lag screws, deck-only bolts and wrong grades | Through-bolts with nuts cannot pull out |
| 10. Common Mistakes: The Slow Failures | Missing gaskets, skipped re-torques, clustered bolts | Re-torque after the first 500 miles |
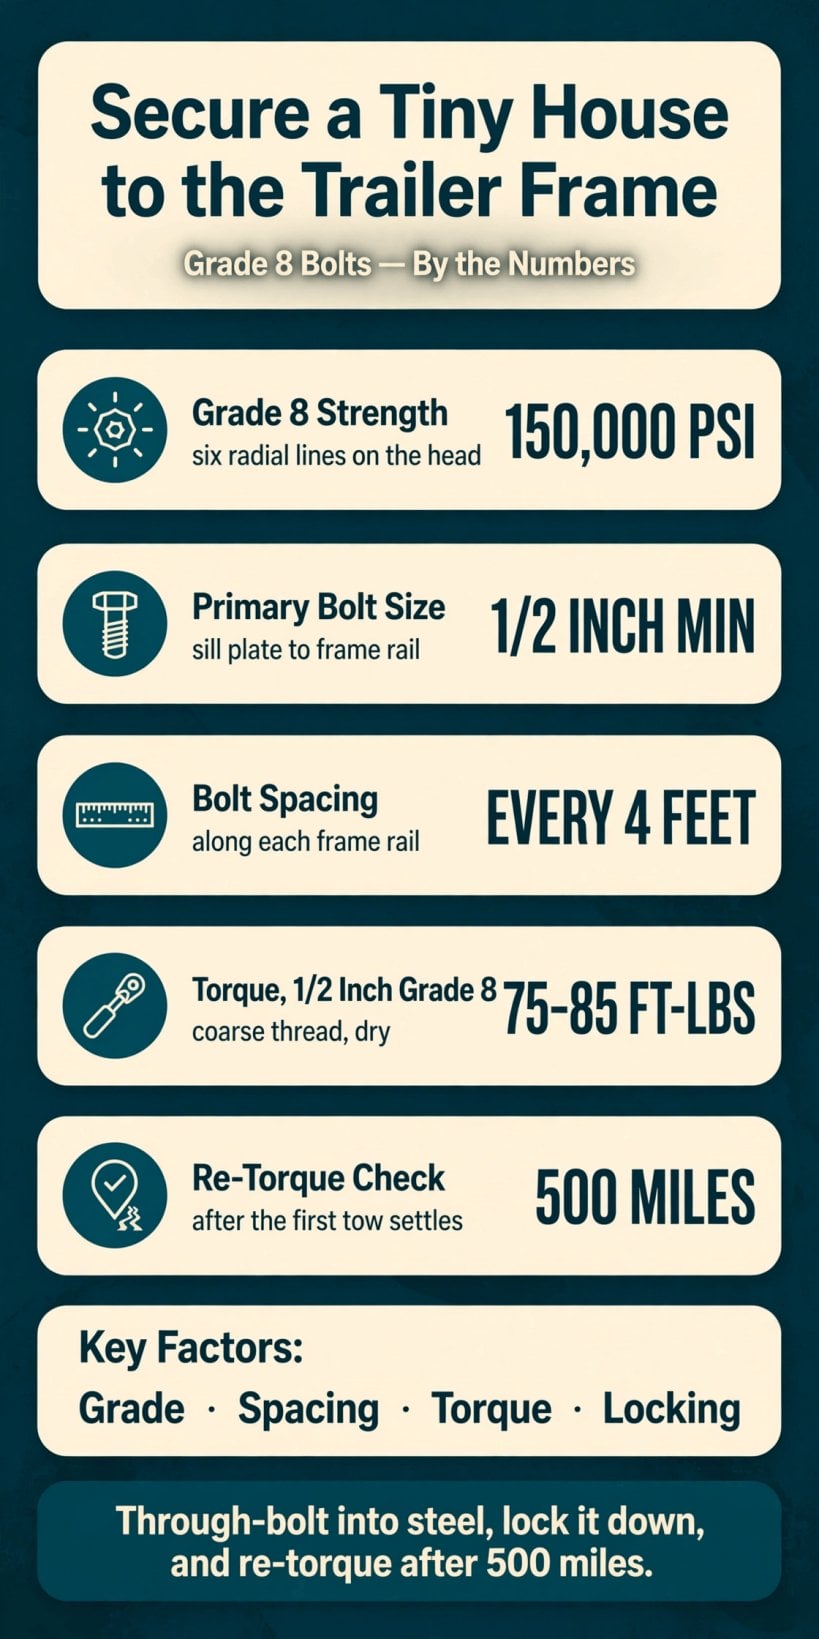
The house-to-trailer joint by the numbers: Grade 8 strength, the half-inch minimum bolt, four-foot spacing, the torque spec — and the 500-mile re-torque that catches the settling.
1. Why Grade 8 (and What the Grades Mean)
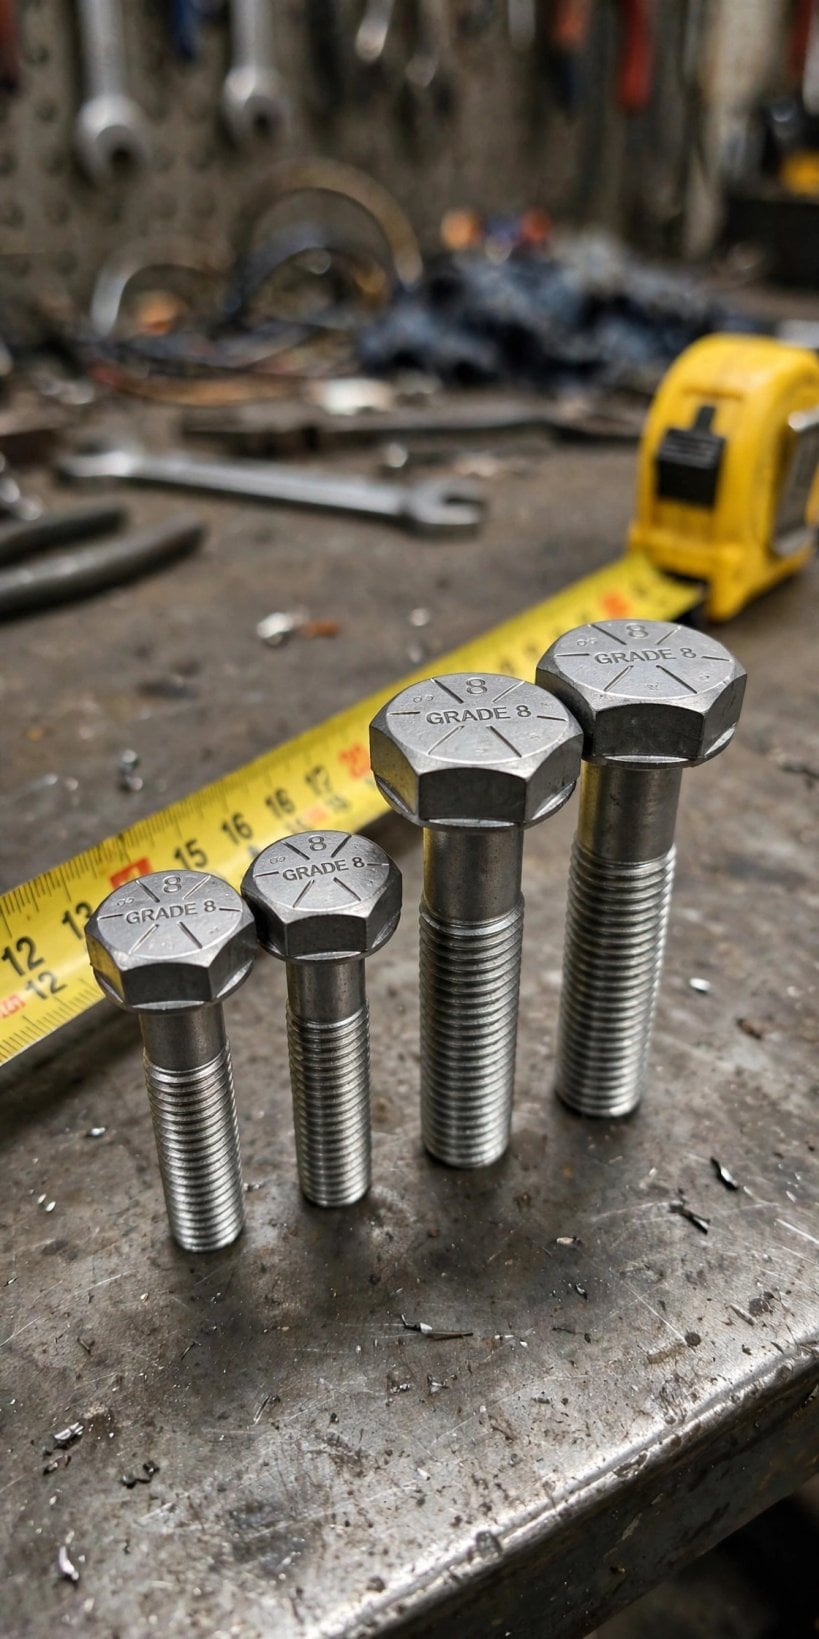
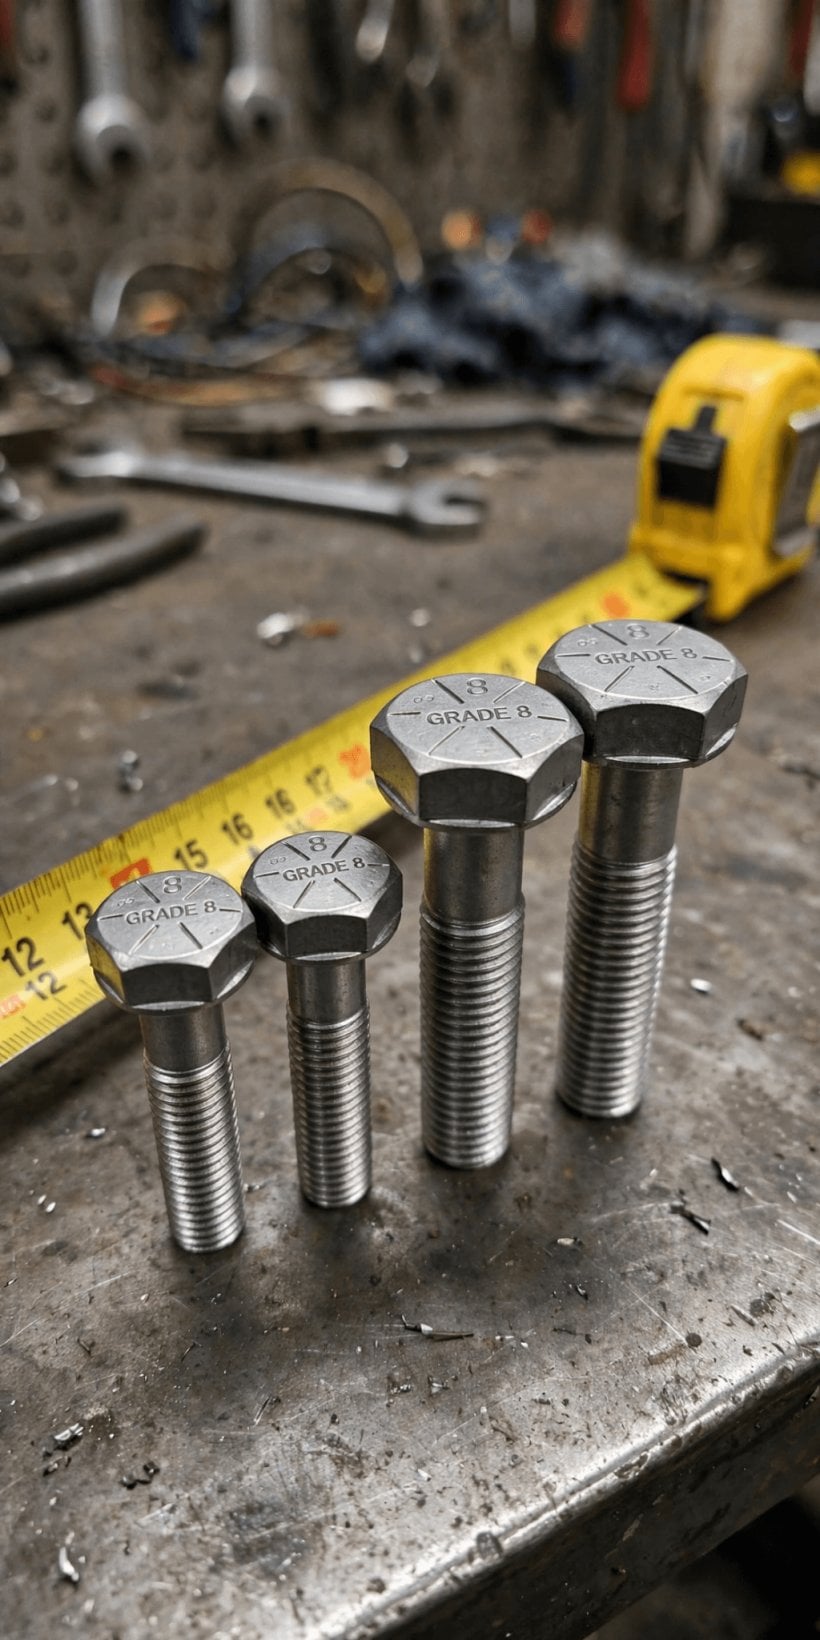
Bolt grades measure tensile strength, and the grade is stamped on the head of every bolt for anyone who learns to read it. Grade 2 is the unmarked hardware-store basic at roughly 60,000 psi — never for structural connections. Grade 5 carries three radial lines and roughly 120,000 psi, acceptable for many structural uses. Grade 8 carries six radial lines and roughly 150,000 psi — and it is the standard for trailer-to-house connections. The markings matter because the bolts themselves all look alike in a bin: the six lines are the only visible difference between the right bolt and a weaker one that happens to share its shelf.
The tiny house community settled on Grade 8 for a mechanical reason. The house-to-trailer connection does not see one clean load; it sees combined shear (sideways) and tension (uplift) loads, delivered dynamically — the crosswind shove, the pothole hammer, the emergency stop, all arriving as shocks rather than steady pressure. Against that combination, the safety margin of Grade 8 over Grade 5 is cheap insurance at roughly $1–2 per bolt. The rule that follows from it admits no negotiation: use Grade 8 for every bolt connecting the house structure to the trailer frame. No exceptions, no “it’s probably fine.”
2. Sizing: Diameter and Length
Sizing starts with diameter. Half an inch is the minimum for the primary connections — the sill plate to the trailer frame — and the size steps up to 5/8″ for heavy houses of 14,000 lbs or more, or wherever the engineering calls for it. Which side of that line a given house falls on is a weight question before it is a hardware question, so the bolt decision belongs after the weighing, not before it: our walkthrough of how to calculate the weight of a tiny house produces the number that picks the diameter. Diameter is the strength decision; length is the fit decision, and it is made against the actual stack the bolt has to pass through.

Length is measured through the whole joint: the bolt must pass through the sill plate, any shimming or gasket material, and the trailer flange, and still show at least 2–3 threads past the nut. For standard builds that works out to bolts typically 4–6″ long. The thread choice is coarse thread (UNC) — more forgiving in field conditions and less prone to galling than fine thread, which matters when hardware is being installed under a trailer rather than on a bench. And one buying rule prevents the classic evening-ruining discovery: buy bolts 1/2″ longer than your calculated need. Trimming a bolt down is easy; discovering a short bolt at 9 PM is not.
3. Spacing and Quantity: How Many Bolts
The rule of thumb is simple to state and strict to apply: bolts every 4 feet along each side of the trailer frame, as a minimum — plus one within 12″ of each corner. Worked through on a real house, a 28-foot tiny house takes 7 bolts per side × 2 sides = 14 primary bolts, plus corner reinforcement. Heavier houses tighten the pattern: at 12,000 lbs and above, the spacing closes to every 3 feet. The pattern matters as much as the count. Bolts are distributed evenly along the run — never clustered amidships, where a builder finds the drilling easy — because the load path they create has to be continuous from corner to corner.
Every bolt location has to satisfy one condition: it lands on solid steel. The bolts run through the sill plate into the trailer’s main frame rails — not just the deck, and not just the outriggers. Where the even spacing and an existing hole disagree, the spacing wins: drill new holes rather than accepting a convenient-but-wrong existing hole that happens to be nearby. A bolt pattern is a designed thing, drawn from the house’s length and weight; the frame’s pre-existing holes were drilled for a different purpose, and letting them dictate the pattern hands the most safety-critical layout in the build over to chance.
4. Placement: Where the Bolts Go
Placement is easiest to understand as a stack, read from the bottom up: trailer frame rail → an optional sill gasket of closed-cell foam or EPDM → the pressure-treated sill plate (the bottom plate of the wall framing, typically a doubled 2×6 or 2×8) → flat washer → lock washer or lock nut → nut. Every layer has a job, and the drilling has to respect all of them: drill through the sill plate AND the trailer flange — not just the deck boards, because the deck is not structural and a bolt that ends in decking is a bolt connected to nothing that matters.
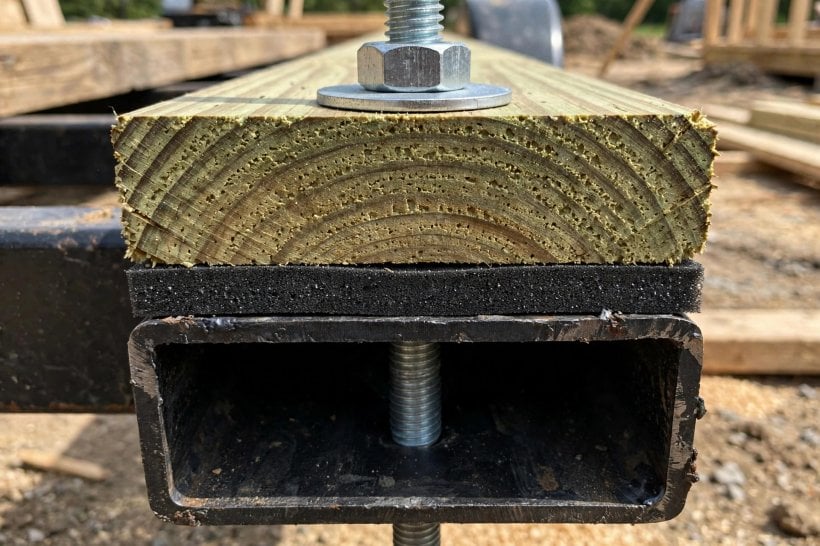
Two details separate a careful placement from a careless one. First, position the bolts to avoid the trailer’s wiring runs — map them before drilling, because a drill bit does not distinguish between steel it should pierce and a wire it should not. Second, use the sill gasket even though it reads as optional in the stack. It prevents the #1 long-term problem at this joint: moisture wicking between steel and wood, which rots the sill plate from below, invisibly, while the top of the joint still looks sound. The frame features the bolts depend on — main rails, flanges, outrigger layout — are worth studying before the drill comes out; our tiny house trailer buying guide walks through the frame anatomy the pattern has to land on.
5. Washers and Locking: What Keeps Them Tight
A bolt torqued correctly on installation day is not a bolt that stays tight, because vibration loosens bolts — the highway is a giant loosening machine, and this joint lives on it permanently. The defense is a stack of cheap components, each doing one part of the job. A flat washer goes under both the bolt head and the nut: it distributes the load and prevents pull-through in the wood. On top of that, the locking element: a lock washer of the split-ring type, OR a nylon-insert lock nut — nyloc, which is preferred, because the nylon collar resists vibration far better than a split washer does.
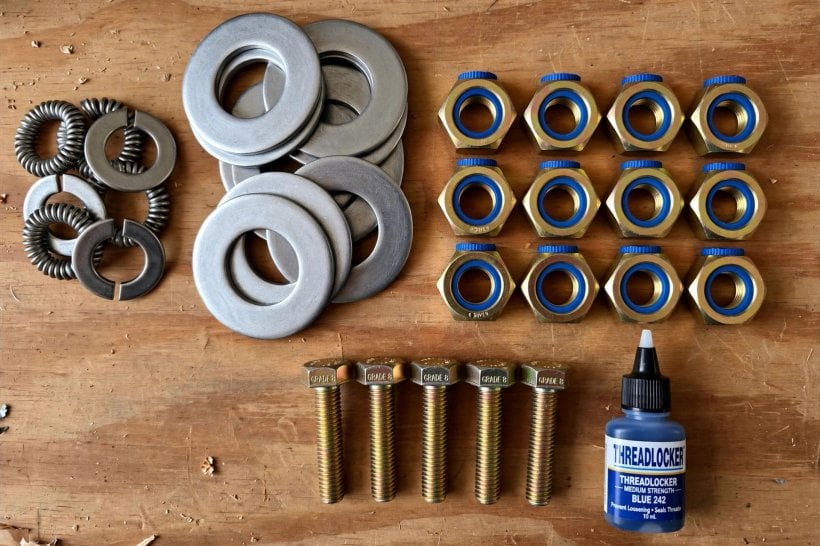
The third layer is chemical: thread locker — medium-strength Loctite 242 on the threads — the belt-and-suspenders that professionals use on top of the mechanical locking. The rule underneath the whole stack is absolute: never use a plain nut without locking on a trailer connection. And locking is not a fit-and-forget system either. Torque is checked annually, and the first re-torque after 500 miles of towing catches the initial settling — the small embedment and seating that happens in every new joint once the road starts working on it. The washers spread the load, the lock nut resists the vibration, the thread locker backs both up, and the calendar catches whatever still moves.
6. Torque Specs: How Tight Is Tight
Torque is where the joint’s clamping force is actually set, and the numbers are specific. For Grade 8, 1/2″ coarse thread: 75–85 ft-lbs dry, or roughly 65 ft-lbs with thread locker — lubrication reduces the needed torque, so follow the locker manufacturer’s guidance when the threads are treated. For Grade 8, 5/8″ coarse: 130–150 ft-lbs. The tool is non-negotiable too: use a torque wrench. “Good and tight” with an impact gun is how bolts snap or strip — the gun cannot feel the difference between clamped and broken, and at this joint both errors are failures.
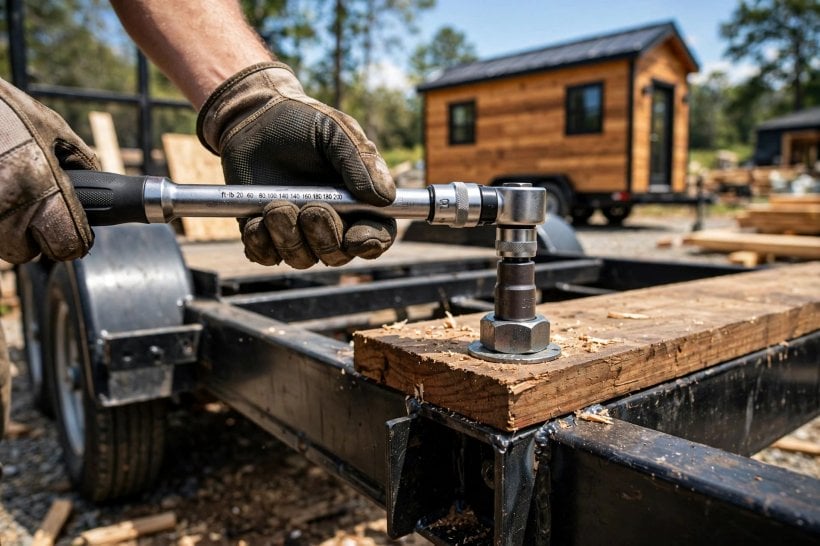
Technique matters alongside the number. Torque in two passes — snug all the bolts first, then final torque in sequence — so the joint closes evenly instead of being pulled down corner by corner. Then re-check after the first tow, when the settling has happened. One warning sign deserves its own sentence: over-torquing crushes the wood sill plate, and if the washer is sinking deep into the wood, you are crushing, not clamping — the fix is a larger washer or a steel plate to spread the load. The road side of the re-check — what the first tow does to a new joint, and why it is inspected before the second — is part of the towing discipline set out in our guide to towing a tiny house: trucks, hitch weights and road regulations.
7. The Outriggers: Carrying the Wall Load to the Frame
Bolts alone are not the whole system, and the first supporting structure is the outriggers: steel arms welded to the trailer frame, extending outward to the house walls. Their job is load path — they carry the wall load to the frame, bridging the distance between the main rails and the walls that stand outboard of them. The bolting rule extends to them directly: bolt the sill plate to the outriggers too, not just to the main rails. A wall whose sill is clamped only where it crosses the main rails is a wall held at intervals its framing never agreed to; the outrigger bolts close those gaps so the clamping runs the full length of the wall.
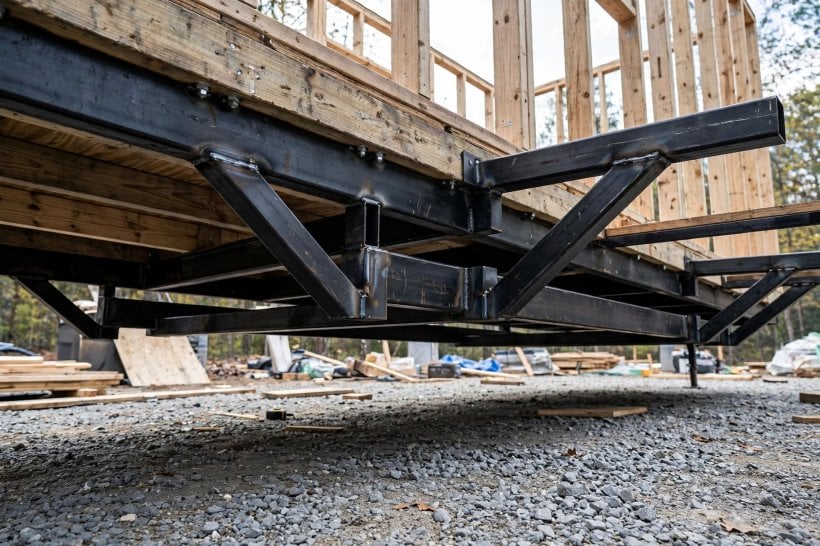
The outriggers also explain why the placement rule in section 4 is about steel, not about any particular steel. Main rails, flanges and outriggers are all frame — welded, load-bearing structure — while the deck laid across them is not. Reading a frame well enough to tell the two apart is a trailer-selection skill as much as a bolting one; the running gear that shares the same frame is covered in our guide to choosing trailer axles for a 14,000 lbs tiny house, where the frame’s load story continues underneath. Bolt to the structure, in every location the walls offer one, and the sill becomes a continuous clamped beam rather than a board pinned at points.
8. Cross-Members and Uplift Straps: The Redundant System
The second supporting system works across and above the frame. Cross-member connections — hurricane ties or steel strapping connecting the floor joists to the trailer cross-members — resist the lateral shear of cornering and wind, the sideways working that the vertical bolts alone are not shaped to answer. Above them, uplift straps complete the path: metal strapping run from the trailer frame up over the wall top plates at intervals. That is the wind-uplift defense, and the load is real — a 65 mph crosswind generates genuine uplift on an 8’6″-wide wall, trying to peel the house upward off the very joint the bolts clamp downward.
Seen whole, the architecture is deliberate: the bolted sill is the primary connection, and the straps and ties are the redundant system behind it. Redundancy is the point — no single component’s failure, loosening or corrosion is allowed to become the house’s failure. The wind side of that equation, the pressures a towed house actually meets, is worked through in our guide to tiny house wind resistance and aerodynamic towing, and the parked side of the same defense — anchoring and securing the house where it stands — is covered in our guide to how to keep your tiny house safe. The bolts hold the house down; the straps hold the argument closed.
9. Common Mistakes: The Hardware Errors
The mistake list begins with the wrong fastener entirely. Lag screws instead of through-bolts: lags pull out under cyclic loading, while through-bolts with nuts cannot — the nut on the far side of the steel is a mechanical lock that no thread bite into wood can imitate, and the highway’s loading is nothing if not cyclic. Bolting to the deck only: the deck boards are not the frame, and bolts must reach steel; a deck-bolted house is connected to the trailer’s flooring, not its structure. Grade 2 or unmarked bolts: insufficient strength for dynamic loads — always Grade 8, always marked, because an unmarked head is a bolt whose strength nobody has certified.
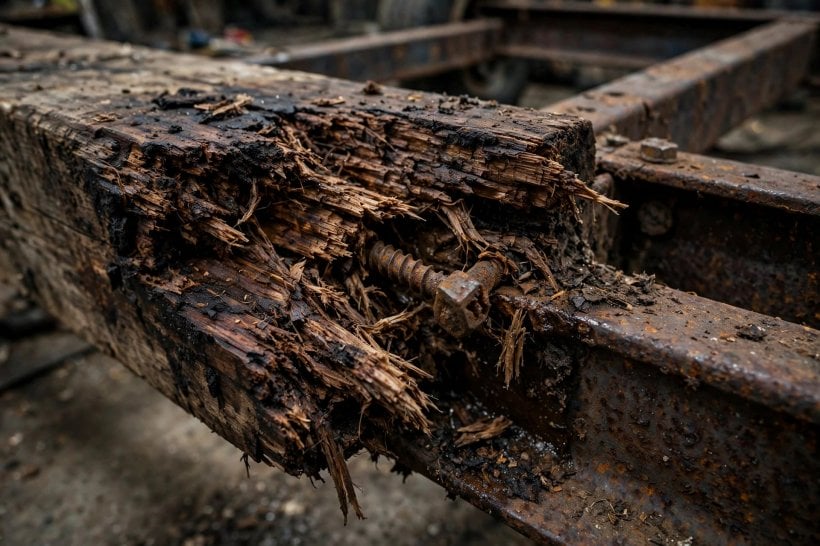
Notice what the three hardware errors share: each one substitutes something that looks like the right component for the component itself — a screw for a bolt, decking for a frame, an anonymous bolt for a graded one. From standing height, all three mistakes photograph as finished work. They declare themselves only under load, at speed, in weather — which is precisely the operating condition of this joint. The defense is boring and total: read the head markings, trace every bolt through to steel, and put a nut on the other side of every connection.
10. Common Mistakes: The Slow Failures
The second family of mistakes does not fail at speed; it fails slowly, invisibly, over seasons. No sill gasket: steel-to-wood contact wicks moisture, and the sill rots from below, invisibly — the joint’s strength draining away inside wood that still looks sound from above. Skipping the re-torque: bolts settle in the first 500 miles, and the check is mandatory, not optional — a joint torqued once and never revisited is a joint whose clamping force nobody actually knows. Bolts too few or clustered: even distribution every 3–4 feet, because the load path must be continuous, and a clustered pattern concentrates the whole house’s security into the short stretch the builder found convenient.
These three share a different signature from the hardware errors: the work looks correct on the day it is done, and every one of them is a sin of omission — a gasket not fitted, a check not made, a pattern not completed. They are also the cheapest mistakes in this entire guide to avoid, since none of them costs parts: the gasket is a strip of foam, the re-torque is an hour with a wrench, the full pattern is a tape measure and the discipline to drill where the layout says rather than where the drill is already pointing. Slow failures punish exactly the builders who assumed the job ended at installation.
Final Considerations
The house-to-trailer connection is the joint where structural engineering meets highway reality. Knowing how to secure a tiny house to a trailer frame reduces, in the end, to a short specification: Grade 8 through-bolts, every 3–4 feet, through sill plate to steel frame, with lock nuts, proper torque, and a sill gasket — plus redundant strapping behind them. It is a Saturday’s work and a few hundred dollars. And when the day comes to actually use the joint at highway speed, the move itself deserves the same discipline — our tiny house moving guide and transport cost breakdown covers the day the bolts earn their keep. It is also, quite simply, the difference between a house that arrives and a house that does not.




1 Comment