

The triangle of steel at the front of your tiny house trailer is prime real estate — and the natural home for the two systems you least want living indoors: propane and batteries. But the two are enemies in a shared space. One can leak a gas that sinks and pools; the other can spark. A tongue box that houses both safely is a design problem before it is ever a carpentry project.
1. Tongue Boxes at a Glance
A tongue box turns the A-frame at the front of the trailer into the mechanical heart of the home’s exterior: the heavy, ugly and potentially dangerous systems live outside the living space, on the one patch of the build that was otherwise wasted. Done right, DIY tongue boxes add curb appeal as well as storage — a box sided to match the house makes the whole build look longer and more integrated. Done wrong, the same box concentrates a fuel leak and an ignition source in one sealed space. Everything in this guide follows from that tension, and the table below is the design on one screen: separation first, then ventilation, insulation, securement and weight, in that order.
| Attribute | Detail |
|---|---|
| The Golden Rule | A sealed physical barrier between the propane and electrical compartments — never one big open box |
| The Propane Side | Usually two 20lb or 30lb tanks, on an open mesh or expanded-metal floor — never solid wood |
| The Venting Split | Propane sinks, so it must fall out through the floor; add vents high and low for cross ventilation |
| The Battery Side | Lined with 1–2 inches of rigid foam insulation (XPS) to moderate temperature swings |
| The Hydrogen Rule | Lead-acid and AGM batteries off-gas hydrogen, which rises — that compartment vents at the top |
| The Weight Target | Tongue weight of 10–15% of total house weight for safe towing |
| The Worked Example | A 10,000 lb house wants 1,000–1,500 lbs carried on the tongue |
| The Floors | Mesh under the propane; 3/4″ marine plywood, painted and sealed, under the batteries |
| The Lid | A significant overhang of 1–2 inches, a high-quality rubber weatherstrip seal, and a slope to shed water |
| The Frame | A steel angle-iron frame welded or bolted to the tongue to carry the box |
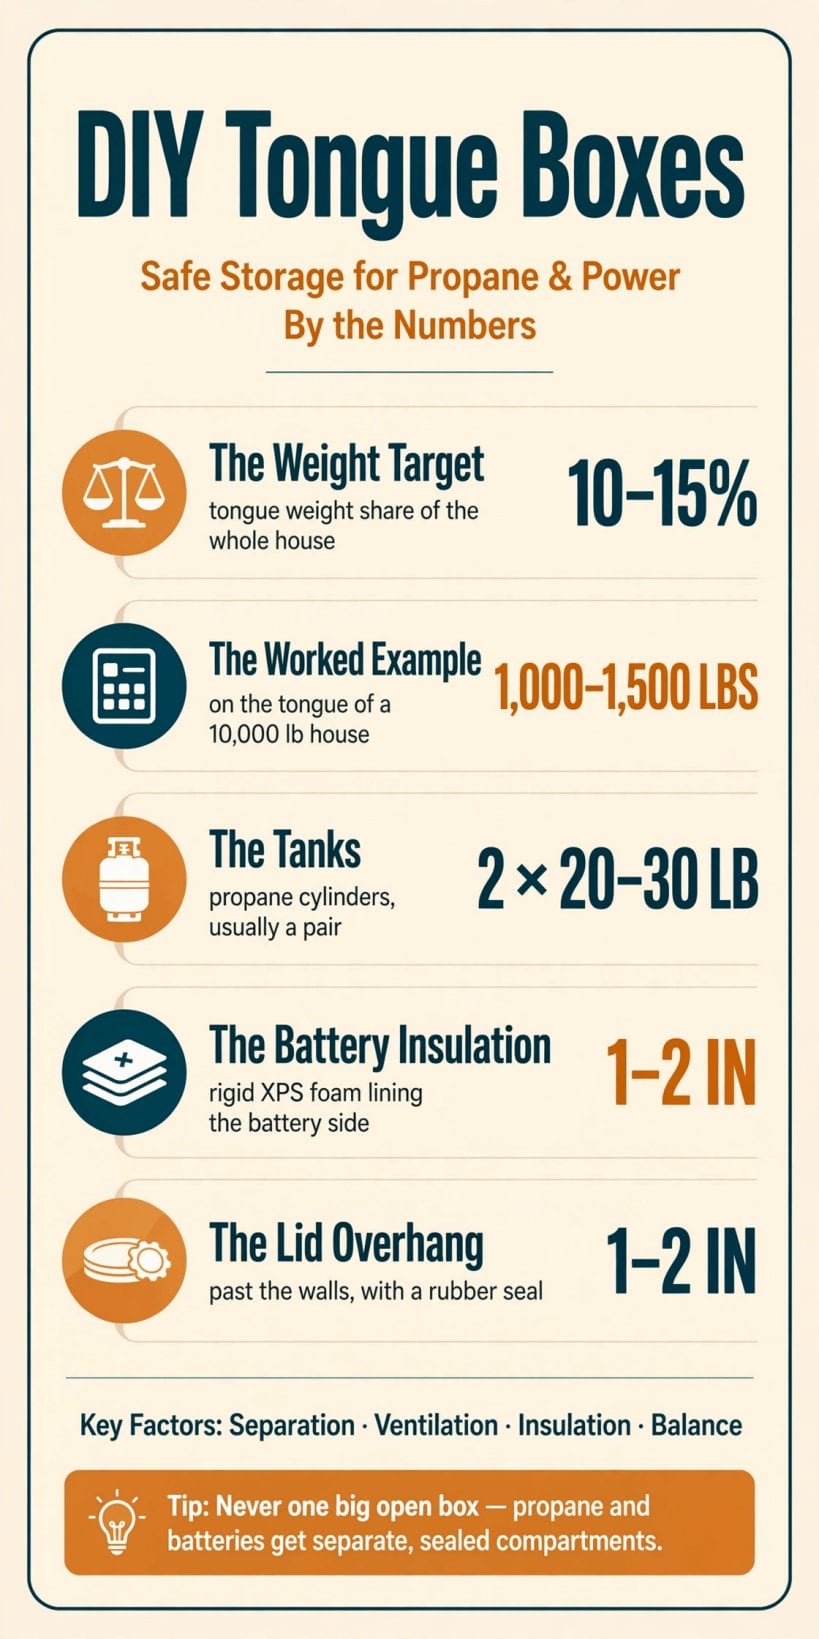
A 10–15% tongue weight target, two venting directions and 1–2 inches of foam — the tongue box by the numbers.
2. The Golden Rule: Separation of Fuel and Spark
Every other decision in this build is negotiable. This one is not. If propane and batteries — or any electrical components, such as inverters — share your tongue box, you face a safety conflict built into the physics of both systems. Propane can leak, and because propane is heavier than air, leaked gas sinks and pools instead of dispersing. Batteries carry the opposite hazard: relays and loose connections can spark, and lead-acid batteries off-gas hydrogen as they charge. Put a sinking fuel and a spark source in one open volume and a slow leak only has to wait for the wrong moment.
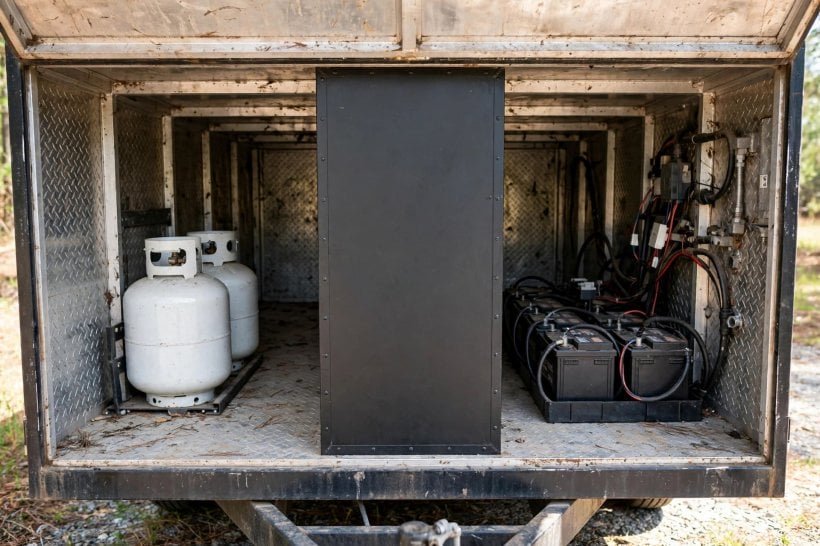
The rule that resolves the conflict is absolute: a sealed physical barrier between the propane compartment and the electrical compartment. Not a shelf, not a gap, not a shared space with the tanks at one end — a partition whose edges are sealed airtight, so gas physically cannot migrate to where a spark could ignite it. The corollary is just as strict: do not run electrical wires through the propane side without explosion-proof conduit. The divider is the single feature that separates a tongue box from a hazard, and it shapes the whole build — two compartments, two venting regimes, two floors, designed from the partition outward. It is the same discipline the road asks of the rest of the build, where selecting windows for road safety treats every component as a travelling one, not a parked one.
3. The Propane Compartment: Built to Leak Safely
Design the propane side around one assumption: one day, gas will escape. Propane tanks — usually two 20lb or 30lb tanks — need to be accessible for refilling, but accessibility is the easy requirement. The governing one is ventilation, and it is non-negotiable, because of where leaked gas goes. Heavier than air, it sinks and pools at the bottom of any enclosure like water in a bowl. A sealed box would hold that pool against the tanks indefinitely, waiting for a spark that the golden rule has banished to the other side of the divider — but only if the gas also has a way out of its own side.
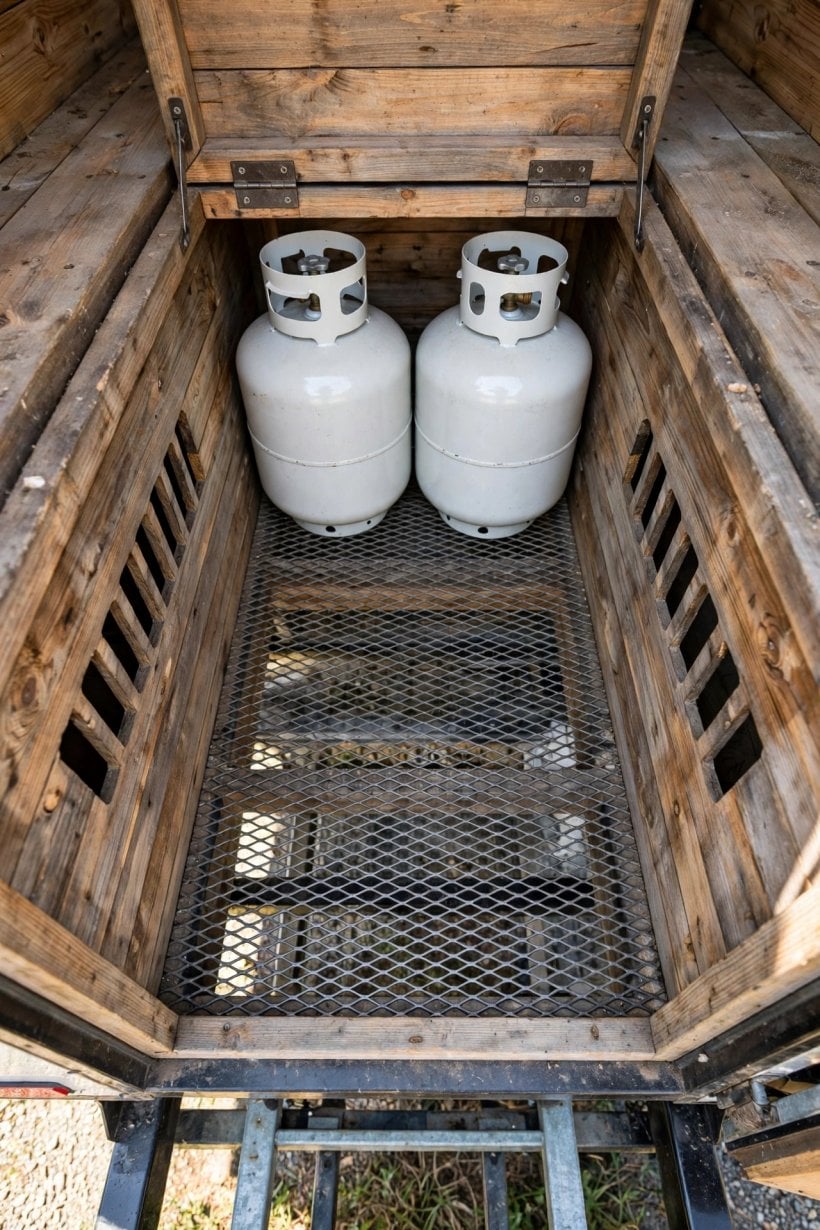
So the floor of the propane compartment is not a floor at all in the usual sense: open mesh or expanded metal, never solid wood. Leaking gas falls through it harmlessly to the ground and disperses, instead of collecting inside the box. Above that self-emptying floor, add cross ventilation — vents high and low on the sides — to keep air moving through the compartment and to prevent heat buildup in summer. The design philosophy is worth naming, because it inverts ordinary storage thinking: this compartment is deliberately the leakiest part of the box. A propane space that cannot trap gas cannot build a dangerous concentration of it, and every opening that looks like a flaw is the safety system working. The same travel logic governs the rest of the trailer’s exterior hardware — the removable gutter systems exist because a house that moves must shed the fittings a parked house can keep.
4. Tank Securement: Nothing Bounces, Nothing Chafes
Ventilation handles the gas; securement handles the tanks themselves. A tongue box rides at the front of a trailer, over every pothole and expansion joint the highway offers, and loose cylinders in a steel triangle will bounce, chafe and work their connections loose — manufacturing the very leak the venting was designed to survive. You cannot have tanks bouncing around. The original’s prescription is standard RV practice: tank brackets made for the purpose, or threaded rods with a cross-bar, bolting the tanks firmly to the trailer frame.

Note what the tanks are bolted to: the trailer frame, not the box. The box is a weather shell and an organiser; the frame is the structure, and securement that depends on the shell inherits every weakness of the shell’s own mounting. A cross-bar over both tanks, drawn down on threaded rods, holds each cylinder against its bracket so the pair travel as one rigid unit with the chassis. Check the arrangement as you would any towing hardware — the aim is zero movement, because movement is wear, and wear on a valve or a hose is a leak arriving early. Accessibility survives the rigour: brackets and cross-bars release with hand tools at the refill station, which is exactly the rhythm the compartment was designed around — sealed and rigid on the road, open and serviceable when parked.
5. The Battery Compartment: Insulation Is the Whole Game
Cross the divider and the design problem inverts. Where the propane side is built to leak safely, the battery side is built to hold a temperature. If you are off-grid, this is likely where your heavy battery bank lives — and unlike propane tanks, batteries hate extreme temperatures. Cold reduces capacity; heat degrades lifespan. A steel or thin-walled box on an exposed trailer tongue is a solar oven in July and a freezer in January, and an uninsulated bank will live at whichever extreme the season is serving.
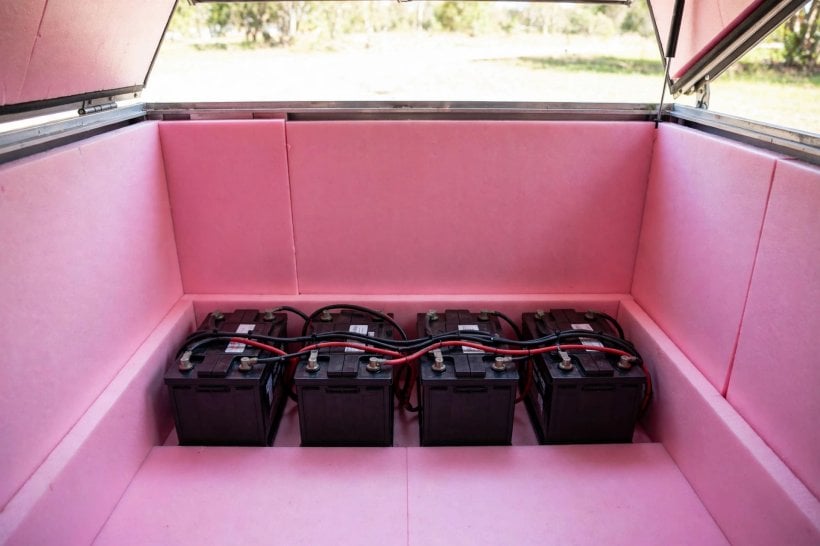
The fix is a lining: 1–2 inches of rigid foam insulation (XPS) on the battery side of the box, moderating the temperature swings before they reach the cells. The thickness is a balance, not a maximum — enough foam to blunt the daily cycle of heating and cooling, in a compartment where every inch is also storage volume. The principle is the one that governs the whole envelope: insulation does not create heat or cold, it slows exchange, and the insulation strategy analyzer scores the same trade on the wall side of the house. Here the stakes are measured in battery lifespan rather than comfort — a bank protected from the extremes simply lasts longer, and capacity that survives a cold night is capacity you do not have to buy twice.
6. Venting by Chemistry: Lead-Acid, AGM and Lithium
The battery compartment’s venting depends on what is inside it, because battery chemistries breathe differently. Lead-acid and AGM batteries release hydrogen gas when charging. Hydrogen rises — the mirror image of propane — so this compartment must be vented to the outside at the top, giving the gas a straight path up and out. A sealed box around a charging lead-acid bank collects an explosive gas at its ceiling; the top vent is not a refinement, it is the requirement that makes the compartment safe.

Lithium (LiFePO4) changes the answer. These batteries do not off-gas, so they can live in a sealed compartment — no top vent required by chemistry. But the exemption comes with a condition that makes the previous section’s work twice as valuable: lithium cannot be charged below freezing. A sealed, uninsulated lithium compartment on a winter tongue is a bank that refuses its charge exactly when the house needs it most; the insulation that moderates summer heat is what keeps a winter bank above its charging floor. So the two chemistries trade requirements rather than one simply being easier: lead-acid demands a vent and tolerates the cold better, lithium forgives the vent and demands the warmth. Design the compartment for the bank you actually own, and revisit the venting if the bank ever changes.
7. Materials: The Cedar Chest vs. the Diamond Plate
With the two compartments designed, the shell that wraps them comes down to two proven options, trading weight against durability and effort. Option A is the “Cedar Chest”: a wood frame, easy to build with ordinary skills, custom-shaped to fit the weird angles of a trailer tongue, and — sided with the same material as the house — perfectly matched to it, so the house looks longer and more integrated. The costs are weight and maintenance: wood is heavy, and wood outdoors asks for care. One build rule is absolute whichever way you go: use pressure-treated lumber for the base that touches the metal trailer, where trapped moisture would rot ordinary timber first.

Option B is the “Diamond Plate”: metal, lighter if aluminum, extremely durable, with a road-ready look that suits a travelling house. Its cost is fabrication — hard to build from scratch without welding skills. The original’s hack dissolves that barrier: buy a pre-made truck tool box, the kind built for a pickup bed, and bolt it to the tongue. It is not custom, but it is waterproof and lockable instantly, and the divider, floors and venting of the previous sections install inside it exactly as they would in a scratch-built shell. Judge the two against your own constraints — the Hardie vs. LP SmartSide siding showdown weighs the same weight-versus-longevity trade for the house’s own cladding — but note that the safety design is identical inside either shell. Materials are a preference; separation is not.
8. The Tongue Weight Equation: Everything Here Is Nose Weight
A tongue box has one more attribute no other storage on the build shares: everything you put in it adds to tongue weight, at the point furthest from the axles. That weight is a towing-safety number, not a storage detail. The target: your tongue weight should be 10–15% of your total tiny house weight for safe towing. The math is simple enough to do before you build — if your house is 10,000 lbs, you want 1,000–1,500 lbs on the tongue — and the box’s contents count toward it in full: two propane tanks, a heavy battery bank, the box itself, all of it riding on the coupler.
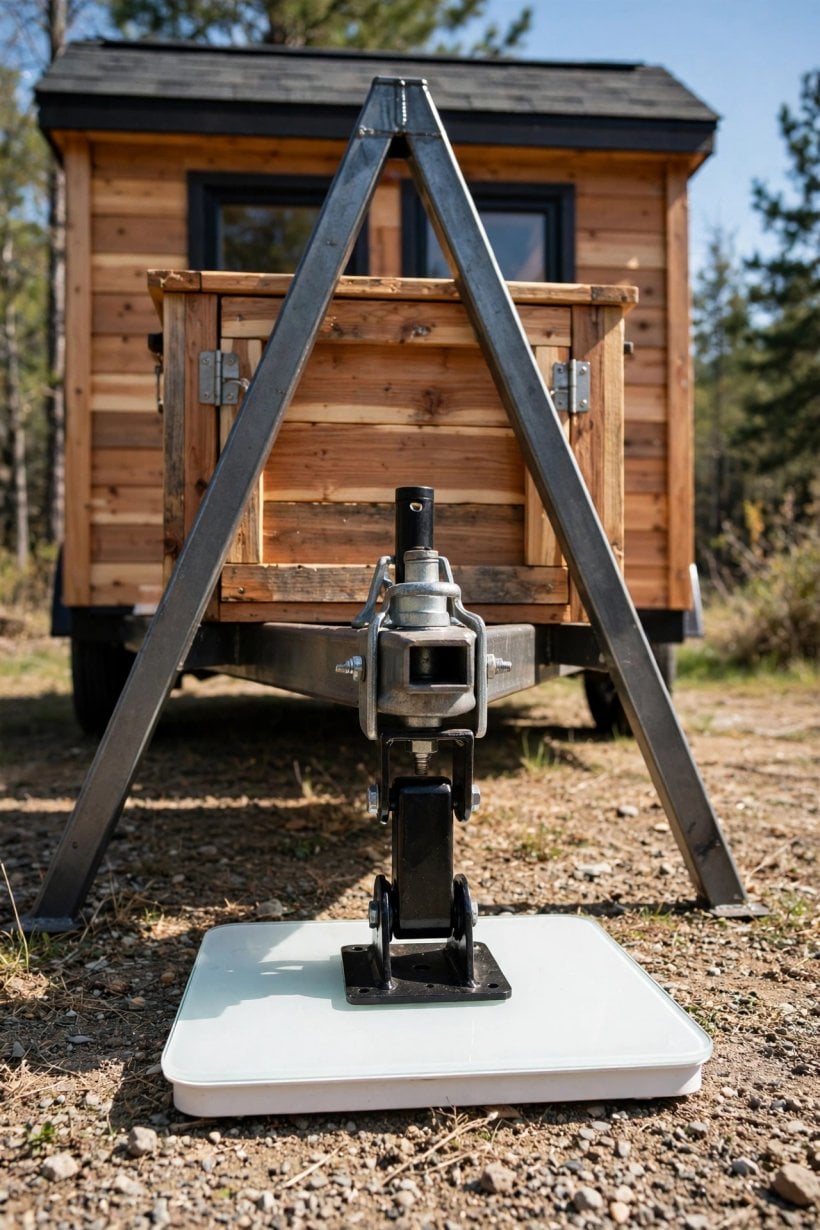
Read the balance both ways, because the box can be the cure as easily as the cause. Too light at the nose — a tail-heavy house — and adding heavy batteries to the tongue box is actually good for stability, moving real mass to exactly where the equation wants it. Too heavy — already nose-heavy — and the prescription reverses: consider moving the batteries inside, over the axles, and keeping the tongue box strictly for light storage and propane. The box is therefore a tuning instrument as much as a cupboard, and its loading belongs in the same calculation as the whole trailer’s — the tiny house tongue weight calculator works that number from the scale tickets up. Decide the loading before the build, and the compartments can be sized for the bank that will actually live in them.
9. The Build Sequence: Frame, Divider, Floors, Shell, Lid
The original’s build order is a logic, not just a list — each step creates the condition the next one needs. First, weld or bolt the base: a steel angle-iron frame, welded to the trailer tongue, to support the box. Do not rely on screwing wood directly to the trailer rails; the frame is the foundation every later fastening trusts. Second, build the divider: install the central partition wall and seal its edges with high-quality exterior caulk or expanding foam, making it airtight between the two sides — this is the golden rule made physical, and it happens before either compartment is fitted out, while the seams are still reachable.
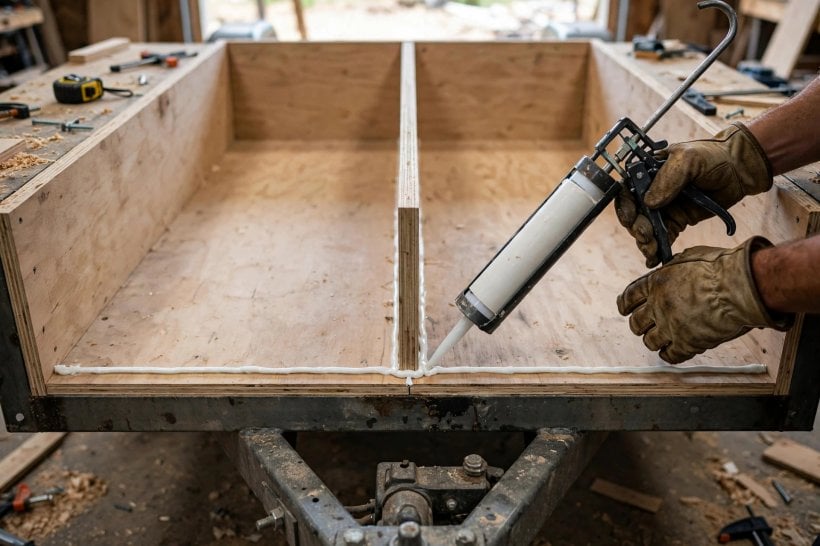
Third, install the floors — expanded metal mesh on the propane side, 3/4″ marine plywood, painted and sealed, on the battery and storage side: two floors expressing the two venting regimes. Fourth, frame and sheath the walls — and if you are using wood, apply house wrap just like the main house before the siding goes on, the same weather-layer discipline a rain screen installation depends on. Last, the lid — and treat it as the most common leak point it is. Build it with a significant overhang of 1–2 inches, install a high-quality rubber weatherstrip seal, and use a sloped lid to shed water away from the house. Get the order right and nothing has to be undone to reach a seam, a floor or a seal.
10. The Safety Checklist: Five Lines Before the First Trip
The original closes with a checklist, and it earns its place as the final inspection before the box carries fuel anywhere. One: a sealed divider between propane and electric — the golden rule, verified by eye and by hand along every edge. Two: a mesh floor under the propane tanks, so leaked gas has its escape route built in. Three: vents installed, high and low, for airflow — low for the sinking gas’s compartment, high for the rising hydrogen’s, each on its own side of the divider. Four: locks installed — propane theft is common, and a tongue box advertises its contents to every layby it parks in. Five: drainage holes in the storage side, in case water gets in — because a sealed-against-weather box that does admit water needs a way to let it back out.
Read the five lines as a map of the failure modes this whole design exists to prevent. The divider answers ignition. The mesh floor and the vents answer accumulation — gas that cannot pool cannot reach a dangerous concentration. The locks answer the human failure mode, the one no amount of engineering inside the box can fix. And the drainage holes answer the slow failure, water sitting quietly against timber and terminals between trips. None of the five is expensive, and all five are checkable in minutes, which is what makes the checklist the right end to the build: the design’s promises, reduced to things you can touch. It belongs with the rest of the trailer’s travel hardware in the pre-trip routine — the same walk-around that covers fittings like the roof hatch installation before a house rolls.
Final Considerations
A tongue box is more than a junk drawer bolted to a trailer; it is the mechanical heart of the tiny home’s exterior, and the design discipline that makes it safe is remarkably compact. Separate fuel from spark with a sealed divider. Let the propane side leak safely through a mesh floor and moving air. Insulate the battery side, and vent it according to its chemistry. Bolt the tanks to the frame, count every pound against the 10–15% tongue weight target, and finish with a lid that treats water as the persistent enemy it is. Do those things and the empty triangle of steel at the front of the trailer becomes what it should be: the safest, hardest-working storage on the whole build.


0 Comments