

A rooftop deck is the ultimate space-saving hack for a tiny house: it doubles your outdoor living area without adding an inch to your footprint. But reaching it means cutting a hole in the one surface that can never leak. A window leak ruins some drywall; a hatch leak ruins your ceiling, insulation and potentially your subfloor. This guide covers how to select, frame and flash a hatch — specifically for a Tiny House on Wheels.
1. The Roof Hatch at a Glance
Roof hatch installation on a tiny house is a high-stakes project governed by three problems that ordinary houses never combine: a legal height limit the hatch itself can break, a structural opening cut through the rafters that carry the roof, and a waterproofing joint that has to survive both weather and highway vibration. Get all three right and the roof stops being a lid and becomes a living room — the access point to a deck that doubles the home’s outdoor space. Get any one wrong and the failure is expensive, because water entering at the highest point of the house has the whole interior below it to damage. The table below gathers the whole project; the sections after it take each row in turn.
| Attribute | Detail |
|---|---|
| The Prize | A rooftop deck that doubles your outdoor living area without increasing your footprint |
| The Stakes | A leaking hatch ruins the ceiling, the insulation and potentially the subfloor |
| The Legal Limit | 13′ 6″ legal road height, in most US states |
| The Curb Problem | Most commercial roof hatches sit on a curb that sticks up 6–12 inches |
| The Worked Example | A roof peak at 13′ 4″ plus a standard hatch puts you over the legal limit |
| The Low-Profile Answer | A low-profile hatch or an egress skylight (like Velux) that sits flush or nearly flush with the roofline |
| The Framing Rule | Double headers transfer the cut rafter’s load; double trimmers carry the hatch and the climber |
| The Curb Build | A 2×6 or 2×8 box on the roof deck — insulated, or it condenses and drips like a leak |
| The Flashing Rule | A curb flashing kit on metal roofs; the membrane run up and over the curb on EPDM/TPO |
| The Travel Rule | The hatch is a sail on the highway — latched with a padlock or a heavy-duty internal draw latch |
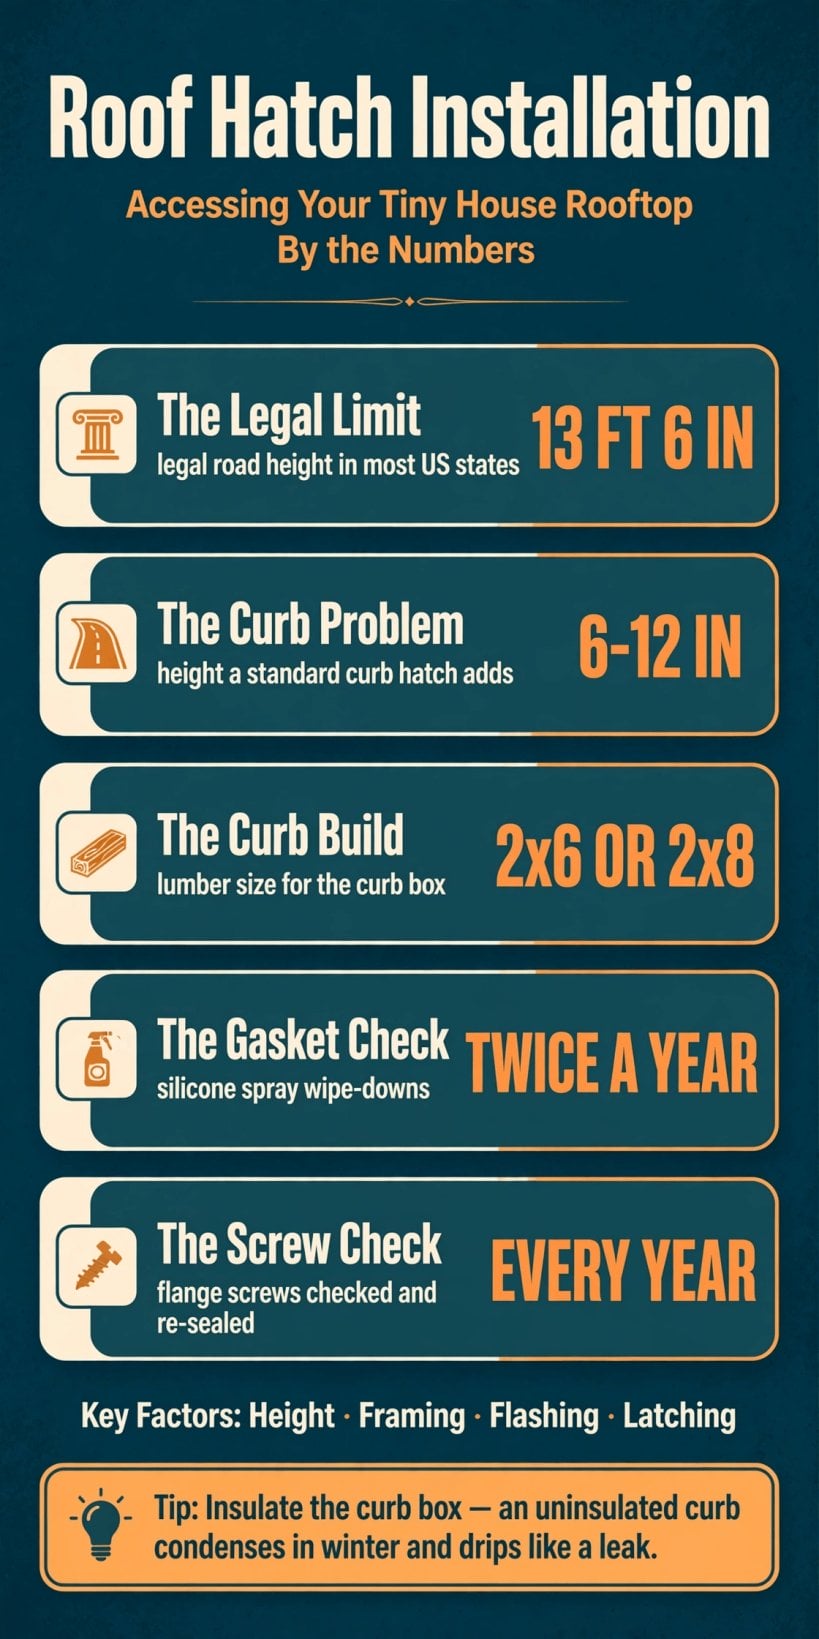
13′ 6″ of legal height, a 6–12-inch curb problem and a hatch that must be framed, flashed and latched — the whole project on one card.
2. The Height Restriction Challenge: Measure Before You Cut
Before you cut a hole in your roof, you must check your clearance, because the hatch is one of the few components that can make a legal house illegal after it is built. The legal road height is 13′ 6″ in most US states. That is the ceiling every part of the house — including anything you bolt on top of the roof — has to fit under, every mile of every trip.
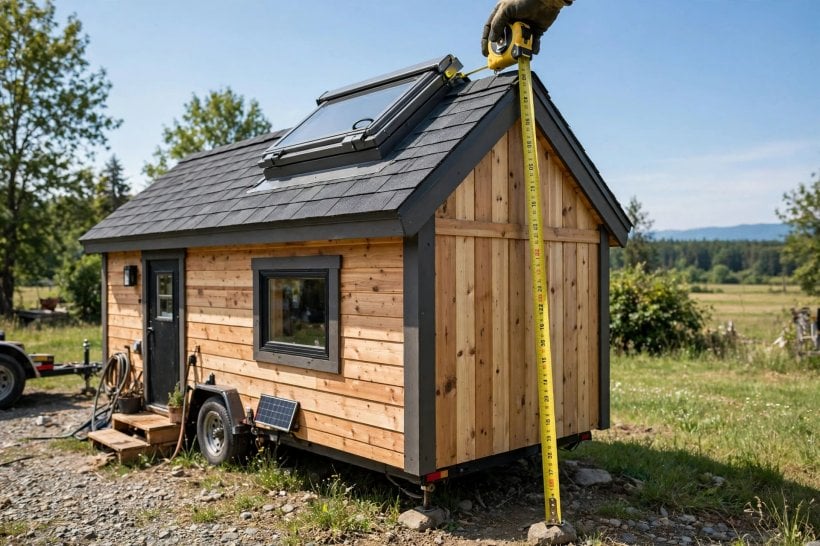
The problem is the curb. Most commercial roof hatches sit on a curb that sticks up 6–12 inches above the roof surface. Now run the original’s own math: if your roof peak is already at 13′ 4″, you have two inches of headroom left, and adding a standard hatch on a 6–12-inch curb will put you over the legal height limit. The solution follows directly: you need a low-profile hatch or an egress skylight that sits flush or nearly flush with the roofline, so the access you add costs you almost none of the height you have. Height is the second half of road legality — the weight half is checked with the tiny house tongue weight calculator — and both halves have to be settled on paper before the saw comes out, not discovered at the first low bridge.
3. Choosing Your Hatch: Commercial Curb Hatch vs. Egress Skylight
Two families of hatch compete for the opening, and the height problem usually decides between them before anything else is considered. The first is the commercial curb hatch: heavy-duty steel or aluminum construction, built-in gas struts and bomb-proof latching are its pros — it is the industrial unit, built to be opened a thousand times and to stay shut under abuse. Its cons are equally plain: it looks industrial, its insulation (R-value) is poor, and it adds significant height on its curb. It is best for flat-roof tiny houses where the roof is well below 13′ 6″ and the curb’s inches are affordable.
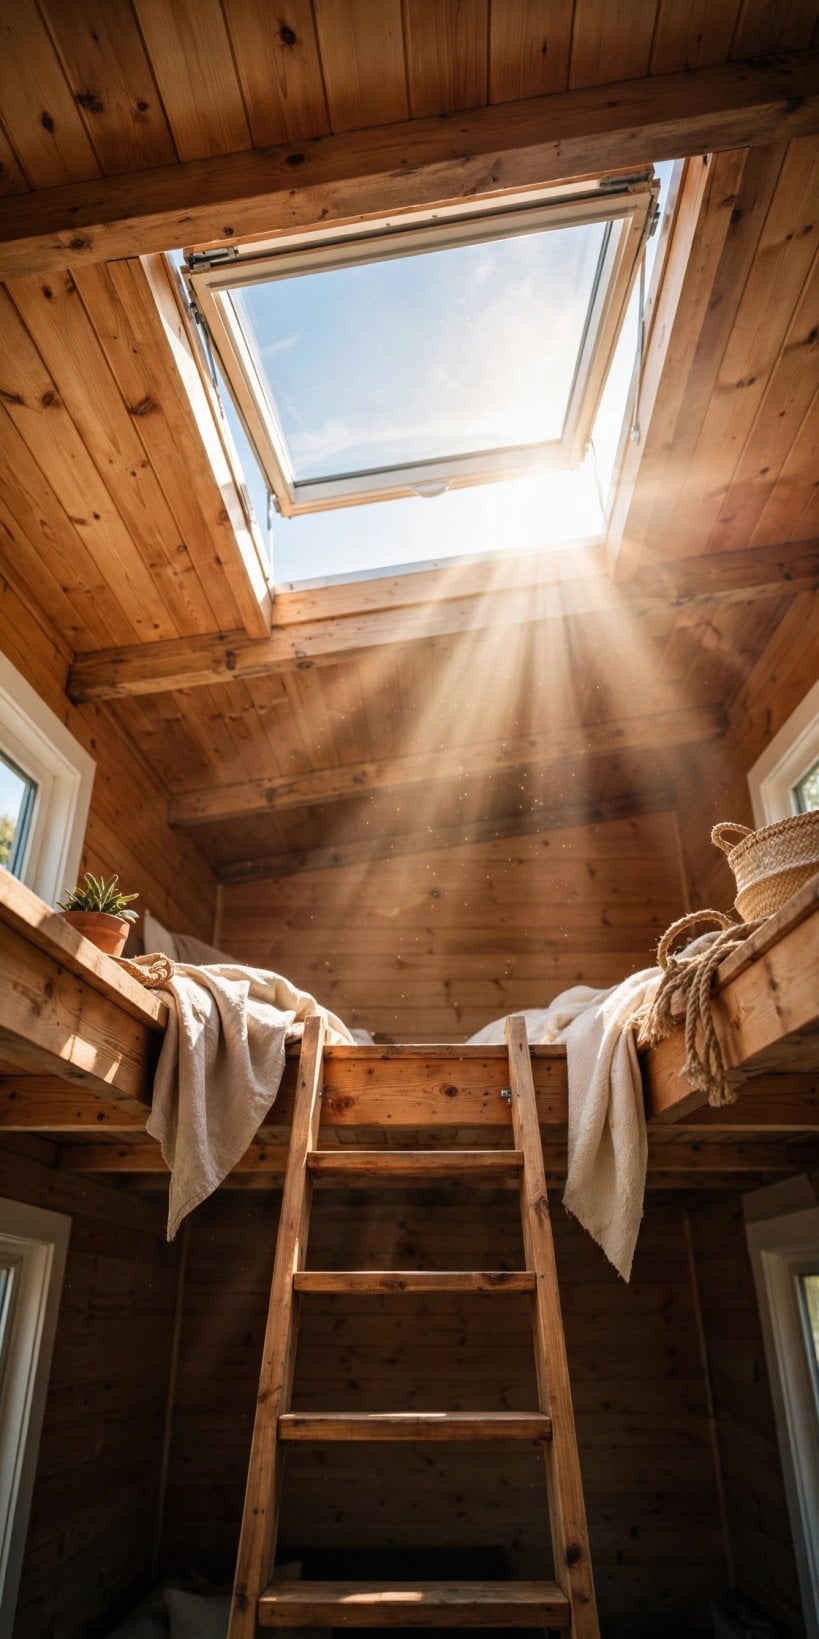
The second is the egress skylight, and it is the recommended option for most tiny houses. It looks like a window, it lets light into the loft below, it sits low to the roof, and it carries a high residential insulation value — the opposite of the commercial unit on every point that matters in a small, height-limited house. Its cons are cost — it is expensive — and the careful handling its glass demands during the install. It is best for gabled roofs and lofts where every inch of headroom counts. The light it brings is a genuine second function, though it cuts both ways across the year: the same glass that brightens a winter loft loads it in summer, which is one more input to the cooling plan in our tiny home summer prep guide.
4. Step 1: Framing the Rough Opening
Whichever hatch you choose, the opening it sits in is structural work, not carpentry decoration. You are cutting through your structural rafters, and structural integrity is key: every load the cut rafter was carrying has to be handed to the framing around the hole before the hatch — and later, a person climbing through it — adds weight of its own.
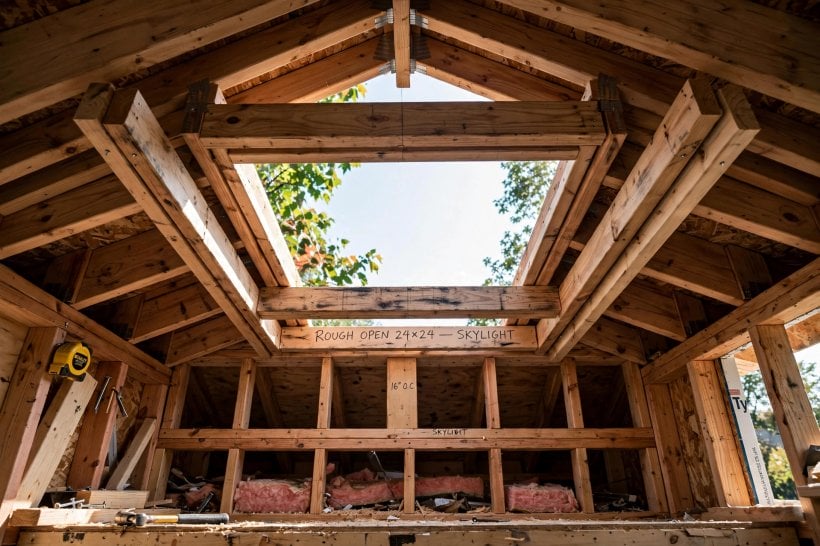
Three rules govern the frame. First, double headers: when you cut a rafter, you must install headers perpendicular to the cut ends to transfer the load to the adjacent uncut rafters, so the roof’s load path steps around the opening instead of ending at it. Second, double trimmers: the rafters on either side of the hatch usually need to be doubled up — sistered — to carry the extra weight of the hatch and the person climbing through it, a live load a plain roof bay never has to bear. Third, squareness: the box must be perfectly square. If it is a parallelogram, the hatch will not seal, and it will leak. That last rule is the one that punishes haste, because a frame can be strong and still be wrong — strength keeps the roof up, but only geometry keeps the water out.
5. Step 2: Building the Curb — and Insulating It
If you are using a curb-style hatch, the opening needs its box: build a 2×6 or 2×8 box on top of the roof deck, sized to the hatch and framed to the same squareness standard as the opening below it. The curb is what lifts the lid above the roof surface and gives the flashing something to climb, and on a taller house it is also the component whose inches you counted so carefully back in the height check.
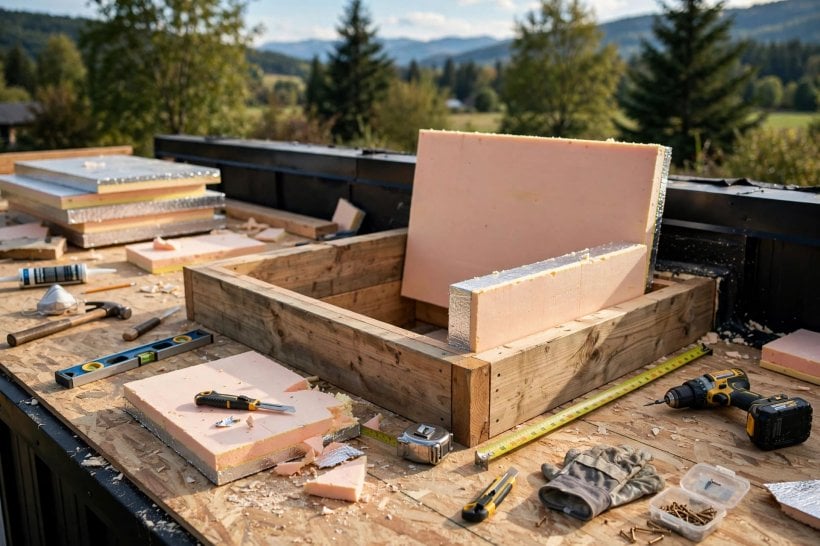
Then comes the step that is often forgotten: insulate the curb. The curb box is a ring of wall standing in the cold, directly above your living space. If you do not insulate it, it will condense in winter — warm, moist interior air meeting the cold curb surface — and drip water onto your head, mimicking a leak. The cruelty of that failure is diagnostic: you will chase flashing and seals for a problem that is actually condensation, tearing at waterproofing that was never broken. Insulating the curb when it is built costs almost nothing; diagnosing a phantom leak a winter later costs weekends. Treat the curb as part of the thermal envelope, not just part of the hatch.
6. Step 3 on Metal Roofs: The Curb Flashing Kit
Flashing is the make-or-break step of the whole project, and the correct method depends on your roofing material. On metal roofs — standing seam or corrugated — the first rule is negative: you cannot just caulk a hatch on top of metal ribs. Sealant smeared against ribbed metal is a countdown, not a waterproofing system, because the ribs guarantee channels the caulk cannot honestly fill.
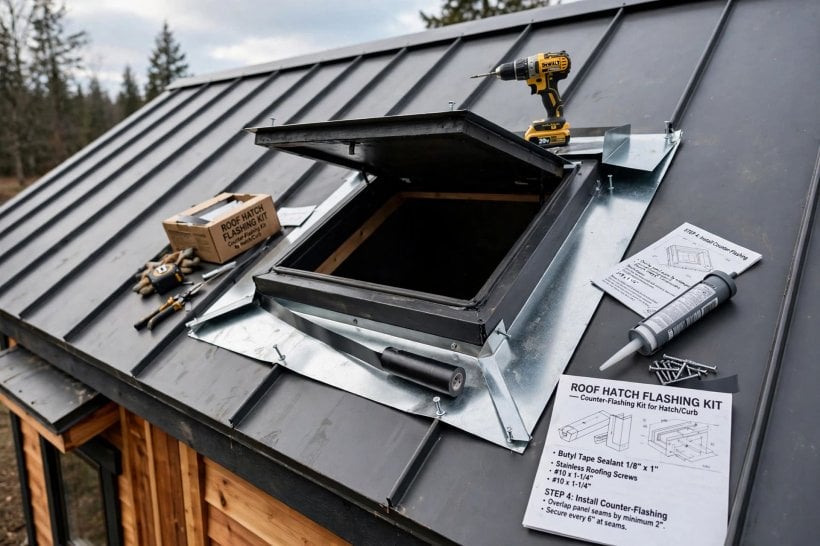
The correct way is sequenced into the roof build itself. You must install the hatch before the roofing panels, using a curb flashing kit that wraps up the sides of the hatch. The metal panels then terminate at the bottom of the curb, and a counter-flashing hangs down over the top of the panels — so water running down the roof meets flashing that sheds it outward at every step, each layer overlapping the one below in the direction water actually travels. It is the same layered philosophy the wall assembly uses, where a rain screen installation keeps siding from being the wall’s only line of defence: no single surface is trusted, and every joint is arranged so gravity works for the system instead of against it. The practical consequence is planning — a hatch on a metal roof is a decision made before the panels go on, not an afterthought cut into a finished roof.
7. Step 3 on Flat Roofs: The EPDM/TPO Bathtub
On a flat roof finished in EPDM or TPO, the flashing logic inverts: instead of metal pieces overlapping in sequence, one continuous membrane does the whole job. The rubber membrane should run up the side of the curb and over the top edge, finishing under the hatch flange. Wrapped that way, the curb stands inside a seamless skin with no joint at the bottom where water pools — the original calls it a seamless bathtub effect, and the phrase is exact: the roof surface and the curb become one waterproof basin, and the hatch bolts down through the membrane’s top edge where standing water never reaches.
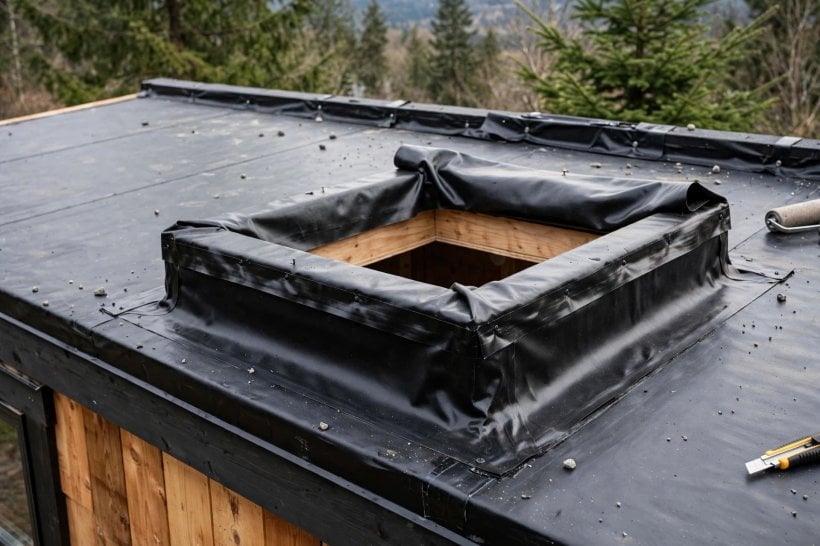
The contrast between the two methods is the real lesson of the flashing step. Metal roofing achieves waterproofing by overlap — many rigid pieces, each shedding onto the next. Membrane roofing achieves it by continuity — one flexible piece with nothing to overlap because it never ends. What both methods share is the refusal to rely on caulk as the primary defence, and the discipline of bringing the waterproof layer up the curb rather than stopping it at the curb’s base. Waterproofing depends on your roofing material; the principle underneath both versions does not.
8. Gas Struts: The Climb You Will Actually Make
A roof hatch is opened from below, usually from a ladder or a loft edge, by someone whose hands are already busy keeping them upright. That is why the struts matter as safety equipment, not convenience. Opening a heavy door while balancing on a ladder is dangerous: the lid’s weight fights you at exactly the moment your balance is committed, and a lid that slams or drops mid-climb is an injury mechanism built into the house’s daily routine.
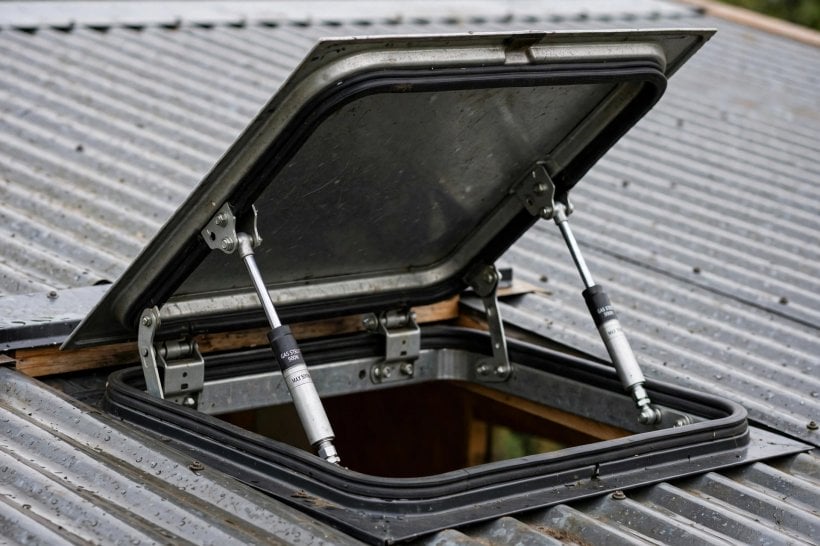
Gas struts solve it mechanically. Ensure your hatch has gas pistons — like a car trunk — to assist with lifting and to hold it open while you climb out. With struts fitted, the lift is a one-handed nudge: the pistons take the lid’s weight, carry it to fully open, and hold it there against gusts while both of your hands are free for the climb. The commercial curb hatch builds them in as standard; on any hatch where they are optional, treat them as required. The climb through the hatch is the movement this whole project exists to enable — it should be the easiest part of the build, not the most dangerous.
9. Step 4: Security — Latching a Sail
The final installation step is about the day you drive. A roof hatch is a sail: a broad, flat lid sitting on top of a vehicle, hinged at one edge. If you forget to latch it and drive down the highway, the wind will get under that lid and rip it off — the original states the outcome without decoration, because there is nothing decorative about a hatch departing at highway speed.
The defence is a latch that cannot be forgotten into failure: install a padlock or a heavy-duty internal draw latch, something that pulls the lid down against its gasket and holds it there under load. The internal draw latch has the extra virtue of compressing the seal it protects, so the same component that keeps the lid on the house also keeps the weather out of it. This is the same road-forces thinking applied to every opening in a moving house — the logic behind selecting windows for road safety applies to the biggest window of all, the one in the roof. Latching belongs on the departure checklist, next to the pins and stows of every other removable system: a hatch checked is a hatch that arrives.
10. Maintenance: The Annual Seal Check
A roof hatch lives a harder life than a skylight on a stationary house, because roof hatches vibrate during travel. Every mile works at the seals and fasteners, so the maintenance is scheduled around exactly those two victims. It is light work — two habits, neither annual in the same rhythm — and it is what keeps a well-installed hatch from becoming a leaking one by slow degrees.
First, inspect the gasket. The rubber seal around the lid can dry out or get compressed over time, and a gasket that no longer springs back no longer seals.
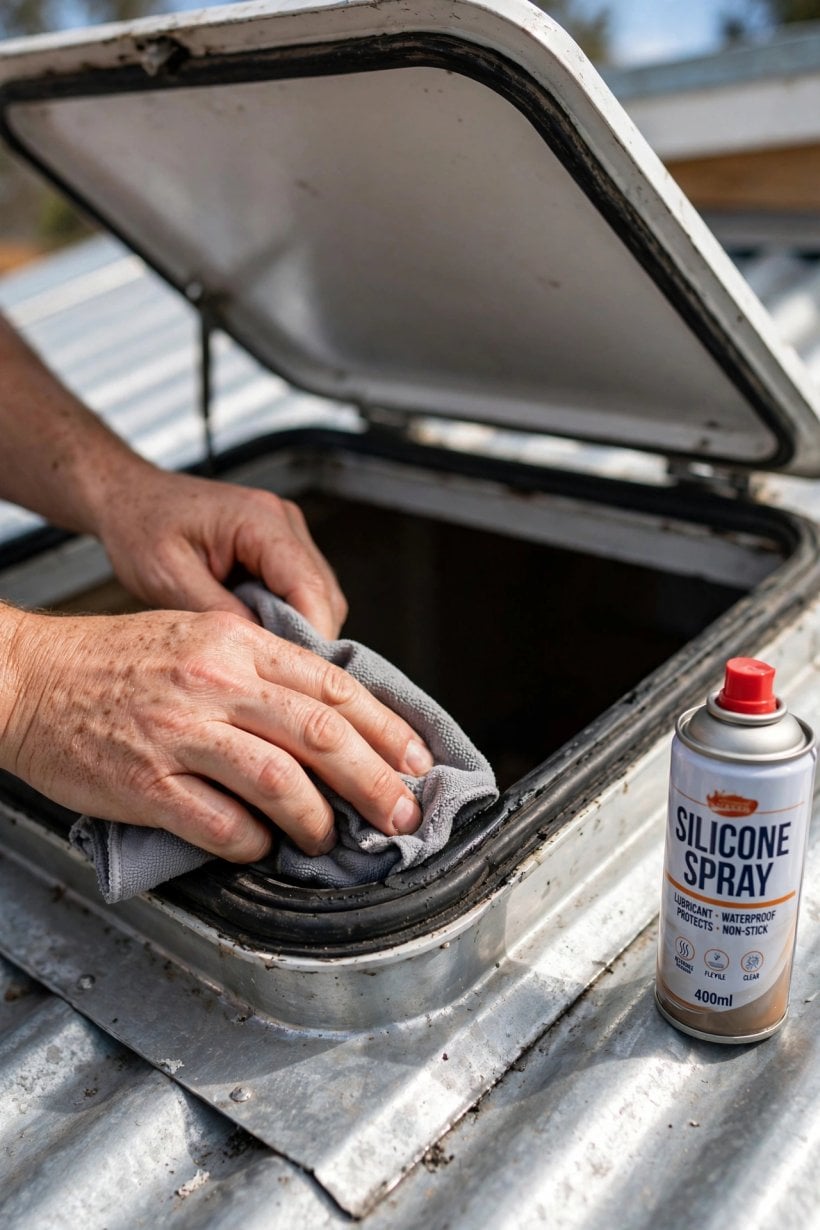
Wipe it down with silicone spray twice a year — the spray keeps the rubber supple and lets the lid close onto a seal that still has give in it. Second, check the flange screws. Road vibration can back out the screws holding the hatch to the curb; check them annually, and re-seal the heads with lap sealant so each screw hole returns to being a sealed penetration rather than a slow inlet. Neither job needs the hatch removed, and both are timed to the component’s actual enemy — not age, but vibration. The reward for the discipline is the deck itself, reached through a hatch that still opens, seals and latches like new — and if the deck is the project that follows, the folding deck designs are its ground-level cousins, solving the same space problem at the hitch end of the house.
Final Considerations
A roof hatch transforms a roof from a lid into a living room — but only if the three governing problems were answered in order. Height first: a low-profile model, chosen against the 13′ 6″ limit before anything was cut, keeps the house road-legal with its access installed. Structure second: doubled headers and trimmers hand the cut rafter’s load around the opening, and a square box lets the hatch seal the way it was built to. Water last and always: flashing matched to the roofing material, an insulated curb that cannot fake a leak, and a gasket and screw check that keeps vibration from undoing the work. The roof edge is a system, and the hatch has neighbours in it — the eaves and overhangs decide how much water the roof hands to the walls, and removable gutter systems carry that water away from a house that still has to travel. Choose the low-profile model, double down on the flashing, and the sunsets from the top of your tiny house come without worrying about the rain getting in.



0 Comments