

On a winter night, the glass in a tiny house becomes the coldest surface in the building — and the heater works against it until morning. Thermal curtains and window quilts exist to close that gap. This guide explains why windows lose so much heat after dark, how an insulated curtain works, and how to seal, fit and model one before you spend anything.
1. At a Glance: Window Heat Loss in Brief
A tiny house wall is a thick, insulated sandwich; a window is a thin sheet of glass set into it. The tool below this article describes windows as holes in the insulation bucket — around R-2 against walls of roughly R-20. In a small space the effect is amplified, because windows form a larger share of the wall area than in a conventional house, and there is less interior air to buffer the chill spilling off the glass. The good news: the weakest element is also the easiest to upgrade — a curtain that behaves like a removable section of wall at night, and disappears every morning.
| Element | What happens at night | The fix |
|---|---|---|
| Bare glass | The pane chills room air on contact; cold air sinks and pools at floor level | Cover the glass with an insulated layer after dark |
| Loose curtain | Room air circulates behind the fabric in a convection loop, cooling continuously | Seal all four edges so the trapped air stays still |
| Window frame | Gaps leak heat around the edges of any covering | Overlap the frame; use tracks or magnets and a pelmet box |
| South-facing glass | Free heat all day, heat loss all night | Open fully for sun by day, close tightly at dusk |
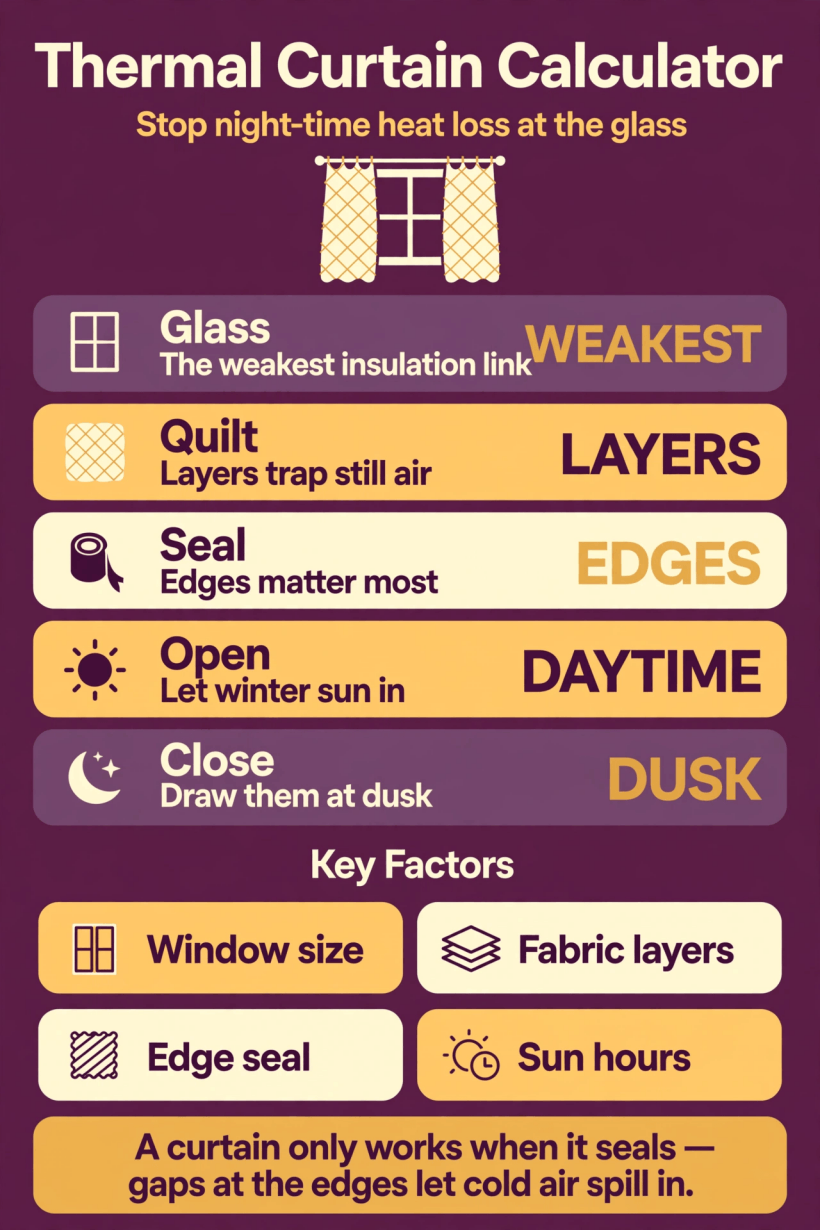
The whole strategy on one card: treat glass as the weakest link, trap still air in layers, seal the edges, and run an open-by-day, closed-at-dusk routine.
Everything else in this article expands one row of that table. If you take one idea away, take the seal: as the thermal curtain calculator at the bottom of this page demonstrates, installation quality changes the result more than fabric thickness. Our overview of heating options for a tiny house shows where window treatments sit in the wider winter picture.
2. Why Windows Lose So Much Heat at Night
Glass is a poor insulator because it is thin and conductive. A single pane offers almost no resistance to heat flow, and even a double-glazed unit is far weaker than the wall around it. Heat leaves by conduction, and the cold inner surface chills the air touching it. That cooled air becomes denser, slides down the pane and spills onto the floor — the “cold air waterfall” the simulator below is built around. The draught on your ankles near a tiny house window is often not a leak at all, but room air refrigerated by your own glass.
Night is when the problem peaks. By day, sunlight offsets some of the loss; after dark there is no incoming gain, temperatures fall to their lowest, and the heating system runs its longest uninterrupted stretch — the window becomes a one-way street for heat. Condensation is the visible symptom: warm, moist room air meeting a cold pane drops its water on the glass, which is why tiny house windows stream with moisture on winter mornings.
Placement matters too: in a loft bed, your head may be inches from a window at the coldest point of the night. Because the glass itself is the main loss path, a removable treatment is so effective — you insulate the hole only while it is losing heat, and keep the view and daylight the rest of the time.
3. How Thermal Curtains and Window Quilts Work
A thermal curtain insulates the same way a wall does: by trapping air in small, still pockets. The fabric itself contributes little; the loft of the material — batting, fleece or a quilted sandwich — holds air motionless, and still air resists heat flow. A window quilt is the heavy-duty version, built like bedding for the window: an outer decorative fabric, thick insulating batting in the middle, and often a reflective or vapour-resistant layer facing the room. Hung over the glass, it converts the coldest surface in the house into a padded, room-temperature one.

The second mechanism is less obvious and more important. A curtain hung loosely on a rod, open at the top and bottom, does not create still air at all — it creates a loop. Air behind the curtain touches the cold glass, sinks, and escapes at the bottom; warm ceiling air is drawn in at the top to replace it. The curtain becomes a pump delivering fresh warm air to be chilled, and the room can feel barely better than with bare glass. The simulator below calls this the convection loop trap, and it is the most common reason window quilts disappoint. The treatment only works when it behaves like a lid, not a sail.
Fitted properly, the quilt and the glass enclose a dead air space — and that trapped layer is where the insulation value lives. It is why the tool on this page models a sealed quilt as turning a terrible window into something closer to a decent wall for the hours it is closed.
4. Fabrics and Layering: What Makes a Good Window Quilt
A good window quilt is a sandwich, and each layer has a job. The room-facing layer is a durable woven fabric that handles daily use and the occasional wash. The middle is the insulation — polyester batting is common because it is light, cheap and tolerant of damp, while wool batting offers natural loft and moisture buffering at a higher price. Quilting stitches hold the batting in place so it does not sag into a lump at the panel’s bottom — insulation that has migrated is insulation that has left.
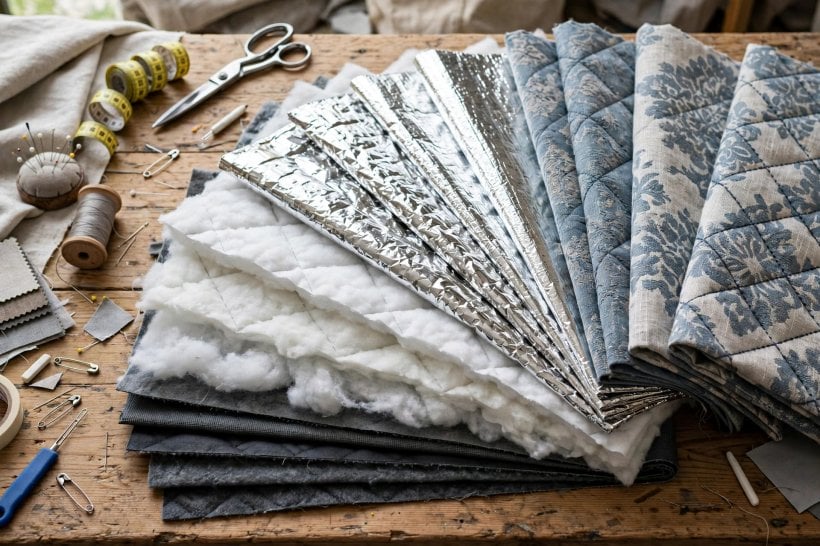
Many designs add a reflective layer — a metallised film facing the room or the glass — to bounce radiant heat back. Others include a moisture-resistant inner face, because air trapped against cold glass can drop condensation inside the quilt cavity on the coldest nights; a layer that tolerates that damp and dries quickly will outlast one that stays wet. The same layering logic runs through wall assemblies: our guide to insulating a tiny house with spray foam, rockwool or sheep’s wool covers how insulations handle loft, moisture and settling.
Weight is a real constraint, too: the quilt must still be lifted or slid aside every morning by one person, sometimes overhead into a loft. A medium quilt closed every night beats a magnificent one left open because it is a wrestling match.
5. Sealing the Edges: Tracks, Magnets and Pelmet Boxes
If the fabric is the insulation, the edges are the engineering. The simulator below models installation quality as two extremes — a loose hang, or a four-sided seal — and treats the loose version as losing most of the treatment’s benefit to the convection loop. Closing that loop means blocking air movement at all four sides. The top is sealed with a pelmet, or valance box: a rigid cover capping the gap between curtain top and wall so warm ceiling air cannot dive in behind the fabric.
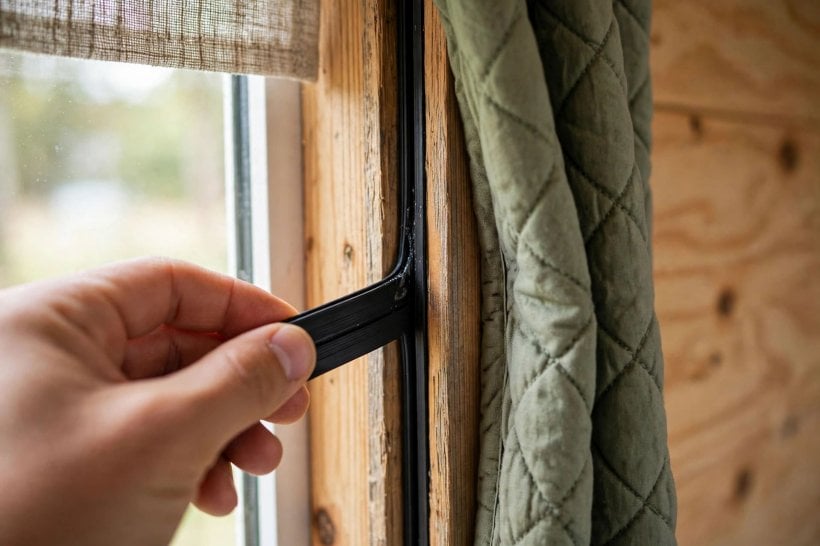
The sides can be closed several ways. Hook-and-loop tape along the frame is simplest and works well on flat trim. Magnetic strips sewn into the curtain edge, matched to a strip on the frame, give a snap-shut seal that is easy to open daily. Full side tracks guide the panel edges in a slot and produce the most complete seal, at the cost of more hardware. The bottom edge finishes the job: a weighted hem resting on the sill stops chilled air escaping at the base.
Sealing has one side effect: moisture. The air trapped in the cavity can still condense on the coldest nights, so check behind the quilt on very cold mornings and air the cavity out on dry days — the same discipline that applies to the wall itself, covered in our vapour barrier placement guide for tiny houses.
6. Measuring and Fitting Curtains to Tiny House Windows
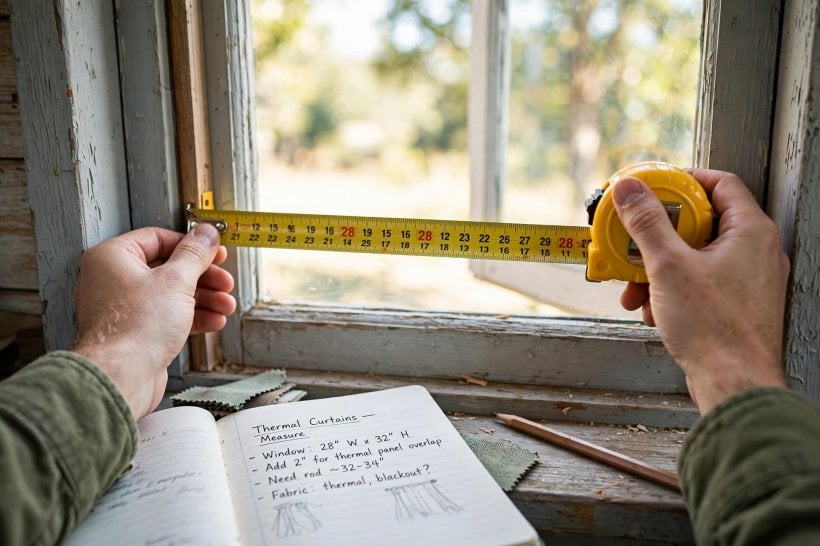
Measure for the seal, not just for the glass. The panel must cover the pane and overlap the frame on every side so the edging — tape, magnets or track — lands on solid trim or wall, not on the edge of the glass. Record the full area, then add the overlap your sealing method requires. For curtains meeting in the middle, the centre seam needs its own overlap or magnetic join: it is a fifth edge waiting to leak.

Tiny house windows bring quirks standard curtain advice ignores. Loft windows may sit close to the ceiling, where a pelmet box has no room to exist — a tape seal across the top edge is the practical substitute. Egress windows must remain openable in an emergency, so any treatment over them should release with one pull; magnets and hook-and-loop score well here, screwed tracks less so. Plan where the open quilt lives, too: a panel that folds or ties back beside the window gets used; one that must be removed and stored spends winter in a drawer. Many of the tiny house plans for cold climates on this site treat window placement as a heating decision from the start — exactly the mindset a good fitting plan follows.
7. Day–Night Routine: Solar Gain vs Night Loss
A thermal curtain is a twice-daily habit. On a sunny winter day, south-facing glass is a free heater: open the quilts fully as soon as the sun reaches the window — a half-open quilt taxes your best heat source. The passive solar simulator for tiny houses shows how much winter warmth well-placed glass can deliver when left unobstructed.

At dusk the balance flips: the moment the sun leaves the glass, the window stops earning and starts spending, so draw the quilts as part of the evening routine. On overcast days there is little gain to harvest, and many owners keep north-facing windows quilted around the clock during cold snaps, opening them only for ventilation and condensation checks. In shoulder seasons, judge by the morning — glass cold to the touch at breakfast means the quilts should have been closed the night before.
The routine extends to maintenance: wash quilts in spring, dry them fully and store them uncompressed, because batting crushed flat all summer starts winter with less loft. Inspect stitching and hook-and-loop tape in autumn — five minutes per window before the first cold night.
8. Curtains vs Shutters, Films and Cellular Blinds
Thermal curtains are one entry in a family of window treatments, and the honest comparison is how each handles the same three enemies: conduction through the glass, convection behind the covering, and air leakage at the edges. Interior shutters — solid insulated panels that hinge or plug into the frame — seal superbly, but they are carpentry projects needing swing or floor space when open. Rigid plug panels of foam board are the budget champions for windows you rarely look through in winter, though they block all light while fitted.

Cellular (honeycomb) blinds trap air in their cells, and side-track versions reduce the convection problem; they are thinner than a batting quilt, so their insulating ceiling is lower, but they win on convenience. Window films work differently — a low-emissivity coating reflects radiant heat — and do nothing about convection or edge leakage, which is why film alone rarely transforms comfort the way a sealed quilt does. Standard blinds and draped curtains sit at the bottom of the table: better than bare glass, undone by their gaps.
For most tiny houses the answer is a mix: sealed quilts on the big, cold, north and bedroom glass; a cellular blind or plug panel where space rules a quilt out; film only as a supplement. Match the treatment to the window’s job — view, vent, egress or daylight.
9. Using the Calculator: Inputs, Outputs and What to Change First
The thermal curtain calculator below turns this article into numbers for your own windows. You set three things. First, the base window: a single pane at R-1 or a standard double pane at R-3. Second, the treatment: bare glass, standard blinds, a heavy draped curtain, or an insulated quilt — modelled as adding roughly R-1, R-2 and R-5 respectively before installation quality is considered. Third, and most revealingly, the installation: a loose hang, or the four-sided seal with pelmet box, side tracks and weighted bottom.

The outputs are the effective R-value of the covered window and the percentage improvement over the bare window. Run the comparison the tool is designed to expose: the same insulated quilt, loose versus sealed. In the model, a loose hang throws away the majority of the treatment’s value — the convection loop keeps flushing the trapped air — while the sealed version keeps nearly all of it, which is why the R-value jumps without the fabric changing at all.
So what should you change first? Installation, every time. If your curtains drape from a rod, sealing the top and sides will typically gain more than upgrading the fabric; from bare glass, a mid-weight quilt fitted tightly will outperform a premium quilt fitted loosely. Test your worst window — the biggest, coldest one — and let that result set your budget.
10. Mistakes That Make Thermal Curtains Disappoint
The first mistake is buying fabric before thinking about edges: owners hang beautiful quilts on a standard rod and conclude thermal curtains do not work, when the convection loop produced the verdict. The second is the reverse error — sealing so enthusiastically that the window can no longer open. Ventilation matters in winter, and an egress window behind screwed-down panels is a safety problem, not an upgrade. Choose seals you can release in seconds.
Third, ignoring condensation: hidden glass can run with water or grow mould unnoticed through a cold month, so build the morning check into the routine and open up on dry, sunny days. Fourth, covering glass that should be earning — quilts left closed through a sunny day waste free heat, a trade-off worth reviewing alongside your wider approach to heating a tiny home in winter. Finally, the fit mistake: panels measured to the glass instead of the frame, leaving the edges nothing to seal against. Measure generously and overlap the trim.
Final Considerations
Windows will always be the weak point of a tiny house envelope, but they do not have to be an all-night liability. A layered quilt, sealed on four sides and run on a dusk-to-morning routine, converts the coldest surface in the home into one of the warmest-feeling — with fabric, tape and magnets rather than renovation. To see what that means for your own glass, scroll down to the Window Quilt Simulator below: set your window type, choose a treatment, toggle the installation quality, and watch the effective R-value — and the convection loop — respond.
Thermal Curtain Calculator
This tool focuses on the “Nighttime Heat Loss” problem. Windows are holes in your insulation bucket (R-2 vs R-20 walls). This tool demonstrates how a properly sealed DIY window quilt can turn a terrible window into a decent wall at night.
It features a “Convection Loop Visualizer” that shows why hanging a curtain without a top valence (pelmet) or side tracks is almost useless, as it creates a “cold air pump” that actively cools your room.
Window Quilt Simulator
Stop the “Cold Air Waterfall” with thermal curtains.
1. Window Setup
2. Installation Quality
The Convection Loop Trap
If you hang a curtain on a standard rod, air touches the cold glass, gets heavy, and drops out the bottom. This creates a vacuum that pulls warm ceiling air into the top. You have inadvertently built a cold air pump that circulates room air against the freezing glass all night.
To make a window quilt work, you must seal the edges. 1. Pelmet (Valance): A box at the top to stop air entry. 2. Tracks/Velcro: Seal the sides to the wall. 3. Sill Seal: Let the curtain rest on the sill or floor to stop air exit. This creates a “dead air space” which is an excellent insulator.


2 Comments