

This tool tackles the #1 nightmare of container builds: “Container Rain.” It simulates the physics of a steel box in winter, visualizing how warm interior air hits the freezing cold steel shell to create indoor rain.
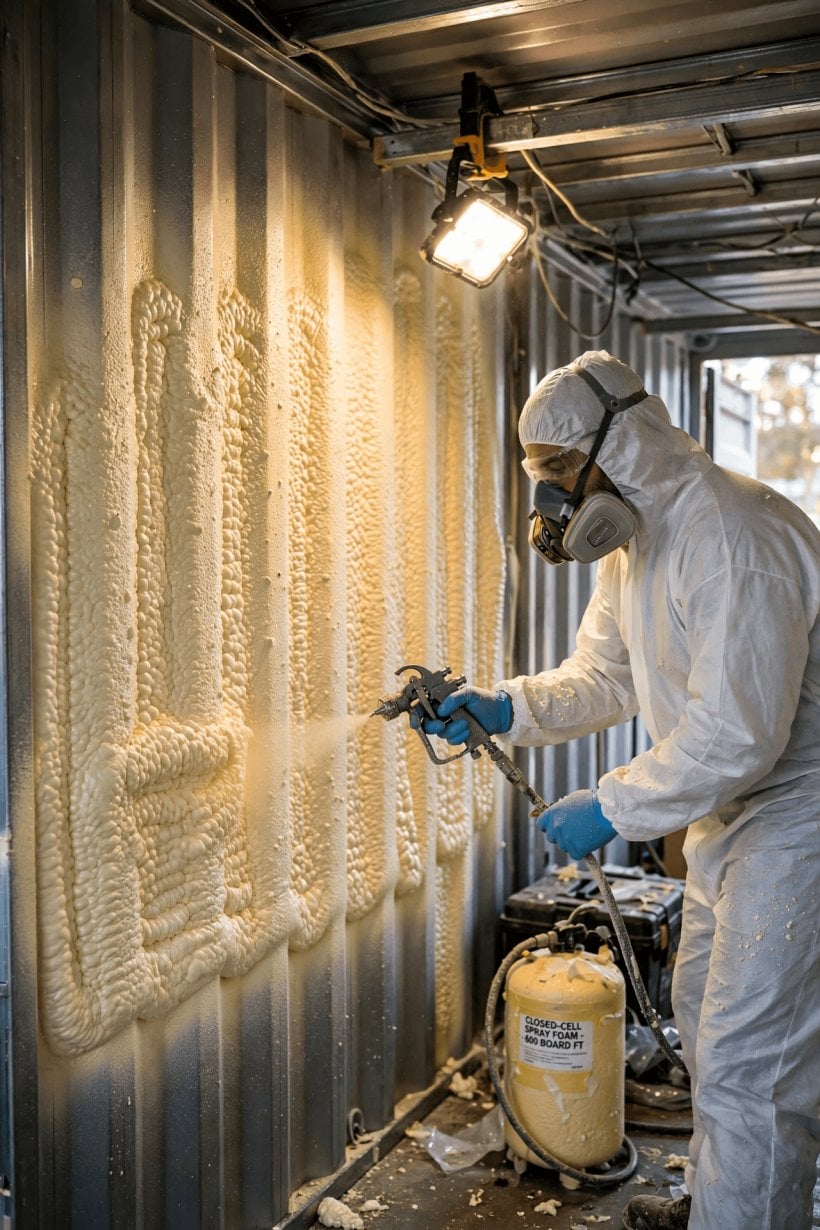
It demonstrates why Closed Cell Spray Foam is the industry standard for containers, as it is the only method that seals the corrugations to prevent hidden mold growth behind your walls.
A shipping container is a steel box, and steel has no mercy in winter. Warm the inside, chill the shell, and the walls themselves start making weather — droplets forming on the metal, running down behind your finishes, feeding mold you cannot see.
That indoor weather has a name: container rain. This guide explains the physics behind it, why the usual insulation fixes fail on corrugated walls, and the one method that stops it.
1. At a Glance: Container Rain in Brief
Container rain is condensation with a postal address: it happens inside the wall of a steel home, on the inside face of the shell. A container rain simulator exists to make that moment testable before you build. The tool below models your wall on a winter night — an outside temperature, an indoor humidity, and one of three insulation methods — and answers a single question: does moist room air reach steel that is colder than the dew point? The three methods it compares are the three ways container builders actually insulate, and they do not perform equally.
| Insulation method | How it meets the steel | What the simulator shows |
|---|---|---|
| Bare Metal (No Insulation) | Nothing between the room air and the shell — direct contact with steel | The steel sits at the outside temperature and the walls drip |
| Fiberglass Batt + Studs | Batts span the high points of the corrugation, leaving gaps in the valleys | Air still reaches cold steel — and the mold grows hidden behind the insulation |
| Closed Cell Spray Foam | Expands into every valley and bonds directly to the steel | No air touching cold steel, so no condensation forms |
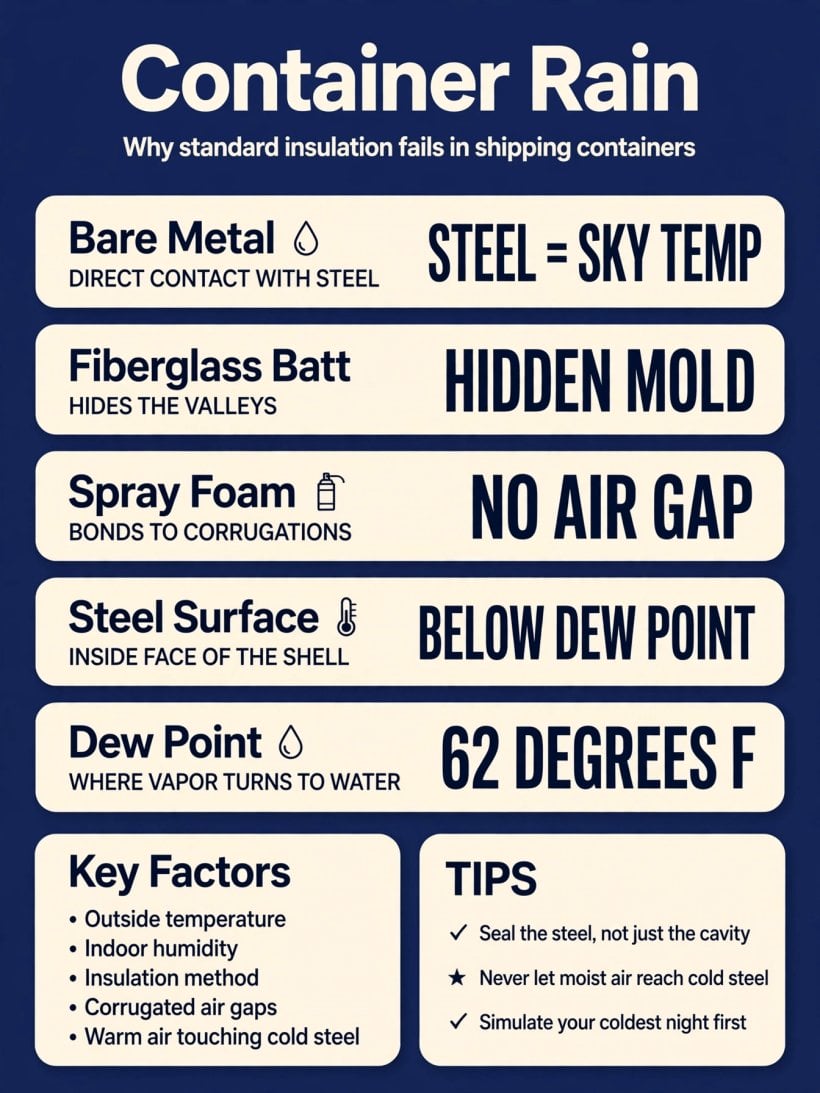
Container rain at a glance: the steel tracks the sky temperature, the dew point decides when vapor turns to water, and only the method that bonds to the corrugations removes the air gap where it all happens.
Read the table as a story about contact. Every method insulates after its own fashion; only one changes whether air can touch the steel at all. That distinction — contact, not thickness — is the whole subject of this guide, and it is why a wall can be well insulated on paper and still rain.
2. What Container Rain Is, and Why Steel Boxes Get It
Start with the box itself. A shipping container is a single skin of corrugated steel: the same sheet of metal is the weather side and, a fraction of an inch away, the room side. In a conventional wall, layers of structure, sheathing and cavity separate the warm air from the cold surface. In a container, almost nothing separates them. Steel gives up heat readily, so on a cold night the inside face of the shell sits essentially at the outside temperature.
Into that cold box, daily life pours moisture: breathing, cooking, showering and drying clothes all load a very small volume of air with water vapor. The tool below calls container rain the number one nightmare of container builds, and the ranking is earned: the water forms not on an exposed surface you can wipe, but behind the insulation and finishes, on the steel itself, where it can work for a whole season before a stain or a smell betrays it. It is also why the structural work in a container build — the openings you cut and how you frame them, covered in our guide to the structural integrity of shipping container homes — has to be planned with the moisture strategy, not after it.
3. The Physics: Steel Surface Temperature Versus Dew Point
Condensation obeys a comparison, not a feeling. Air holds water vapor up to a limit set by its temperature; cool the air — or cool a surface the air touches — past a threshold called the dew point, and the vapor it can no longer hold comes out as liquid water. The simulator reduces the contest to two numbers. The first is the steel surface temperature — the inside face of the shell, which tracks the outside temperature you set. The second is the dew point of your indoor air, worked out from your humidity at the tool’s fixed indoor temperature.

When the steel number falls to the dew point number, the verdict is container rain. The defaults make the arithmetic vivid: on a 20-degree night at 60 percent indoor humidity, the tool puts the dew point at 62 degrees while the steel sits at 20, and the rain warning fires. The steel temperature is mostly the weather’s decision; the dew point is partly yours. Raise the humidity and the dew point climbs toward room temperature, so condensation starts on surfaces that are barely cool; lower it and the dew point falls, buying the wall margin. Managing vapor is a layer-order question as much as a number, which is the thinking behind our vapor barrier placement guide for tiny houses.
4. The Corrugation Trap: Why Flat Insulation Fails on Wavy Walls
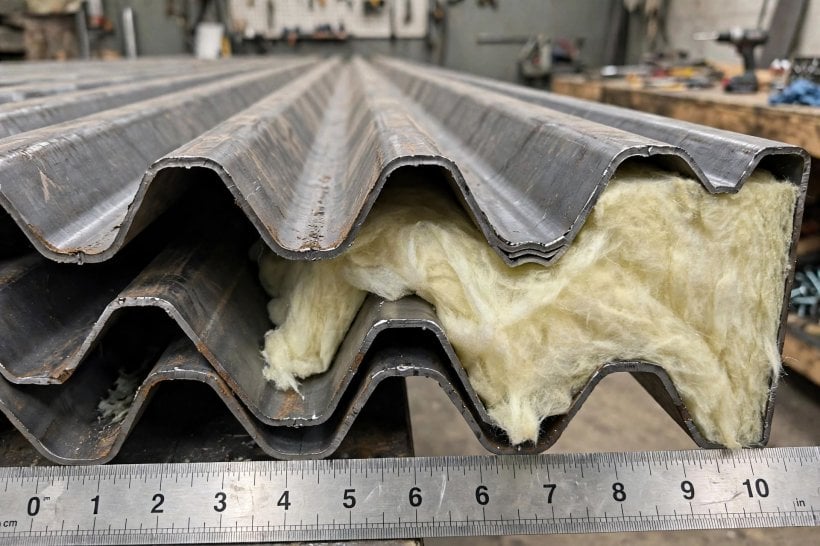
Here is the detail that defeats standard practice: container walls are not flat. They are corrugated — a repeating wave of high points and valleys that gives the thin steel its strength — and flat insulation products are made for flat walls. Press a rigid board or a batt against that wave and it touches the high points while bridging straight over the valleys, leaving a network of enclosed air gaps running the height of the wall behind the insulation. The tool names this the corrugation trap — and the air gap at its center is the real enemy.

Those gaps are not empty in any useful sense. Warm, moist room air migrates into them through every seam, joint and outlet cut, and once inside it does what air against cold steel always does: it cools, reaches its dew point, and condenses — inside the valley, against the shell, behind the insulation where no one can see it. The insulation has, in effect, built a hidden condensation chamber and then hidden it — which is why the failure surprises builders whose wall looks correct from the room: the geometry of the steel was never part of the plan.
5. Method One: Bare Metal and the Honest Disaster
The simulator’s first method is no method at all: bare metal, with the room air in direct contact with the steel. It is the baseline every container starts from, and some budget builds live in it longer than they should — a winter in the shell while the fit-out continues. The physics is unfiltered: the inside face of the steel is the coldest surface in the room and the first place vapor lands, so on a cold night the walls quite literally drip. The tool’s verdict for this method is the bluntest of the three: steel walls are dripping water.
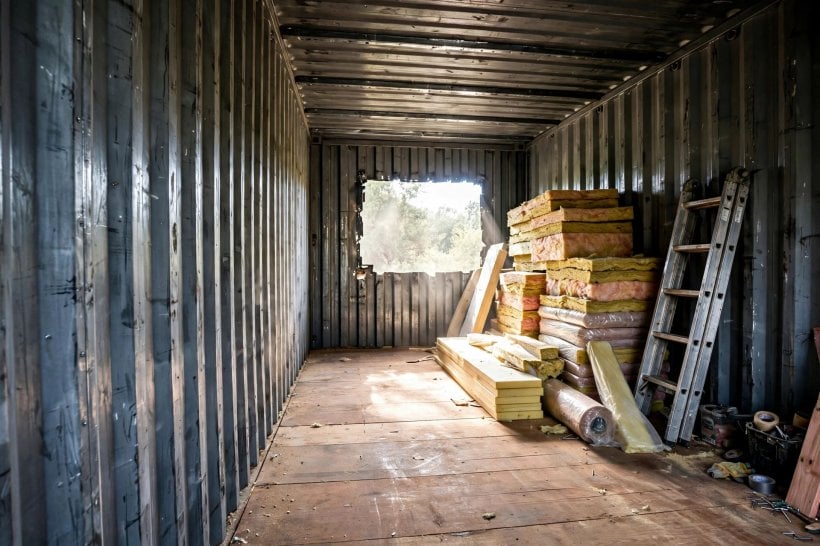
Nobody chooses bare metal as a finished strategy, but it earns its place in the comparison for one reason: it shows the size of the problem the other methods have to solve. The steel will be at the outside temperature; the room air will carry moisture; the dew point will sit far above the steel on any genuinely cold night. Any insulation approach that leaves an air path to that steel has not solved the problem — it has only moved it out of sight, which is the difference between this method and the next one.
6. Method Two: Fiberglass Batts, Studs and the Hidden Mold Problem
The second method is the one most builders reach for first, because it is the standard home building method: a stud frame inside the shell, fiberglass batts between the studs, drywall over the top. Against a corrugated shell it has the flaw described in Section 4 — the batts span the high points of the wave and leave the valleys open, so moist air still reaches steel that sits at the outside temperature. Run the simulator with this method selected and the rain warning fires just as it does for bare metal, but with a quieter message: hidden mold detected behind the insulation.

That word hidden is the whole critique. With bare metal, the water announces itself and you can respond. With batts, the same condensation forms in the corrugation valleys, season after season, wetting the back of the insulation and the face of the steel, and mold — which needs only moisture, darkness and time — establishes itself in a cavity nobody opens. The insulation does not merely fail to protect the wall; it conceals the failure. Fiberglass itself is not the villain — as our comparison of insulating a tiny house with spray foam, rockwool or sheep’s wool shows, every fill material has a wall it suits. The problem is the pairing — an air-permeable fill against a wavy, cold, conductive shell. A sibling tool makes the same point from the foam side: the flash coat mold prevention simulator shows a thin sealed layer against the sheathing deciding whether a wall stays dry.
7. Method Three: Closed Cell Spray Foam and the End of the Air Gap
The third method changes the geometry instead of fighting it. Closed cell spray foam is applied as a liquid that expands, so instead of spanning the corrugation it flows into it — filling every nook of the wave, as the tool puts it, and bonding directly to the steel. That bond is the entire strategy. The air gap is not reduced, ventilated or managed; it is eliminated, because there is no longer a space between insulation and shell for air to occupy. And air that cannot reach the steel cannot condense on it: no air touching cold steel means no condensation.
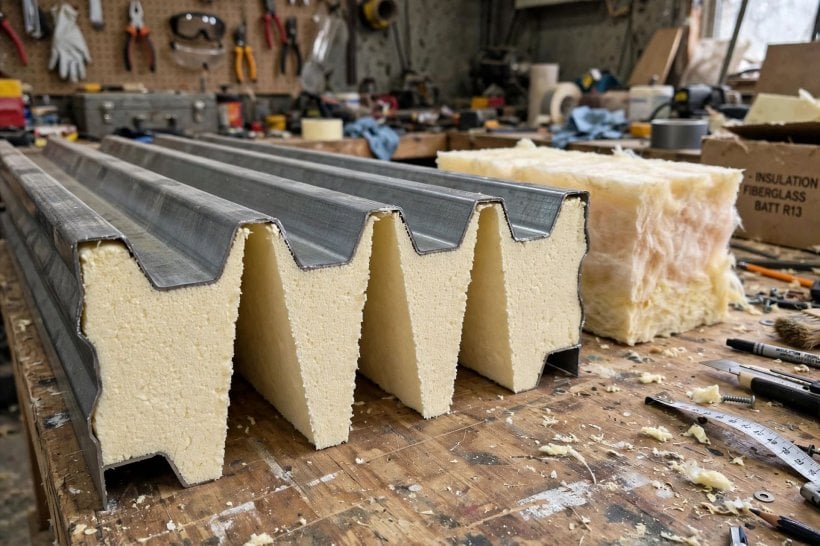
In the simulator this shows up as a completely different verdict. Select spray foam and the surface where condensation would form is no longer the freezing shell — the tool treats the condensing surface as sitting just a couple of degrees below the indoor temperature, far above the dew point, and the rain warning never fires. The warm-air layer in the visualization dims, telling the same story: the air has been stopped at a warm boundary instead of a cold one. This is why the tool describes closed cell spray foam as the industry standard for containers — not because it insulates hardest, but because it alone seals the corrugations and prevents the hidden mold growth behind the walls. The general principle — that conductive framing needs a continuous warm layer over it — is the same one the steel frame thermal bridge simulator demonstrates for steel stud walls.
8. Indoor Humidity: The Half of the Equation You Live In
The simulator’s second slider is indoor humidity, and it is the variable you will keep setting every day you live in the house. The tool lets it run from dry to very humid, and the dew point follows it faithfully: push the humidity up and the dew point climbs, so even a shoulder-season night can rain inside the wall. Pull the humidity down and the dew point falls with it, widening the safety margin on every method, including the imperfect ones.
Daily life pushes the number the wrong way. Showers, cooking, boiling kettles, wet boots and drying laundry all inject vapor into a small air volume — small enough that one long shower can move the whole home’s humidity. The defenses are habits and hardware: extract steam at the source, ventilate deliberately after cooking and bathing, and avoid drying a full load of laundry indoors in midwinter. Windows give you the visible version of the same physics — fogged glass is condensation you can see — and the window condensation and HRV calculator explores how balanced ventilation holds indoor humidity down without throwing the heat away.
9. Outside Temperature: Reading the Cold Side of the Slider
The first slider sets the outside temperature, across the tool’s cold-season range, from freezing down to the hardest nights. Its effect is brutally direct in the bare-metal and batt methods: the inside face of the steel simply follows it. Every degree the night takes off the steel widens the gap between the steel temperature and the dew point, and a wall that survives a mild frost can be raining steadily a week later when the temperature drops in earnest.

That is why the honest way to use this slider is at the bottom, not the middle. Design decisions made against an average winter night fail on the coldest one, and container rain is a coldest-night phenomenon: the steel at its coldest, in a house at its most lived-in and humid. The coldest weather is also when the house is sealed tightest, ventilated least, and generating the most indoor moisture from heating-season life. A method that stays dry at the bottom of the slider stays dry all winter; verdicts earned at comfortable settings are worth very little.
10. Using the Simulator, and the Mistakes It Exposes
Running the container rain simulator below takes under a minute. Set the outside temperature for the coldest night your site honestly delivers, set the indoor humidity to the level your household honestly lives at, and choose the insulation method you are actually planning — then press Check for Condensation and read its two numbers: steel surface temperature and dew point. If the steel is at or below the dew point, the rain graphic appears with the warning for your method. Run all three methods at the same settings before you conclude anything; the comparison at your numbers, not at the defaults, is the lesson.
The mistakes are consistent. Testing at a mild temperature and a modest humidity, then building for a climate that delivers neither. Assuming insulation thickness is the fix, when the tool shows the batt wall failing at the air gap, not at the material. Sealing most of the wall and leaving one unsealed corrugation run or penetration for air to find. And treating the verdict as a one-time check rather than a design boundary — the right output is a method chosen because it stays dry at your worst settings, with humidity habits that keep those settings honest. The ventilation half of that discipline is covered by the tiny house HRV efficiency calculator, which weighs fresh air against the heat it costs.
Final Considerations
Container rain is not a defect in your insulation; it is a property of the box. A thin corrugated steel shell will sit at the outside temperature, room air will carry moisture, and wherever the two are allowed to meet, water will form — visibly on bare steel, invisibly behind batts. The fix the physics points to is the one the tool demonstrates: remove the meeting place. Bond the insulation to the steel, fill the corrugations, and leave no air gap for weather to happen in. Set your sliders to your coldest, dampest honest night, choose the method that stays dry there, and the box stops making rain and starts keeping the weather on the outside.
Container Rain Simulator
Container Rain Simulator
Why standard insulation fails in shipping containers.
1. Environment
2. Insulation Method
The Corrugation Trap
Shipping container walls are wavy. Rigid foam or batts span the high points, but leave gaps in the valleys. Warm, moist air gets trapped in these gaps, hits the cold steel, and condenses.
Closed Cell Spray Foam expands to fill every nook of the corrugation. It bonds directly to the steel, eliminating the air gap. No air touching cold steel = No condensation.




1 Comment