

This tool corrects a common and dangerous misconception in tiny house building: that you can vent a cathedral ceiling (vaulted ceiling) using Gable Vents.
It features an “Airflow Physics Simulator” that shows exactly what happens inside the rafter bays.
- Ridge + Soffit: Visualizes the “Stack Effect” creating a continuous wash of cold air under the roof deck (Safe/Dry).
- Gable Vents: Visualizes air hitting the first rafter and stopping, leaving the middle of your roof to rot (The “Dead Zone”).
- Hot Roof (Unvented): Shows how closed-cell foam works by eliminating the air gap entirely.
A vaulted ceiling is the tiny house roof almost everyone wants — and the one most often vented wrong. The rafters that create that soaring slope also chop the roof into sealed channels, so the venting trick that works in a conventional attic quietly fails here. This guide walks through the physics, the three strategies, and the mistakes that rot decks — then hands you the visualizer to test your own roof.
1. At a Glance: Three Strategies, One Roof Deck
The tool below starts from an uncomfortable truth about tiny house roof venting: in a cathedral ceiling there is no shared attic airspace for vents to draw on. Each rafter bay is its own narrow channel between the insulation and the underside of the roof deck, and air either travels the full length of that channel — in at the soffit, out at the ridge — or it barely moves at all. The three strategies in the table are the three answers builders actually give to that problem, and the visualizer grades each with a roof deck status.
| Strategy | How it works | Roof deck status in the tool |
|---|---|---|
| Ridge + Soffit (Cold Roof) | Continuous baffles from eave to peak; the stack effect washes cold air under the deck in every bay | COOL & DRY |
| Gable Vents Only | Vents on the end walls; air hits the first rafter and stops, leaving a dead zone | OVERHEATING / ROT |
| Unvented (Hot Roof) | Spray foam only, no air gap; closed-cell foam eliminates the air gap entirely | SEALED (WARM) |
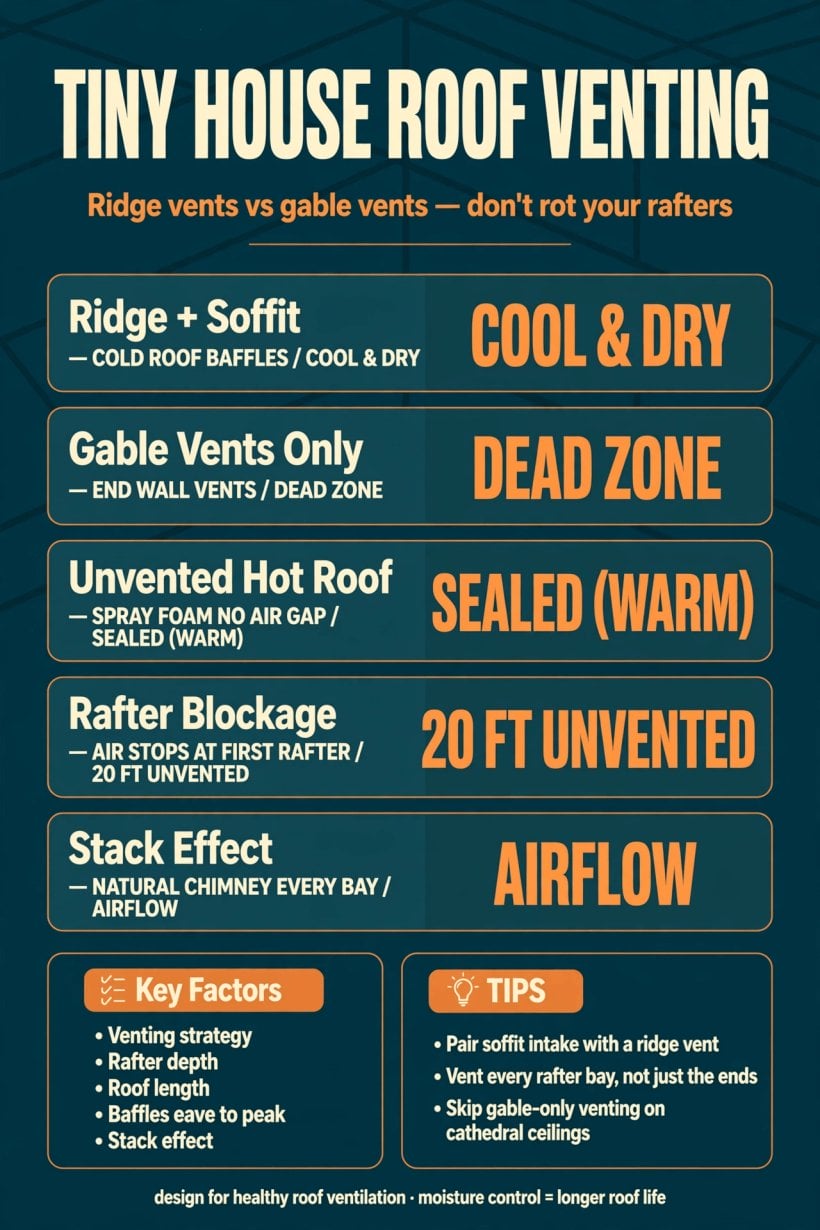
The three strategies at a glance: a vented cold roof that stays cool and dry, gable vents that leave the middle of the roof unvented, and a sealed hot roof with no air gap at all.
Notice the argument is never really about vents — it is about whether moving air, or a deliberate seal, reaches every part of the deck. Two strategies accept that discipline. One pretends the ends of the roof can speak for the middle, and the tool shows exactly how that ends.
2. The Rafter Bay: A Separate Channel for Every Rafter
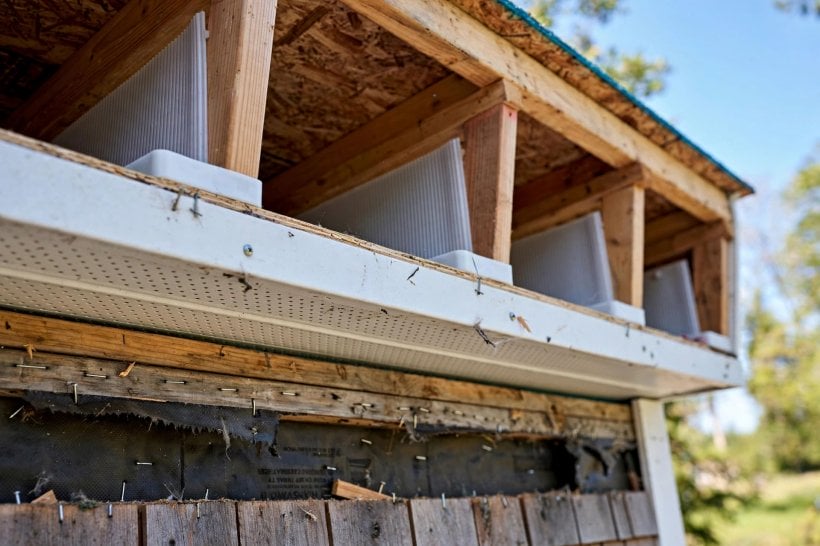
Everything in this subject follows from one piece of geometry. In a conventional house with an open attic, the space above the insulation is a single shared volume: air can drift horizontally across it, enter at one end and leave at the other, and no part of the roof is truly cut off from the flow. A cathedral ceiling removes that volume entirely. The finished ceiling follows the slope of the roof, so the only space left is the depth of the rafters themselves — a row of long, narrow channels, each one walled off from its neighbours by solid timber.
Those channels are the rafter bays, and each one behaves like its own small roof. Air inside a bay cannot step sideways into the next bay when it meets resistance; the rafter is in the way. Whatever ventilation a bay gets has to arrive along the bay itself, entering low and leaving high. That is why roof venting in a vaulted ceiling is planned bay by bay rather than for the roof as a whole, and why a strategy that ventilates the building in general can still leave most individual bays completely still.
3. The Stack Effect: How Ridge and Soffit Venting Works
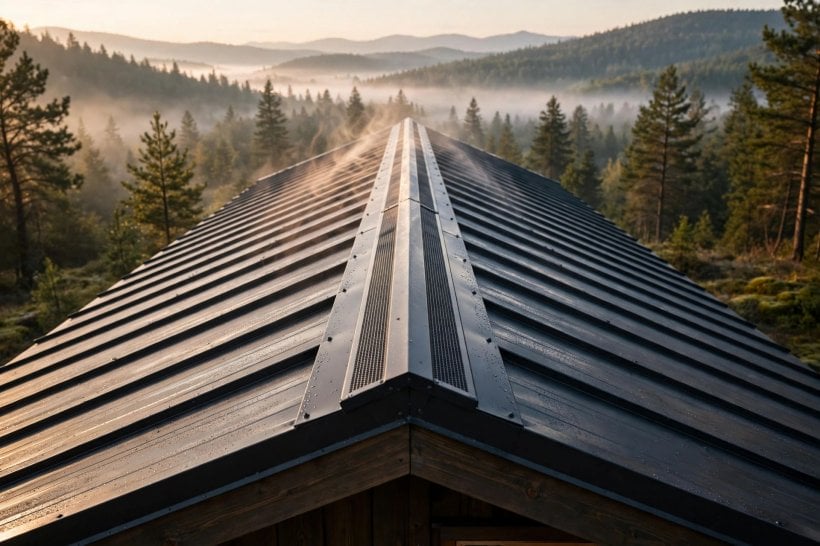
The winning vented strategy runs on a piece of physics the tool names the stack effect: hot air rises. A sun-heated roof warms the air inside its rafter bays, and that warmed air wants to climb. Give it an exit at the very top of the slope — a ridge vent along the peak — and an entrance at the very bottom — vents in the soffits, the underside of the eaves — and each bay becomes a small natural chimney. As the roof heats up, it sucks cool air in at the bottom and pushes hot air out at the top.
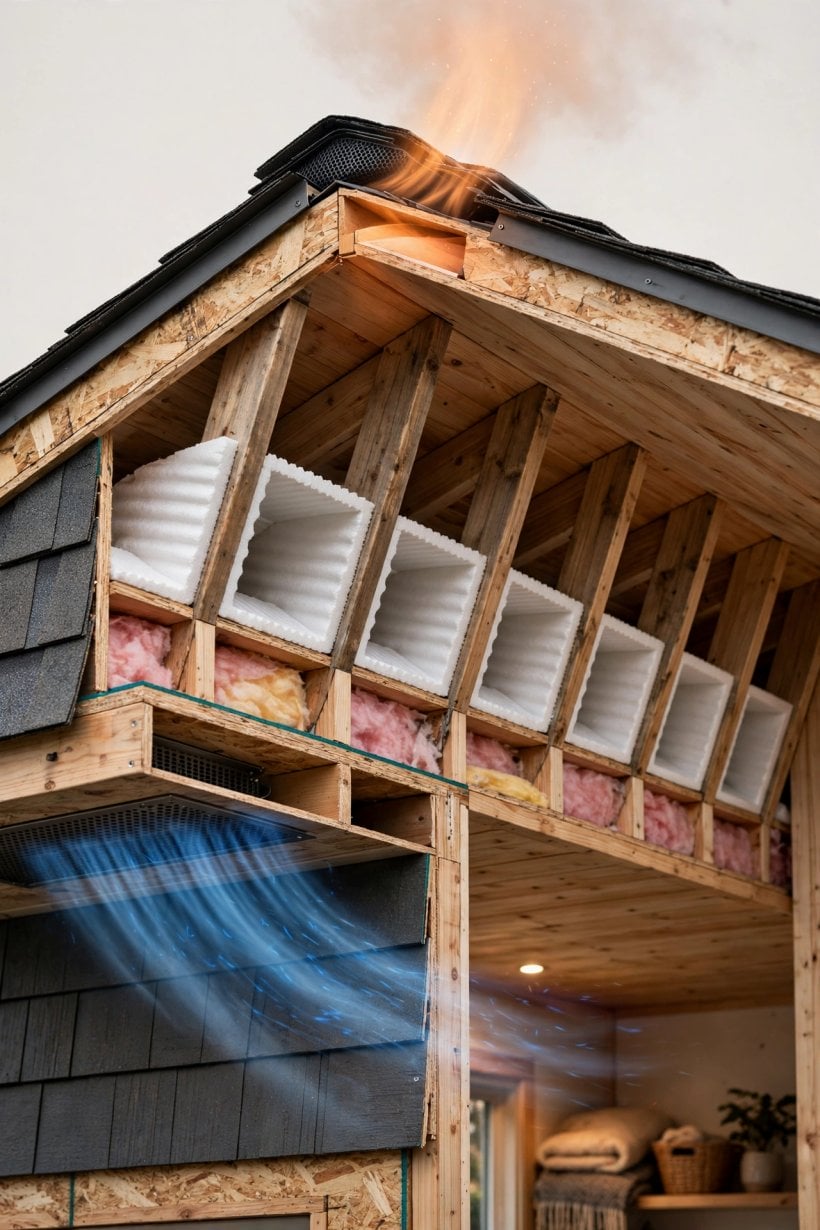
The result, in the tool’s words, is a continuous wash of cold air under the roof deck. That moving air does two jobs at once. It carries heat away before the deck and the roofing above it can bake, and it carries moisture away, drying the small amounts of water vapour that migrate up from the living space instead of letting them settle on cold timber. The tool’s verdict for this strategy is the green one: the deck stays cool and dry. No fan, no power, no moving parts — just an unbroken path from low to high in every bay, working hardest exactly when the sun is working hardest on the roof.
4. Baffles: Keeping the Air Channel Open From Eave to Peak
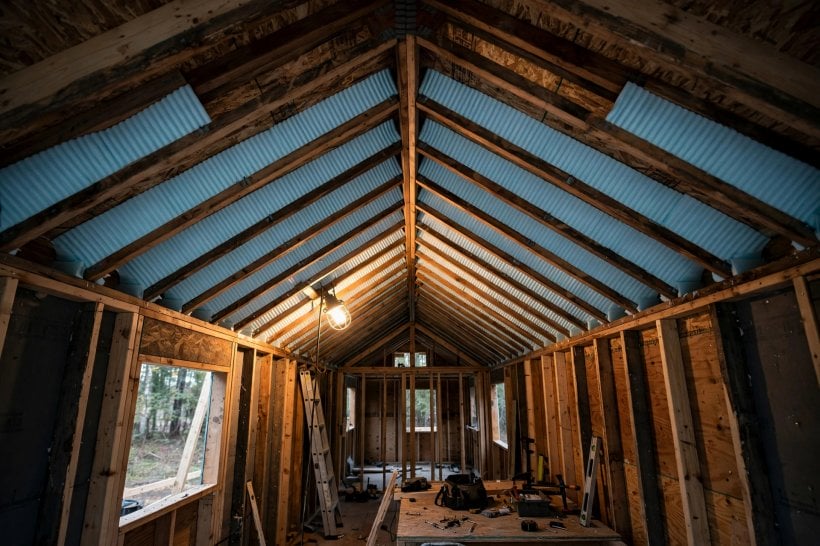
The stack effect only works if the channel it flows through actually exists. Rafters are deep and insulation is eager to fill every available inch, so a bay stuffed tight with insulation has no air path at all — the chimney is plugged. Baffles are the simple inserts that prevent that: fitted against the underside of the deck in each bay, they hold the insulation back and preserve a clear airway above it, continuous from the eave to the peak, exactly as the tool describes the ridge-and-soffit strategy.
Continuity is the whole point. A channel that runs most of the slope but pinches shut near the top plate, or gets crushed where a bay narrows, stalls the flow for that entire bay — the stack effect is a chain that breaks at its weakest link. This is also where venting meets the insulation decision itself: the fill you choose for the cavity decides how the channel above it has to be protected, which is why it is worth reading the venting plan alongside a comparison of insulation options for a tiny house before the ceiling goes on. Once the interior finish closes over the bays, none of this can be fixed without opening the roof back up — baffles are cheap, but only on build day.
5. Gable Vents: Why End-Wall Vents Fail in a Vaulted Ceiling
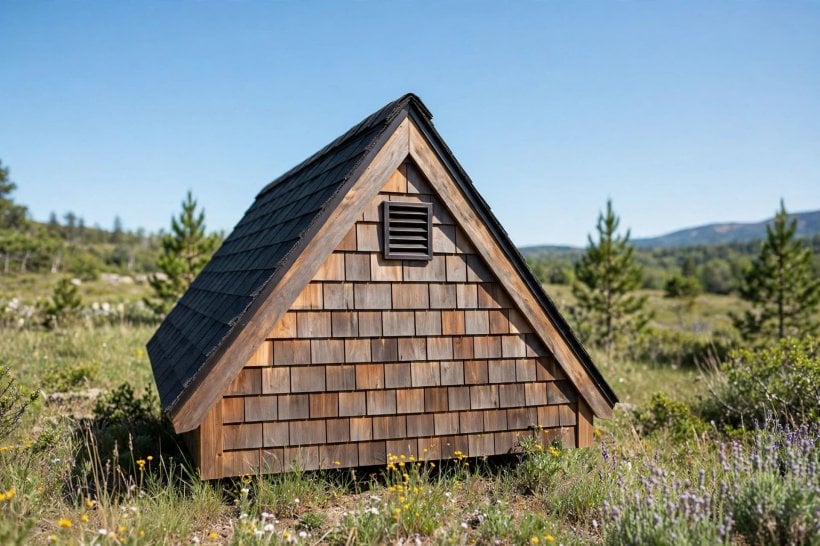
Gable vents — louvres set into the triangular end walls of the house, just under the peak — are the traditional answer in a conventional attic, and in that setting they genuinely work: air flows horizontally from gable to gable across the open attic floor. The misconception the visualizer was built to correct is that the same trick transfers to a tiny house cathedral ceiling. It does not, and the reason is the rafter blockage problem from Section 2.
Air entering a gable vent in a vaulted roof is not entering an open attic. It is entering the end of the first rafter bay. It hits the first rafter and stops. The tool is blunt about what follows: the rest of the roof — its example is a 20 ft roof, where the other 20 ft gets zero airflow — sits in a dead zone, cooking the shingles from below and breeding mold in the still, damp air. The visualizer’s verdict for gable vents only is the red one: overheating and rot. The failure is especially treacherous because it is invisible from outside. The gable vent looks correct, the end bay near it may even stay healthy, and the middle of the roof quietly deteriorates for years before a soft deck or a stain announces what happened. If your design has gable vents, treat them as decoration or as a supplement — never as the venting strategy for a cathedral ceiling.
6. The Unvented Hot Roof: Closed-Cell Foam With No Air Gap
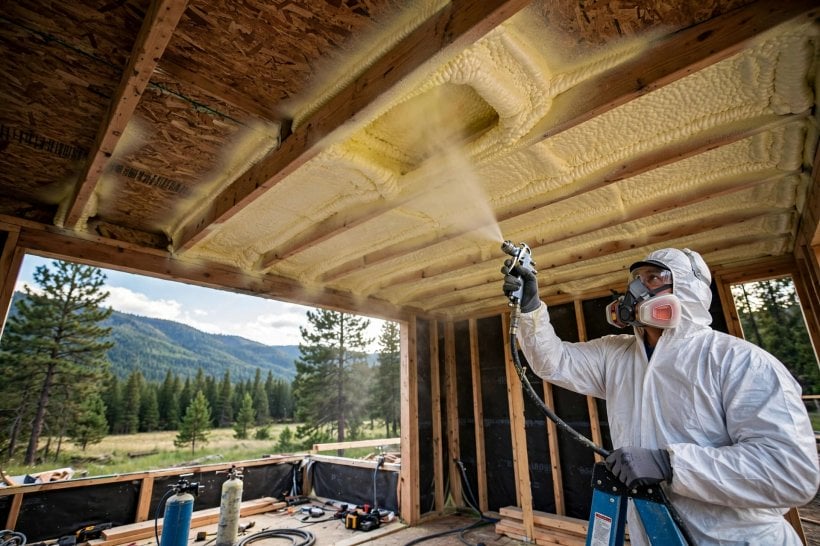
The third strategy takes the opposite lesson from the same physics. If managing moving air through every bay is difficult, why have air in the roof at all? An unvented assembly — the tool calls it a hot roof — fills the rafter bays completely with closed-cell spray foam, applied directly against the underside of the roof deck. With the air gap eliminated entirely, there is no channel for warm moist air to travel through, no cold deck surface for it to condense against, and nothing for the stack effect to do. The tool’s status for this build is sealed and warm.
This is a legitimate strategy, not a shortcut, but it changes where the discipline sits. A vented roof forgives small imperfections because moving air dries them; a sealed roof depends on the foam layer being continuous and complete, because the assembly has no drying mechanism to fall back on. It is the same foam-first logic used lower in the wall build-up, and if the idea appeals, the flash coat mold prevention simulator explores how a sealed foam layer changes where condensation can form. Choose the hot roof deliberately — because your roof suits a seal better than a channel — and execute it as a complete system, not as a vented roof that ran out of patience.
7. What Bad Venting Costs: Overheating, Mold and Rot
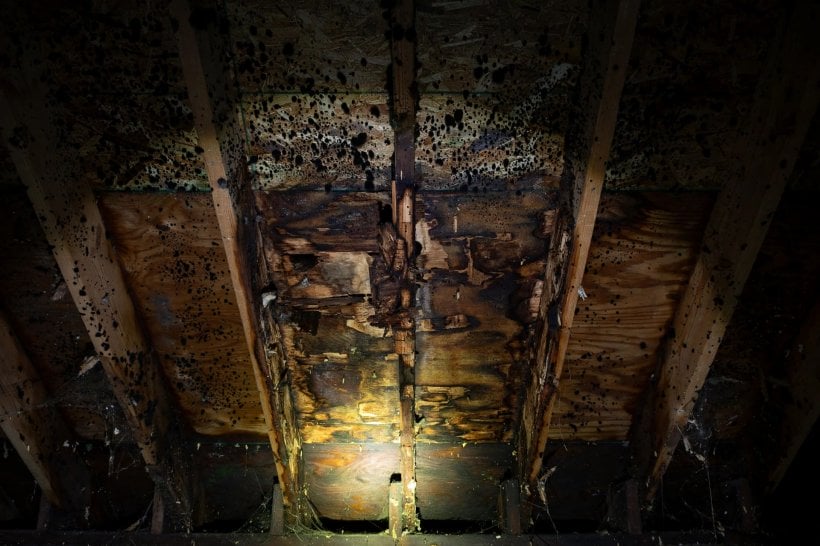
The tool compresses the failure into two words — overheating and rot — and both deserve unpacking. Overheating is the summer problem: a deck with no airflow beneath it absorbs the sun’s energy and holds it, baking the roofing from underneath. The original guide’s phrase is that dead-zone air ends up cooking your shingles. Heat that cannot escape also radiates downward, working against whatever cooling the small interior below is trying to achieve.
Rot is the slower, more expensive problem. A tiny house generates plenty of water vapour — cooking, showers, breathing in a very small volume — and vapour that migrates up into a still, cold rafter bay will condense on the deck and the rafter sides. In a vented bay, moving air dries that moisture away. In a dead zone it accumulates, feeding mold first and then the fungi that soften structural timber. Managing moisture is a whole-envelope habit: the roof works alongside the vapor barrier placement in the walls, and cold surfaces anywhere in the assembly behave the way the steel frame thermal bridge simulator demonstrates — they collect the water the rest of the build sheds. The cruel detail is timing: all of this happens hidden inside a finished ceiling, so the first symptom usually arrives years after the decision that caused it.
8. Rafter Depth and Roof Length: The Two Sizing Inputs
Beyond strategy, the visualizer asks for two dimensions, and both are worth understanding before you frame. The first is rafter depth: the tool offers a 2×6 at 5.5 inches, a 2×8 at 7.25 inches and a 2×10 at 9.25 inches. Depth is the size of the bay itself — it sets how much room the channel, the baffle and the insulation have to share, and how much air each bay can move. A shallower rafter squeezes everything: less space for insulation below the airway, and a narrower airway above it. A deeper rafter makes the vented strategy easier to execute well, because the air channel and the insulation stop competing for the same inches.

The second input is roof length in feet — the tool starts at 24 — which is the distance every bay’s air must travel and the scale across which a dead zone does its damage. Length is what turns the gable-vent failure from a corner case into a whole roof: on a long roof the unvented middle is most of the structure. Length and depth also belong in the roof’s wider budget, since deeper rafters and the layers they carry are part of the build-up weighed by our roofing weight impact calculator. Run the visualizer at your real dimensions rather than the defaults; a strategy that survives at one length and depth can fail at another.
9. Choosing Your Strategy: Vented Cold Roof or Sealed Hot Roof
With the physics clear, the honest choice is between the two strategies that work — and it is a choice about your build, not about which one is “best”. The vented cold roof, ridge plus soffit, suits straightforward gable roofs with a clean run from eave to peak in every bay. It is inspectable in principle, forgiving in operation, and costs little beyond baffles and vent hardware. Its demand is continuity: soffit intake, ridge exit, and an unobstructed channel in every single bay.
The sealed hot roof suits roofs where that continuity is hard to guarantee — complex shapes, interrupted bays, or builds where the deck needs the foam’s rigidity and air seal as part of the structure. Its demand is completeness: the foam layer becomes the whole strategy, so gaps and thin spots have no airflow to rescue them. Whichever you choose, the connections at the top of the wall still have to hold against the weather, which is the territory of our roof uplift and hurricane tie calculator. What neither strategy permits is the middle path of good intentions: a vent at each end and a hope that the middle looks after itself.
10. Using the Visualizer: Test Your Roof Before You Build
The tool below turns this guide into a one-minute experiment, and it is worth running before any material is ordered. Start with the strategy: select ridge plus soffit, gable vents only, or the unvented hot roof. Set the rafter depth you actually plan to frame — 2×6, 2×8 or 2×10 — and enter your roof length in feet. Press Run Simulation and read the roof deck status it returns for that exact combination.
Work through the comparisons deliberately. Run your planned build first, honestly. Then switch only the strategy to gable vents and watch the status flip to overheating and rot — that single change is the misconception the tool exists to kill, shown on your own dimensions rather than in the abstract. If you are weighing the sealed route, run the hot roof and sit with what “sealed” asks of your foam work. The visualizer will not design the roof for you, but it will stop the one error that cannot be fixed later: assuming air is moving in bays where it is not. Pair it with the moisture picture inside the living space — our window condensation and HRV calculator covers the indoor half of the same water story — and your tiny house roof venting decisions stop being guesses.
Final Considerations
A tiny house roof does not fail because its builder chose the wrong vent product. It fails because air was assumed to be somewhere it never went — across a dead zone, through a plugged bay, out of a vent that only served the end of the roof. Respect the rafter bay as the unit of ventilation, give every bay either a working chimney from soffit to ridge or a complete foam seal, and the deck above your ceiling will stay what the tool’s best verdict promises: cool and dry. Test the combination you actually intend to build in the visualizer below, and let its verdict argue with your assumptions while arguing is still free.
Roof Venting Visualizer
Roof Venting Visualizer
Ridge Vents vs. Gable Vents: Don’t rot your rafters.
1. Select Strategy
The Rafter Blockage Problem
In a standard house with an open attic, air flows horizontally from gable to gable. In a tiny house Cathedral Ceiling, the rafters act like solid dams. Air entering the gable vent hits the first rafter and stops. The other 20ft of roof gets zero airflow, cooking your shingles and breeding mold.
Hot air rises. By installing vents in the Soffits (bottom) and the Ridge (top), you create a natural chimney in every single rafter bay. As the roof heats up, it sucks cool air in the bottom and pushes hot air out the top, keeping the deck cool and dry.


3 Comments