

This tool is essential for steel-frame tiny house builders. It demonstrates the “Radiator Fin Effect”—how steel studs conduct heat 400x faster than wood, effectively bypassing your insulation. It calculates the “Effective R-Value” (which is usually shockingly lower than the rated R-value) and visually demonstrates how Continuous Insulation (CI) is the only true fix.
The insulation in a steel-framed tiny house can look perfect on paper and still disappoint on a cold night, because the frame itself carries heat straight through the wall.
That leak has a name — the steel frame thermal bridge — and it is why a wall’s R-value can fall far below the number on the insulation package. This guide explains how it works, why it leaves ghost lines on the drywall, and the fix that closes it.
1. At a Glance: Your Wall’s Real R-Value in Brief
Start with the whole wall, not with the insulation bag. In a steel-framed wall there are two very different paths heat can take: slowly through the insulation packed between the studs, or quickly along the metal itself. The table below summarises the three thermal break strategies the simulator compares, from leaving that metal path wide open to wrapping it shut.
| Thermal break strategy | What it is | What the simulator says |
|---|---|---|
| None | Steel studs touching the sheathing directly | A direct contact pathway — the bridge is fully active |
| Thermal break tape (1/8″) | A thin break fitted over the stud | Stops condensation, but adds minimal R-value |
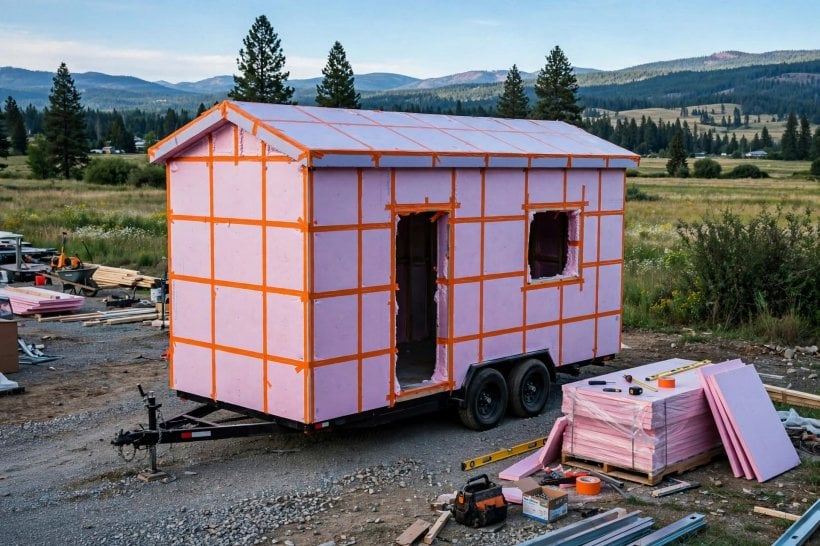
| 1″ continuous insulation (CI) | Rigid foam (R-5) wrapping the exterior | Keeps the steel studs warm and raises the effective R-value dramatically |
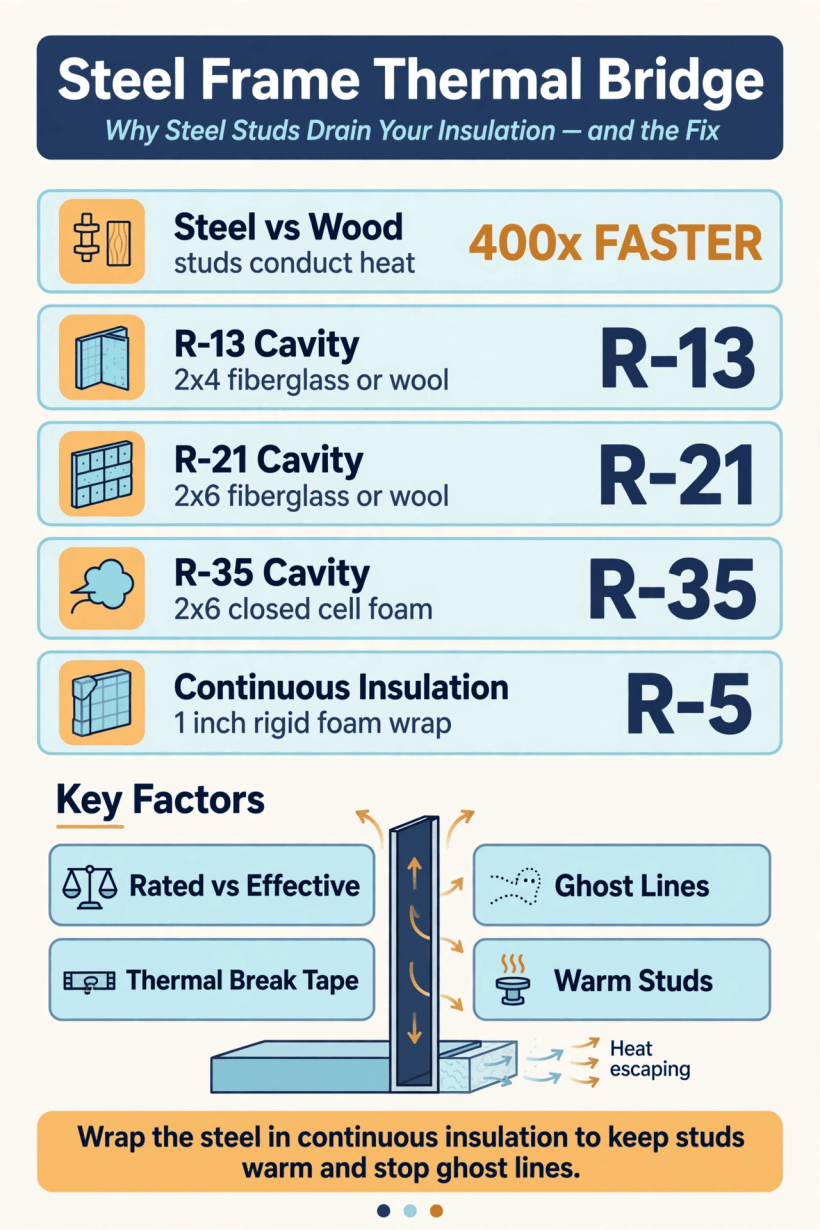
The wall at a glance: steel conducts heat 400x faster than wood, cavity ratings in the simulator run from R-13 to R-35, and a 1-inch continuous insulation wrap at R-5 is what keeps the studs warm.
Read the table as a ladder. Each step up interrupts the metal path a little more, and only the top step — a continuous layer outside the frame — covers every stud at once. The sections that follow explain why that coverage matters more than the size of the number on your insulation.
2. The Radiator Fin Effect: Why Steel Studs Drain a Wall
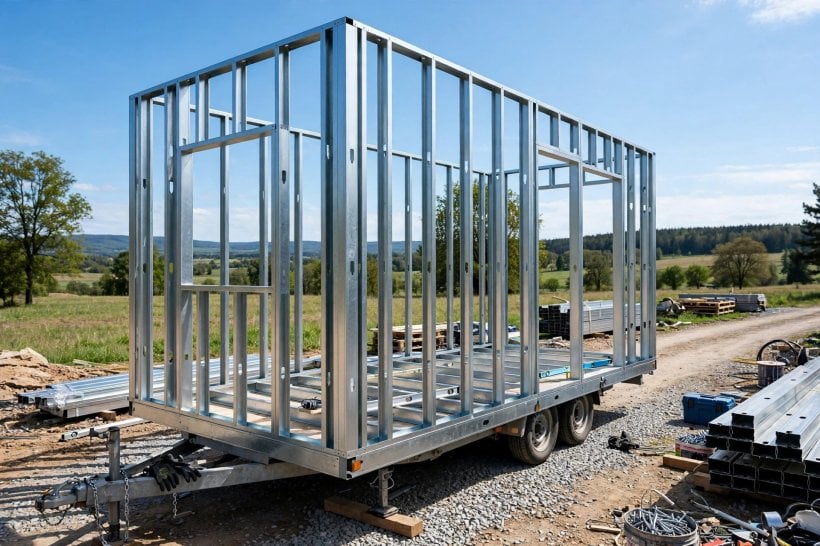
The simulator names the problem memorably: the radiator fin effect. A radiator is designed with thin metal fins precisely because metal moves heat so efficiently, spreading warmth from hot water into a room. A steel stud does the same job in reverse. It touches the cold exterior sheathing on one face and the warm interior lining on the other, and it conducts heat along that path continuously, all winter, in every wall of the house.
The scale of the effect is the surprise. As the tool states, steel studs conduct heat 400x faster than wood. A timber stud is a modest conductor sitting inside an insulated cavity; a steel stud is closer to a solid metal bridge punched through the insulation layer at regular intervals, each one bypassing the very material you paid to install. The insulation between the studs can be flawless and the wall will still leak heat through the frame.
This is why the problem is structural rather than a matter of workmanship. You cannot stuff, seal or tape your way out of it from inside the cavity, because the bypass is the frame itself. Any honest fix has to deal with the metal path directly — which is exactly what the strategies in the rest of this guide do, in ascending order of ambition.
3. Rated R-Value vs Effective R-Value: The Gap That Matters
Every bag of insulation carries a rated, or nominal, R-value — as the simulator puts it, the nominal R-value stated on the package. That number describes the insulation material itself, tested on its own. It does not describe your wall. The wall also contains studs, tracks, screws and junctions, and in a steel frame those metal parts drag the whole assembly’s performance down to its effective R-value: what the finished wall actually delivers.
The simulator exists to make that gap visible. You choose a cavity insulation and a thermal break strategy, press Analyze Heat Loss, and it sets the nominal figure beside the effective one. Its own description warns that the effective figure is usually shockingly lower than the rated R-value — and with no thermal break in place, it flags the wall as high loss, with the bridge active and major heat escaping through the studs.
Hold on to that distinction whenever you compare wall options. Two walls can share the same package rating and perform very differently once framed. The rated number tells you what you bought; the effective number tells you what you got. Heating bills, comfort and condensation risk all follow the second number, never the first.
4. Cavity Insulation Options: R-13 to R-35, and Why Bigger Is Not the Fix
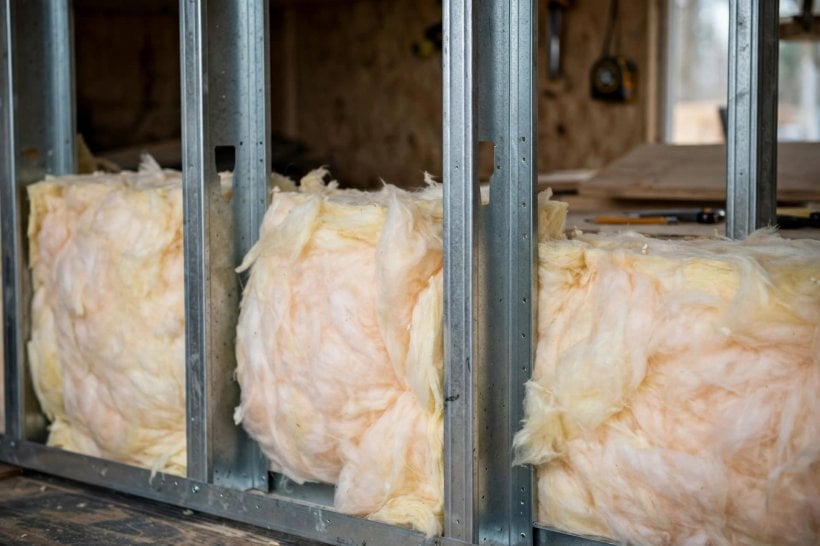
The simulator offers four cavity insulations, spanning the builds steel framers actually use: R-13 in a 2×4 wall with fiberglass or wool, R-21 in a 2×6 wall with fiberglass or wool, R-23 in a 2×4 wall with closed cell foam, and R-35 in a 2×6 wall with closed cell foam. Deeper studs and denser foam genuinely raise the cavity’s own resistance, and if the wall were nothing but cavity, the biggest number would simply win.
The wall is not nothing but cavity, though — and that is the trap. However good the material between the studs becomes, the studs themselves remain bare metal bridges at the same spacing, carrying heat at the same 400x advantage over wood. Improving the cavity improves only the part of the wall that was already the warm part. The cold stripes stay cold, and the effective R-value climbs far more slowly than the package numbers suggest.
So choose the cavity on its own merits — depth, budget, how the foam or batts suit your build — but do not ask it to solve bridging. That job belongs to the layers outside the frame. The wisest builds pair a sensible cavity choice with a deliberate break over the studs, rather than pouring the whole budget into a higher cavity rating that the frame then undermines.
5. The Ghosting Phenomenon: Why Stripes Appear on Your Walls
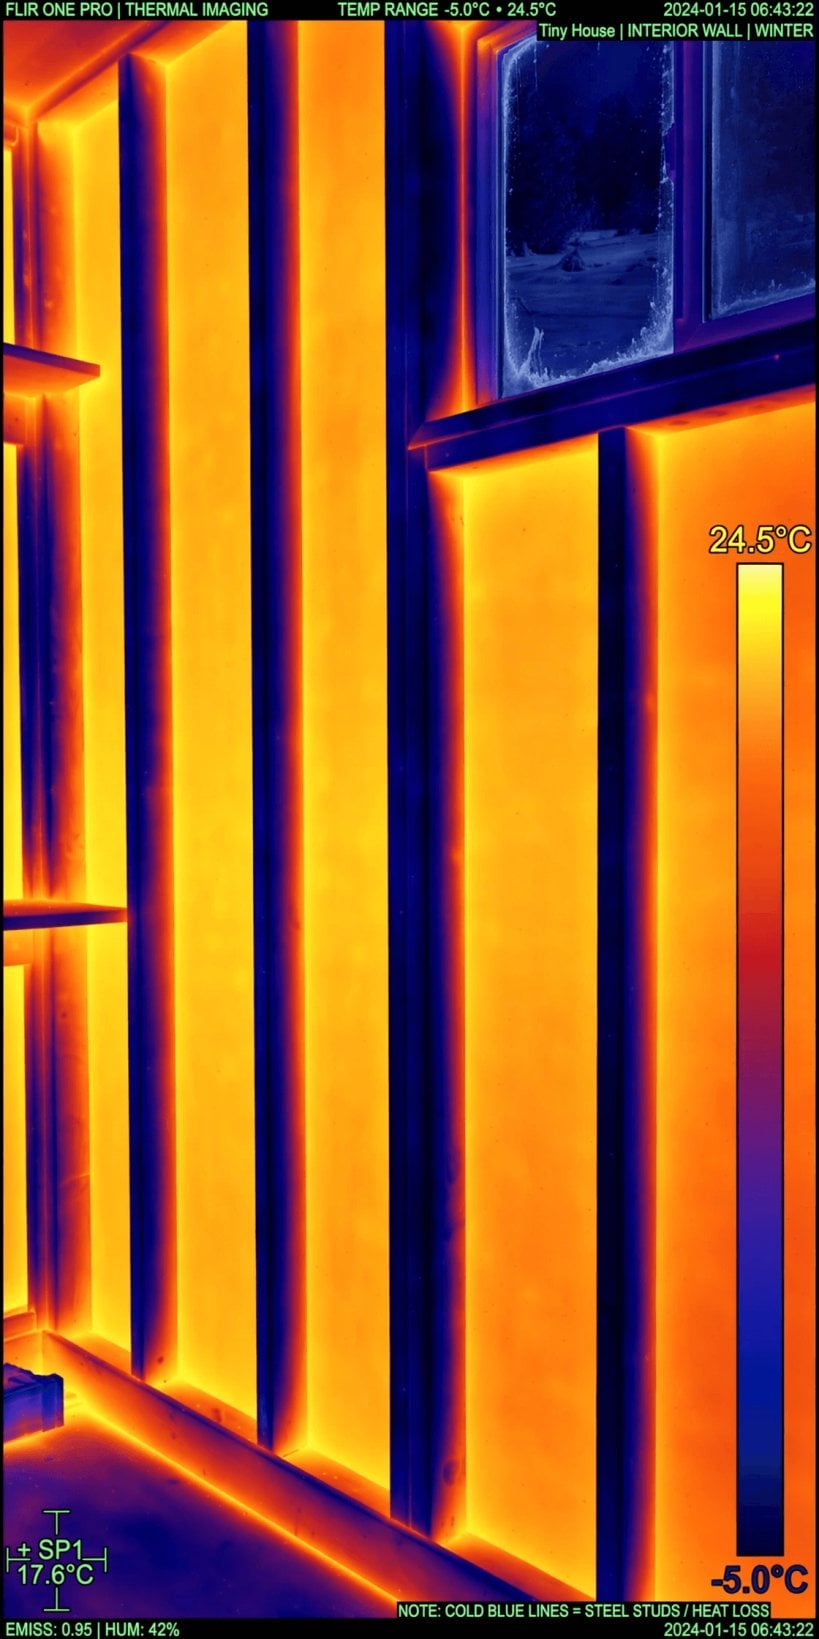
The most visible symptom of an unbroken steel wall is oddly domestic: faint dark stripes on the paintwork. The simulator calls it the ghosting phenomenon and answers its own question — why do I see lines? Without a thermal break, the steel stud stays cold while the rest of the wall is warm. That cold stripe runs vertically behind the drywall at every stud position.
Cold surfaces collect moisture. The stripe sits at or below the dew point of the room’s air, so a film of condensation forms on the drywall directly over each stud. Dust in the air sticks to that damp film far more readily than to the dry wall beside it, and over a heating season the pattern prints itself onto the surface: vertical black ghost lines every 16 or 24 inches — a quiet X-ray of the frame, drawn in dirt.
Ghosting matters beyond cosmetics. It is visible proof that parts of your wall run cold enough to condense room air, week after week, and it marks exactly where the heat is leaving. Cleaning the lines treats the symptom; warming the studs — the subject of the sections below — treats the cause, and the lines stop forming once the stripe is no longer cold.

6. Condensation: The Moisture Risk Hiding Behind the Lines
Condensation on a painted surface is the polite version of the problem. The same cold-stud physics applies inside the assembly, where moist air that finds its way into the wall meets cold metal and cold sheathing. Water that forms inside a wall dries slowly, and in a small, tightly built tiny house the moisture load from cooking, showers and breathing is concentrated into a very small volume of air and wall.
This is why layer order matters as much as layer thickness. The lining, membranes and insulation have to be arranged so vapour is controlled and any surface that can condense stays warm — the thinking set out in our vapor barrier placement guide for a tiny house applies directly here, because a steel frame adds cold metal to exactly the places a careless assembly leaves exposed.
The reassuring news is that the most effective condensation fix and the most effective heat fix are the same fix. Keep the studs warm and the dew point stops sitting on them: no cold stripe, no damp film, no ghost lines, and a wall assembly whose coldest surfaces are the ones designed to handle it. Warm structure is dry structure.
7. Thermal Break Tape: The Modest Middle Option
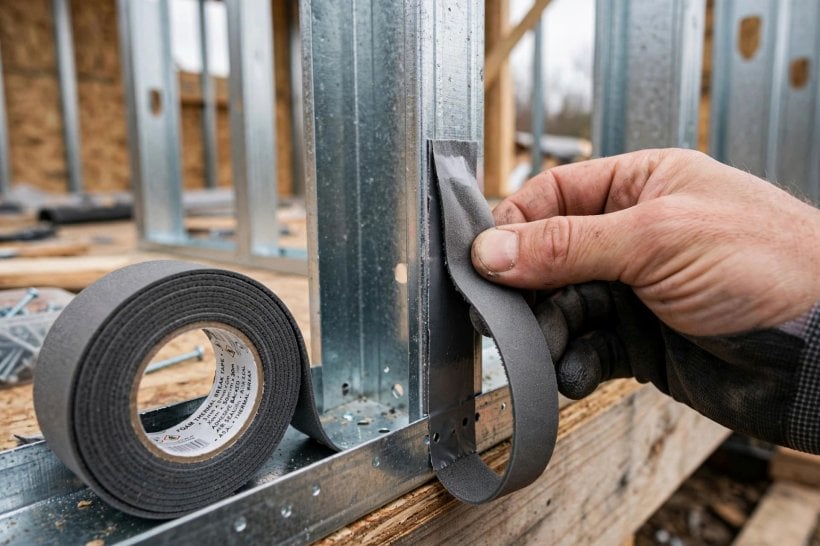
Between doing nothing and wrapping the whole house sits the smallest intervention in the simulator: thermal break tape, a thin 1/8″ break fitted over the stud where it would otherwise touch the sheathing. It interrupts the direct contact pathway at the exact point of contact, and the tool credits it with one clear win: it stops condensation. Lifting the stud’s surface temperature even slightly can be enough to keep the stripe above the dew point, so the ghosting mechanism never starts.
The tool is equally honest about the limit: tape adds minimal R-value. A 1/8″ layer is a temperature nudge, not an insulation layer, and the stud beneath it remains a good conductor carrying heat around the break and through the rest of its depth. Expect the effective R-value to improve only modestly, even though the visible symptoms improve a lot.
Tape therefore suits a specific brief: a build where condensation and ghosting are the feared problems, the climate is not extreme, and a full exterior wrap is genuinely impractical. It is cheap insurance for the walls’ appearance and surface health. Just do not mistake it for the whole answer on warmth — the simulator’s third strategy exists precisely because tape is only a partial one.
8. Continuous Insulation: The Sweater That Actually Works
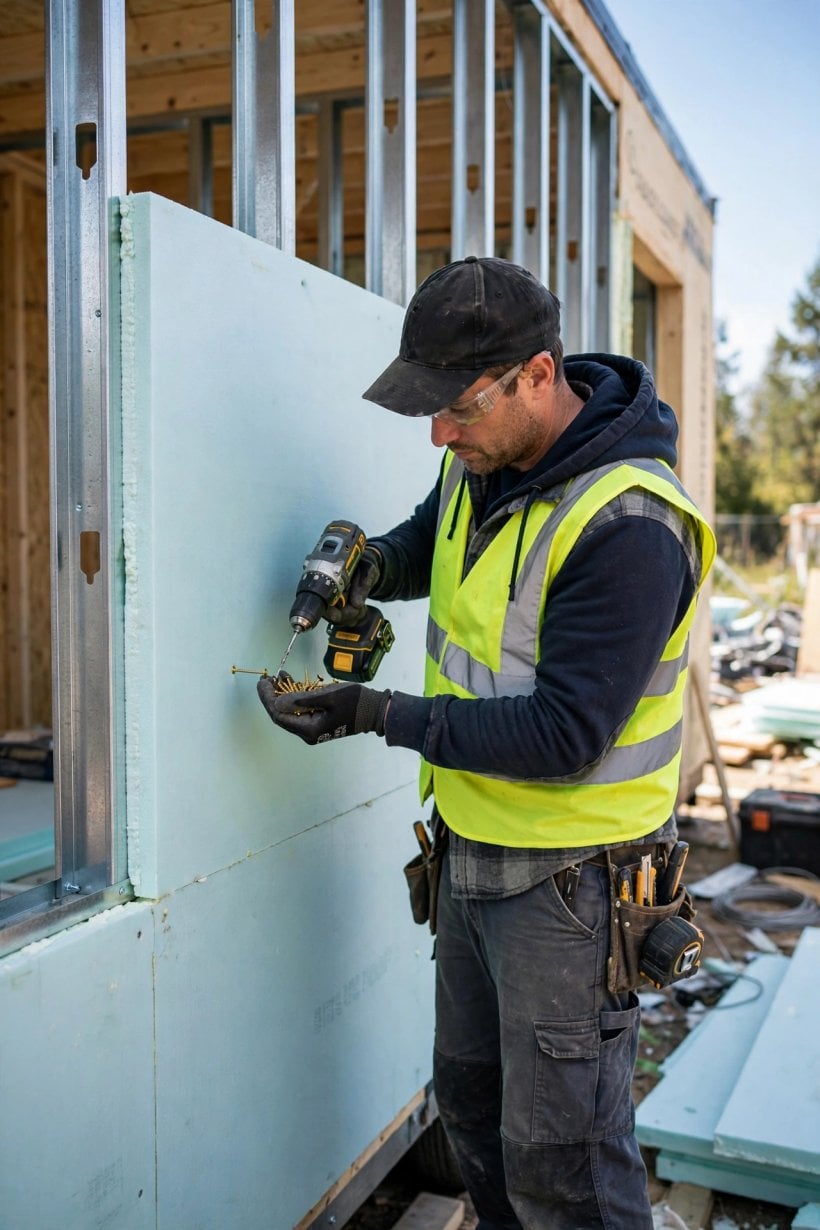
The simulator’s verdict is unambiguous: continuous insulation is the only true fix. Its analogy is the clearest in the whole tool — CI is like putting a sweater over your ribs instead of just stuffing cotton between them. Cavity insulation stuffs the gaps; a continuous layer covers the structure itself, studs included, so the metal never presents a cold face to either side of the wall.
In the tool, the CI strategy is 1″ of rigid foam at R-5 wrapping the exterior. That R-5 sounds modest beside cavity ratings of R-21 or R-35, but it is applied where it counts: across every stud, track and fastener, with no gaps at 16- or 24-inch intervals. By wrapping the exterior in rigid foam, you keep the steel studs warm — the tool’s own summary — preventing condensation and drastically increasing the effective R-value, out of all proportion to the foam’s headline number.
Practically, the wrap also has to coexist with the rest of the shell: it sits under the exterior cladding, and its thickness belongs in the same layer-by-layer accounting as the linings inside — our sheathing weight calculator is a useful companion for weighing those layers honestly. But as a thermal decision it is simple: if you frame in steel, plan the sweater from the start, not as a retrofit.
9. Steel or Wood? Placing the Bridge in the Bigger Decision
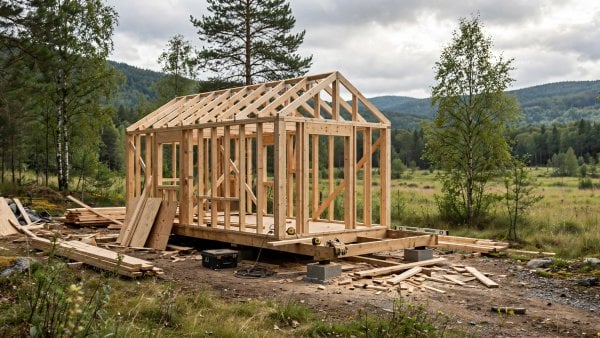
None of this is an argument against steel framing itself. Steel brings real strengths to a tiny house — straight, light, consistent members that do not rot or feed insects — and for many builders those strengths decide the frame before insulation is even discussed. Our steel vs wood framing weight comparison weighs the structural side of that choice, and the honest summary is that steel’s thermal weakness is a detailing problem, not a disqualification.
Wood framing has the gentler version of the same physics. Timber studs bridge too, just far less aggressively — the 400x conductivity gap is why a wood wall’s effective R-value sits much closer to its rated one. Panel systems sidestep the issue differently again, with continuous foam built into the wall itself, as the comparison in our SIPs vs stick framing analyzer shows.
Frame weight still matters alongside all of this, because every layer you add — including the CI wrap — rides on the same trailer. A quick pass through calculating GVWR for tiny homes before you finalise the wall build-up keeps the thermal plan and the weight plan in the same conversation, where they belong.

10. Running the Simulator on Your Own Wall
Using the tool takes a minute, and it is best done with your actual wall in mind. In the Wall Assembly panel, choose the cavity insulation that matches your build — R-13 or R-21 fiberglass or wool, R-23 or R-35 closed cell foam — then set the thermal break strategy to None and press Analyze Heat Loss. Note the effective figure beside the nominal one, and the high-loss warning: that is your wall exactly as framed, with the bridge fully active.
Then change one thing. Switch the strategy to thermal break tape and run it again; watch the condensation verdict improve while the effective number barely moves. Finally select the 1″ continuous insulation and run it once more, and compare all three results. That three-step sequence, on your own specification, teaches the whole topic faster than any table: the cavity sets the ceiling, but the break decides how close the real wall gets to it.
Carry the result into the wider design. A wall that holds its heat changes what your heating system must do — the thinking in our guide to heating a tiny home in winter assumes walls that perform as rated — and orientation gains modelled in a tiny house passive solar simulator are only bankable if the envelope keeps the heat the sun delivers. Even soft layers help at the margins, as a thermal curtain calculator shows — but they help a sound wall, not a bridged one.
Final Considerations
A steel frame is a good servant and a poor insulator. Its studs will move heat 400x faster than wood for as long as the house stands, quietly taxing every rated R-value you install between them and printing the evidence as ghost lines on your own walls. None of that is a reason to avoid steel. It is a reason to detail it properly: know the difference between the number on the package and the number your wall delivers, use tape where condensation is the only battle, and wrap the frame in continuous insulation where warmth is the goal. Detail the bridge away, and the steel wall keeps every advantage that made you choose it — straight, light and strong — without the cold stripes.
Steel Frame Thermal Bridge Simulator
Steel Frame Thermal Bridge Simulator
See how steel studs kill your R-Value (and how to fix it).
1. Wall Assembly
Nominal R-Value stated on the package.
Thermal Bridge Active: Major Heat Loss
The “Ghosting” Phenomenon
Without a thermal break, the steel stud stays cold while the rest of the wall is warm. This cold stripe causes condensation (dew point) on the interior drywall. Dust sticks to the wet drywall, creating vertical black “ghost lines” every 16 or 24 inches.
Continuous Insulation (CI) is like putting a sweater over your ribs instead of just stuffing cotton between them. By wrapping the exterior in rigid foam, you keep the steel studs warm, preventing condensation and drastically increasing the effective R-value.



3 Comments