

This tool pits the Mini-Split (the gold standard for tiny homes) against the humble Window Unit. It calculates the long-term electricity savings of high-SEER inverter technology vs. the low upfront cost of a window shaker.
It features an “Aesthetics & Noise Visualizer” that demonstrates not just the energy difference, but the quality-of-life difference—showing how a window unit blocks your view and generates noise right next to your head, while a mini-split keeps the noise outside and the view clear.
A tiny house heats up fast. A small volume of air, a big share of window and wall exposed to the sun, and one hot afternoon are all it takes to turn a cozy home into an oven. The cooling system you choose decides not just the temperature, but your power bill, your sleep, and even your view.
1. At a Glance: Mini-Split vs. Window Unit in Brief
Two systems dominate tiny house cooling, and they could hardly be more different in character. The window unit is the humble workhorse: cheap to buy, simple to install, and famously thirsty and loud. The mini-split is the gold standard the original guide below sets it against: an inverter-driven system that costs far more upfront and then quietly sips electricity for years. A tiny house cooling analyzer exists because the right answer depends on your floor area, your hours of use, your cooling season, and your electricity rate — not on the price tag alone. The table below sums up the contest; the sections that follow work through every attribute in turn.
| Attribute | Window Unit | Mini-Split (Inverter) |
|---|---|---|
| Efficiency | SEER 11 | SEER 22+ |
| Upfront cost in the guide | Cheap — $200 | Expensive — $1,200 |
| Interior noise | 60 dB — loud, like conversation right beside you | 25 dB — a whisper, like a library |
| How it controls temperature | Bang-bang: 100% on or 100% off | Inverter throttle: modulates, even down to 20% power |
| Effect on your windows | Blocks light and view; an open hole in the house | Only a 3-inch hole for the lines; windows stay free |
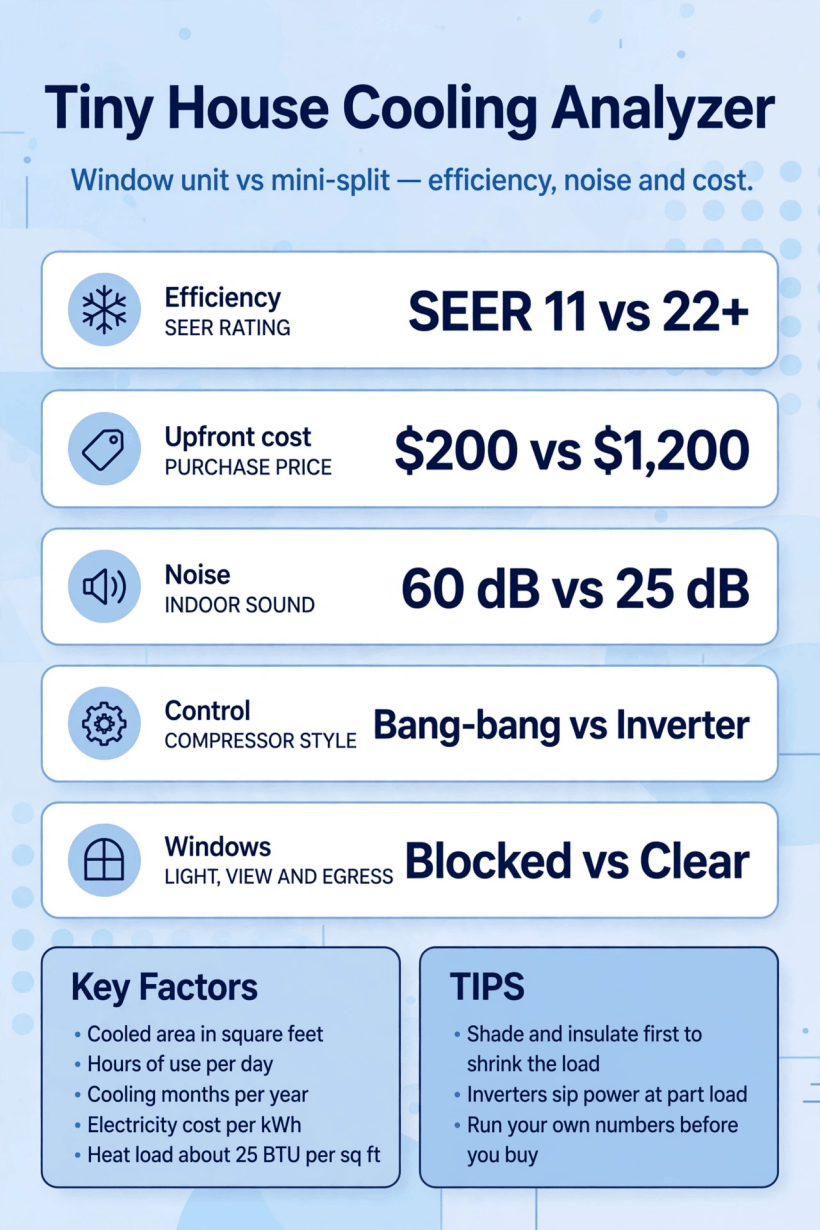
The whole contest on one card: the window unit wins on purchase price, and the mini-split wins on efficiency, noise, control, and the windows it leaves alone.
2. How Each System Works: One Box in the Window vs. a Split System
A window unit packs the entire refrigeration cycle — compressor, coils, and fan — into a single box that sits in a window opening. Everything it does happens in that one casing, including the noise: the compressor that does the heavy work is quite literally inside the room with you, separated from your ear by a thin sheet of metal and plastic. It pulls heat from the indoor air and dumps it outside through the back of the same box.
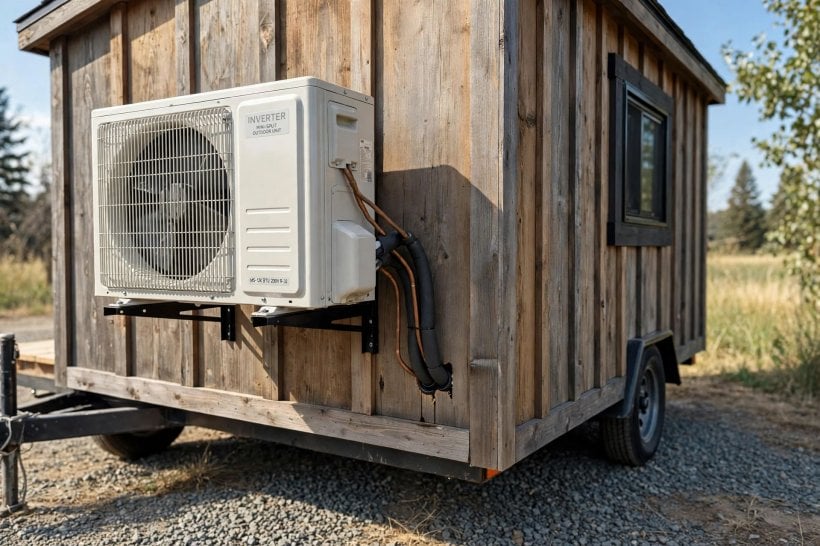
A mini-split divides the same job between two places. The compressor and condenser live outside the house in their own unit, while a slim indoor head mounted high on the wall handles the cooled air. The two are joined only by refrigerant lines that pass through a hole about 3 inches across. That split is the source of nearly every advantage the system has: the loud machinery is outside, the window stays a window, and the indoor unit does little more than move quiet air across a cold coil. Keep that physical picture in mind — where the parts sit explains the efficiency, noise, and aesthetics results the analyzer below puts numbers on.
3. Efficiency and SEER: The Inverter Advantage
SEER is the efficiency score the whole comparison turns on: the higher the number, the more cooling you get for each unit of electricity. The guide below rates the window unit at SEER 11 and the mini-split at SEER 22+, which means the mini-split delivers roughly double the cooling per watt before anything else is considered. On its own that gap would matter. Combined with how the two machines control themselves, it becomes decisive.

The original explainer names the window unit’s control style perfectly: bang-bang. Its compressor is either running at 100% or switched off entirely, so the room temperature swings above and below the setting, and every restart draws a fresh surge of power. A mini-split’s inverter works like a gas pedal instead. It throttles the compressor up and down to match the load — cruising at something like 20% power once the room is cool — which holds the temperature steady and uses, in the guide’s words, a fraction of the electricity. In a tiny house, where the cooling load is small to begin with, a machine that can turn itself down has an outsized advantage over one that can only blast or stop.
4. Heat Load and Sizing: How Much Cooling a Tiny House Needs
Before any system can be judged, the job itself has to be sized. Cooling load is the amount of heat the system must remove, and it grows with the space being cooled: more square feet of sunlit wall, roof, and glass means more heat arriving every hour. The analyzer below builds its estimate the simple, transparent way — it works on roughly 25 BTU of cooling load per square foot of cooled area, a figure its own notes tie to the reality that tiny houses usually have modest shading and insulation working against the sun.

That per-square-foot estimate is why the tool’s first input is your cooled area, and why its example value is 250 square feet — a typical tiny house footprint. Sizing matters in both directions. An undersized system runs flat out and still loses ground on the hottest afternoons. An oversized bang-bang system is its own problem: it blasts, switches off, and blasts again, swinging the temperature instead of settling it. The inverter’s turndown ability forgives some oversizing, but the honest starting point is still the same: measure the area you actually cool, and let the load follow from it. Heat also leaves and enters through the roof, which is why roof venting belongs in the same planning pass — our tiny house roof venting visualizer shows how the roof assembly handles the heat that collects at the top of a small house.
5. Running Costs: Price, Power, and the Break-Even
The purchase prices in the guide frame the whole economic argument: about $200 for the window unit against about $1,200 for the mini-split. That is a sixfold gap at the checkout, and it is real money. But a cooling system is bought once and paid for every summer, and the analyzer’s job is to price the second part of that sentence. From the system’s SEER it derives the wattage your heat load demands, then multiplies by your hours per day, your months per year, and your electricity cost per kilowatt-hour to reach an estimated operating cost per year.

The defaults the tool starts from sketch a typical cooling season: 8 hours a day, 4 months a year, electricity at $0.16 per kWh. Change any of them and the verdict can move — a long, hot season with heavy daily use widens the efficient system’s lead quickly, while a short mild season narrows it. The tool even colors the result: a window unit whose yearly cost climbs past $200 gets flagged in red. And its verdict for the mini-split carries the balancing figure: break-even on cost usually takes 3–5 years, after which the lower running cost is pure saving. The window unit is cheap to buy and expensive to own; the mini-split is the reverse, and your own usage pattern decides which side of that trade you live on.
6. The Envelope First: Insulation, Shading, and Thermal Bridges
The cheapest cooling is the heat that never gets in. The analyzer’s 25 BTU per square foot is an estimate for a typical tiny house, and its own note names the two levers that move a real house off that line: shading and insulation. A house parked under trees or fitted with shade over its glass asks every system — efficient or not — to do less work, for fewer hours, all season long. Before comparing machines, compare the load they will face.

The envelope work is unglamorous and permanent. Wall and roof insulation slows the sun’s heat on its way in, and the fill you choose matters — our guide to insulating a tiny house with spray foam, rockwool, or sheep’s wool compares the main options inside real tiny house walls. The floor is part of the same envelope, and the floor insulation calculator helps size what goes underfoot. Steel framing adds a subtle leak of its own, conducting heat straight through the wall assembly — the effect the steel frame thermal bridge simulator makes visible. Every BTU the envelope keeps out is a BTU no compressor has to remove, at any SEER.
7. Ventilation and Fresh Air Alongside Cooling
Cooling and ventilation solve different problems, and a comfortable tiny house needs both thought through. An air conditioner recirculates and chills the air already inside; it does not bring in fresh air or manage the moisture that cooking, showers, and breathing add to a very small volume. On mild days and cool nights, simply moving air through the house — openings on opposite sides, a breeze path through the living space — can carry the comfort load with no compressor at all, stretching the season at both ends before the cooling system has to work.

For the hours when the house is closed up and the cooling is running, controlled fresh air becomes a system of its own. A heat recovery ventilator trades stale indoor air for fresh outdoor air while keeping much of the temperature you paid to create — the balance our tiny house HRV efficiency calculator works through in detail. Moisture is the other half of the fresh-air story, since cooled surfaces and humid air are where condensation forms; the window condensation and HRV calculator connects those dots. Plan the air changes with the cooling, and neither system undermines the other.
8. Noise, Sleep, and Everyday Comfort
The analyzer’s second output is the one owners feel every single night: interior noise. It rates the window unit at 60 dB and describes that honestly — loud, at the level of conversation. The mini-split is rated at 25 dB, a whisper, at the level of a library. Numbers aside, picture where each sound is made. The window unit’s compressor sits in the window of the room you are trying to sleep in, generating its noise, in the original guide’s phrase, right next to your head. The mini-split’s compressor is outside the house entirely, and its Aesthetics & Noise Visualizer shows the result: a sleeper, undisturbed, on the mini-split side of the comparison.
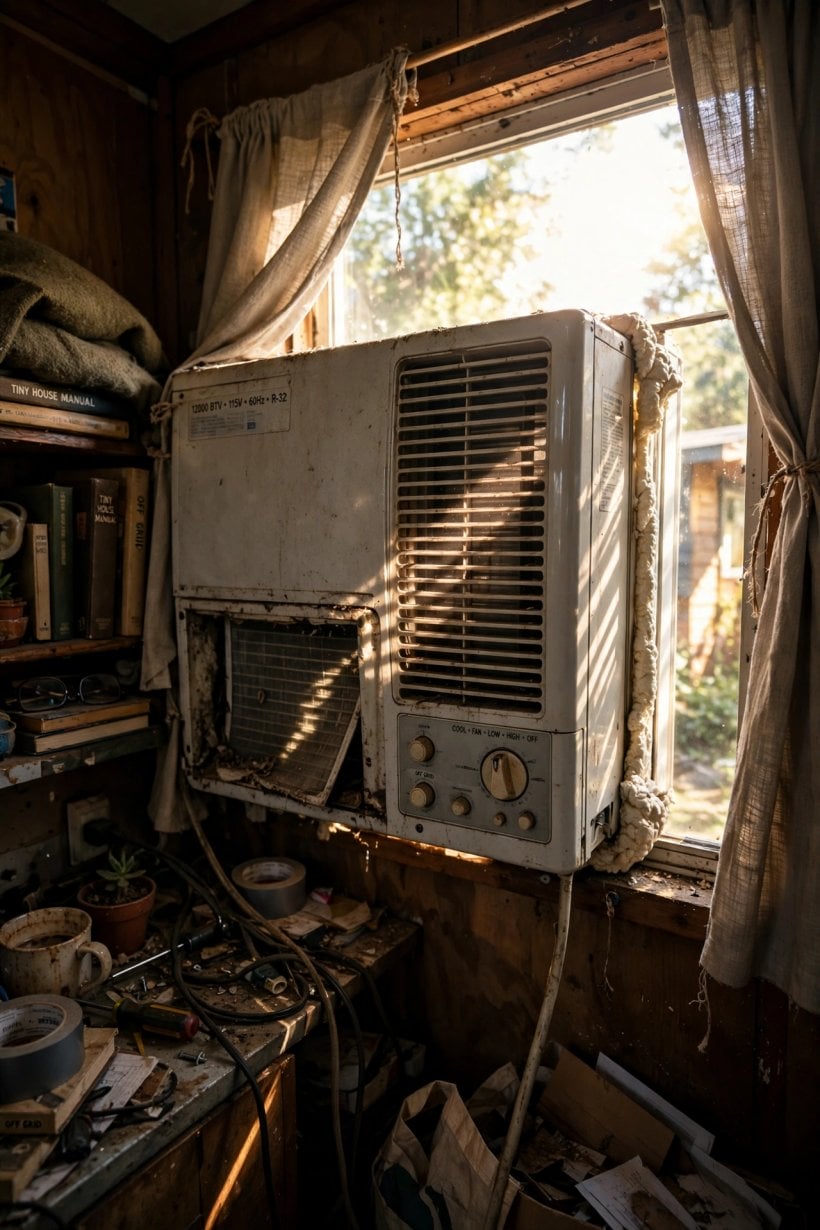
This is why the tool treats noise as a headline result rather than a footnote, and why its verdicts are written the way they are: “High Noise, Low Efficiency” for the window unit, “Ultimate Comfort” for the mini-split. In a one-room house there is no escaping to a quieter room — the bedroom, the desk, and the sofa all share the same few feet of air. A cooling system that disturbs sleep and conversation taxes you every hour it runs, in a currency no electricity bill records. However the cost math lands, weigh the decibels as seriously as the dollars.
9. Windows, Light, Security, and Emergency Egress
A tiny house has few windows, and each one is doing several jobs at once: daylight, view, ventilation, and escape. A window unit takes one of them out of service entirely. The original guide is blunt about the trade — a window unit sacrifices natural light and security, because the window it fills is partly open to the world and no longer locks like a window, and it stops being an exit. In a very small house, that one window might be the bedroom’s emergency egress, which turns an appliance choice into a safety decision.

The mini-split asks almost nothing of your windows. Its connecting lines pass through a single hole about 3 inches across, and every window keeps its full job description: light in, view out, air when you want it, and a way out if you ever need one. The tool’s visualizer draws exactly this contrast — the blocked window and the frustrated room on one side, the clear view and the sleeping figure on the other. When you count what each system costs, count the window too: in a tiny house, losing one is losing a meaningful share of the whole home’s light and outlook.
10. Common Cooling Mistakes — and How to Use the Analyzer Below
The mistakes repeat reliably. Buying on purchase price alone, without ever pricing a single summer of running the thing. Ignoring your own usage pattern — the hours per day and months per year are not fine print, they are half the answer. Dismissing noise on paper and then sleeping next to a compressor all July. Filling the only egress window with an appliance. And shopping for a bigger machine before shrinking the load, when shade and insulation would have let a smaller, cheaper system — of either kind — do the whole job.
So run your own numbers through the tiny house cooling analyzer below before you buy anything. Enter the area you will actually cool, your realistic hours per day and months per year, and your electricity rate. Select the window unit and press Run Comparison: the tool returns your estimated operating cost per year and the interior noise figure, with the visualizer showing what life with that system looks like. Then select the mini-split and run it again. Same house, same season, same rate — and the two verdicts side by side are the honest version of this entire article, priced in your own circumstances rather than anyone else’s.
Final Considerations
There is no universal winner here — there is a winner for your area, your season, your electricity rate, and your tolerance for noise. The window unit’s case is simple: very little money now, and a short or mild cooling season to forgive its thirst. The mini-split’s case is the long game: double the SEER, a fraction of the running cost after a 3–5 year break-even, near-silence, and windows that stay windows. Shrink the heat load first, then let the tool below settle the machine question with your own numbers. And when the season turns and the questions become about heating instead, the same efficiency-and-noise thinking applies — the RV furnace efficiency and noise simulator runs that comparison for the cold half of the year.
Mini-Split vs. Window AC
Mini-Split vs. Window AC
Efficiency (SEER), Noise, and Aesthetics Analyzer.
1. Cooling Needs
2. Select System
SEER & Inverters Explained
Window Units are “Bang-Bang” controls: 100% On or 100% Off. This causes temperature swings and high power surges.
Mini-Splits use Inverters to throttle the motor like a gas pedal (e.g., running at 20% power). This maintains perfectly stable temps while using a fraction of the electricity.
A window unit sacrifices natural light and security (it’s an open hole in your house). A mini-split requires only a 3-inch hole in the wall for lines, leaving your windows free for views and emergency egress.


1 Comment