

This tool teaches the golden rule of winter plumbing: “Heat Tape creates the heat, Insulation keeps it.” Many tiny house owners fail because they apply heat tape but skip the foam insulation, causing the wind to strip the heat away faster than the tape can generate it.
It features a “Spiral vs. Straight” Visualizer that calculates exactly how much extra tape you need to spiral-wrap your pipes for extreme cold, and a Power Monitor to warn you if your winterizing plan will trip your breaker.
The coldest night of the year is when a tiny house plumbing system tells the truth. Water sits still in exposed pipes under the trailer, the temperature keeps falling, and by morning a burst line can flood the one room you live in.
The good news: freeze protection is a system you can size before winter, not a hope you switch on. It starts with the golden rule below — heat tape creates the heat, insulation keeps it.
1. At a Glance: Heat Tape, Insulation and the Freeze Line
Every input in the heat tape pipe freeze simulator below is one half of a single bargain. The tape is the heat source: a self-regulating cable that warms the pipe. The insulation is the retainer: the layer that stops the wind stripping that heat away faster than the cable can generate it. The original guide is blunt about why systems fail — owners apply heat tape but skip the foam insulation, and the cold wins. The table gathers the decisions the simulator puts in front of you.
| Decision | Options in the simulator | What it decides |
|---|---|---|
| Pipe size | 1/2″ PEX, 3/4″ PEX or 3″ Sewer (Drain) | How much pipe surface the tape has to protect |
| Wrap style | Straight Run (Standard) or Spiral Wrap (Extreme Cold) | How much heat lands on each foot of pipe |
| Insulation layer | None (Bare Pipe), 1/2″ Foam Tube (Basic) or 1″ Fiberglass/Rubber (Heavy) | Whether the heat stays on the pipe or blows away |
| Lowest expected temp | A slider from -40°F to 32°F, preset at 10°F | The coldest night the system has to survive |
| The verdict | Total Tape Needed, Peak Power, and a safe or PIPE BURST result | Whether the plan works before you buy anything |
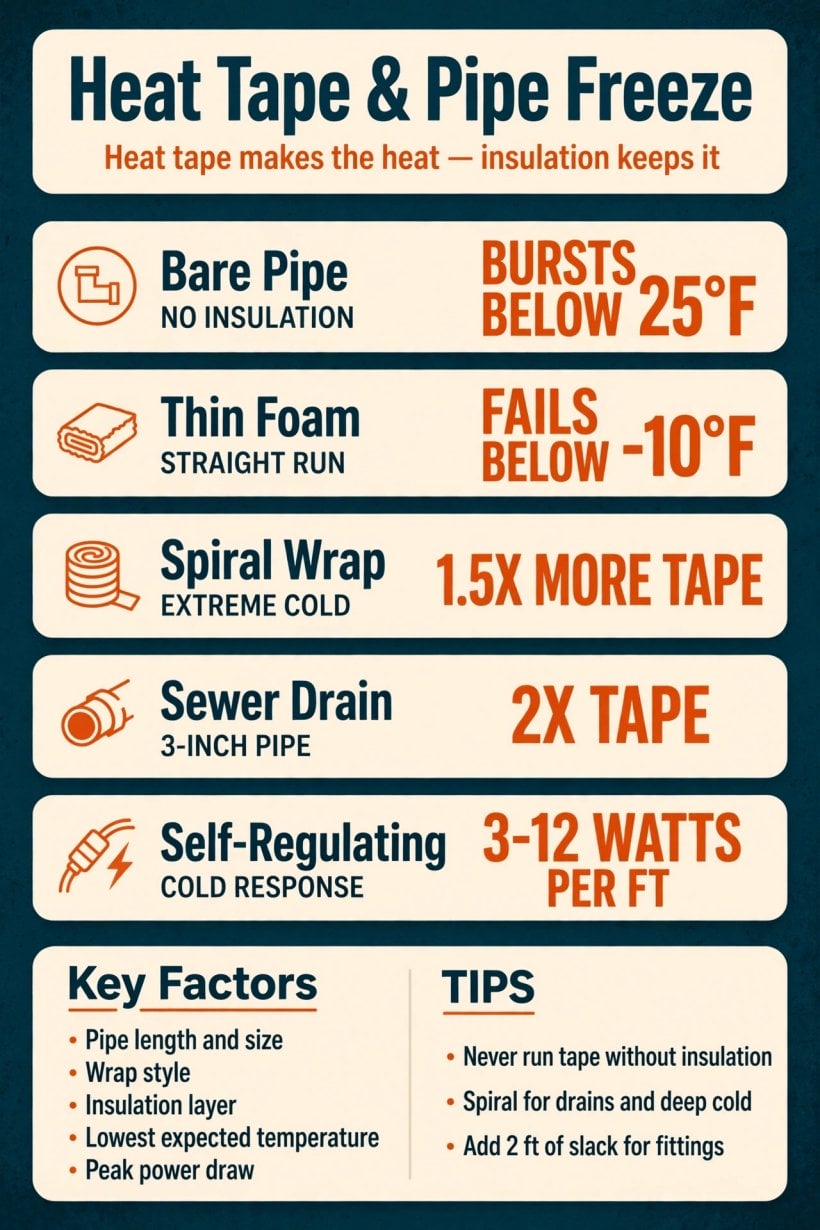
The freeze line at a glance: a bare pipe bursts below 25°F, thin foam with a straight run fails below -10°F, and a spiral wrap asks for half again as much tape — double on a 3-inch drain.
Read the table as a chain rather than a shopping list. Pipe size sets the surface, wrap style sets the heat per foot, insulation sets how much of that heat survives the wind, and the temperature sets the size of the enemy. Change any one of them and the verdict can flip — which is exactly why the simulator exists.
2. Why Tiny House Pipes Freeze: Exposed Runs and Moving Air
A site-built house hides its plumbing inside heated walls and deep foundations. A tiny house on a trailer runs its water lines and drains underneath the floor, in the open air beneath the chassis, where winter reaches them from every side. The pipes are thin, the water in them is often standing still overnight, and there is no warm building mass around them to slow the temperature down. Everything about the layout that makes a tiny house towable makes its plumbing the first thing to freeze.
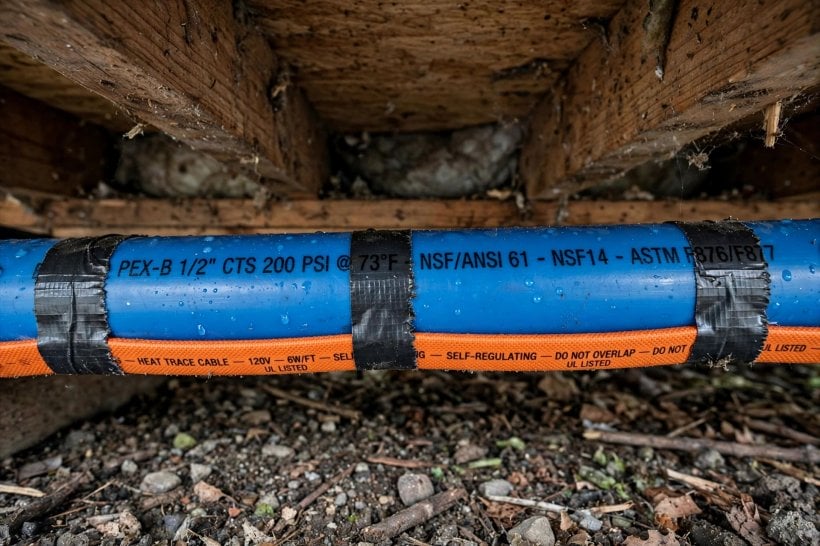
Moving air is the accelerant. The original guide names the failure mechanism plainly: without insulation, the wind strips the heat away faster than the tape can generate it. That applies to an unprotected pipe even before any tape is involved — still air is a mild insulator, but wind sweeping under a trailer is a conveyor belt carrying warmth off the pipe wall. This is also why freeze protection belongs in the same planning pass as the plumbing itself: the runs you lay out with a plumbing system weight calculator are the same runs you will later have to keep above freezing, and their length is the first number the simulator asks for. The wider winter picture — how the whole house is heated and held through the cold months — is covered in our guide to heating a tiny home in winter.
3. Self-Regulating Cable: How the Tape Answers the Cold
Modern heat tape is not a dumb heating element, and the guide’s Self-Regulating Cable 101 section explains why. Inside the cable is a conductive core that reacts to temperature. As it gets colder, the core contracts, creating more electrical paths and generating more heat. As it warms up, it expands and reduces power. The cable therefore pushes hardest exactly where and when the pipe is coldest, and eases off on milder stretches — one cable behaving differently along its own length.
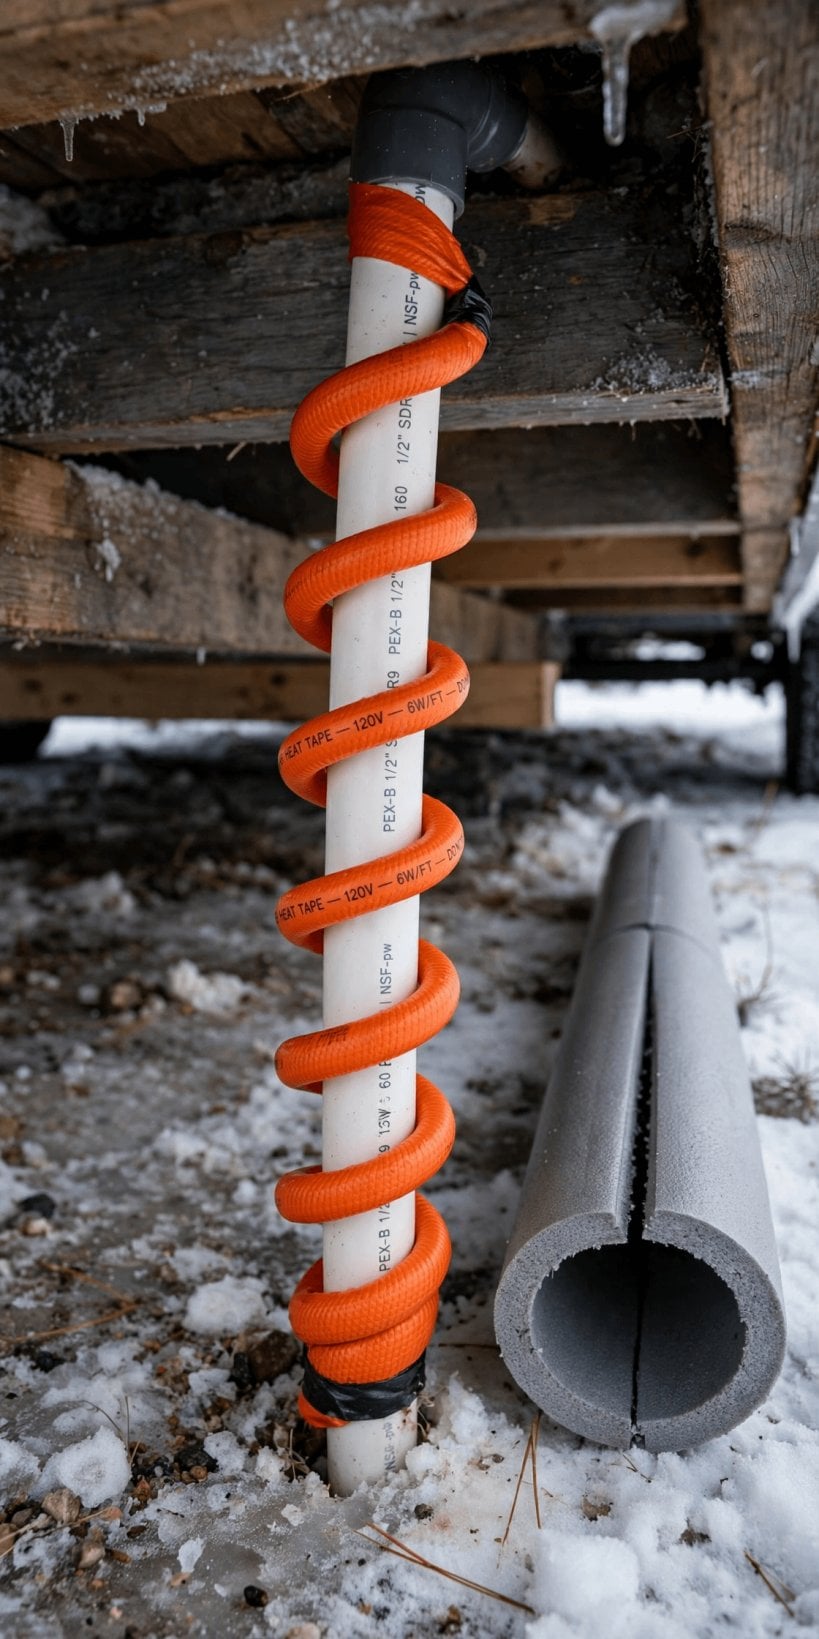
Two consequences follow. First, the power draw is a moving target: the simulator models the cable drawing from the low end of its range in mild cold up toward the top of it — roughly 3 to 12 watts per foot — as the temperature falls, which is why its Peak Power figure matters for the electrical planning in Section 5. Second, and easier to miss: the guide warns that self-regulating cable never turns completely off unless you unplug it. All winter, whenever it is plugged in, it is sipping power and standing guard. That is the right trade for freeze protection, but it belongs in your winter energy budget, not as a surprise in it.
4. Straight vs Spiral: Choosing the Wrap Style
The simulator’s second decision is how the tape meets the pipe, and its visualizer exists because the difference is not cosmetic. A straight run is taped along the bottom of the pipe, at the 6 o’clock position, and the guide rates it good for moderate winters: one line of heat, applied where cold air settles least and the pipe is easiest to cover afterwards. A spiral wrap winds the cable around the pipe like a candy cane, putting more heat on every foot of pipe — the guide’s prescription for extreme climates and, in its word, mandatory for 3″ sewer drains.
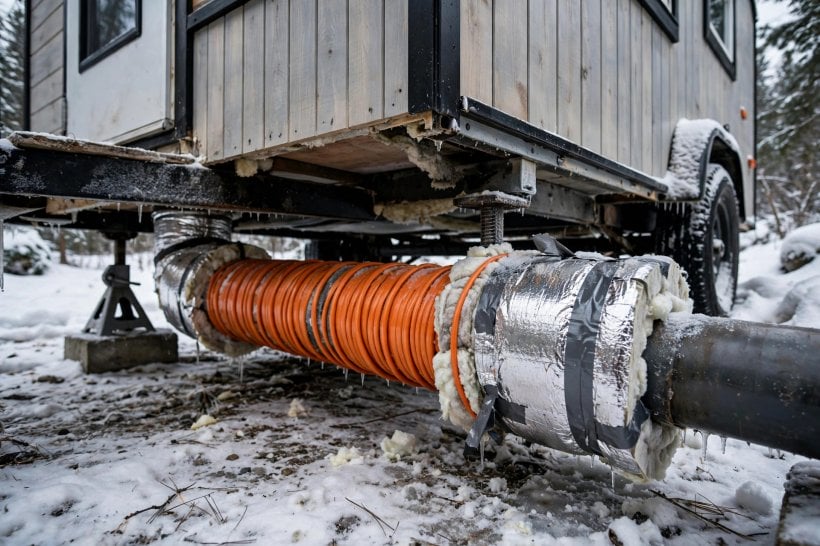
More heat per foot costs more tape per foot, and the simulator does that arithmetic honestly. On the supply sizes — 1/2″ and 3/4″ PEX — a spiral wrap needs half again as much tape as the pipe is long; on the 3″ drain it needs double. Either way, the simulator adds 2 feet of slack to the total, because real pipes have valves, elbows and ends that a bare length measurement forgets. So the wrap decision is really two decisions wearing one coat: how cold it gets where you park, and how much cable — and power — the honest answer requires. Run both styles through the tool at your lowest expected temperature and let the verdict, not optimism, choose.
5. Peak Power: What the Tape Draws on the Coldest Night
Heat tape is an electrical load, and in a tiny house every load is a negotiation with a small supply. The simulator answers with its Peak Power readout: the total watts your chosen setup draws when the temperature is at its lowest and the self-regulating cable is working at its hardest. It also carries a Power Monitor whose job the guide states directly — to warn you if your winterizing plan will trip your breaker. A long spiral-wrapped run on the coldest night of the year is precisely the moment a marginal circuit will introduce itself.

The off-grid version of the same problem is battery. Below 0°F the simulator’s own status line warns that the system is working hard and battery drain is high — the cable is at full output for hours, all night, every night of a cold snap. That draw belongs in the same energy conversation as your heating choices generally: the power questions behind a radiant floor heating power analyzer and the amp-draw comparisons in the RV furnace efficiency and noise simulator are the winter budget your heat tape is spending from. Size the tape with the verdict you need, then check the peak watts against the circuit and the bank that have to feed it.
6. Insulation: The Half of the Golden Rule Everyone Skips
If this article has a villain, it is the bare pipe wearing a tape like a medal. The simulator’s insulation menu offers three honest positions: None (Bare Pipe), 1/2″ Foam Tube (Basic), and 1″ Fiberglass/Rubber (Heavy) — and beside the menu it prints the sentence the whole tool is built around: heat tape needs insulation to work effectively. The insulation is not packaging for the tape. It is the wall that keeps the generated heat on the pipe instead of donating it to the wind.

The simulator’s freeze logic shows what skipping it costs. A bare pipe fails — the full PIPE BURST verdict — once the temperature drops below 25°F, however willing the tape is, because the heat loss exceeds generation. Even the basic foam tube has a limit: paired with a straight run, it fails below -10°F, which is the tool quietly telling you that deep cold demands the spiral and the heavier layer together. Treat insulation as a rated part of the system, the way you would any other layer of the envelope — the material choices in our guide to insulating a tiny house with spray foam, rockwool or sheep’s wool and the layer-by-layer thinking in the floor insulation calculator apply under the trailer just as they do inside the walls.
7. Skirting and Shelter: Stopping the Wind That Strips the Heat
Insulation slows the wind’s theft; skirting prevents a good deal of it. Remember the failure mechanism from Section 2: moving air under the trailer carries heat off the pipes faster than any reasonable cable replaces it. A skirted trailer base turns that open wind tunnel into a still, sheltered pocket, and still air is the one free insulation every winter setup can have. The pipes, tape and foam all perform closer to their ratings when the gale is no longer invited underneath the house.
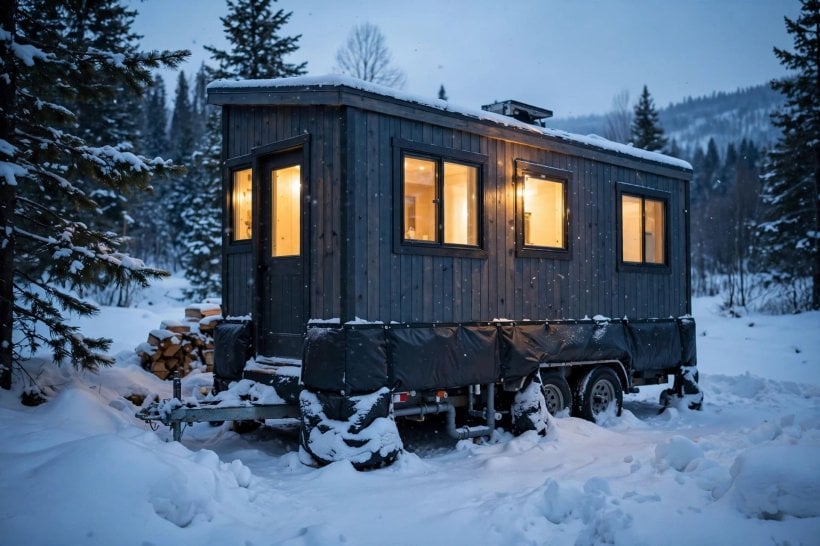
This is why freeze protection reads as a system rather than a product. Tape makes heat, foam keeps it on the pipe, and skirting keeps the weather away from both — each layer covering the weakness of the one inside it. The skirting decision has its own variables of material, insulation value and ventilation, worked through in our tiny house skirting for winter calculator. Siting helps too, in the small ways that are free: a parking spot out of the prevailing wind is worth watts you do not have to buy, plug in or drain a battery to feed.
8. Fitting the System: Tape First, Foam Over, Slack at the Ends
The installation order is written into the physics. Tape goes on the pipe first — straight along the bottom at 6 o’clock, or spiralled with even spacing — because the cable has to touch the pipe it protects. Insulation goes over the tape, enclosing cable and pipe together, because its job is to hold the cable’s heat against the pipe wall. Reverse the order, or leave the foam off a section because it was awkward to fit, and you have built a warm cable next to a cold pipe, which is the expensive way to own both.
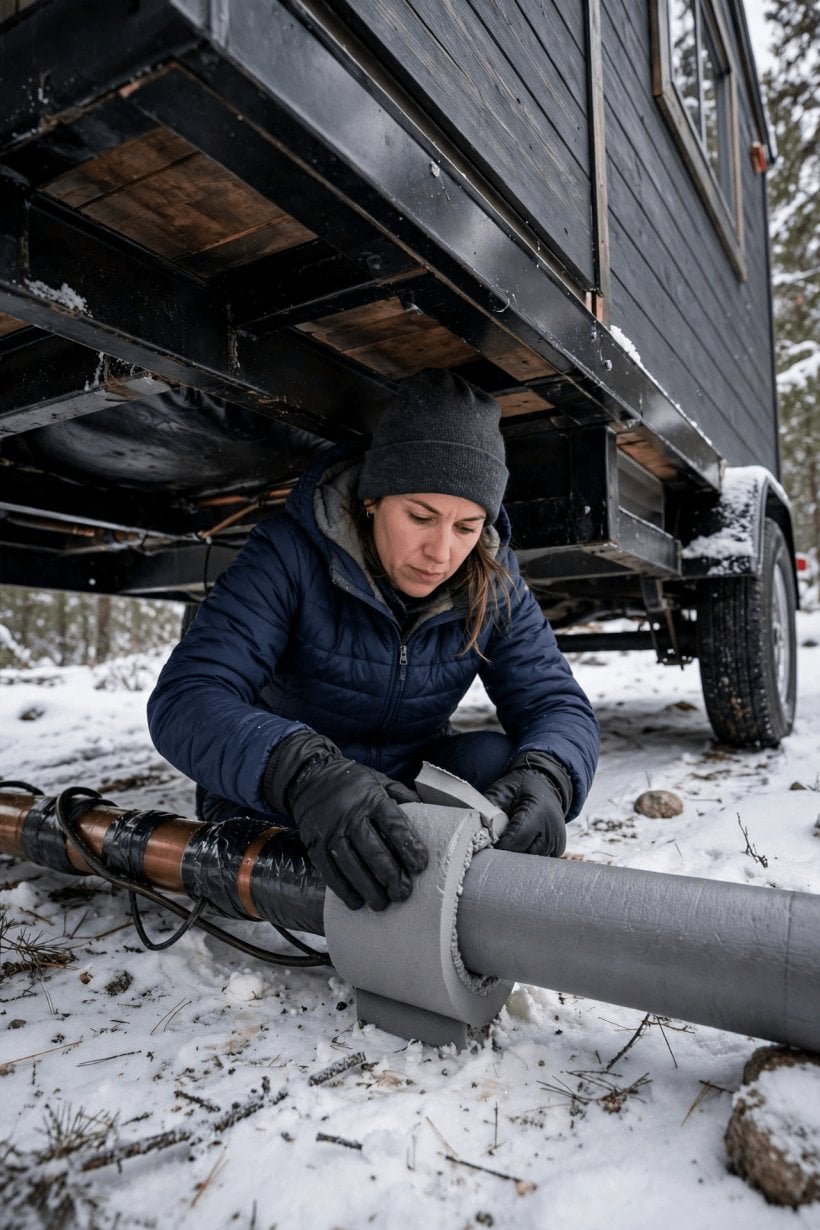
The details that decide real installations are the interruptions: valves, filter housings, elbows, the tank connections, the drain outlet. Those fittings are often bulkier, more exposed and slower to warm than the straight runs between them — which is why the simulator’s extra 2 feet of slack is not padding but planning. Buy to the simulator’s Total Tape Needed figure rather than to the bare pipe length, leave the slack where the fittings are, and make sure the insulation closes over the awkward shapes too, even when that means cutting and taping smaller pieces. A system that is 95 percent covered has its failure address already printed: the coldest night will find the other 5 percent.
9. Before the First Freeze: Measure Honestly, Then Recalculate
The simulator is only as honest as its first input, so measure the pipe run the way it actually runs — every exposed foot under the trailer, supply and drain, including the awkward drops and rises a floor-plan measurement misses. The tool opens with a 25-foot placeholder, which is a fine guess for some houses and a serious undercount for others. The same honesty applies to the temperature slider: set the lowest temperature your parking spot genuinely delivers, not the average winter night, because freeze protection is designed for the worst night, not the typical one.
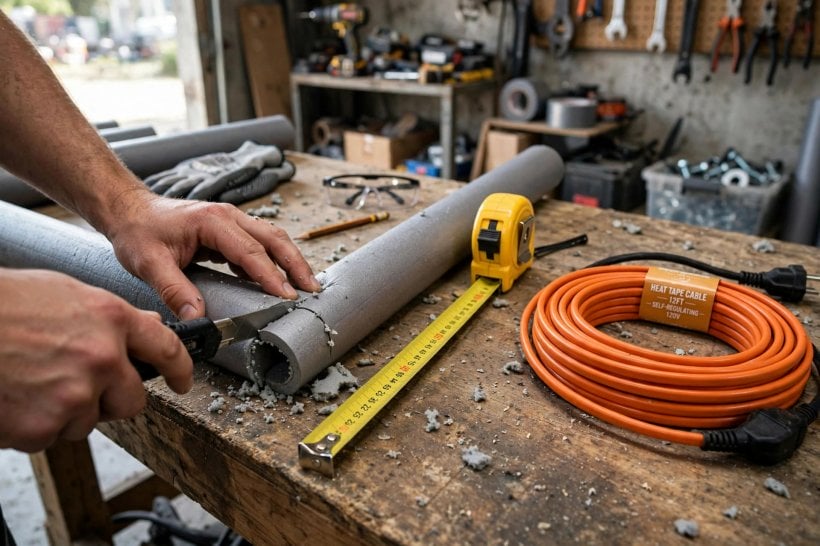
Then use the Recalculate button the way the tool intends — as a rehearsal. Run your real numbers and read all three outputs: the tape length to buy, the peak watts to budget, and the status line. If the verdict is the burst warning, change one variable at a time — wrap style first, insulation second — and watch which change buys back the margin. Doing this in autumn, on a screen, costs nothing. Doing it in January, under a trailer, in the dark, with water already expanding in the line, is the same lesson at a very different price.
10. Using the Simulator: From Four Answers to a Verdict
Working the heat tape pipe freeze simulator takes under a minute. Enter your pipe length in feet, choose the pipe size — 1/2″ PEX, 3/4″ PEX or the 3″ Sewer drain — and pick the wrap style and insulation layer you actually intend to install. Drag the temperature slider to your lowest expected temperature and press Recalculate. The visualizer redraws your pipe with the tape in place, the insulation over it and the cold pressing in, while the readouts give you Total Tape Needed in feet and Peak Power in watts.
Read the verdict in its three voices. On a safe setup the status reports efficient operation. Push the temperature below zero and the tool warns that the system is working hard, with battery drain high — protected, but at a price worth knowing before the cold snap. And when the combination cannot hold — the bare pipe in real cold, the thin foam asked to survive deep-freeze on a straight run — the tool says so without diplomacy: PIPE BURST, heat loss exceeds generation, insulation insufficient for the temperature you set. Believe it the first time, adjust the plan while adjusting is still free, and only then go and buy the tape.
Final Considerations
Freeze protection fails as a system or not at all. The cable cannot out-generate the wind, the foam cannot warm a pipe by itself, and the skirting cannot help tape that was never fitted to the drain. But assembled in the simulator’s order — honest length, the right wrap for your cold, insulation over everything, shelter from the wind, and a peak-power figure your circuit and batteries can carry — the same components become boringly reliable, which is the highest praise winter plumbing can earn. Run your own numbers through the PEX Freeze Guard Simulator below before the season turns, and let its verdict write your shopping list.
PEX Freeze Guard Simulator
PEX Freeze Guard Simulator
Don’t burst a pipe. Calculate heat tape & insulation needs.
Heat tape needs insulation to work effectively.
Self-Regulating Cable 101
Modern “Self-Regulating” heat tape has a conductive core that reacts to temperature. As it gets colder, the core contracts, creating more electrical paths and generating more heat. As it warms up, it expands and reduces power. This saves energy, but it never turns completely off unless you unplug it.
Straight: Taped along the bottom of the pipe (at 6 o’clock). Good for moderate winters.
Spiral: Wrapped like a candy cane. Provides more heat per foot of pipe. Mandatory for 3″ sewer drains or extreme climates (-20°F).


1 Comment